Warning Messages in Jupyter Notebook Example Code

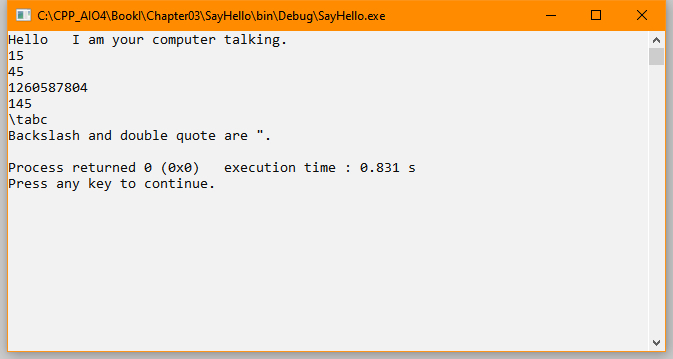
You’re working with the downloadable source code from a book like  Algorithms for Dummies, 2nd EditionBeginning Programming with Python For Dummies, 3rd EditionMachine Learning for Dummies, 2nd EditionPython for Data Science for Dummies, or Machine Learning Security Principles and see a warning message like this:

C:\Users\John\anaconda3\lib\site-packages\sklearn\feature_selection\_sequential.py:206: FutureWarning: Leaving `n_features_to_select` to None is deprecated in 1.0 and will become 'auto' in 1.3. To keep the same behaviour as with None (i.e. select half of the features) and avoid this warning, you should manually set `n_features_to_select='auto'` and set tol=None when creating an instance.
  warnings.warn(

Well, that’s pretty confusing looking and if you’re just learning to work with Python may give you the idea that you’ve done something seriously wrong. There are a couple things to note here. First, this is a warning message. In fact, it’s a FutureWarning message, which means the change mentioned in the warning hasn’t actually taken effect yet.

Second, if you’re using the version of Jupyter Notebook and Python mentioned in the book, it’s unlikely that the effects described in the message will become a problem anytime soon, so you can usually ignore them. (This is one reason that I always ask which version of Jupyter Notebook and Python you’re using because a newer version can definitely cause error messages to appear.) Of course, if this warning ever does turn into an error, Luca and I definitely want to hear about it at [email protected].

Third, the message does state a potential fix for the problem. If the fix is simple enough, you can always try to make the required change to see if it works. However, this is a do it at your own risk sort of modification. The point is that the warning isn’t keeping you from using the downloadable source today, so ignoring it is probably the best action to take.

If you really don’t want to see these warnings, you can always add two lines of code the to first cell of the downloadable source. The warning isn’t actually going away, you just won’t see it:

import warnings
warnings.simplefilter(action='ignore', category=FutureWarning)

So, what causes these warning messages in the first place? Is the book’s source code faulty? There is nothing wrong with the book’s source code. What you’re seeing is the result of a library upgrade. Python uses a huge number of libraries and a change in any one of them can create a warning message of the sort you’ve seen. Luca and I work hard to ensure that the source code you get with the book is functional (and warning free) on all of the supported platforms at the time of writing, but it would be impossible for us to constantly update the book’s code to keep up with these library changes.

IDE Screenshot Usage in Books

There are cases where it’s very tough to figure out the correct presentation of material in a book, which is made more difficult by some readers preferring one presentation and other readers another. It comes down to how people learn in many cases. Visual learners prefer screenshots, abstract learners prefer text. Of course, there are all sorts of learners between these two extremes. So, what seems like a simple question can become quite complex.

The question at hand is whether to present screenshots of an IDE in a book with the associated example code and its output. The problem is that vendors now assume that developers have very large displays and so have made use of all of that extra screen real estate. In addition, book publishers don’t want books where a single image consumes an entire page. The result is that it’s very hard to get a screenshot where the text is completely readable. It can be done, but the text will generally still be smaller than the print in the book. Older readers complain that they need a magnifying glass to see the text at all.

However, there are benefits to using screenshots. The most important benefit is that, even if the text isn’t completely readable, visual learners can see what their IDE should look like as they follow the progress of procedures in the book. This feedback lets the visual learner know that they are doing things correctly and are getting the correct result. Another benefit is that an example tends to stay in one piece. The graphical output of an example doesn’t end up several pages away from the source code that produces it. Sometimes, textual output is wider than the page will allow using the normal font size. So, the options are to print the output in the book at the normal font size, but in a truncated form, which means that it’s no longer complete. A screenshot can show the complete textual output, but at a smaller font. For beginner readers, the second form, while not optimal, is preferred because truncating the output produces questions in the reader’s mind.

So, how do you feel about IDE screenshots in books? Are they more helpful or more confusing? Part of the reason for posts like this is to get your opinion and discover more about you as a reader. Obviously, a book author wants to use the communication techniques that work best overall for everyone, book space often not allowing for the investigation of every presentation alternative. Let me know your thoughts at [email protected].

Choosing a C++ Editor

This is an update of a post that originally appeared on August 25, 2014.

A lot of people have asked why I chose Code::Blocks as the editor for C++ All-In-One for Dummies, 4th Edition. There are a number of reason that I chose this particular editor including:

  • Ease of use
  • Free download
  • Runs on a large number of platform types
  • Provides internationalization support

However, the fact that Code::Blocks works well for the book and for most beginning projects doesn’t mean it’s the best solution for your particular needs. There are many different C++ Integrated Development Environments (IDEs) out there and I’m constantly trying new products. When the new version of Visual Studio comes out, you can be sure I’ll obtain a copy and check it out because some of my readers use Visual Studio. The problem with Visual Studio is that it tends to use Microsoft additions to the C++ language and it also doesn’t run on all the platforms that the book must support. However, if you’re working with Microsoft systems and need to create a relatively large project, Visual Studio might be a good choice for you—only you can make that determination.

The Eclipse IDE is another good selection. I had thought about using Eclipse for C++ All-in-One for Dummies, 4th Edition, but after reviewing the IDE and comparing it to Code::Blocks, I felt Code::Blocks was a lot simpler. Even so, if you need great multiplatform support for your C++ projects, Eclipse is a great choice.

I recently looked at another IDE, Intel® oneAPI Base Toolkit. This is most definitely not a IDE for the faint of heart or the light of pocketbook (the asking price for the cheap version is $1,499.00). The main reason to obtain a product like this one is that it provides phenomenal parallelism support for multiprocessor applications. In other words, you use this sort of IDE for high end projects. You can read all the other features this product offers on the vendor site. One of the other items that grabbed my attention is that it provides both multiplatform (Windows, Mac, Linux, and Android) and multiformat (Phone, Tablet, PC, Ultrabook, and Server) support. Whether this particular IDE makes sense for your needs depends on the kind of applications you create.

Although the information in Wikipedia is often suspect, you can find a comparison of various IDEs at http://en.wikipedia.org/wiki/Comparison_of_integrated_development_environments. The best way to choose a C++ IDE is to look for a product that meets your needs and then try it out on a subset of the problem you’re trying to solve. Researching the IDE you use is essential because a mistake can cost you a lot of time later. Not every IDE support every C++ feature, every platform, or every team need. Tell me why you think I should move to something other than Code::Blocks for the next edition of the book at [email protected].

Pausing the C++ Example Output

This is an update of a post that originally appeared on December 23, 2013.

A number of readers have written to ask about running the example code in C++ All-In-One for Dummies, 4th Edition. The book shows that the examples pause so you can see the output, yet a few people experience problems getting the example to pause as shown in the book. Let’s take the first book example. When you run the example, you should see a command window similar to the one shown here open.

The paused output of a Code::Blocks example.

This is how the command window looks in Windows, but if you use some other operating system, you should see something similar. Notice that the output is paused. Pressing any key will cause the window to disappear and the example to end. The purpose of pausing the output is so that you can see the result.

There are two common reasons that people aren’t seeing the output pause. The most common reason is that the example is run in debug mode. Make sure you click Run or choose Build | Run to execute the example. If you click Debug/Continue or choose Debug | Start/Continue instead, the example will execute without pausing and you won’t see the output. Of course, you can always set a breakpoint to get the example to pause, but most people simply want to see the example output which means running the example, rather than debugging the example.

A less common cause is that the project environment is configured incorrectly. Normally the Code::Blocks environment automatically pauses when you run the example. However, it’s possible to set Code::Blocks not to pause. Some readers inadvertently change this setting while exploring the environment. In order to check this setting, choose Project | Properties to display the Project Targets/Options dialog box. Select the Build Targets tab and you see the dialog box shown here.

The Build Targets tab of the Project Properties dialog box contains a Pause When Execution Ends setting.
Changing the default Code::Blocks settings can cause the IDE not to pause the output.

Notice the Pause When Execution Ends option. If this option is cleared, the example won’t pause when you run it. Make sure this option is checked and click OK. The projects that come with the downloadable code all have this setting set up correctly.

Of course, there could always be other reasons why the examples aren’t pausing. Please let me know if you have any problems setting the example output. It’s essential that you be able to see the example output as you follow along in the book to understand how C++ works. Send your queries about this (or any other book-specific) topic to [email protected]. I always want to ensure you have the best possible experience when using my books.

Comment and Document Updates for CI/CD

In reading about Continuous Integration/Continuous Deployment (CI/CD) I often find ways to manage the code, to get people around the code, to keep errors out of the code, and so on. It’s all about the code. Developers have, in fact, developed myriad ways to keep code size small, updated, deployed, tested, and so on to ensure that users have what they want, when the they want it (if not before). Sometimes my head spins on its axis after reading such documents because it becomes a high speed dizzying affair. It’s somehow assumed that everyone can just keep up. Except, there are new people and older people and people with lesser attention spans who can’t keep up, which is why comments and documentation are so important.

As part of the coding process, developers also need to update both comments and documentation or someone will come along and make modifications based on outdated information. Even though making such updates seems like a waste of time since everyone should be able to keep up, the truth is that these updates ultimately save time. However, the updates, when they occur (which apparently isn’t often) are often made in a haphazard manner reminiscent of an old Keystone Cops movie.

Adding a process, a workflow, to the CI/CD mill is important to ensure that everything remains in sync: code, comments, and documentation. A best practice way to accomplish this task is to add steps to every update process so that nothing is left behind. Here’s how you could approach the problem:

  1. Perform the required code updates.
  2. During testing, ensure that the comments within the code actually match what the code is doing. Testing and other review processes should not only look at the code, but the comments too.
  3. Update the documentation as final testing occurs. Make sure to include these elements:
    • Text
    • Drawings
    • Mockups
    • Visual Aids
    • Videos
    • Any other documentation elements
  4. Specify that any old comments/documentation are outdated using one of these approaches:
    • Mark it as deprecated
    • Remove it from the work area and put it in an archive
    • Delete it completely
  5. Deploy the application update. If you don’t deploy the update after these steps are done, they won’t get done. Everyone will wander off somewhere and forget all about any sort of comment or documentation update.

Obviously, the approach you end up using has to meet the requirements of your organization. It also has to be simple enough that people will actually, albeit begrudgingly, perform the work. What methods do you use to keep everything in sync at your organization? Let me know at [email protected].

Creating a CodeBlocks Project with Multiple Existing Files

This is an update of a post that originally appeared on July 26, 2011.

Most real world C++ projects include multiple source files. Book I Chapter 7 of C++ All-In-One for Dummies, 4th Edition shows how to create a project that has multiple source files starting on page 170. The first example (page 177), found in \CPP_AIO4\BookI\Chapter07\MultipleSourceFiles, discusses two .cpp files. The second example starts on page 179 and you find it in \CPP_AIO4\BookI\Chapter07\MultipleSourceFiles2. This example includes two .cpp files and a single .h file. I’ll use the files from the second example for this post. The example works the same as the one in the book, but in this case, we’ll start with the three files and create a project around them.

Defining the Project

You need to start with a Code::Blocks project. It’s possible to use either an existing project or create a new project to hold the files (I’m doing the latter and naming the new product MultipleSourceFiles3). In either case, once you have a project to use, you simply add the files you want to it, set the build options for those files, and then create your application. The following steps create a new project, add the files from MultipleSourceFiles2 to it, set the build options, compile the resulting project, and show you the results.

  1. Choose File > New > Project. You’ll see the New From Template dialog box.
  2. Highlight the Empty Project template as shown here:
  3. Click Go. You’ll see the Empty Project wizard. If you’re seeing the Welcome screen, click Next to get past it.
  4. Type the name of the project (the example uses MultipleSourceFiles3) in the Project Title field and choose a location for the project (the example uses \CPP_AIO4\BookI\Chapter07\) in the Location field. If you’re following the example, your wizard should look similar to the one shown here:The Empty Project configuration information for MultipleSourceFiles3.
  5. Click Next. Look in the Compiler field and ensure that the GNU GCC Compiler option is selected.
  6. Click Finish. The wizard creates a blank project for you.

Referencing the Other Project Source Files

At this point, you have an empty project without any files in it. However, you can add files to any existing project. The following steps add the files from the MultipleSourceFiles2 project to this project.

  1. Right click the project entry (MultipleSourceFiles3) in the Projects tab of the Management window and choose Add Files from the context menu. You see the Add Files to Project dialog box shown here: Adding new files to an empty project.
  2. Locate the \CPP_AIO4\BookI\Chapter07\MultipleSourceFiles2 folder on your system.
  3. Click on main.cpp. Ctrl+Click on safestuff.cpp and safestuff.h. You’ll see all three files added to the File Name field.
  4. Click Open. You’ll see the Multiple Selection dialog box. This dialog box contains entries for each of the builds that you specified when creating the project. The default is to use the files you’re adding in all of the builds as shown here. (The example uses all of the files in all of the builds.)Ensure the that targets will appear in all build types.
  5. Configure the files you’ve selected by choosing the build the file should appear part of and click OK. You’ll see all three files added below the MultipleSourceFiles3 entry in the Projects tab of the Management window as shown here:The files from MultipleSourceFiles2 are referenced in this project.

The referencing technique adds existing files to a different project. Notice that the files are still referenced in the original project. If you make a change to these files, the changes will also appear in the original project.

Copying the Other Project Source Files

Referencing files isn’t always what you want to do. So, you need an alternative for those situations where you want a copy of the file in a new project (allowing changes in the new project that won’t affect the existing project). In this case, follow these steps instead:

  1. Right click the project entry (MultipleSourceFiles3) in the Projects tab of the Management window and choose Add Files from the context menu. You see the Add Files to Project dialog box.
  2. Locate the \CPP_AIO4\BookI\Chapter07\MultipleSourceFiles2 folder on your system.
  3. Click on main.cpp. Ctrl+Click on safestuff.cpp and safestuff.h. You’ll see all three files added to the File Name field.
  4. Right click main.cpp and choose Copy from the context menu.
  5. Locate the \CPP_AIO4\BookI\Chapter07\MultipleSourceFiles3 folder on your system.
  6. Right click inside the file selection area and choose Paste from the context menu. You see the files pasted into the new location as shown here: Actually copying the files to a new location.
  7. Click Open. You’ll see the Multiple Selection dialog box.
  8. Configure the files you’ve selected by choosing the build the file should appear part of and click OK. You’ll see all three files added below the MultipleSourceFiles3 entry in the Projects tab of the Management window as shown here (notice that they’re now actually part of MultipleSourceFiles3 and not just a reference):The files are now copied, not referenced.

Many developers find the need to use existing files in a project. It’s something you’ll do quite often, especially with header files. Of course, when working with header files you also have the option of using the #include directive. Please let me know if you have any questions about this process at [email protected].

Antivirus and Application Compilation


This is an update of a post that originally appeared on 
April 2, 2014.

Sometimes applications don’t get along, especially when one application is designed to create new content at a low level and the other is designed to prevent low level access to a system. Such is the case with compilers and antivirus applications in some cases. I haven’t been able to reproduce this behavior myself, but enough readers have told me about it that I feel I really do need to address it in a post. There are situations where you’re working with source code from one of my books, compile it, and then have your antivirus application complain that the code is infected with something (even though you know it isn’t). Sometimes the antivirus program will go so far as to simply delete the application you just compiled (or place it in a virus vault).

The solution to the problem can take a number of forms. If your antivirus application provides some means of creating exceptions for specific applications, the easiest way to overcome the problem is to create such an exception. You’ll need to read the documentation for your antivirus application to determine whether such a feature exists. In most cases today, antivirus applications also provide settings that accommodate specific applications and you’ll want to check with the antivirus vendor and/or community support to see if this need has been met.

In some cases, the compiler or its associated Integrated Development Environment (IDE) simply don’t follow all the rules required to work safely in protected directories, such as the C:\Program Files directory on a Windows system. As far as I know, all of the development environments currently used in my books do follow the rules, so you shouldn’t have a problem in this area, but please let me know if you do. Often, the workaround for this problem is to install the application in a directory that the user owns and just avoid the security issue.

Not including the application in the Windows path can cause problems and I cover this issue in the Adding a Location to the Windows Path post. In addition, there are problems with installing the source code in a path containing spaces or lacks proper access. I discuss these issues in the Source Code Placement post.

Unfortunately, creating exceptions and installing the application in a friendly directory only go so far in fixing the problem. A few antivirus applications are so intent on protecting you from yourself that nothing you do will prevent the behavior. When this happens, you still have a few options. The easiest solution is to turn the antivirus program off just long enough to compile and test the application. Of course, this is also the most dangerous solution because it could leave your system open to attack.

A safer, albeit less palatable solution, is to try a different IDE and compiler. Antivirus programs seem a little picky about which applications they view as a threat. Code::Blocks may cause the antivirus program to react, but Eclipse or Visual Studio might not. Unfortunately, using this solution means that steps in the book may not work precisely as written. In addition, unless the compilers are compatible, the book’s source code may not compile at all without changes. Because I can’t cover every contingency, I also can’t support using a compiler other than the one specifically called out in a book.

Getting a different antivirus application is also a good idea. Antivirus applications and IDEs have come a long way since I originally created this post, but some antivirus applications really don’t work well and create more headaches than they’re worth. The choice is up to you, of course, but with the wealth of antivirus programs available on the market today, there isn’t a good reason to avoid getting something new when the situation warrants.

My goal is to ensure you can use the examples in my books without jumping through a lot of hoops. When you encounter problems that are beyond my control, such as an ornery antivirus application, I’ll still try to offer some suggestions, but I can’t take time to fix your system. In this case, the solution truly is out of my control but you can try the techniques offered in this post. Let me know if you find other solutions to the problem at [email protected].

Checking Your Compiler in Code::Blocks

This is an update of a post that originally appeared on April 6, 2011.

Compilers are important because they turn your human-readable source code into executable code that the computer understands. Selecting the right compiler is essential if you want to obtain the best results from your application. Some readers have asked, “Just how do you select a compiler when working with C++ All-In-One for Dummies, 4th Edition?” The book assumes that you’re using the GNU GCC Compiler setting and there isn’t any guarantee another compiler will work with the book’s source code. Use these steps to check your compiler setting.

  1. Open the Code::Blocks application.
  2. Choose Settings | Compiler and you see the Global Compiler Settings dialog box shown here:
    A display of the Global Compiler Settings dialog box in Code::Blocks.
  3. Choose GNU GCC Compiler in the Selected Compiler field as shown in the figure.
  4. Click OK.

You should be ready to work with the book’s code at this point. Let me know if you have any problems choosing the right compiler at [email protected].

Book Reviews – Doing Your Part

This is an update of a post that originally appeared on October 4, 2013.

Readers contact me quite a lot about my books. On an average day, I receive around 65 reader e-mails about a wide range of book-related topics. Many of them are complimentary about my books and it’s hard to put down in words just how much I appreciate the positive feedback. Often, I’m humbled to think that people would take time to write.

There is another part to reader participation in books, however, and it doesn’t have anything to do with me—it has to do with other readers. When you read one of my books and find the information useful, it’s helpful to write a review about it so that others can know what to expect. I want to be sure that every reader who purchases one of my books is happy with that purchase and gets the most possible out of the book. The wording that the publisher’s marketing staff and I use to describe a book represents our viewpoint of that book and not necessarily the viewpoint of the reader. The only way that other readers will know how a book presents information from the reader perspective is for other readers to write reviews. A good review will tell:

  • What you liked about the book
  • How it met your needs
  • What it provides in the way of usable content
  • Whether you liked any intangibles, such as the author’s writing style
  • When you used the content to obtain a new job or learn a new skill
  • Who recommended the book to you

    The review should also present any negatives (obviously, I want to know about the flaws, too, so that I can correct them in the next edition of the book and also discuss them on my blog):

    • Did the book provide enough detailed procedures needed to accomplish a task?
    • Are significant technical flaws and why do you feel they’re an issue?
    • Are there enough graphics to augment the text and make it clearer?
    • Is the source code useful?

    Many reviewing venues, such as the one found on Amazon, also ask you to provide a rating for the book. You should rate the book based on your experience with other books and on how this particular book met your needs in learning a new topic. The kind of review to avoid writing is a rant or one that isn’t actually based on reading the whole book. As always, I’m here (at [email protected]) to answer any questions you have and many of your questions have appeared as blog posts when the situation warrants.

    So, just where do you make these reviews? The publishers sometimes provide a venue for expressing your opinion and you can certainly go to the publisher site to create such a review. I personally prefer to upload my reviews to Amazon because it’s a location that many people frequent to find out more about books. You can go to the site, click Write a Customer Review (near the bottom of the page), and then provide your viewpoint about the book.

    Thank you in advance for taking the time and effort required to write a review. I know it’s time consuming, but it’s an important task that only you can perform.

    Handling Source Code in Books

    This is an update of a post that originally appeared on April 4, 2011.

    One of the biggest conundrums for the technical writer is how to handle source code in a book. The goal is to present an easily understood example to the reader—one that demonstrates a principle in a clear and concise manner. In fact, complexity is a problem with many examples—the author tries to stuff too much information into the example and ends up obfuscating the very principles that the reader is supposed to obtain.

    There is also the problem with pages because books have a limited number of them. The technical writer must balance the depth and functionality of the examples against a need to present as many examples as possible. Even if a book is balanced, some readers are going to be disappointed that the book doesn’t contain the example they actually needed. So, very often simplicity must win the day in creating application source code for a book, despite the desire of the author to present something more real world, something with additional glitz and polish.

    Because the goal of an example is to teach, very often the examples you see in a book have more comments than those that you see in real life. An example in a book must include as much information as possible if the code is going to fulfill its purpose. Of course, book comments should illustrate all the best principles of creating comments in real code. In short, if real world code looked a bit more like book code, then its possible that developers would spend far less time trying to figure code out and more time making changes.

    Some readers will take the author to task because the code may not always provide the error trapping that production code provides. In fact, as with many teaching environments, the safety features in code are often removed for the sake of clarity. This problem plagues other environments too. In the past, it was common for woodworking magazines post a note near the beginning of the magazine telling the reader that the safety devices have been removed for the sake of clarity and that no one in their right mind would actually work with woodworking equipment without the safety devices. Likewise, the code you see in a book often lacks sufficient error trapping, making the principle that the code demonstrates clearer, at the cost of fragility. You can usually cause book examples to break easily, but no one in their right mind would create production code like that.

    Choosing good examples for a book is hard, so getting your input really is important. I may not be able to provide precisely the example you need or want, but I may be able to provide something similar in the next edition of the book. Of course, I won’t know your needs or wants unless you tell me about them. I’m always open to hearing your ideas. However, I’m not open to providing free consulting in the form of troubleshooting your error code unless you’re willing to hire me to do so. Please keep the discussion to ideas that you’d like to see in book updates by contacting me at [email protected].