Ongoing Education

This is an update of a post that originally appeared on April 7, 2011.

In looking at a lot of my previous posts, I try to see the truth value in them. Did they hold up to the test of time? When it comes to ongoing education, it doesn’t matter how old you get, you still need to learn new things. I encountered a friend at the library the other day, long retired, he’s still feeding his brain with new things and doing so makes him a very interesting person to talk to.

There are only 24 hours in each day, making it impossible for any one human to know the sum of human knowledge or even a small portion of it. The 24 hour limit means we must actually choose carefully and depend on others to have knowledge we don’t possess. Anything that isn’t growing is dead and a form of growth is the increase of both knowledge and wisdom.

Of course, I do obtain daily increases in knowledge. The art of writing technical books is embracing a strategy of learning all the time. I read voraciously, subscribe to word builders, and conduct experiments to see just how things really work (as contrasted to the theoretical discussions in the books and magazines I read). The very act of writing involves learning something new as I discover new ways to express myself in writing and convey information to readers. I’ve picked up books I wrote early in my career and am often appalled at what I considered good writing at the time, but it was good writing given my experience, even though it would be unacceptable today.

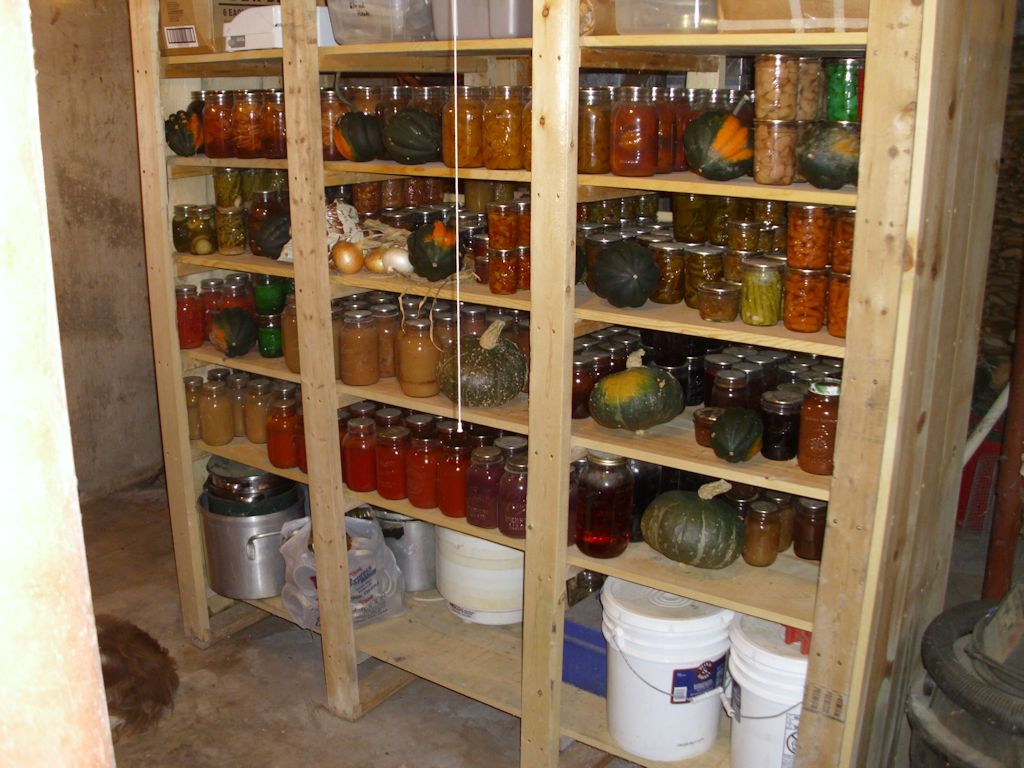
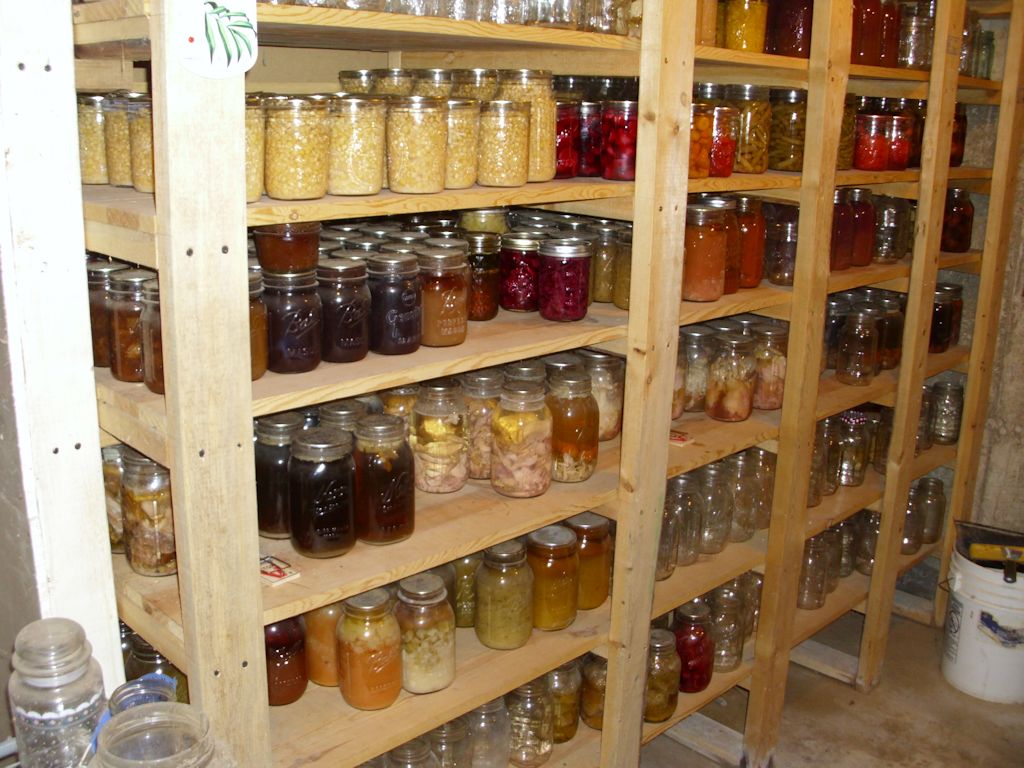
Learning is part of every activity in my life and I relish every learning event. So it was on this particular weekend twelve years ago that my wife and I packed our lunch and sent to Get Ready…Get Set…Garden! We looked forward to it every year. This year we took classes on hostas (for fun) and horseradish (as part of our self-sufficiency).

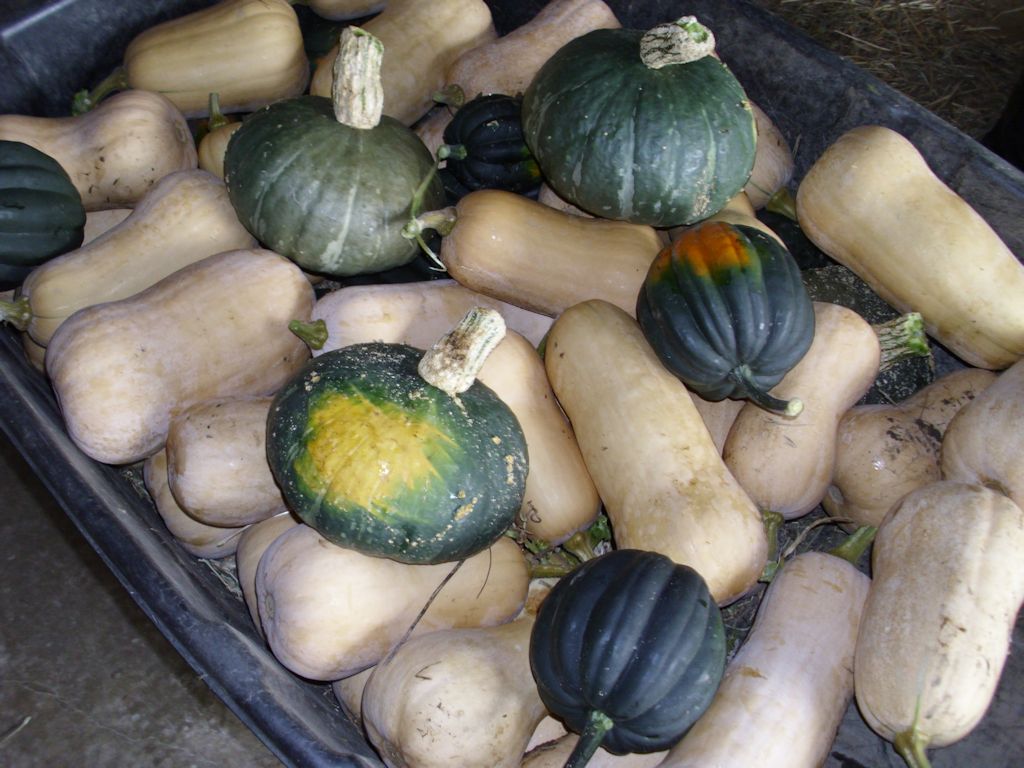
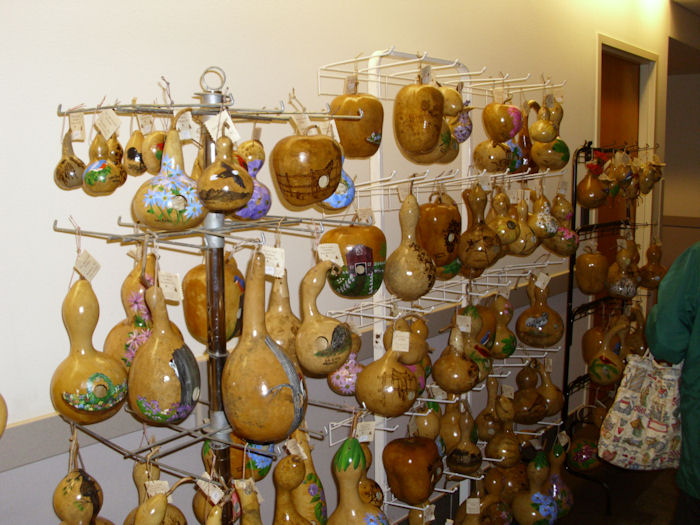
Before we went to class though, we just had to spend a little time looking at some of the displays. A personal favorite of mine was the gourds:

A display of interesting things made with gourds.

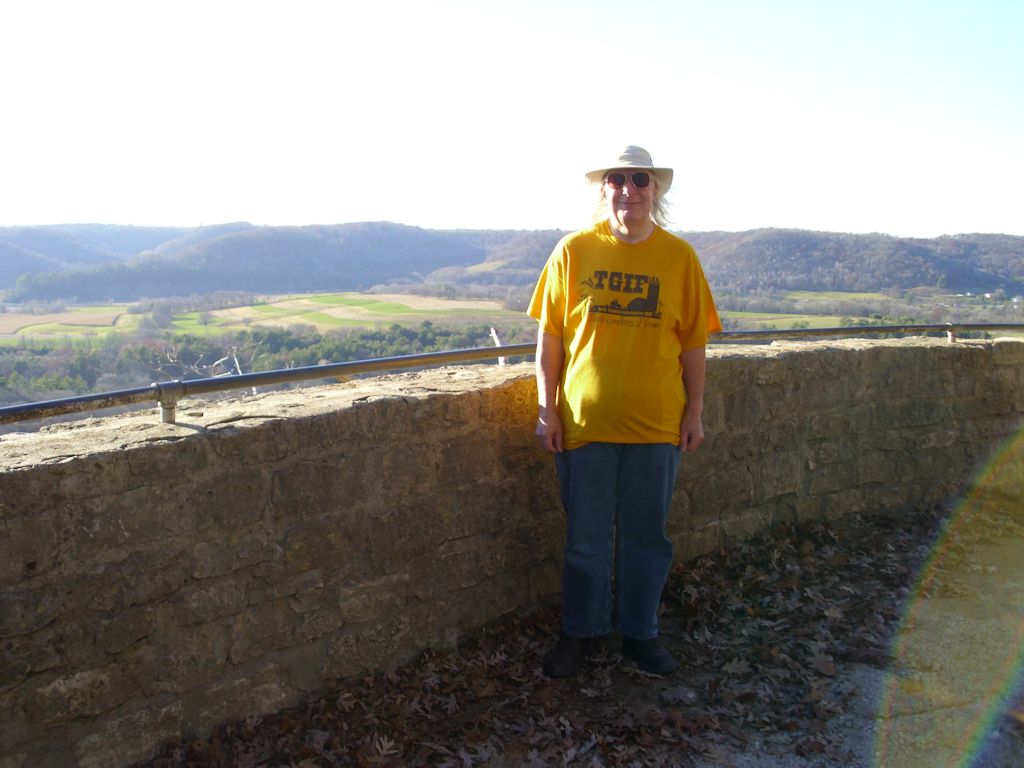
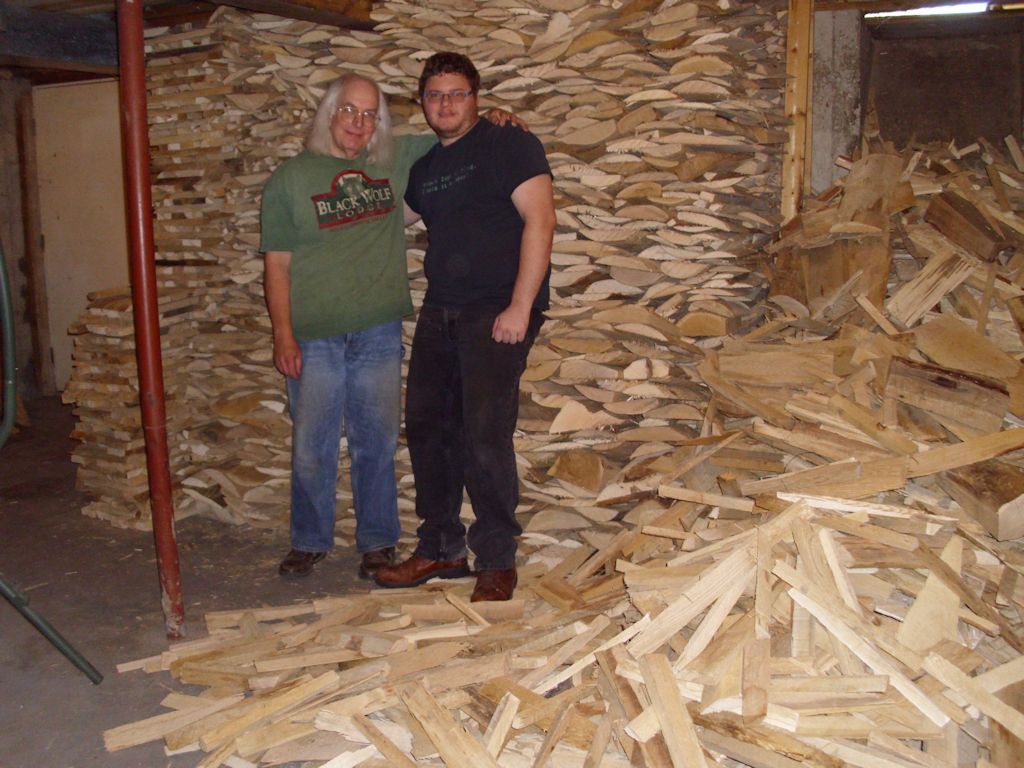
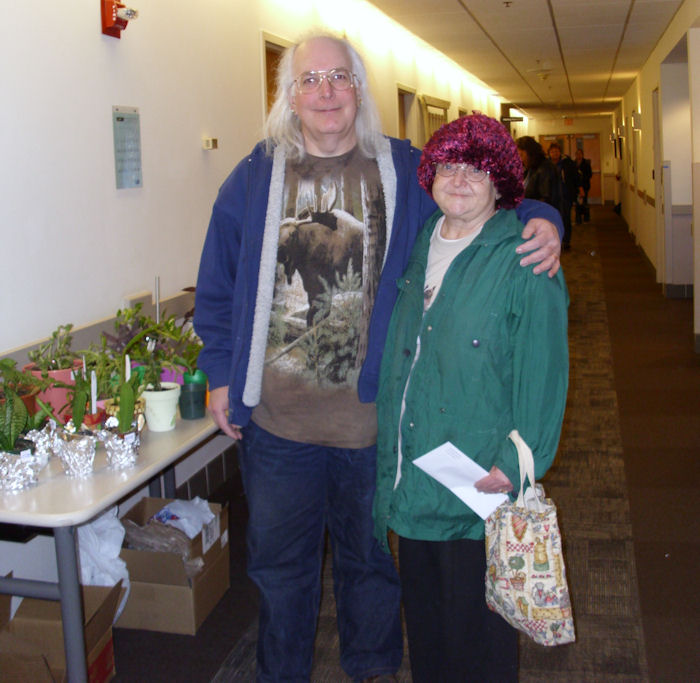
I’ve always wanted to make some bird houses, but never quite have the time. They actually had a class on the topic this year and I was tempted to take it, but that would have meant missing out on the horseradish class, which I considered more important. Here’s Rebecca and me standing in front of one of the displays:

John and Rebecca standing in front of one of the displays.

Well, onto the classes. I found out that there are over 2,000 varieties of hostas, which I found amazing. They originated in Japan, Korea, and China.  It takes five years on average to grow a hosta to full size, but it can take anywhere from three years to ten years depending on the variety. I found out our place for growing them is perfect, but our watering technique probably isn’t, so we’ll spend a little more time watering them this summer. Our presenter went on to discuss techniques for dealing with slugs and quite a few other pests. Most important for me is that I saw some detailed pictures of 50 of the more popular varieties that are easy to get in this area. I’ll be digging out some of the old hostas in my garden and planting new as time allows.

The horseradish session was extremely helpful. I learned an entirely new way to grow horseradish that involves laying the plant on its side for the first six weeks, digging it up partially, removing the suckers, and then reburying it. The result is to get a far bigger root that’s a lot easier to grind into food. I can’t wait to try it out. Of course, our instructor had us sample a number of horseradish dishes while we talked. I’m not sure my breath was all that pleasant when we were finished, but I enjoyed the tasty treats immensely.

So, what are your educational experiences like? Do you grow every day? Let me know at [email protected].

A Hurt Chicken Update

A number of people wrote to ask about my hurt hen after reading Dealing with Hurt Chickens. You’ll be happy to know that my hen is fully healed at this point and the infection is completely gone (without leaving any signs). Over the years I’ve found that hens are quite resilient as long as you get to the source of a problem quickly and provide at least a modicum of care. Getting the hen out of the coop when her mates can’t help her is the prime concern. Otherwise, the other hens will proceed to peck her to death.

Chickens aren’t particularly known for their long term memory. After almost a month, the other members of the coop had quite forgotten about the hurt hen, so I couldn’t just put her back into the coop and expect everything to work right away. The process involves putting the hen, cage and all, into the coop for a few days. Unfortunately, the addition of a relatively large cage made the coop seem amazingly small as I tried to get to the eggs. The hens took great delight in sitting on my shoulders and head while I tried to get past the cage. They also mumbled strange, dark chicken thoughts about how I’d be so much better off if I simply removed the stranger from their midst. I’m used to this little inconvenience because it happens every time I introduce new chicks to the coop.

What I hadn’t quite expected is the hen’s reaction to their new coop mate. Normally, the hens spend a good deal of time running around the cage, sitting on top of it, and attempting to peck the chicks. In other words, they’re active in their desire to be rid of the strangers at any cost. Not so this time! The hens took up a line around the cage and stared. Some sat, some stood, but all mumbled, and then mumbled some more. I’m not sure why a single adult hen should be different from five or six juveniles, but there is some point of chicken etiquette of which I’m most definitely not aware. After a while though, the hens simply started ignoring the cage and went about their business.

Because of the absurd initial reaction, I decided to leave the hen in her cage for an extra day, so the inconvenience of trying to get to the eggs lasted longer than I would have liked, which is where the trip comes into play. Imagine trying to get around in a coop that one wouldn’t normally consider spacious with a bunch of hens and a relatively large cage in your way. One day I went in and, as usual, put the eggs into my jacket pocket as I collected them. My sweatshirt jacket makes a fine place to put eggs most of the time, but not this time. Yes, I fell and did the Lucy act (see Lucy Does the Tango). Well, my jacket really did need to be washed anyway and a shower is always nice after working in the coop.

At this point, my hurt hen is no longer hurt. She’s running around with the other chickens, who have somehow suddenly remembered where she was at in the pecking order. Normally, when I introduce juvenile chicks, there is a lot of fighting until the new pecking order is established, but that didn’t happen in this case except for a little while on the first day. Otherwise, the coop has been quite happy. Let me know your thoughts on reintroducing chickens after they heal to the coop at [email protected].


Dealing with Hurt Chickens

Chickens can get hurt in a number of ways. In some cases, the chicken will care for itself or its nest mates will help out. For example, it’s not uncommon for a chicken’s comb to get a little frostbite during colder than normal weather. The damaged part of the comb will eventually die off and the chickens nest mates will pick it off. The comb usually grows back all on its own (I’ve never seen it do otherwise, but have heard of situations where the chicken needs help). In some cases, you see blood on the other chickens, which is perfectly normal. They’ll clean themselves up. The best thing you can do is observe the chickens carefully, but maintain a hands off policy unless the chicken really does exhibit a need for help (you notice an odor, the flesh is off color, or the chicken behaves contrary to normal).

However, there are also situations where you need to be proactive in helping the chicken because it’s impossible for the chicken or its nest mates to do the job. For example, one of my hens recently laid an egg so large that it caused damage to the cioaca (essentially the chicken’s anus). The cioaca actually turns inside out during egg laying so that the egg doesn’t come in contact with the intestine or any fecal matter, but both eggs and fecal matter come out of the same hole. The damage caused bleeding, which brought the other hens, who pecked insistently. If the hens had been allowed to continue, the hurt hen would have eventually died.

I check all of my hens daily, but even so, by the time I understood what was going on, the hen had also developed an infection. In order to prevent problems in the coop and for the hen, you must have a hen-sized cage available. I recommend one about two square feet in size so that the hen can walk around a little, but not too much. Line the bottom of the cage with fresh hay every day to help keep things clean (hens are inherently dirty).

To combat the infection, it’s important to keep the hurt area clean. This means cleaning the area once or possibly twice daily using a product such as hydrogen peroxide. You can use the 3% hydrogen peroxide commonly available from your drug store, but I’ve found that a 12% solution is far more effective. You must use it with care because a little goes a long way. In addition, make absolutely certain you get food grade hydrogen peroxide or you risk killing the chicken. Gently wipe the area after cleaning with a clean cloth (a soft paper towel works well). Discard the cloth afterward—you really don’t want to reuse it. You’ll need to hold your chicken firmly, but gently during this process.

Cleaning is a good first step. To help the area heal faster, apply triple antibiotic cream. Don’t even think about trying to bandage the area. All you’ll end up doing is frustrating both you and the chicken. Leaving the area open will generally help it heal faster.

Check your chicken several times a day. Make sure you keep things as clean as is possible, but otherwise let the chicken rest. Depending on the kind of injury, your chicken may spend a lot of time standing—this act is perfectly normal. Hens won’t lay any eggs when they’re hurt due to stress. Chickens generally won’t talk to you either. In fact, you know that they’re starting to feel better when they do start talking to you again.

If you find that your chicken is pecking at the wound, it often means you need to look closer. In many cases, a chicken will peck when an abscess develops. When this happens, you must carefully pop the abscess so it can drain. Use alcohol to clean the area first and make sure you use alcohol to clean both your hands and any instruments you use. Focus on keeping things open and clean.

Your chicken may not want to eat or drink at first. This is also perfectly normal. However, make sure the chicken has fresh water available. In addition, you can provide other sorts of high protein treats to encourage eating and drinking. For example, most chickens love milk, which contains protein and vitamins that will help the chicken heal faster. In addition, you can get the chicken meal worms, which are easier for it to digest and are considered a delicacy by chickens too.

The most important thing to remember is that you must wait until the chicken is completely healed before returning it to the coop. The other chickens will treat it as a new arrival and the usual hectic activity will occur while everyone decides on a new pecking order. Let me know your thoughts on helping hurt chickens at [email protected].


Pruning Your Grapes After a Major Freeze

Previous posts, Pruning the Grapes (Part 1) and Pruning the Grapes (Part 2), have discussed techniques for pruning your grapes. In most cases, these two posts contain everything needed to prune your grapes using the four-cane Kniffin system. However, pruning grapes sometimes involves more than simply dressing them up. In general, your canes can remain fully productive for many years, but sometimes mother nature steps in and causes severe damage. In my case, all of my young caned died completely and there was nothing to do about it. In addition, two-thirds of the mature canes suffered above ground loss, which is what I want to talk about in this post.

Good hearty canes will come back after a major freeze that kills the top of the plant. No, you won’t get anything in the way of grapes after the top is killed off, but the root stock is well-established and coming back after the freeze is a lot faster and easier than planting new canes. The spring after the freeze will see the old canes looking like gray skeletons and you might think everything is lost, but give your plants time. Look carefully at the ground around the old canes.

The first year after a major freeze will see all sorts of suckers coming out of the ground. Just leave them be. Let them climb up using the old canes as support. What you’ll end up with with look like a horrid mess. The new canes will grow everywhere. That’s fine, just don’t look too often if the mess offends you.

In the spring of the second year, carefully work with the mess. Remove the skinny trunks. One or two the trunks (with their associated canes) will look quite hearty. Leave both for the time being. Also remove the old, dead, trunk and associated canes with extreme care. You don’t want to damage your new canes, which may very well end up resting on the ground for a while. It takes time, but work slowly and carefully. (I find that working through the mess usually requires an hour or perhaps two per plant, so allocated plenty of time and don’t rush.) Eventually, you’ll clean up everything but the two strongest canes.

Now that you’re down to two contestants, carefully look at the canes attached to each of the trunks. You need to consider which trunk has the heartiest canes placed in the right positions for the trellis system you’re using. In my case, I looked for the best trunk with four canes—two upper and two lower. Cut off the trunk you don’t want to use.

It’s important to remember that your plant is frozen and won’t be very flexible during this time of year. Carefully tie the canes to the trellis using a stretchy material that won’t harm the canes. I cut up old, clean pantyhose. It’s stretchy, holds up moderately well in the sunlight, and is inexpensive. Plus, it tends to dry out quickly after getting wet, which means you won’t introduce mold to your plants. You’ll likely need to work more with the canes later in the spring, after they defrost, but before they become productive.

In most cases, mother nature won’t kill your plants. The roots will survive even if the top of the plant is completely dead. Unlike most orchard plants, you don’t normally need to worry about grafts when working with grapes, so using those root suckers is a great way to get your grapes back after being killed off. Instead of the seven years required for new plants, you could potentially get grapes from the restored plants in as little as three years, so the time spent coddling the damaged grapes is well worth the effort. Let me know your thoughts on grape pruning at [email protected].


Advantages of Making Your Own Extracts and Tinctures

It might be easy to initially dismiss someone who makes their own extracts and tinctures, but knowing how to make your own is an important skill. I commonly make many of my own extracts and tinctures because the products I create offer these benefits:

  • Cost: Even though you can get fake vanilla at a low cost, the flavor just isn’t the same as the real thing and buying the real thing is incredibly expensive. For example, buying the beans and making your own vanilla is significantly less expensive than buying it from someone else.
  • Customization: I don’t just make vanilla with vodka or some other relatively pure alcohol. Vanilla made with a moderately priced brandy or rum has a unique taste that is fuller than anything you could ever buy in the store. Sometimes adding vanilla to flavored alcohol, such as Grand Marnier, produces some amazing results.
  • Strength: It’s possible to make your extract or tincture to any strength desired. This feature means that your recipes end up tasting as you expect them to, rather than lack the pizzazz that you’d get with a store purchased product.
  • Characteristics: Many of the tinctures and extracts that you obtain from the store, even when pure, rely on the least expensive source of flavor. However, when making your own product, you can choose ingredients with specific characteristics. For example, the three kinds of vanilla bean you can commonly obtain are: Madagascar (traditional), Tahitian (a fruity flavor), and African/Ugandan (bold smoky flavor). Other sources are likewise robust. For example, a mint extract can combine the best characteristics of several kinds of mints.

Creating your own extract or tincture isn’t hard. The goal is to use some sort of solvent, normally an alcohol product, to extract the essential oils from an herb or spice. To create the extract or tincture, place the product you want to use, such as vanilla, into a glass jar. Fill the jar with the solvent, such as vodka, place the covered jar in a cool, dark place, and then wait. Just in case you’re wondering about the difference between an extract and a tincture:

  • Extract: A solvent containing the essential oils of an herb or spice. The solvents can include glycerine, vinegar, alcohol, and water. The product can be heated to induce more rapid extraction of the oils from the herb or spice (with some subsequent loss of strength). The herb or spice isn’t normally macerated. You can use some extracts the same day you start them (such as when steaming mint to make mint jelly).
  • Tincture: An extract that is always made with alcohol and no other solvent. The extracted item is normally macerated for maximum penetration. Tinctures are typically stronger than extracts and require more time to make.

Making your own extracts and tinctures is a lot of fun and experimenting with different formulations can produce surprising results. Most importantly, you know precisely what your extract or tincture contains, unlike the products you obtain from the store. Let me know your thoughts on making extracts and tinctures at [email protected].


Time to Check the Larder

The seed catalogs begin to arrive in the mail and you look upon them as a bit of pure heaven—the announcement that spring is on the way. Your eyes nearly pop out as you see the multicolored carrots, juicy tomatoes, and fragrant herbs. The new kinds of fruit trees immediately attract your attention, and what about that amazing new berry bush that will pack your freezer with sumptuous berries? You go into a mix of information and appetite overload and you consider just how those new offerings will satiate your cravings for all things fresh. However, before you go into a swoon over the latest delights, consider the fact that you probably don’t need them all. Your larder is craving things too! The items you’ve used up have created gaps in the deliciousness that your larder can provide during the winter months when fresh simply isn’t an option.

Of course, everyone loves to experiment. After all, that’s how I found kabocha squash this past summer—that delectable mix of sweet and savory that will likely find its way into a pie this upcoming fall. Had I known then what I know now, I would have planted more and canned the extra as an alternative to using pumpkin for pies. Lesson learned, more kabocha squash will find their way into the mix this year, alongside the butternut and acorn squash I love so well.

Back to the larder though. You probably don’t have any idea of where the holes are right now and you really do need to find out. That’s why you need to perform an inventory of your larder. The inventory will tell you about the items you need most. This year I’ve decided to try canning three bean salad, which means growing green, yellow wax, and kidney beans. However, I already have enough green beans in quarts in the larder, so I won’t make a big planting of green beans.

Your larder inventory should include more than a simple accounting. As you go through your larder, you should also perform these tasks:

  • Ensure all of the canned goods are still sealed
  • Wipe the jars down to remove the dust
  • Verify all of the oldest products are in the front
  • Make a list of products that are more than five years old so you can use them up
  • Place all the empty jars in one area
  • Sort the jars by type (both size and the kind of lid used)

Taking these extra steps will help you get a better handle on your larder. You should have a good idea of what your larder contains at all times and the only way to achieve that goal is to actually look at the containers. Let me know your thoughts about larder management at [email protected].


Calcium Nodules on Eggs

At some point during your time of working with chickens, you might encounter eggs that look like they have insect eggs on them. The view can be disquieting at first—all sorts of images could go through your mind. However, it’s more likely that what you’re actually seeing are calcium nodules that merely look like insect eggs. Here is an egg that has such nodules on it.

An egg may have harmless calcium nodules that look like insect eggs deposited on it.
Calcium nodules can look like insect eggs.

These nodules are completely harmless. In fact, you can wash them off the eggs quite easily. When crushed, the nodules feel gritty, much like crushed eggshell would feel. These nodules typically appear for two reasons:

The first reason is the one that occurs most often. Five of my hens are now four years old and one is five years old. The five year old hen (a Black Australorp) laid this egg, so the nodules aren’t unusual at all. (Most factory settings keep laying hens for one or two years after they start laying eggs, I’ve found that four years in optimal settings works well.) This spring I’ll replace two of the hens with new layers (the other four are pets and will die of old age). I also had one hen eaten by hawks and another died of an impacted egg, so I’ll actually get four new layers this spring.

I’m thinking of trying Barred Rocks (a kind of Plymouth Rock) because I’ve never had them before and they’re quite pretty. According Henderson’s Chicken Chart, they’re cold hard and produce large eggs. A friend of mine has them in her flock and feels that they’re a good investment. The point is that when you start seeing these nodules on one or two eggs and not on the eggs of your flock as a whole, you may need to start thinking about replacing the bird that laid it. Let me know your thoughts about keeping a healthy flock at [email protected].


Colorful Carrots

The carrots go by many different names, but the main idea is that they’re quite colorful. I have now tried two different kinds, Carnival and Rainbow. Both kinds produced yellow, orange, red, and purple carrots. The Carnival variety pictured below also produced white and, oddly enough, one green carrot. I’m pretty sure the green carrot was due to some oddity in the seeds (or possibly it was introduced to sunlight in some manner). They both produced tasty carrots where the color definitely affected carrot taste. Of the two packages, I obtained the largest carrots from the Rainbow packet, but a single season doesn’t truly provide enough testing time to say that this would always be the case. I may simply have had an exceptional year. I plan to buy one packet of each sometime and plant them in the same area of the garden in the same year so I can perform side-by-side comparisons.

Colorful carrots make for exceptional meals.
A Colorful Array of Carrots

The carrots weren’t just colored on the outside. Cutting the carrots showed that the white, yellow, and orange carrots were the same color all the way through. The red carrots were red on the outside and orange in the inside. The purple carrots proved the most interesting, with bands of purple, orange, and yellow. Eating the carrots raw proved to be a real joy because you got different flavors with each bite and adding a dip (such as ranch or blue cheese dressing) simply added to the variety.

Growing colorful carrots means seeing color both inside and out.
Carrots Can Vary in Color Inside and Out

Cooking the carrots will change the color of the red and purple carrots to a dark orange. The white carrots do take on an orange cast, but you can still tell they were originally white. The same holds for the yellow carrots—they grow a bit more orange, but are most definitely remain lighter than the orange carrots. Therefore, even when cooked, you end up with a colorful meal, but not quite as colorful as the raw carrots. The colorful carrots even can well. The taste differences between carrots tends to fade a little when cooked and even more when canned. I can still tell the difference between these carrots when canned and other, pure orange, carrots.

Even the canned version of the carrots are colorful.
Canned Carrots Retain Some Color Differences

Unlike many multi-colored vegetable choices, getting multi-color carrots will provide you with enjoyment throughout the year. I now have some colorful choices for a variety of uses this winter. Let me know your thoughts about colorful vegetable choices at [email protected].


Remembering to Rest (Part 2)

It’s important to rest—to stop working for a while and to do something different, something enjoyable. In Remembering to Rest, I talked about Wildcat mountain, a favorite place to go in the fall to unwind a bit after a summer of hard work in the garden. Once the work gets to that magic point where it’s possible to take a little break, reflecting on the summer is a good way to get ready for the rigors of winter. This year I went to Wildcat mountain a little later than usual because the weather has been warmer than normal and it takes me a bit longer now to get to that magic resting point.

Of course, my first stop after my picnic lunch is observation point. I went to Wildcat Mountain on a Tuesday, so I more or less had the park to myself. Yes, there were other people, but we all seemed to sense the need to respect each others’ privacy. I did ask one young lady to take my picture at observation point. As you can see, the fall colors are past their peak, but it’s still a beautiful view.

John standing at observation point in Wildcat Mountain.
Observation Point at Wildcat Mountain

I took my Old Settler’s Trail hike. It’s a 2.5 mile trail that I’m sure some people would consider a bit mundane, but I find it plenty exciting and more than a little exercise. The 1.5 to 2 hour hiking time only counts if you’re in shape and I definitely don’t recommend the trail if you have a fear of heights or any problems whatsoever walking. I finished the trail in one hour and 43 minutes this time—not my best time, but I took extra care because I was alone on the trail. Of course, the first thing you see on this trail are the steps down. I took this picture looking back up the steps once I got to the bottom.

Looking back up the first set of steps.

Most of the hike is on uneven ground, but the trail is clearly visible. Staying on the trail is a good idea because you don’t really know what you’ll encounter otherwise. I saw quite a bit of wildlife, including a beautiful buck who refused to allow me to take his picture. One of my favorite places along the trail is the foot bridge over a creek. It’s a nice place to take a few moments to rest and just enjoy the gorgeous scenery.

This footbridge goes over a small creek and provides a wonderful view.
Footbridge Over a Creek

The trail does provide resting points. You do need to climb up to them. However, they do provide wonderful views of the countryside while you rest.

The resting places provide a beautiful view of the countryside.
Step Up to a Resting Place

For me, the highlight of the hike is Taylor Hollow Overlook. The view isn’t quite as amazing as those provided by some other Wisconsin parks, but you really can see quite a distance and when the colors are just right, the patchwork is really quite colorful. By this point in the hike, a lot of people are starting to get a bit tuckered out, so this particular bench doesn’t require any climbing. You can just sit and enjoy the view.

A place to sit down for a while and enjoy the view.
Tailor Hollow Overlook

It’s at this point where you might want to turn around if you suffer from any vertigo at all. The trail becomes steep and there are no handholds to speak of. The drop would likely result in broken bones or other injury. The point is that you want to take care to traverse this part of the trail with great care.

A combination of steep steps and no handholds makes this part of the trail difficult.
Step Steps and No Handholds

It isn’t long after you get past this part of the trail that you loop around and rejoin the trail you originally used to get down the steps shown in the first picture. This time you go up the steps. By the time you’re finished, you’ll likely be a bit out of breath and will definitely know you’ve had a workout. Still, what a place to workout! Let me know if you’ve ever been to Wildcat Mountain at [email protected].


Harvest Festival 2015

Harvest Festival is one of my favorite holidays of the year. What, you haven’t heard of Harvest Festival? Well, it happens each year sometime during September. The date isn’t precise because you just can’t hold Mother Nature to a specific time to make the majority of the fruits and vegetables ripe. That said, the harvest does happen every year and it’s a time to celebrate, even though it also means hard work. I’ve presented Harvest Festival in the past:

What made this Harvest Festival different is that I did the majority of the work on my own. There was lots to do, of course, and I plan to talk about some of the things I did in future posts. This year the Harvest Festival included getting some of my wood for the winter into the basement. My friend Braden helped me get the wood down there—it’s a big job even for two people. I now have five cords down there and two cords outside. Seven cords will take me through most winters, but I’ll cut another cord just in case things get extra cold. The wood you see in the picture is mostly slab wood, with about a cord of logs underneath.

John and Braden standing next to a huge pile of wood.
Getting the firewood stacked in the basement was a big job.

This year the apples ended up as chips for the most part. I also saved some for eating. The larder already has all applesauce, juice, pie filling, and odd assorted other apple products I could use. The remaining apples ended up with friends. I did make up pickled crab apples this year and did they ever turn out nice. I also made a crab apple vinaigrette salad dressing and canned it. The result is quite nice. For once, my pears let me down. The weather just wasn’t conducive to having a good pear crop. I did get enough pears for eating and a few for sharing as well.

Every year is good for something though and it was a banner squash year. The squash vines grew everywhere. At one point, the squash was chest high on me—I’ve never seen it grow like that.


A largish squash patch with chest high squash plants.
The squash grew like crazy this year!

The picture shows the squash about mid-summer. By the end of the summer they had grown into the garden (overwhelming the tomatoes) and into the grass. The squash also grew larger than normal. I ended up with a total of 700 pounds worth of squash (much of which has been preserved or distributed to friends). Here is some of the squash I harvested this year.


The squash patch produced three kinds of squash in abundance this year.
A cart full of squash.

The largish looking round green squash (one of which has a yellow patch on it) are a Japanese variety, the kabocha squash. So far, I’m finding that they’re a bit drier and sweeter than any of my other squash. I think I could make a really good pie with one and they’ll definitely work for cookies. Unlike most winter squash, you can eat the skin of a kabocha squash, making it a lot easier to prepare and it produces less waste. Given that I received these squash by accident, I plan to save some of the seeds for next year. The squash I was supposed to get was a buttercup squash. The two look similar, but are most definitely different (especially when it comes to the longer shelf life of the kabocha).

Canning season was busy this year. I’ve started filling in all the holes in the larder. For one thing, I was completely out of spaghetti sauce. Even though making homemade spaghetti sauce is time consuming, it’s definitely worth the effort because the result tastes so much better than what you get from the store. I also made a truly decadent toka plum and grape preserve and grape and pear juice. I’ve done hot water bath canning by myself before, but this was the first year I did pressure canning on my own. Let me just say that it all comes down to following the directions and not getting distracted. My two larder shelves are looking quite nice now (with Shelby on guard duty).


The larder contains two shelving units and a freezer.
A view of the larder from the front.

The right shelving unit contains mostly fruit products of various sorts and condiments. Yes, I even make my own ketchup and mustard. Of course, some of the squash also appear on the shelves, along with my cooking equipment and supplies. Let’s just say there isn’t a lot of room to spare.


Fruit products dominate the right shelving unit.

The left shelving unit contains mostly vegetables and meats. In years past I’ve canned venison, pork, and chicken. This year I thought I might try canning some rabbit as well. Canning the meat means that it’s already cooked and ready to eat whenever I need it. The meat isn’t susceptible to power outages and it lasts a lot longer than meat stored in the freezer. Even though canning meat can be time consuming and potentially dangerous when done incorrectly, I’ve never had any problem doing so.


The left shelving unit contains mostly vegetables and meats.

Harvest Festival 2015 has been a huge success. The point is that I have a large variety of different foods to eat this winter, which will make it easier to maintain my weight and keep myself healthy. I had a great deal of fun getting everything ready. There was the usual music, special drinks, and reminiscing about times past. What makes your harvest preparations joyful? Let me know at [email protected].