This is an update of a post that originally appeared on July 26, 2011.
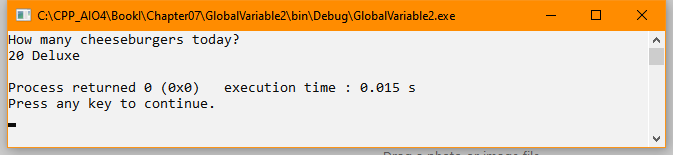
Most real world C++ projects include multiple source files. Book I Chapter 7 of C++ All-In-One for Dummies, 4th Edition shows how to create a project that has multiple source files starting on page 170. The first example (page 177), found in \CPP_AIO4\BookI\Chapter07\MultipleSourceFiles, discusses two .cpp files. The second example starts on page 179 and you find it in \CPP_AIO4\BookI\Chapter07\MultipleSourceFiles2. This example includes two .cpp files and a single .h file. I’ll use the files from the second example for this post. The example works the same as the one in the book, but in this case, we’ll start with the three files and create a project around them.
Defining the Project
You need to start with a Code::Blocks project. It’s possible to use either an existing project or create a new project to hold the files (I’m doing the latter and naming the new product MultipleSourceFiles3). In either case, once you have a project to use, you simply add the files you want to it, set the build options for those files, and then create your application. The following steps create a new project, add the files from MultipleSourceFiles2 to it, set the build options, compile the resulting project, and show you the results.
- Choose File > New > Project. You’ll see the New From Template dialog box.
- Highlight the Empty Project template as shown here:
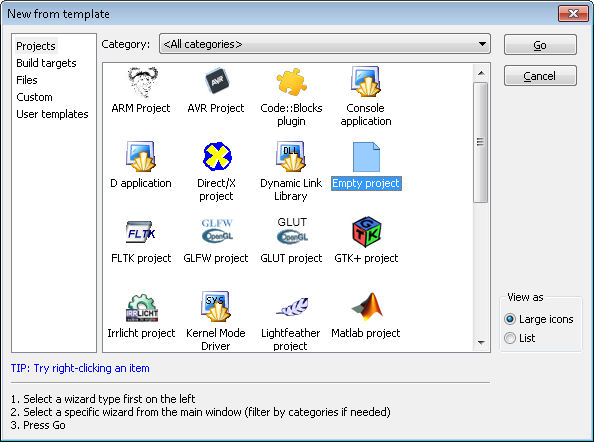
- Click Go. You’ll see the Empty Project wizard. If you’re seeing the Welcome screen, click Next to get past it.
- Type the name of the project (the example uses
MultipleSourceFiles3) in the Project Title field and choose a location for the project (the example uses\CPP_AIO4\BookI\Chapter07\) in the Location field. If you’re following the example, your wizard should look similar to the one shown here: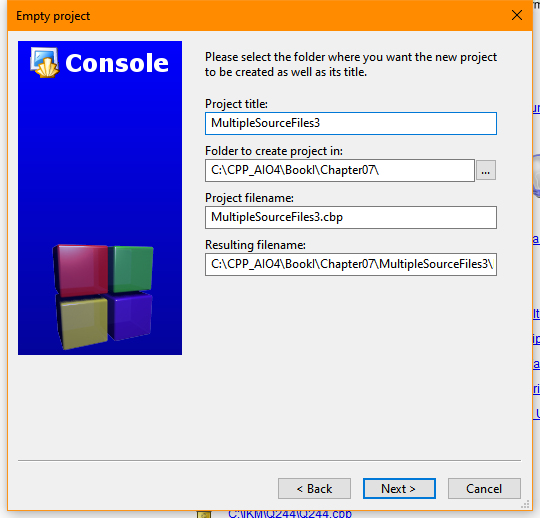
- Click Next. Look in the Compiler field and ensure that the GNU GCC Compiler option is selected.
- Click Finish. The wizard creates a blank project for you.
Referencing the Other Project Source Files
At this point, you have an empty project without any files in it. However, you can add files to any existing project. The following steps add the files from the MultipleSourceFiles2 project to this project.
- Right click the project entry (
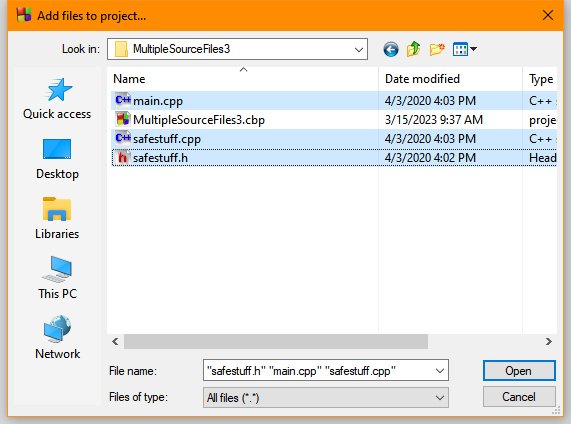
MultipleSourceFiles3) in the Projects tab of the Management window and choose Add Files from the context menu. You see the Add Files to Project dialog box shown here: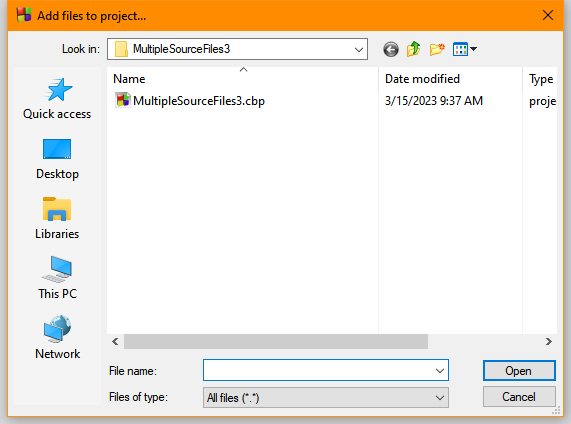
- Locate the
\CPP_AIO4\BookI\Chapter07\MultipleSourceFiles2folder on your system. - Click on
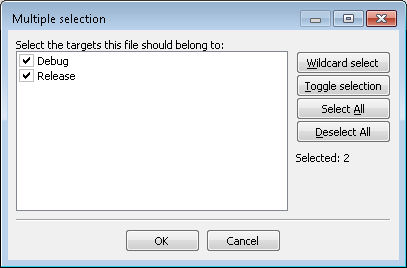
main.cpp. Ctrl+Click onsafestuff.cppandsafestuff.h. You’ll see all three files added to the File Name field. - Click Open. You’ll see the Multiple Selection dialog box. This dialog box contains entries for each of the builds that you specified when creating the project. The default is to use the files you’re adding in all of the builds as shown here. (The example uses all of the files in all of the builds.)
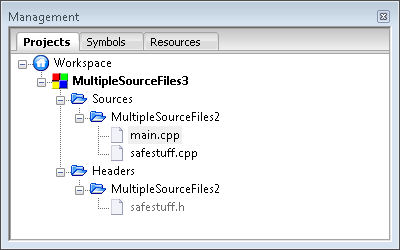
- Configure the files you’ve selected by choosing the build the file should appear part of and click OK. You’ll see all three files added below the MultipleSourceFiles3 entry in the Projects tab of the Management window as shown here:
The referencing technique adds existing files to a different project. Notice that the files are still referenced in the original project. If you make a change to these files, the changes will also appear in the original project.
Copying the Other Project Source Files
Referencing files isn’t always what you want to do. So, you need an alternative for those situations where you want a copy of the file in a new project (allowing changes in the new project that won’t affect the existing project). In this case, follow these steps instead:
- Right click the project entry (
MultipleSourceFiles3) in the Projects tab of the Management window and choose Add Files from the context menu. You see the Add Files to Project dialog box. - Locate the
\CPP_AIO4\BookI\Chapter07\MultipleSourceFiles2folder on your system. - Click on
main.cpp. Ctrl+Click onsafestuff.cppandsafestuff.h. You’ll see all three files added to the File Name field. - Right click
main.cppand choose Copy from the context menu. - Locate the
\CPP_AIO4\BookI\Chapter07\MultipleSourceFiles3folder on your system. - Right click inside the file selection area and choose Paste from the context menu. You see the files pasted into the new location as shown here:
- Click Open. You’ll see the Multiple Selection dialog box.
- Configure the files you’ve selected by choosing the build the file should appear part of and click OK. You’ll see all three files added below the MultipleSourceFiles3 entry in the Projects tab of the Management window as shown here (notice that they’re now actually part of MultipleSourceFiles3 and not just a reference):

Many developers find the need to use existing files in a project. It’s something you’ll do quite often, especially with header files. Of course, when working with header files you also have the option of using the #include directive. Please let me know if you have any questions about this process at [email protected].