Wood Stove Cleaning Day

It’s February and the wood stove has seen a lot of use this season. It’s easy to forget that the wood stove needs maintenance while you use it. I discussed annual and regular maintenance of a wood stove in my Care and Feeding of a Wood Stove post. However, a wood stove requires more maintenance to continue to work properly. A reader was asking me the other day just how much maintenance I recommend and that’s a really hard question to answer. It depends on how much you use your wood stove and what sort of wood you burn in it. You also need to consider the wood stove type and its age.

I actually do maintenance twice weekly during the heaviest usage portion of the season. During the twice weekly cleanup, I make sure the wood stove is completely out and empty the ashes. The ashes actually work quite well when spread on icy areas. The grit in the ash keeps you from slipping. It’s a bad idea to put the ashes where they could cause a fire, such as your compost heap, unless you’re absolutely certain that they’re out. Even then, you must exercise extreme care.

As part of my maintenance, I sweep down the outside of the wood stove using a foxtail broom. This includes the stove pipe and any other surfaces that could become encrusted with dirt, dust, or cobwebs. Not only does such cleaning enhance the appearance of your stove, but it can also help (slightly) with its efficiency and potentially reduce any fire hazard.

Cleaning any glass on the front doors is helpful. You can’t manage the fire as well if you can’t see it. I’ve tried a number of cleaners. Mr. Clean is my current choice. It seems to do a better job with the buildup on the glass. I know some people use the stuff to clean other glass around their homes, like the frameless shower doors in their bathrooms for instance. If someone else comes up with a good selection, please let me know (but please try Mr. Clean first for comparison purposes).

Chimney fires are something to avoid at all costs. Burning hardwoods that are completely dry help quite a lot. A little creosote can still build up through and you really do want to get rid of it. All the chimney sweep should find in your chimney is a little ash. To help keep things clean, I spray Anti-Creo-Soot into the stove once a week. Make sure you follow the instructions on the bottle precisely. If you don’t, you might find yourself dealing with an uncontrollable fire that could cost you a lot more than your home. If the fire doesn’t get that far, you may still have to deal with fire damage, requiring the aid of a fire restoration service similar to Service Master by Zaba (https://www.servicemasterbyzaba.com/fire-restoration) that may be able to help you with fire damage repair.

Keeping things clean will help you enjoy your wood stove longer and to use it safely. A few minutes spent cleaning your wood stove may save you a lot of grief later. Let me know about your cleaning tips at [email protected].

Exercising Care in the Woods

It’s fall and the woods are quite beautiful. For the most part, the bugs have started packing it in, even though we haven’t had a frost yet. I can spend hours in the woods, enjoying a soft breeze, with nary a bite to show for it. There are times where I just sit on one of my stumps up there and wait for something to happen (it usually does). I never run out of interesting things to see in the woods, despite the fact that they really aren’t all that large.

Of course, it’s also the time of the year when I’m cutting wood for winter. So, I often go up with my chainsaw in hand, looking for wood to cut up. The first priority is to keep the woods clean, so I start by cutting anything that is already lying around. Even small wood burns, so I’m not too particular about what size the logs are. Sometimes I find a log that is quite dry and burns nicely lying right there on the ground. In fact, that’s where I found these piece that I cut up.

CarefulWoodCutting01

There is an equal mix of slippery elm and black locust in this case. Both woods burn quite nicely. These pieces are quite dry, but not rotted. Even if there were some rot, I’d take the wood because it’s better to keep the woods cleaned up whenever possible and wood with a little rot still burns just fine.

After I get done looking for fallen wood, I find any snags (trunks that lack limbs) that no one is using. It’s important not to cut down every snag because owls and other birds often nest in them. In addition, it could be a matter of self-preservation because bees will also nest in the snags at times. (For this reason, I actually put my ear up to the trunk and listen for a while.) On this particular day, I found a wonderful piece of black locust to cut up.

CarefulWoodCutting02

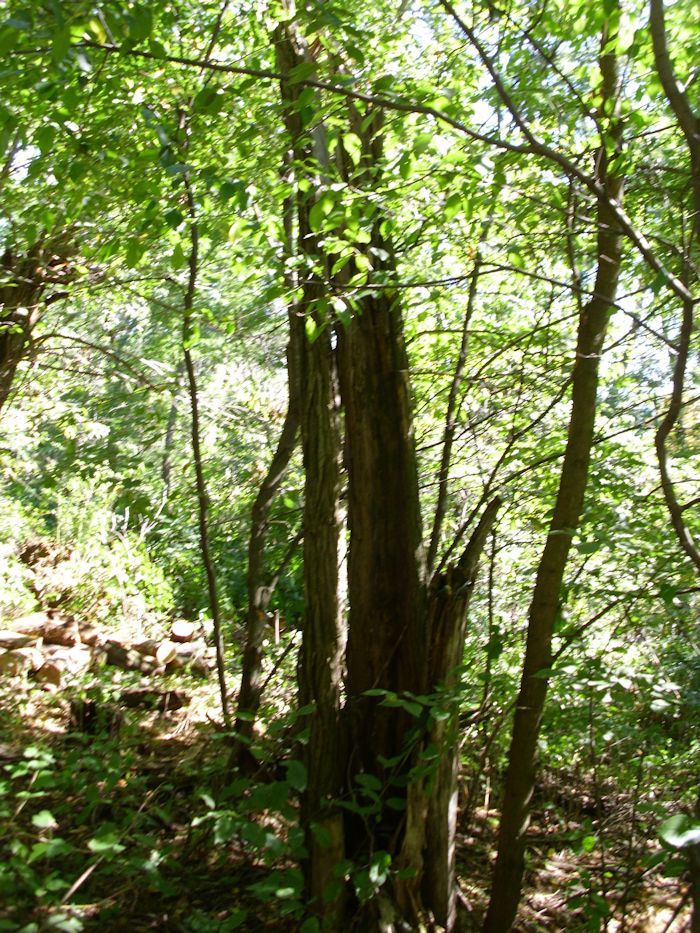
This snag looks like a mess. It doesn’t appear to be usable. The inside has rotted out and there are shards where the tree was hit by lightning. However, this is black locust and the wood is actually quite good. Cutting into it, I found that the outside had indeed rotted a little (up to a half inch), but the inside was both sound and dry. so, the snag ended up on the wood pile along with everything else.

On this particular day, I found everything I needed on the ground or as a snag. However, there are some days when I do need to cut a tree down. When this happens, I look for trees that are already completely dry (the bark has come off of its own accord) and no one is using. Even with these restrictions, I usually find all I need. All it takes is a little looking and given the beauty of these woods, looking is something I like to do.

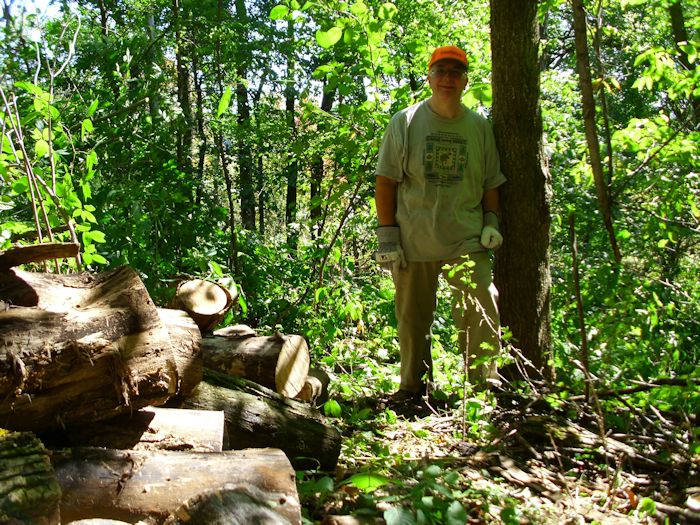
Notice that these pictures show that the woods is intact. It’s what I try to achieve when I cut wood for winter. I leave all of the young trees and anything that’s alive intact as much as possible. Even the ground vegetation is left intact except for the narrow path I create for myself. (All the wood is carried down by hand to minimize damage.) Using management techniques like these ensures that the woods will continue to look beautiful and produce wood well into the future.

Have you taken a stroll through a woods lately? Let me know your thoughts about careful management techniques at [email protected].


Making an Opportunity from Falling Trees

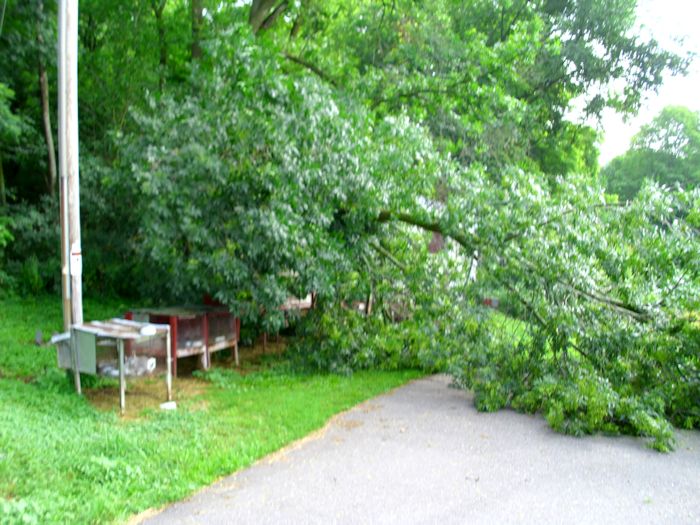
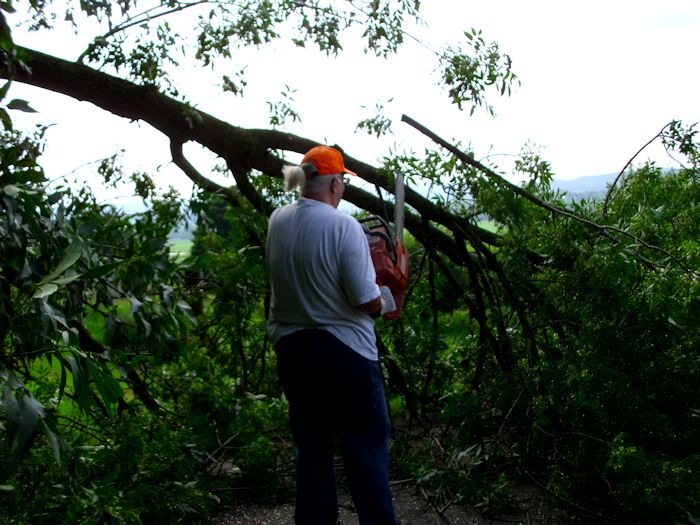
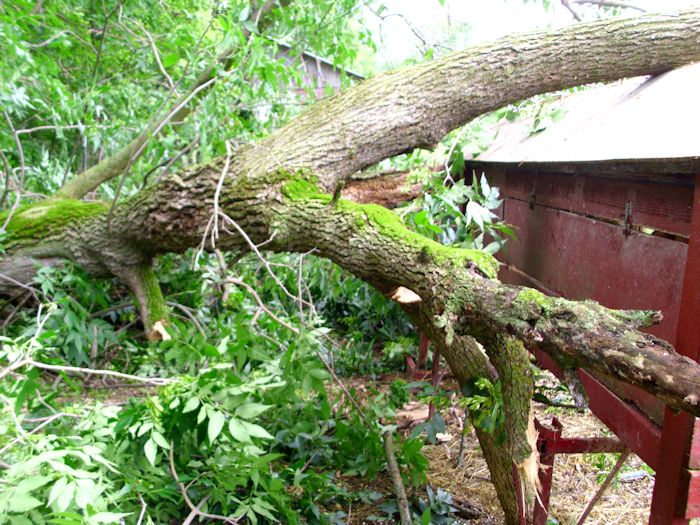
No matter where you have them, trees eventually fall and you’ll end up needing to get rid of the dead tree or get a tree removal denton service. Parts of our property are heavily wooded, so falling trees are expected and happen fairly often. Winds will blow a tree down, lightning will crack it, insects will kill it, woodpeckers will weaken it, or old age will simply take it. No matter the cause, the tree lands somewhere and in most cases, the landing is benign from our perspective. However, we recently experienced a less benign falling tree. The woodpeckers had weakened it, birds had nested in the holes, and carpenter ants had drilled a hole through the center. A lightning strike and high winds finished the job. After the storm we got up to see a rather large tree draped across our rabbit hutches.

Now of course, I don’t expect everyone reading this to have the resources required to remove a tree, let alone one of this size. When most people need Tree Work done, they just call the professionals. But I quite enjoy trimming and removing my trees, especially when I can benefit from it, so I like to do it myself.

FallenTree01

Most of the pictures in this post were taken by my wife, Rebecca. I greatly appreciate her help in putting this post together.

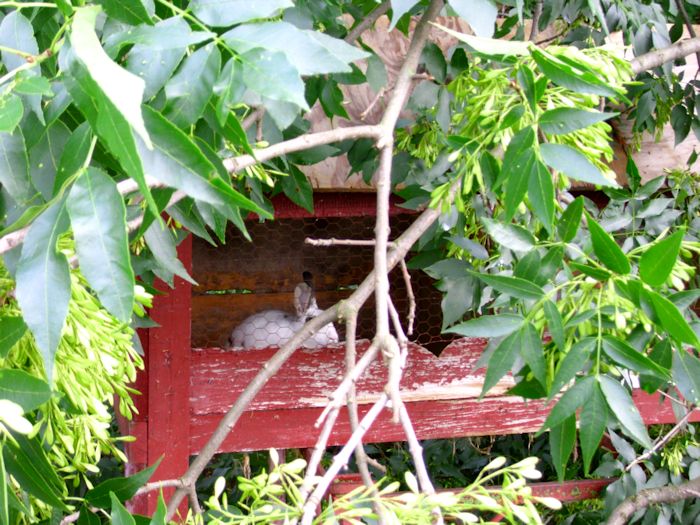
Our first thought was that the rabbits had escaped their hutch or were possibly dead. Amazingly, the rabbit hutch held and the rabbits were safe. The main problem was that we couldn’t get to them to feed them.

FallenTree02

Unfortunately, cutting up a large tree is hot work and the heat index was well over 100 degrees that day (into the danger zone of the heat index chart). Let’s just say that it was sweaty work and leave it go at that. The tree was poised like a giant spring. The main trunk was actually split in two, but it was butted up against the rabbit cages in a way that didn’t let it fall completely, so I had to cut the tree with extreme care-starting with the branches.

FallenTree03

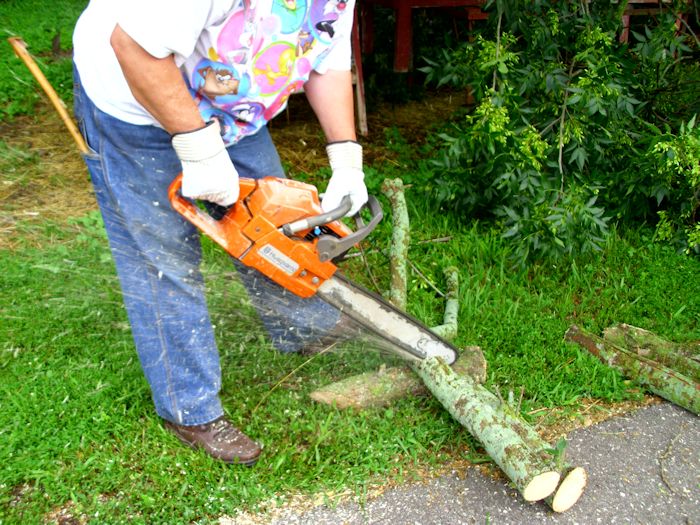
As I cut the branches, I separated the parts that I would later chip from those we would dry for firewood. The larger pieces were cut into lengths for stacking.

FallenTree04

After a while, all of the branches were cut. The tree was as safe as I could make it. However, the main part of the trunk was still braced against the rabbit hutch, so we still couldn’t get to the rabbits to feed them.

FallenTree05

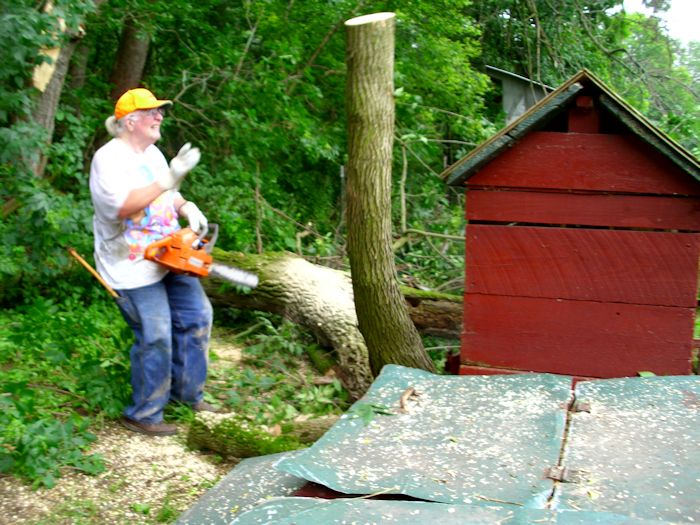
The most challenging moment came when I had to release the spring holding the trunk against the cages. The cut was extremely dangerous because I had to cut the tree enough to release the pressure, but not so much that it would flip in some unexpected way. What I needed was a slow release of pressure so that the tree would come to a safer position. I made the cut and the tree slowly started to move as expected. The spring completely released itself and the piece I had partially cut ended up standing straight in the air before falling to the ground. Perhaps if you have a similar situation but are not familiar with safe methods of removing the tree yourself, you could similar services to those found on treeserviceremoval.com to help you get rid of it without putting yourself in any danger.

FallenTree06

I still have a lot of tree to cut, but we’ve managed to make use of everything. The pieces of the tree I have already cut up are stacked and drying nicely.

FallenTree07

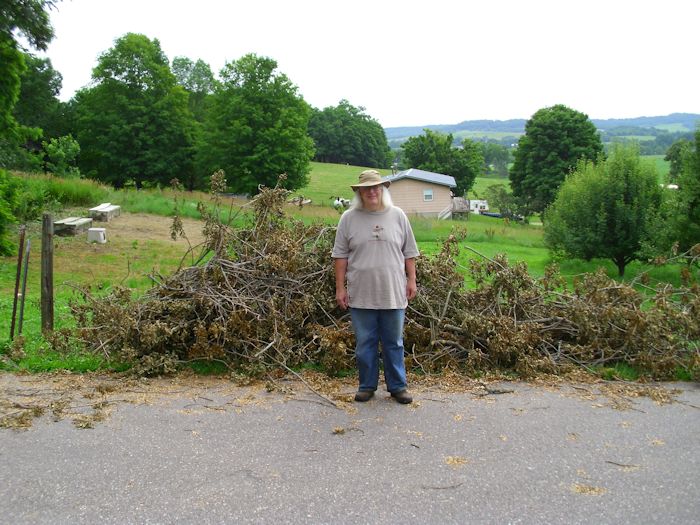
We also obtained a large stack of branches.

FallenTree08

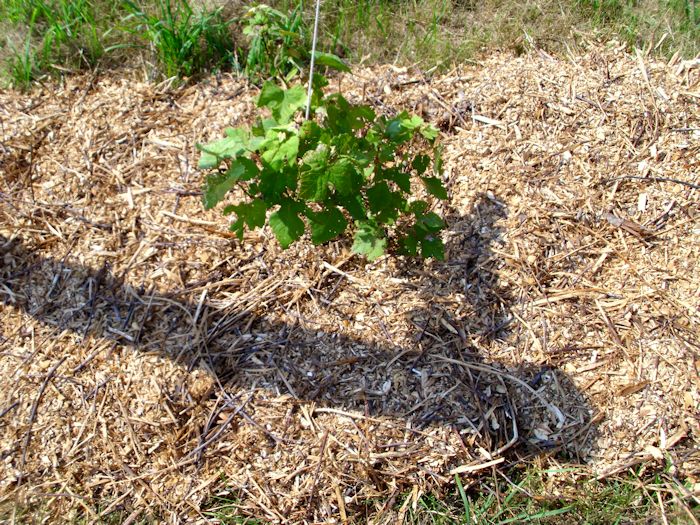
A lot of people would create a huge brush pile from the branches and burn them. However, doing so is really bad for the environment and wasteful of a useful part of the tree. I’m currently chipping the branches up and using them for mulch on our grapes. The mulch will keep the grapes moister, reduce watering costs, and make the grapes more productive because they won’t be battling weeds.

FallenTree09

In the end, what started as a disaster turned into an opportunity. Not every act of nature turns out this way, but we try to make the best of every situation. When did you last make an opportunity out of a natural event that started as a negative? Let me know at [email protected].

Chickens in the Woods

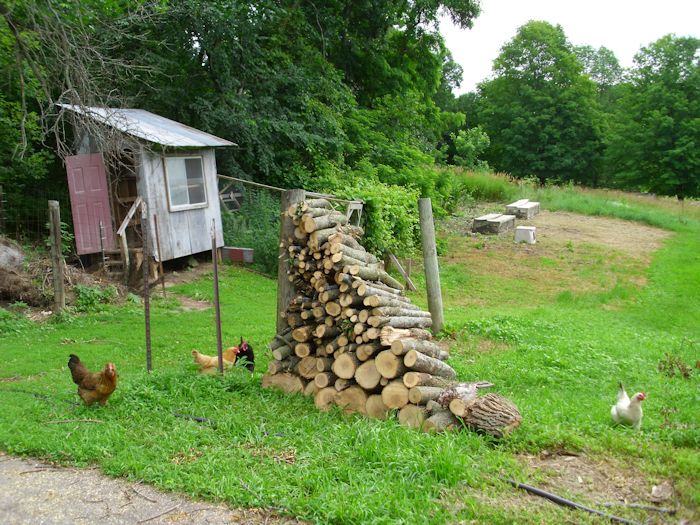
We let our chickens run about as they want. Yes, they have a run so that they can stay in a safe environment when desired or they’ll have a protected place to run if something chases them, but chickens do need the freedom to wander about. Besides, letting the chickens run around doing what chickens do best, eating insects, helps reduce the tick population in the woods. So, it didn’t surprise me the other day to see chickens in our woods while I was working on a relatively large log. However, I thought that they’d maintain their distance because my chainsaw does make a frightful amount of noise.

As I worked along, I noted that the chickens were getting closer. As soon as they saw me looking at them, they curtsied. Now it may sound quite odd to hear that chickens curtsey, but ours do quite regularly. The move their wings out in a manner reminiscent of a woman holding out her skirts and then they do a bit of a bow legged dip. It really is quite humorous to see. Our chickens curtsey when they want us to pick them up and hold them. Normally, this is followed by some amount of petting and us telling them how good they are. Our birds truly are spoiled in grand fashion.

Since I didn’t want to stop cutting the log up, I ignored the chickens and kept working. I felt that they would probably head back the other direction due to the noise of the chainsaw. So, it surprised me quite a lot to look up and see that they had gotten closer still. When they saw me looking again, they curtsied yet again—looking quite annoyed in a chicken sort of a way. I could almost see them huff and they were quite annoyed that their human just hadn’t gotten the idea that they really needed to be picked up and told what good birds they were.

Not taking the hint, I decided to continue working on the log. Certainly, they’d get the idea this time and go in the other direction or possibly stop to watch me for a while (something that chickens do relatively often because they really are quite nosy). When I looked up the third time, the chickens had gotten dangerously close to my logging operation and I decided that I really must get them to safety. Seeing me look again, they not only curtsied, but squawked quite loudly in order to better attract my attention.

So, I shut my saw off and went over to the two birds. I picked a bird up in each arm (good thing there weren’t three of them). Now, I’m walking down this rather steep hill, one chicken under each arm, hoping that I don’t fall. All the while I’m telling the chickens what good birds they are. Eventually, I get to the coop and let them inside. I go inside with them and tell them what good birds they are again and give them some pets. At this point, I closed the run door, got the rest of the birds inside, and then went back to work.

Lesson learned? If your chickens really think they need to be petted and they take the time to curtsey, don’t ignore them. I have to admit, they really did make my afternoon better. I laughed about their antics all the way back up the hill where I finished my log, loaded it into the cart, and dumped it down the chute. Feel free to share your favorite humorous chicken story with me at [email protected].


Splitting the Dreaded Elm

I’ve read a lot of truly awful comments from wood cutters about elm trees online. Yes, everyone admits that they’re quite pretty and the vase shape produces an amazing amount of shade. Elm trees are popular in cities because they can grow quite well in the pollution. The elm tree’s twisted internal structure means that even when the tree is hit by lightning, it often doesn’t split apart and cause significant damage. Of course, elm trees are susceptible to a number of beetles, including those that spread Dutch Elm Disease (DED). Wood cutters of all sorts now have experience with the twisted internal structure of the elm because DED has wiped out so many trees. This structure makes it incredibly hard to split the tree. In fact, some wood cutters will refuse to cut down an elm for wood simply because the tree is so incredibly hard to split.

Elm does have some redeeming features for someone who needs wood for their stove. Unlike my favorite, black locust, you don’t have to mix elm with other woods to keep your stove temperature under control. Elm will burn at a moderate rate for a long time. In addition, elm produces a lot of heat for the amount of wood you get, it isn’t hard to start, won’t produce a lot of sparks, and doesn’t produce an overwhelming amount of ash.

A friend recently helped me cut down two elms—one of which was threatening my house (the other would have threatened at some point if it had been left in place). These are mature trees that have the the classic signs of beetle infestation, but don’t appear to have the fungus associated with DED. Even so, all of the wood from the two trees will find a home in my wood pile at some point.

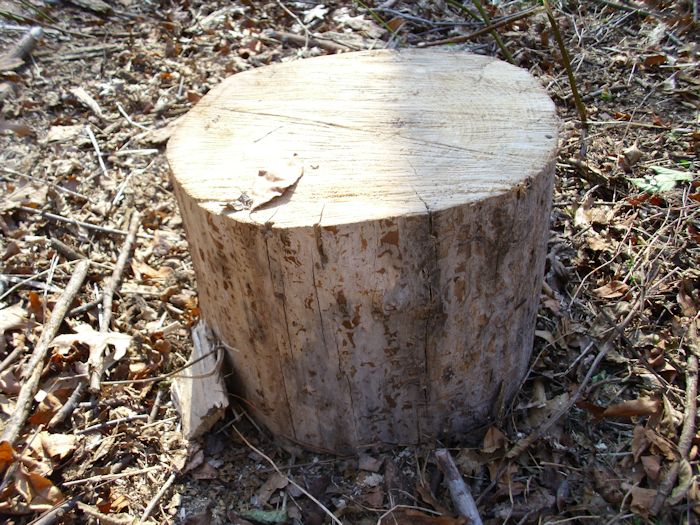
One way to deal with elms is not to split them in the first place. Most people think you have to cut trees into the classic log shape. I’ll cut elm into short logs that fit flat into the wood stove instead of as a log. You can continue cutting the tree up like this until the diameter of the log begins to exceed the depth of your wood stove. So, I’ve ended up with a number of logs that look like this, rather than the usual round shape.
SplittingElm01

At this point, I can see you scratching your head. You insert the wood like this into the wood stove. The height of this piece matches the height of the wood stove opening—the diameter is less than the length and depth of the wood stove, so the piece will fit just fine, even if it isn’t in the normal orientation. All the wood stove needs is a piece of wood that’s the right size to fit and it definitely doesn’t care anything about shape. The piece will burn just fine in this direction.

Warning: You may need to insert felling or bucking wedges to keep the cut open when working with thinner cuts like the ones shown in this post. Never use splitting wedges for this purpose. If the chainsaw chain hits a metal splitting wedge, the chain will likely break and could cause personal injury. Always use plastic or fiberglass felling or bucking wedges designed for use in holding open cuts instead.

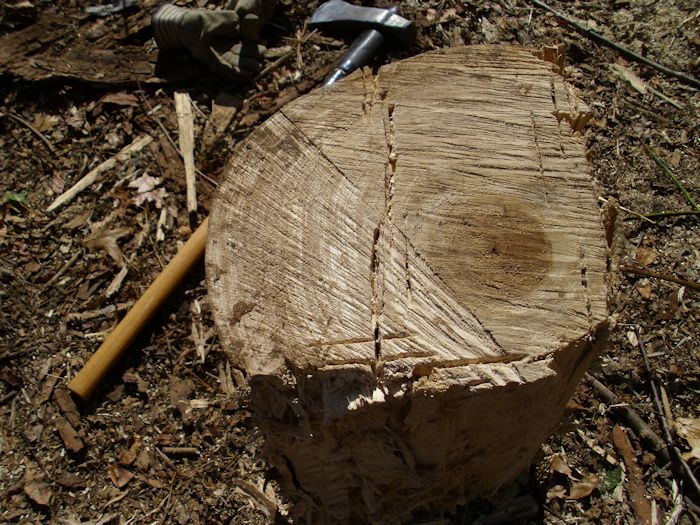
The trees had a 20-inch diameter, which is just a bit bigger than my wood stove will allow, no matter how I want to orient the pieces. I chose to split the pieces in this case so they look a bit more like standard logs. However, elm is so tough to split, that just hitting it with a maul or an axe won’t work. I have a 20 pound maul and it simply bounces off the top unless I really want to pound on the log, in which case, I get a nice dent. To split this wood, you need splitting wedges. I used three wedges to split the 20-inch diameter pieces from this tree. When working with elm, you can’t have too many wedges. To start the process, create a stress line across the log like this.
SplittingElm02

What you’re seeing is about six hits with the maul to create a straight line through the early wood. Notice that I purposely avoided the late (heart) wood. If you try to split the heart wood, you may never get the job done.

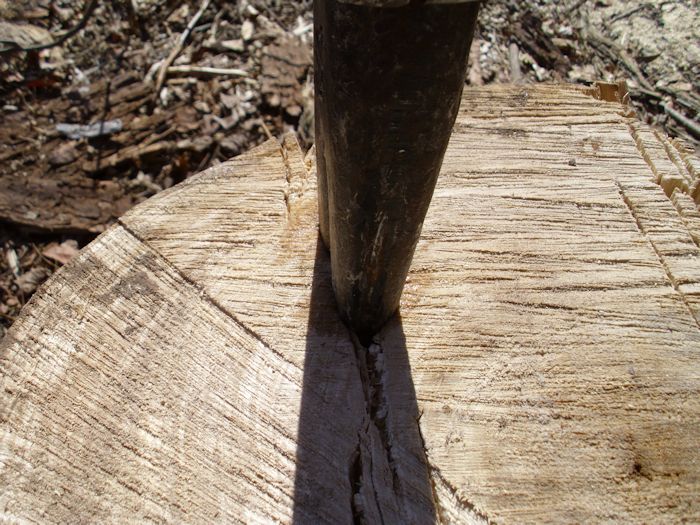
After you get the initial stress line created, pound in your first wedge. Given the size of this log, I chose to place the wedge about 1/3 of the way across to ensure the log would split all the way down the side. Again, you really want to avoid that heart wood if at all possible.

Some people like to wait until elm is completely dry to split it. What I have found is that elm continues to harden and the interlocking becomes worse as it dries. I prefer to split the logs when the bark has come off, but before the tree is completely dry. Normally I see some wetting around the wedge as I pound it in as shown here.
SplittingElm03

Even with the lubrication provided by the moisture, getting the wedge all the way down can prove difficult. The first wedge is the hardest. Splitting the wood in sub-zero weather will give you a small advantage in some cases—it depends on how interlocked the fibers are. I chose to split this wood in warmer weather because I want it to start drying out.

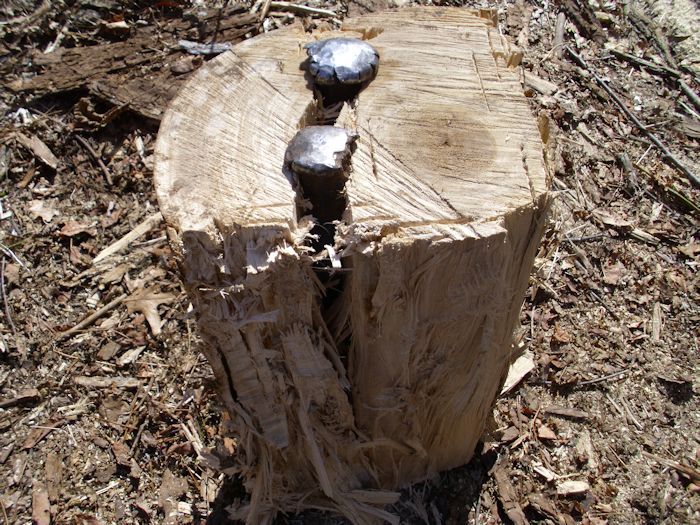
After I get the first wedge all the way down, I pound in a second wedge 1/3 of the way from the other side. I end up with two wedges in the first end like this.
SplittingElm04

Warning: Make sure you dress your wedges properly! The two wedges shown here have been used to split a number of trees and are mushrooming out at the top due to being hit by the maul. The maul is made of harder metal than the wedges, which are designed to mushroom out like this as they’re being hit to reduce the risk of shattering (metal hitting metal). At some point, little pieces of the wedges will break off and could cause physical injury. Dressing the wedges using a grinder will keep the mushrooming under control and reduce the risk of physical injury. Of course, you should always wear the proper safely equipment when using a maul, which includes safety goggles (an OSHA approved face mask in addition to the safety goggles is better), long sleeves, heavy pants (adding wood cutting chaps is better), and heavy gloves.

As you can see, even with two wedges in place, this log refuses to split. At this point, you turn the log over. Create a stress line across the log using your maul that reinforces the current split. If you’re really lucky, you may be able to get the log to finish splitting this way, but don’t count on it. In my case, I needed a third wedge, so I put it in like this.
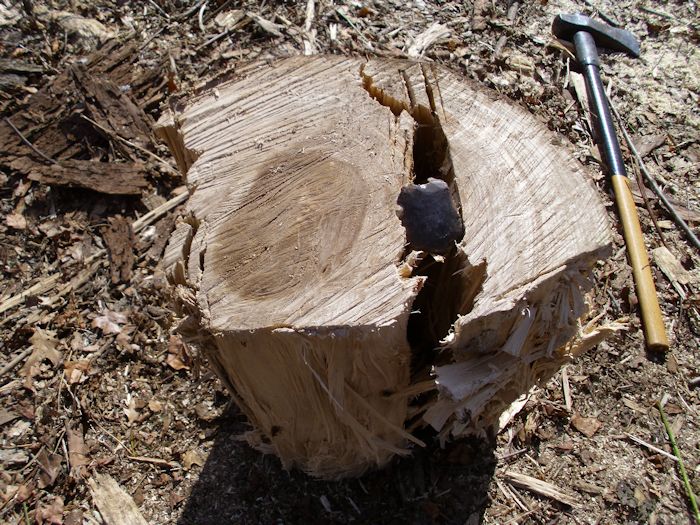
SplittingElm05

I now have a crack from top to bottom, but the crack doesn’t go all the way through the log and it still isn’t split. At this point, you turn the log over on it’s side and break the center by striking it with the maul. Make sure you hit directly in the middle and not on either end. If you hit the ends, you’ll also hit the wedges and dull your maul. When the split is complete, your log looks like this.
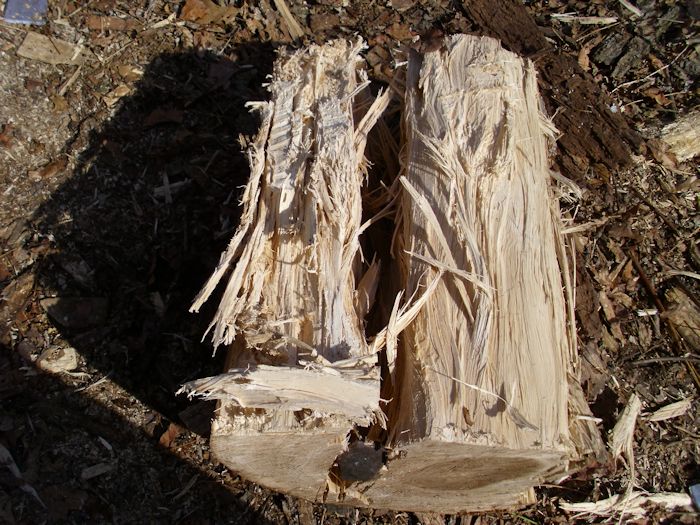
SplittingElm06

You can remove the two wedges at this side now. What you have is a split side and a hinge (connected) side. All you have in place in the second wedge on the top of the log at the hinge side. Turn the log over so that the bottom is up and the hinge side faces you. Use the maul to break open the bottom of the hinge as shown here.
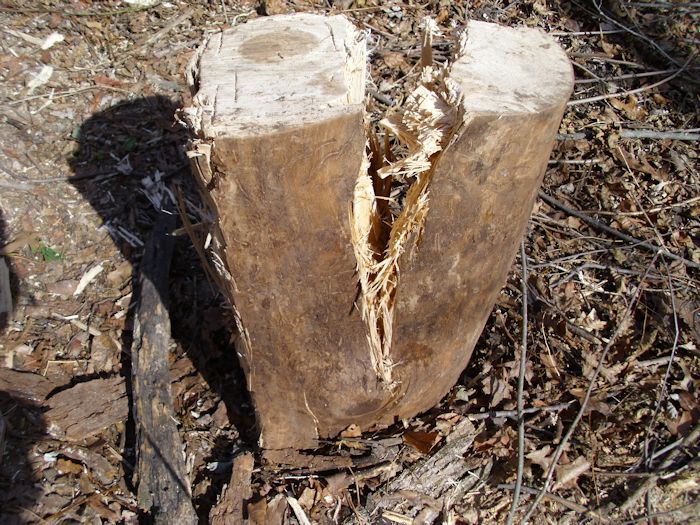
SplittingElm07

This action should free the third wedge. At this point, you can place the top end up and finish the final split with the maul. You now have a split piece of elm as shown here.
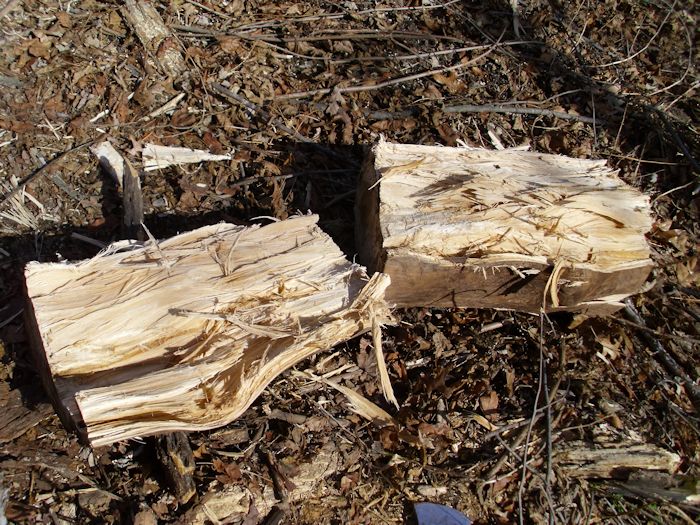
SplittingElm08

In my experience, only elm splits this horribly, which is why many people avoid it. Yet, the wood does have some good characteristics and if you handle the tree right, you can get by without splitting most of it. Let me know about your elm splitting experiences at [email protected].


Maintaining Your Chainsaw

It’s wood cutting season and I’ve already been in the woods a couple of times. Nothing is quite as nice as a fresh breeze, wonderful scenes, the feel of nature, and the smell of freshly cut wood. I choose the wood carefully, as described in Choosing Wood Carefully. However, no matter how carefully you choose the tree, the task is only as easy as the condition of the tools you use. The tools must be the right size, fully maintained, and inspected carefully. Of the tools I use, the one I worry about most is my chainsaw. A failure of my chainsaw at the wrong time could mean death. This means that as well as thorough inspections, your chainsaw must be of good quality, like these top rated cordless chainsaws.

I know a lot of people maintain their saws personally. However, given that my small engine experience is limited, I normally take my saw to a professional for its annual maintenance. This includes everything from cleaning the air filter and changing the fuel filter, to making sure the saw is clean and has a sharp chain on it. This annual workup is enough for my needs because I’m not using the saw professionally. I cut just enough wood to meet my heating needs each year, plus stock up a bit of emergency wood.

However, I do perform certain types of maintenance every time I go out to cut wood, the kind that may need some stuff from safety equipment suppliers to perform safely. This frequent maintenance may seem like overkill, but I really don’t want to end up dead due to an equipment failure, so I perform these checks absolutely every time I use my chainsaw:

  • Clean the exterior of the saw.
  • Inspect the saw for damage.
  • Check the sharpness of the chain and replace it if necessary.
  • Clean the area that houses the chain when I have the chain off.
  • Verify the chain is at the proper tension.
  • Grease the bar sprocket.
  • Fill the chain lubricant reservoir.
  • Fill the gas reservoir.
  • Check my safety equipment, which includes safety glasses, hearing protectors, and heavy gloves.


Even performing all of these checks, it’s possible that you’ll have an equipment failure, but it’s a lot less likely. If you’re smart, you’ll continuously check for potential problems while you’re working in the woods. Make sure you check the saw every time you refuel it and always ensure that you add bar chain lubricant when you gas up. It also doesn’t pay to be cheap in this case-use high quality lubricant and make sure your gas is fresh and has the proper two-cycle engine oil in it.

It often amazes me that people don’t take more care when they prepare to go into the woods. Even though I feel that the woods are one of the most beautiful places on earth, I also give them the respect their due and you should too. Let me know your thoughts on chainsaw maintenance at [email protected].

Woody

Woody my friend,
has met his end,
amidst leaves and briars so cold.

Never to pound,
the woods to resound,
looking for his next luscious meal.

He’ll never again spy,
as I pass him by,
to cut down a tree or two.

Our talks I’ll so miss,
as he filled me with bliss,
just seeing that red head of his.

While others do fly,
away in the sky,
as I invade their sanctum so rude.

Woody was there,
as near as my chair,
cut from a tree stump I hewed.

So goodbye my friend,
my heart you do rend,
I’ll think of you each morning dew.

Dedicated to Woody the pileated woodpecker.
Copyright 2012, John Paul Mueller

Enjoying the Flowered Woods

I always find the springtime woods inviting. All of the flowers are amazing! Unfortunately, I don’t know the names of every flower out there, even though I’m sure that someone has named them at some point. Every spring does bring back a few friends, such as the cranesbill geranium:

WoodlandFlowers01

The berry brambles produce a riot of flowers too. The gooseberries, black caps (black raspberries), and red raspberries have already bloomed and set fruit. However, the blackberries are only now putting out blossoms and the initial burst of flowers portends a wonderful summer of berry picking.

WoodlandFlowers02

I can taste the berries now. Our entire woods is packed with berry brambles. There are times when I can pick two or three gallons of berries in a single day. In fact, the limiting factor is usually the amount of time I have to pick, rather than the number of available berries. Everyone eats the berries during the summer months, including both birds and squirrels (oddly enough). There is no doubt in my mind that other forest creatures benefit from the berries too.

Sometimes the woods offers up something special. In times past, I’ve encountered bloodwort (bloodroot) and mayapples. Both plants were used for medicinal purposes in the past. The mayapple fruit is edible in small quantities as long as you know when to pick it. The fruit must ripen on the plant and must be completely yellow. The leaves can be used to make an effective insecticide when boiled, allowed to cool, and then sprayed.

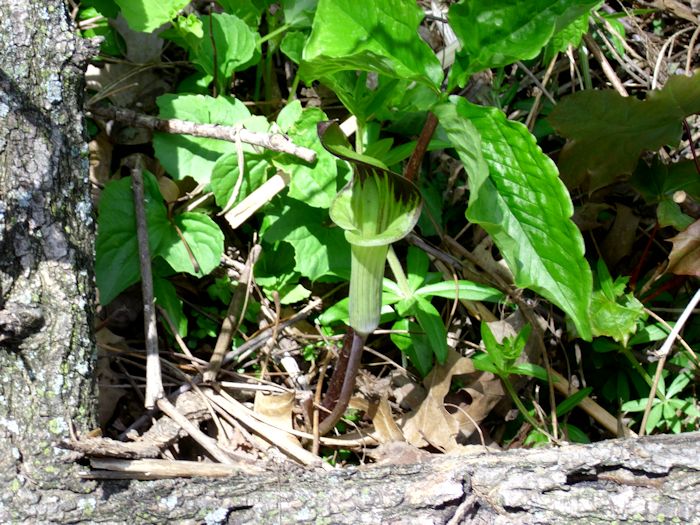
This year we were treated to something special, a jack-in-the-pulpit. It showed up right above the rock garden at the very edge of the woods, so Rebecca was the first to spot it. I must admit that it’s a bit hard to see. We’re fortunate that this one came up so close that we can enjoy it each year. In fact, Rebecca plans to extend the rock garden to include our new addition.

WoodlandFlowers03

Of course, there is a lot more to see in the woods and I hope to be able to take time to enjoy it all. Do you have a woods near to you? If so, do you ever get to enjoy all of the beauty it contains? Let me know at [email protected].


Care and Feeding of a Wood Stove

After reading my recent post entitled, “Choosing Wood Carefully,” one reader wrote to ask me about wood stoves. Yes, you really must exercise care with your wood stove or end up paying the price. For that matter, any wood burning appliance requires care and if you don’t maintain it, you’ll likely end up with a chimney fire at some point. There is little doubt in my mind about it. A fire would cause a lot of damage and it’s likely the whole chimney will need to replaced, not just the Flue Liner. Even if you don’t have a chimney fire, the wood will burn less efficiently and you’ll get less heat from it. In addition, there is always the problem of potential carbon monoxide poisoning. If you haven’t gotten the point yet, maintaining your wood burning appliance isn’t just a nice thing to do, it’s a requirement.

Make sure you perform your required maintenance. When it comes to my wood stove, that means ensuring I clean the glass twice a week so that I can actually see what’s going on inside the wood stove as the wood is burning. Opening a door when there is a burning piece of wood leaning against it (due to shifting) is never an easy task, but clean windows make things easier. You’ll also want to clean out the ash content from time-to-time (I do it daily) to ensure there is no buildup that could reduce the efficiency of the stove. As part of my personal regular maintenance, I also spray some Anti-Creo-Soot into the stove daily to ensure that no creosote builds up in the chimney. This product will greatly reduce the likelihood of a chimney fire and ensure that your wood stove continue to work a full efficiency at all times.

There is also annual maintenance to perform. The most important thing you can do is to obtain the services of a certified chimney sweep. You want a certified professional because they have specialized equipment to clean and check your wood burning appliance. In addition, these professional can usually perform repairs. For example, my wood stove has a very odd shaped window in the front. It broke at one point, causing the stove to operate poorly. Our chimney sweep was able to make the required glass insert when it was discovered that the vendor no longer supplied it, saving me considerable expense and worry.

When the chimney sweep is done, it’s usually a good idea to repaint any rusty areas on your stove. Make sure you wear a mask during the entire process because wood stove paint contains some incredibly nasty chemicals. Use a high temperature paint to repaint the surface after you prepare it. It’s absolutely essential that you paint your stove with all of the windows open and with a fan blowing air into the room. Using a spark proof fan (one designed for use in painting) is a good idea. Always follow the vendor instructions (including using the stove with all of the windows in the room open the first two or three times). Maintaining the paint job will help you enjoy your wood stove for a lot longer and present a nicer appearance when people visit.

Although it isn’t strictly a maintenance task, I also verify that my wood stove is burning at the right temperature. You do this by placing a magnetic thermometer directly on the stove pipe. It’s a good idea to keep the stove in the orange zone of a colored thermometer. Burning wood at too low a temperature causes creosote buildup in the chimney. Of course, keeping the stove too hot could result in a fire.

When you choose the right wood and maintain your stove, you’ll find that your wood burning experiences are significantly better and considerably safer. It doesn’t take long to perform these tasks and the savings from heating your home with wood are incredible. I find that the radiant heat actually feels warmer than the heat produced by a furnace. Let me know your thoughts on wood stove maintenance at [email protected].


Fun is Where You Find It! (Part 4)

For many people, this time of the year is extremely depressing. There are all sorts of acronyms associated with this time of the year, such as Seasonal Affective Disorder (SAD). I have no doubt that these disorders, diseases, and disabilities all exist and are quantifiable in some way. In fact, I imagine that there are tests to determine precisely which of them you have and to what extent you suffer from them. The bottom line is that the holidays are over, the weather is stormy, and the budget tight. Excitement is nowhere to be found-at least, not the sort of excitement that many people consider fun today.

It’s this time of year when Rebecca and I engage most strongly in crafting. Making things tends to take your mind off of all of the things that would make you SAD. For example, this is the time of year that I make knitted items most. A craft need not be expensive or require skills that most people lack. I’ve known more than a few families who have gathered pine cones in the fall, drizzled a bit of glue on them, dipped them in glitter, and added a bit of yarn to string the pine cones up. Not only do them make attractive Christmas ornaments, you can hang them up in a room as decoration. The cheerful colors and the occasional glint of the sun dancing off the glitter can dispel the gloom in any room. Stenciling and other forms of decorative art are helpful this time of the year as well. I got the idea for bright colors in a room from some of the displays in European Village at the Milwaukee Public Museum. Old world houses weren’t drabthey were colorful to keep things cheery during the winter months. This form of decoration improves your ability to withstand the drab winter months and could very well help keep SAD at bay. The best part of all is that you can get the supplies for any of the crafts I’ve mentioned for less than $20.00 and some, like stenciling, can consume an inordinate amount of time that you’d otherwise spend feeling bad.

Of course, not everyone likes crafts and I wouldn’t want you to saddle yourself with something that you won’t ever enjoy (no matter how hard you try). This is also a good time of the year to take a winter walk. Wait for a nice day and go into the woods. The woods are amazing this time of the year and if you’re careful, you’ll see some interesting animals, such as a fox or weasel. You have to look extra hard in some cases. Some animals change color in the winter to better blend in with their environment. A white rabbit on white snow is incredibly hard to see.

So, you’re not into the outdoors and crafts have no interest. There are still things you can do to make this time of the year better. Some people live for sports. Gambling and betting on games is a lot of peoples hobby and their favourite part of sports. By choosing one of the many betting formats, such as by clicking here, you can bet online and enjoy the game even more. The Superbowl takes place in two weeks. Personally, I’m not much of a sports fan. In fact, I just barely know the names of our teams here in Wisconsin (much less the rest of the country). But if you asked my friends, they could practically tell you every player for every team. They are huge sports fans, and they especially love the Superbowl. It’s what they wait all year for. So, I wouldn’t be surprised if they decided to have a look at these Sportsbook Promo offers to make a bet. If I had as much knowledge as them, I’d definitely decide to look at gambling because I wouldn’t be surprised if they manage to win a decent amount of money from it. I hope they don’t ask me for my advice because I wouldn’t have a clue. Even though I’m not much of a Superbowl fan, I do like action movies, so we have a Super Action Hero Bowl on Superbowl Sunday. Here are the steps for creating your own Super Action Hero Bowl:

  1. Create a list of the action heroes that appear in your movie collection (or that you know you can borrow free from somewhere like the library).
  2. Place the names in a hat and have someone draw four or five names.
  3. Create lists of the movies that you own for each action hero.
  4. Place the movies for a specific hero in the hat and draw out the name of a movie for that hero.
  5. Create movie lists and draw a movie name for each of the remaining heroes.
  6. Now that you have a list of names and movies, create a scorecard. It doesn’t have to be anything fancy, but each member of the family who participates in Super Action Hero Bowl should have a separate scorecard.
  7. Watch the first movie on the scorecard and mark that movie’s rank. Each movie should be ranked from 1 to 4 (or 5, depending on how many movies you choose). No two movies should receive the same score. (No peaking at your neighbor’s scorecard please!)
  8. Continue watching movies until you have completed them all.
  9. Tally the scores from each of the scorecards for each movie. The movie with the lowest score (the highest rank) wins.


It’s a good way to spend a day in family fun. It’s inexpensive and the competition adds a certain appeal to the event. Of course, just like the Superbowl, you can grab some special foods from your larder and serve them during the course of the day. If you don’t feel like you have a wide enough variety of superhero or action movies then it might be worthwhile looking at the likes of internet proxies that can allow you to visit the pirate bay online to find and download or stream a very large selection of movies, this will also help you keep it all as inexpensive as possible.

Just because the holidays are over, doesn’t mean you have to make things drab. Rebecca and i usually store some special goodies in the larder for this time of the year. When there is something to celebrate, we make an impromptu personal party using these items. We’ll play games, listen to special music, put puzzles together, or do other things to make the event special. Get a good report from the doctor? Why not have a party to celebrate it? It takes a little effort to avert the drudgery of this time of the year, but you can do it and it doesn’t have to cost a lot (or anything at all).

How do you avoid the January blues? Do you like crafts, a bit of nature, some mild competitive fun, or a bit of a party? Let me know at [email protected]. Make sure you also view the other Fun is Where You Find It posts for other ideas.