Fighting Dry House Conditions

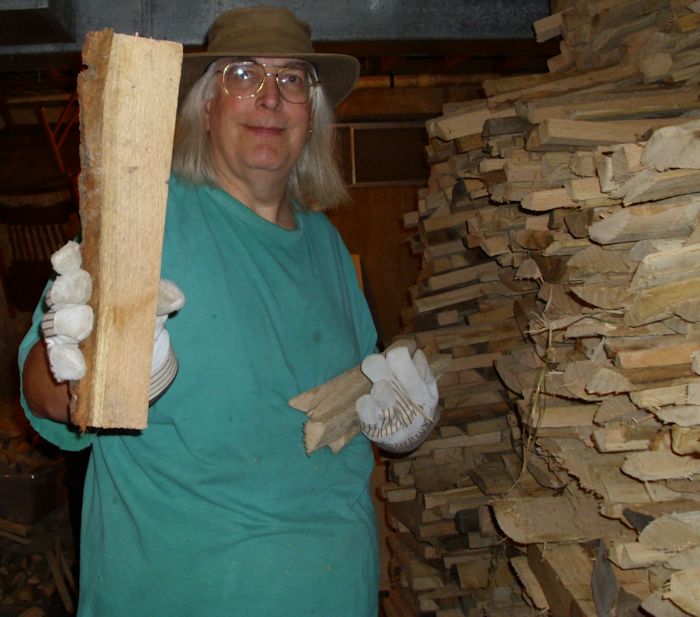
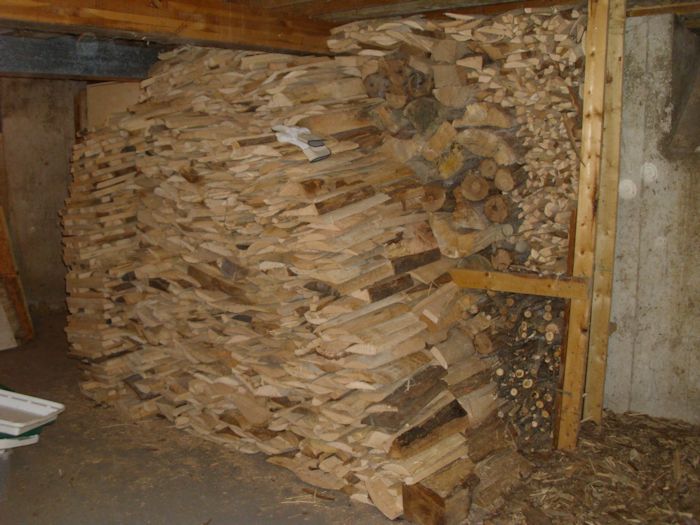
Anyone who knows me, knows I love my wood stove. It keeps my house toasty warm. The floors, walls, and ceilings are all warmed so that I can walk around barefoot in my 68 degree house if I want. Just try doing that in a house heated by a furnace! So, there is no doubt that I’ll continue to enjoy the benefits that radiant heat can provide.

There are down sides to everything and heating a house tends to produce really dry air. My furnace has an Aprilaire whole house humidifier attached to it. On those rare occasions that I do use the furnace, my Aprilaire adds much needed humidity to my really dry house. Of course, not everyone has such a device, so houses heated with furnaces can suffer from a lack of humidity too. Fortunately for us, a HVAC can give us the help we need to do deal with a humid home. A friend of mine had this issue and found that a local service similar to Complete Comfort Plumbing Heating & Air (completecomfort-hvac.com/areas-we-serve/aliso-viejo-ca/) could help him install a system into his home which dealt with the humidity.

Horridly dry air has a number of nasty side effects. For example, you might find that you literally can’t breath because your nose is so dry. Petting the cat becomes an experiment in shock therapy (and don’t even think about brushing the dog). You could see damage to your furniture as well. The glue joints tend to fail when the humidity is too low. So, there are both health and monetary issues to consider when it comes to winter heating. The issue that seems to elude most people though is that humid air is able to support more calories than dry air. This means that really dry air actually feels cooler than humid air heated to the same temperature. Humidity that causes you to sweat in summer keeps you warm in winter, so having a good HVAC system could not only regulate the air in your home but help to keep your family warm in the winter and cool in the summer. You can Read more here.

Over the years I’ve come to believe that keeping a house as humid as possible in the winter (within reason, you really don’t want the walls dripping either) is a good idea. But when it comes to the summer months, some people can’t think of anything worse than having a humid home. Who could blame them? You would literally be sweating all of the time. That’s when places similar to this Air Conditioning Repair Houston company come in useful. If your life-saving air conditioning system malfunctions, you won’t be receiving that cold air that helps to cool you down, so what happens? You’ll feel even hotter. If that happens, (just like it did to my friend last week), you should get it fixed as soon as possible. For me though, I welcome the feeling of humidity, especially in the winter months. When my hygrometer (a humidity measuring device) reports 60 percent, I’m quite happy. Even 50 percent is worthwhile achieving. The problem is that with wood heat, you don’t have an Aprilaire to help out.

Assuming that your wood stove provides a place to put one, the first course of action is to get a couple of inexpensive soup pots-big ones. Actually, you might be able to get one almost free at a thrift store or garage sale, so look around to see what you can find. Fill them with water and put them on the wood stove. The heat will evaporate the water inside and produce humidity for your home. If you want, you can add wood stove simmering spices to make you home smell nice as the water evaporates. The people living with you in your closed up house will appreciate the fragrance. My stove will accommodate two pots, so I have two really large pots going most of the time (one is removed when I want to heat water for tea, heat something up, or make soup).

Sometimes using the pots just doesn’t help enough, unfortunately. It’s during those times that I leave the bathroom door open when I shower and turn off the ceiling fan. The ceiling fan normally takes the humidity outside, which is a really good thing to do in summer when you don’t want things rotting inside the house. During the winter, it seems like a better idea to allow the steam to get out into the house. Of course, you’ll need to exercise more caution to ensure everyone keeps their privacy intact. We actually have a few Ceiling Fans in our home. I think that they are such classic pieces that never go out of style. Plus, they help to control the temperature in your rooms so they are incredibly useful.

Winter is also a dandy time to make soup. It’s possible for me to make soup on my wood stove when it’s completely fired up. However, there are a lot of times where I still need to use the stove. In those cases, I keep the stove’s vent fan off so that the steam from the soup stays in the house. Not only does the house get humidified, but it also helps build a healthy appetite.

I’m sure by now someone is wondering why I haven’t mentioned the obvious-a humidifier. Yes, a humidifier will do the job and yes you could use one, but all of the other techniques I’ve mentioned are free. A humidifier will cost money to purchase, maintain, and operate. In the long run, using every free technique at your disposal first is the best idea. Let me know your ideas on humidifying a home at [email protected].

Wood Stove Cleaning Day

It’s February and the wood stove has seen a lot of use this season. It’s easy to forget that the wood stove needs maintenance while you use it. I discussed annual and regular maintenance of a wood stove in my Care and Feeding of a Wood Stove post. However, a wood stove requires more maintenance to continue to work properly. A reader was asking me the other day just how much maintenance I recommend and that’s a really hard question to answer. It depends on how much you use your wood stove and what sort of wood you burn in it. You also need to consider the wood stove type and its age.

I actually do maintenance twice weekly during the heaviest usage portion of the season. During the twice weekly cleanup, I make sure the wood stove is completely out and empty the ashes. The ashes actually work quite well when spread on icy areas. The grit in the ash keeps you from slipping. It’s a bad idea to put the ashes where they could cause a fire, such as your compost heap, unless you’re absolutely certain that they’re out. Even then, you must exercise extreme care.

As part of my maintenance, I sweep down the outside of the wood stove using a foxtail broom. This includes the stove pipe and any other surfaces that could become encrusted with dirt, dust, or cobwebs. Not only does such cleaning enhance the appearance of your stove, but it can also help (slightly) with its efficiency and potentially reduce any fire hazard.

Cleaning any glass on the front doors is helpful. You can’t manage the fire as well if you can’t see it. I’ve tried a number of cleaners. Mr. Clean is my current choice. It seems to do a better job with the buildup on the glass. I know some people use the stuff to clean other glass around their homes, like the frameless shower doors in their bathrooms for instance. If someone else comes up with a good selection, please let me know (but please try Mr. Clean first for comparison purposes).

Chimney fires are something to avoid at all costs. Burning hardwoods that are completely dry help quite a lot. A little creosote can still build up through and you really do want to get rid of it. All the chimney sweep should find in your chimney is a little ash. To help keep things clean, I spray Anti-Creo-Soot into the stove once a week. Make sure you follow the instructions on the bottle precisely. If you don’t, you might find yourself dealing with an uncontrollable fire that could cost you a lot more than your home. If the fire doesn’t get that far, you may still have to deal with fire damage, requiring the aid of a fire restoration service similar to Service Master by Zaba (https://www.servicemasterbyzaba.com/fire-restoration) that may be able to help you with fire damage repair.

Keeping things clean will help you enjoy your wood stove longer and to use it safely. A few minutes spent cleaning your wood stove may save you a lot of grief later. Let me know about your cleaning tips at [email protected].

Fun is Where You Find It (Part 7)

The Fun is Where You Find It series of posts is one of the more popular series I’ve created because they all talk about fun things you can do for little or no cost. Of course, the problem that most people are facing right now is some sort of Seasonal Affective Disorder (SAD) mixed with negative feelings about the weather and a general letdown from the holidays. Fortunately, there are a lot of fixes for these issues—all of which hinge on focusing on anything else.

I use a lot of laugh therapy to get past this time of year. Generally speaking, laugh therapy is all about getting a good laugh in every day. You can get the laugh any way that works for you, but I’ll read something funny, view funny videos, or talk with a friend who knows good jokes (not the lame sort that I usually tell). There are even books about laugh therapy if you have problems figuring out how to get a good laugh on your own.

This past Sunday I decided to approach the problem from another angle. I have a number of items that need to be used up, so I decided to use them for a picnic. No, the picnic isn’t outside in the cold. Instead, I put together potato salad, fruit salad, fried chicken, chips, and drinks. I laid a blanket out on the floor in front of my wood stove (which is standing in for the hot summer sun) and watched a summery movie. The whole thing cost me about $5.00, so were not talking a major entertainment expense for several hours of fun.

Of course, the question is whether my little experiment worked. Overall, I felt pretty happy afterward—it was a lot of fun and I plan to do it again. Doing something completely different, something outside the range of normal winter activities, helped me get past some of the usual problems associated with winter by thinking about summer and picnics instead. A lot of the time, how we approach life and what we think about controls our mood, so thinking about summer and picnics in winter is possibly every bit as good as the laugh therapy I normally use. At least, it gives me another alternative.

What sorts of amazing things are you doing to fight the winter blahs? Do you think you might ever try a winter picnic to chase the blues away? Let me know your thoughts about winter fun at [email protected].


Getting Wood for Winter

It’s that time of year again-time to get the wood ready for winter. Of course, cutting, splitting, and stacking wood warms you twice: once when you do it and again when you burn it. With our weather being so beautiful, I really did get quite warm over the last couple of weeks getting my wood ready. It is definitely easier if you use quality wood axes, though, and now the piles are finally finished. I have a little over two cords of wood outside and four cords in the basement. I’ll eventually bring the outside stack up to three cords.

As I mentioned in The Many Appearances of Firewood, I use three different cuts of wood for my pile: slab, log, and disk. Each kind of wood has its own advantages. For example, it’s extremely easy to get slab wood started as long as it isn’t wet. In addition, I buy slab wood, rather than cut it, so the slab wood is less work because I only have to stack it. Logs, the traditional firewood, are easy to stack and burn at a moderate rate, which makes them a good option for maintaining a fire. Using disks has the advantage of a slow, long lasting burn of larger pieces without having to split them. I generally put a disk in the wood stove before I start it up in the morning to keep the fire burning at a nearly even temperature. Larger disks are hard to add later, but you can easily add smaller disks to a wood stove.

Of course, there is the question of what precisely a cord is. A full cord is always 4 feet deep, 4 feet high, and 8 feet long (128 cubic feet). I generally cut my logs 2 feet long, so my cords are usually some combination of dimensions that add up to 128 cubic feet. For example, my outside stack is 2 feet deep, 4.5 feet high (actually, a little higher), and 14 feet long. The stack in my basement is 2 feet deep, 8 feet high, and 8 feet long. Any set of dimensions that adds up to 128 cubit feet is one cord. Purists will insist on the standard measurement, but really, the wood doesn’t care how its organized.

Ask specific questions when you buy wood. Some sellers will try to tell you that they’re selling you a cord of wood when you’re really getting a face cord, which doesn’t have a precise size. Most face cords are one-third to one-half the size of a full cord. The pieces of wood are sometimes only 16 inches long to accommodate smaller wood stoves and fireplaces. You need to ask how much you’re getting when comparing prices between sellers. If a seller won’t tell you how much wood is in a load, it’s probably a good idea to go somewhere else.

Beware of the fluffy load. Someone will drive up with what looks like a full load of wood, but the wood is ill stacked with a lot of air gaps in it. A poorly stacked load won’t contain as much wood as you might think it will. Another trick that some wood cutters use is to include a lot of smaller pieces that tend to add air gaps and don’t burn very well. You can obtain your own kindling with relative easy, so look for sellers who provide larger pieces of wood in a well-stacked form so that you know the amount you’re actually getting.

When I cut wood, I know precisely what kind I’m getting. This year I’ll be burning a combination of American oak and white elm. There is a little maple and black locust mixed in, but the majority of the wood is oak and elm. The wood you get determines how much heat you get. After you find out what kind of wood you’re getting for your stove, make sure you consult a wood heating chart. A load of wood with great burning characteristics may actually be a better deal, even if it costs more, because you get more heat from it. As an example, let’s say that one seller offers you a cord of white oak at $120, while another seller offers you a cord of birch at $100. The white oak is a better deal because it only costs $4.124 per million BTU (120 / 29.1 million BTU), compared to $4.808 per million BTU for the birch (100 / 20.8 million BTU). You also want to verify that the wood is actually dry (some people will try to sell you green wood, which won’t burn well).

Some people neglect to factor in the amount of smoke and ash that the wood creates. Of the two, the amount of smoke is the most important factor because you have to call a chimney sweep if your chimney gets clogged by wood that produces too much smoke. This kind of hassle often leads people to make the decision to have central heating installed, from a site similar to this one, rather than having to buy and chop firewood. However, I think a wood-burning stove creates a kind of homely atmosphere you can’t replace with a heating system. The ash is an annoyance, but you can always clean the ash out of the wood stove as needed. Even so, getting wood that produces less ash means less ash for you to clean up later. Let me know your thoughts about getting your winter wood supply together at [email protected].

Keeping Warm in the Cold Winter Months

Most people know that this has been one of the colder winters in recent memory. In fact, I’ve been taking enough heat about my views on global warming that I wrote a post entitled, Where is the Global Warming?. The effects of the cold have been serious enough to drastically raise the price of propane and to create local shortages. In fact, a few of my neighbors have been paying upwards of $6.00 a gallon for propane that normally costs around $2.50 a gallon. What this means is that a house that normally requires $300.00 per month to heat now costs $720.00. Most people can’t afford the price increase. More than a few people feel that the propane industry is engaged in price gouging. At issue is the need for propane to keep warm.

We heat our home for the most part using our wood stove. Wood heat is a lot better than propane because a wood stove will heat not only the air, but also the floor, walls, and ceiling. You get a mix of both direct and radiant heat. In addition, wood is a renewable resource. Carefully managed woods produce an abundant supply of wood that won’t ever run out as fossil fuels will. However, due to some unexpected circumstances, we’ve been using the furnace a bit this winter as well and feeling the pinch just a little.

There are some long term fixes for some of the problems with heating in the works. For example, there is a movement now to improve the standards for furnaces. The technology exists to improve the efficiency of furnaces from the current 80 percent to nearly 98 percent. In addition, newer furnace fans can save substantially on the electric bills. Unfortunately, even though the technology exists, you’d be hard pressed to find any furnaces like this for sale-they simply aren’t available today. If your home does require a new heating unit, you may want to approach a furnace installation business in your area to do this in time for the Winter months. There are lots of brilliant companies around who could fit a replacement furnace for you, so you just have to take the time to find a good local company. For example, learn about a Furnace Installation in Durham if that is where you are based. It’s as easy as that!

So what do you do to improve fuel usage in your home today? We’ve been experimenting with various strategies over the years. For one thing, we turn the thermostat way down at night-we’re talking 47 degrees. Blankets are a lot less expensive than fuel and we’ve actually found we sleep more soundly. I’m not sure anyone has ever done a study on the proposed benefits of sleeping cool (if you find such a study, please let me know). A programmable thermostat can get the furnace started up just a few minutes before you begin your day. If you haven’t already got a furnace installed or you need a new one, Boulden Brothers are highly recommended for Furnace Replacement. I do know that we both sleep better and feel more refreshed when the house is kept warm during the winter months. A furnace is essential in my opinion!

One of the more interesting aspects of most homes is that the bathroom actually warms quickly and is usually high on the priority list for getting heat. Even though the rest of your house is now at 47, you can run into the bathroom, close the door, and enjoy a nice warm early morning experience quite quickly. Just take your clothes with you (I certainly do) and dress inside. If you set up a schedule, other family members can just remain cozy in bed until it’s their turn to keep warm while dressing in the bathroom. Actually, it’s a technique that people have used for hundreds of years. I still remember my father telling me about running from the bedroom down to the kitchen where he’d dress in front of the woodstove in the morning.

We’ve found that running the furnace for one long period is far more efficient than running it over several short periods. An engineer who specializes in such things could probably produce the math required to tell you precisely why this is the case, but simply observing the monthly costs has shown us that long burns are more efficient. A long burn also provides some of the same radiant heat benefits that our wood stove provides. So, we get the house up to temperature in the morning and then turn the thermostat down while we work. When it’s time to sit and relax, we heat the house back up again and then turn it down about 2 hours before we go to bed (the house will most definitely maintain temperature long enough for you to get cozy beneath the blankets). Using this cycled method of maintaining house temperature can reduce the heating bill by as much as 30 percent when used correctly. Given that we work in our house, the cycled method does mean making comfort choices, but the savings are just too great to pass up. If you’re working outside the house, using the cycled approach is a given.

I doubt that there is a perfect solution to any heating problem during the winter months. If you are using central heating, make sure you’re covering up any gaps in the house that are letting in a draught. If you have double glazed windows, this should help with insulation too. On the topic of insulation, a friend of mine had a foam roof repair and he saved up to 50% on his heating bills due to the insulation benefits. This is something you might also want to consider if you want to lower the cost of your bills. The important thing is that you’re staying warm even when it’s cold outside!

Have you come up with any interesting solutions to the heating problems for your home? Have you ever tried a cycled approach? Let me know your thoughts at [email protected].

The Many Appearances of Firewood

Most people are used to viewing firewood as simply cut up logs. The logs are then stacked in cords (128 cu. ft) and proudly displayed outside the home. They have the old homestead or wild west view of wood, with the healthy young male whacking away with an axe and turning perfectly good chunks into kindling. However, real firewood comes in a variety of forms, not just logs. In addition, the wood is often stored in a basement or other area inside the home for easy access and to keep it dry. We actually have firewood in three forms:


  • Logs: The old time view of wood cut across the natural growth of the tree. However, unlike the television view of logs, our logs are generally 24″ long and up to 10″ in diameter. No one really takes a huge log and splits it down into kindling (unless absolutely necessary)—they use the copious branches of the tree for that purpose.
  • Disks: A wood stove doesn’t care how the wood is oriented. If you put a piece of wood into the stove, it will eventually burn (assuming the wood is dry). In Splitting the Dreaded Elm I discuss how to avoid splitting elm by cutting the tree into disks that will fit into the wood stove sideways. This means we can burn a tree up to 24″ in diameter without splitting it. Most trees that someone looking for firewood encounters aren’t that size.
  • Slabs: This kind of firewood is actually the focus of this post. Slab wood is what remains when you turn nicer hardwood logs into boards for furniture or other uses. The slabs are bundled together and you cut them to length with a commercial table saw or a chainsaw.


Slab wood is the sort of firewood that you won’t find at your local store and you generally can’t get it delivered by someone who sells firewood. You actually need to know someone who has a sawmill and is willing to sell you the remnants as firewood. What you receive doesn’t really look much like firewood at all. It doesn’t look like a board either—it looks like wood scrap, which is what it is.

Firewood01

The advantages of slab wood are many:


  • It costs a lot less than a cord of logs (usually about half).
  • It’s guaranteed dry.
  • The presence of flat surfaces makes it easy to stack.
  • You know you’re getting quality hardwood that won’t clog your chimney.
  • It’s unlikely that the wood will contain any serious pests such as carpenter ants.


Slab wood also has some serious deficiencies:


  • It isn’t readily available from most sources.
  • You normally can’t buy just one cord.
  • There is the problem of cutting the slabs to length.
  • It’s absolutely essential that the wood not get wet because it soaks up water like a sponge.
  • You must mix slab wood with other kinds of wood because it tends to burn both hot and quickly.

Our wood pile currently contains all three kinds of wood we use. The pile in the basement of our home has mostly logs and slab wood. The outside pile contains logs and disks. Most of the outside wood currently contains pests, such as carpenter ants. After a good freeze, the ants will be gone and we’ll be able to bring the wood inside a little at a time to burn. In the meantime, we have a wonderful assortment of wood inside to use during the cool autumn months.

Firewood02

So, how do you like your wood (slabs, disks, or logs)? What kinds of wood do you prefer to burn? Let me know at [email protected].


Winter Cactus Color

One of the issues that we face living where we do is the bleakness of winter. Yes, it’s just lovely sitting in front of the wood stove soaking in the heat, but the short days and gray skies do take a toll after a while. Even the heartiest of us feels a certain yearning for summer months of long days and warmer climes. However, I personally wouldn’t be without winter because there is too much to see and overall, it’s a pleasant season despite the occasional bout of depression.

Fortunately, there are many ways to combat the fatigue that comes with extended cold and short days. One of the ways in which we do this is to have lots of plants in our home. My office has more than a few. I personally like cactus. They’re easy to care for, have interesting foliage, and the cats definitely don’t like to eat them. A favorite cactus of mine is the Mistletoe Cactus. The foliage really is interesting and it just looks fun. Imagine my surprise when it bloomed for the first time after I owned it for 16 years. It has bloomed again this year, much to my delight.

Cactus

The interesting thing about my mistletoe cactus is that the blooms are bright yellow, not white like many pictures you see of them. According to the source I read, there are actually 35 varieties of this delightful plant that produce blossoms in white, red, pink, and yes, even yellow. The flowers look almost like they’re made of plastic and it was quite tough to get the picture you see in my post today.

House plants of any sort can help lift your mood. If you find that you have a terrible case of the winter blahs, try getting a flowering plant to care for. A truly interesting plant can take your mind off the weather and can prove to be quite fun. I’ve had this particular plant for over 20 years now and I’ve heard of people who have had theirs for 40 or more years, so I imagine I’ll see it bloom a few more times. What are your favorite winter plants? Let me know at [email protected].


Splitting the Dreaded Elm

I’ve read a lot of truly awful comments from wood cutters about elm trees online. Yes, everyone admits that they’re quite pretty and the vase shape produces an amazing amount of shade. Elm trees are popular in cities because they can grow quite well in the pollution. The elm tree’s twisted internal structure means that even when the tree is hit by lightning, it often doesn’t split apart and cause significant damage. Of course, elm trees are susceptible to a number of beetles, including those that spread Dutch Elm Disease (DED). Wood cutters of all sorts now have experience with the twisted internal structure of the elm because DED has wiped out so many trees. This structure makes it incredibly hard to split the tree. In fact, some wood cutters will refuse to cut down an elm for wood simply because the tree is so incredibly hard to split.

Elm does have some redeeming features for someone who needs wood for their stove. Unlike my favorite, black locust, you don’t have to mix elm with other woods to keep your stove temperature under control. Elm will burn at a moderate rate for a long time. In addition, elm produces a lot of heat for the amount of wood you get, it isn’t hard to start, won’t produce a lot of sparks, and doesn’t produce an overwhelming amount of ash.

A friend recently helped me cut down two elms—one of which was threatening my house (the other would have threatened at some point if it had been left in place). These are mature trees that have the the classic signs of beetle infestation, but don’t appear to have the fungus associated with DED. Even so, all of the wood from the two trees will find a home in my wood pile at some point.

One way to deal with elms is not to split them in the first place. Most people think you have to cut trees into the classic log shape. I’ll cut elm into short logs that fit flat into the wood stove instead of as a log. You can continue cutting the tree up like this until the diameter of the log begins to exceed the depth of your wood stove. So, I’ve ended up with a number of logs that look like this, rather than the usual round shape.

SplittingElm01

At this point, I can see you scratching your head. You insert the wood like this into the wood stove. The height of this piece matches the height of the wood stove opening—the diameter is less than the length and depth of the wood stove, so the piece will fit just fine, even if it isn’t in the normal orientation. All the wood stove needs is a piece of wood that’s the right size to fit and it definitely doesn’t care anything about shape. The piece will burn just fine in this direction.

Warning: You may need to insert felling or bucking wedges to keep the cut open when working with thinner cuts like the ones shown in this post. Never use splitting wedges for this purpose. If the chainsaw chain hits a metal splitting wedge, the chain will likely break and could cause personal injury. Always use plastic or fiberglass felling or bucking wedges designed for use in holding open cuts instead.

The trees had a 20-inch diameter, which is just a bit bigger than my wood stove will allow, no matter how I want to orient the pieces. I chose to split the pieces in this case so they look a bit more like standard logs. However, elm is so tough to split, that just hitting it with a maul or an axe won’t work. I have a 20 pound maul and it simply bounces off the top unless I really want to pound on the log, in which case, I get a nice dent. To split this wood, you need splitting wedges. I used three wedges to split the 20-inch diameter pieces from this tree. When working with elm, you can’t have too many wedges. To start the process, create a stress line across the log like this.

SplittingElm02

What you’re seeing is about six hits with the maul to create a straight line through the early wood. Notice that I purposely avoided the late (heart) wood. If you try to split the heart wood, you may never get the job done.

After you get the initial stress line created, pound in your first wedge. Given the size of this log, I chose to place the wedge about 1/3 of the way across to ensure the log would split all the way down the side. Again, you really want to avoid that heart wood if at all possible.

Some people like to wait until elm is completely dry to split it. What I have found is that elm continues to harden and the interlocking becomes worse as it dries. I prefer to split the logs when the bark has come off, but before the tree is completely dry. Normally I see some wetting around the wedge as I pound it in as shown here.

SplittingElm03

Even with the lubrication provided by the moisture, getting the wedge all the way down can prove difficult. The first wedge is the hardest. Splitting the wood in sub-zero weather will give you a small advantage in some cases—it depends on how interlocked the fibers are. I chose to split this wood in warmer weather because I want it to start drying out.

After I get the first wedge all the way down, I pound in a second wedge 1/3 of the way from the other side. I end up with two wedges in the first end like this.

SplittingElm04

Warning: Make sure you dress your wedges properly! The two wedges shown here have been used to split a number of trees and are mushrooming out at the top due to being hit by the maul. The maul is made of harder metal than the wedges, which are designed to mushroom out like this as they’re being hit to reduce the risk of shattering (metal hitting metal). At some point, little pieces of the wedges will break off and could cause physical injury. Dressing the wedges using a grinder will keep the mushrooming under control and reduce the risk of physical injury. Of course, you should always wear the proper safely equipment when using a maul, which includes safety goggles (an OSHA approved face mask in addition to the safety goggles is better), long sleeves, heavy pants (adding wood cutting chaps is better), and heavy gloves.

As you can see, even with two wedges in place, this log refuses to split. At this point, you turn the log over. Create a stress line across the log using your maul that reinforces the current split. If you’re really lucky, you may be able to get the log to finish splitting this way, but don’t count on it. In my case, I needed a third wedge, so I put it in like this.

SplittingElm05

I now have a crack from top to bottom, but the crack doesn’t go all the way through the log and it still isn’t split. At this point, you turn the log over on it’s side and break the center by striking it with the maul. Make sure you hit directly in the middle and not on either end. If you hit the ends, you’ll also hit the wedges and dull your maul. When the split is complete, your log looks like this.

SplittingElm06

You can remove the two wedges at this side now. What you have is a split side and a hinge (connected) side. All you have in place in the second wedge on the top of the log at the hinge side. Turn the log over so that the bottom is up and the hinge side faces you. Use the maul to break open the bottom of the hinge as shown here.

SplittingElm07

This action should free the third wedge. At this point, you can place the top end up and finish the final split with the maul. You now have a split piece of elm as shown here.

SplittingElm08

In my experience, only elm splits this horribly, which is why many people avoid it. Yet, the wood does have some good characteristics and if you handle the tree right, you can get by without splitting most of it. Let me know about your elm splitting experiences at [email protected].


Maintaining Your Chainsaw

It’s wood cutting season and I’ve already been in the woods a couple of times. Nothing is quite as nice as a fresh breeze, wonderful scenes, the feel of nature, and the smell of freshly cut wood. I choose the wood carefully, as described in Choosing Wood Carefully. However, no matter how carefully you choose the tree, the task is only as easy as the condition of the tools you use. The tools must be the right size, fully maintained, and inspected carefully. Of the tools I use, the one I worry about most is my chainsaw. A failure of my chainsaw at the wrong time could mean death. This means that as well as thorough inspections, your chainsaw must be of good quality, like these top rated cordless chainsaws.

I know a lot of people maintain their saws personally. However, given that my small engine experience is limited, I normally take my saw to a professional for its annual maintenance. This includes everything from cleaning the air filter and changing the fuel filter, to making sure the saw is clean and has a sharp chain on it. This annual workup is enough for my needs because I’m not using the saw professionally. I cut just enough wood to meet my heating needs each year, plus stock up a bit of emergency wood.

However, I do perform certain types of maintenance every time I go out to cut wood, the kind that may need some stuff from safety equipment suppliers to perform safely. This frequent maintenance may seem like overkill, but I really don’t want to end up dead due to an equipment failure, so I perform these checks absolutely every time I use my chainsaw:

  • Clean the exterior of the saw.
  • Inspect the saw for damage.
  • Check the sharpness of the chain and replace it if necessary.
  • Clean the area that houses the chain when I have the chain off.
  • Verify the chain is at the proper tension.
  • Grease the bar sprocket.
  • Fill the chain lubricant reservoir.
  • Fill the gas reservoir.
  • Check my safety equipment, which includes safety glasses, hearing protectors, and heavy gloves.


Even performing all of these checks, it’s possible that you’ll have an equipment failure, but it’s a lot less likely. If you’re smart, you’ll continuously check for potential problems while you’re working in the woods. Make sure you check the saw every time you refuel it and always ensure that you add bar chain lubricant when you gas up. It also doesn’t pay to be cheap in this case-use high quality lubricant and make sure your gas is fresh and has the proper two-cycle engine oil in it.

It often amazes me that people don’t take more care when they prepare to go into the woods. Even though I feel that the woods are one of the most beautiful places on earth, I also give them the respect their due and you should too. Let me know your thoughts on chainsaw maintenance at [email protected].

Care and Feeding of a Wood Stove

After reading my recent post entitled, “Choosing Wood Carefully,” one reader wrote to ask me about wood stoves. Yes, you really must exercise care with your wood stove or end up paying the price. For that matter, any wood burning appliance requires care and if you don’t maintain it, you’ll likely end up with a chimney fire at some point. There is little doubt in my mind about it. A fire would cause a lot of damage and it’s likely the whole chimney will need to replaced, not just the Flue Liner. Even if you don’t have a chimney fire, the wood will burn less efficiently and you’ll get less heat from it. In addition, there is always the problem of potential carbon monoxide poisoning. If you haven’t gotten the point yet, maintaining your wood burning appliance isn’t just a nice thing to do, it’s a requirement.

Make sure you perform your required maintenance. When it comes to my wood stove, that means ensuring I clean the glass twice a week so that I can actually see what’s going on inside the wood stove as the wood is burning. Opening a door when there is a burning piece of wood leaning against it (due to shifting) is never an easy task, but clean windows make things easier. You’ll also want to clean out the ash content from time-to-time (I do it daily) to ensure there is no buildup that could reduce the efficiency of the stove. As part of my personal regular maintenance, I also spray some Anti-Creo-Soot into the stove daily to ensure that no creosote builds up in the chimney. This product will greatly reduce the likelihood of a chimney fire and ensure that your wood stove continue to work a full efficiency at all times.

There is also annual maintenance to perform. The most important thing you can do is to obtain the services of a certified chimney sweep. You want a certified professional because they have specialized equipment to clean and check your wood burning appliance. In addition, these professional can usually perform repairs. For example, my wood stove has a very odd shaped window in the front. It broke at one point, causing the stove to operate poorly. Our chimney sweep was able to make the required glass insert when it was discovered that the vendor no longer supplied it, saving me considerable expense and worry.

When the chimney sweep is done, it’s usually a good idea to repaint any rusty areas on your stove. Make sure you wear a mask during the entire process because wood stove paint contains some incredibly nasty chemicals. Use a high temperature paint to repaint the surface after you prepare it. It’s absolutely essential that you paint your stove with all of the windows open and with a fan blowing air into the room. Using a spark proof fan (one designed for use in painting) is a good idea. Always follow the vendor instructions (including using the stove with all of the windows in the room open the first two or three times). Maintaining the paint job will help you enjoy your wood stove for a lot longer and present a nicer appearance when people visit.

Although it isn’t strictly a maintenance task, I also verify that my wood stove is burning at the right temperature. You do this by placing a magnetic thermometer directly on the stove pipe. It’s a good idea to keep the stove in the orange zone of a colored thermometer. Burning wood at too low a temperature causes creosote buildup in the chimney. Of course, keeping the stove too hot could result in a fire.

When you choose the right wood and maintain your stove, you’ll find that your wood burning experiences are significantly better and considerably safer. It doesn’t take long to perform these tasks and the savings from heating your home with wood are incredible. I find that the radiant heat actually feels warmer than the heat produced by a furnace. Let me know your thoughts on wood stove maintenance at [email protected].