Making an Opportunity from Falling Trees

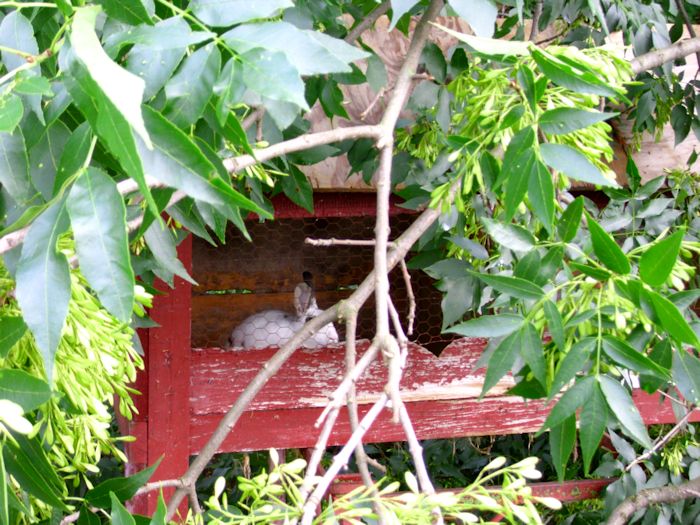
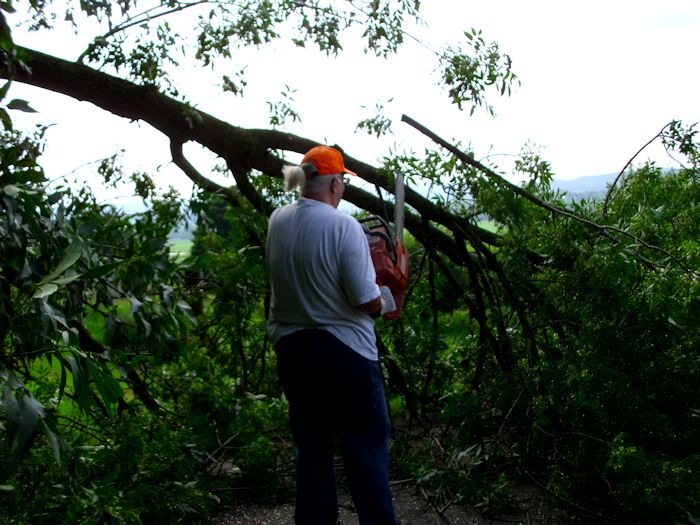
No matter where you have them, trees eventually fall and you’ll end up needing to get rid of the dead tree or get a tree removal denton service. Parts of our property are heavily wooded, so falling trees are expected and happen fairly often. Winds will blow a tree down, lightning will crack it, insects will kill it, woodpeckers will weaken it, or old age will simply take it. No matter the cause, the tree lands somewhere and in most cases, the landing is benign from our perspective. However, we recently experienced a less benign falling tree. The woodpeckers had weakened it, birds had nested in the holes, and carpenter ants had drilled a hole through the center. A lightning strike and high winds finished the job. After the storm we got up to see a rather large tree draped across our rabbit hutches.

Now of course, I don’t expect everyone reading this to have the resources required to remove a tree, let alone one of this size. When most people need Tree Work done, they just call the professionals. But I quite enjoy trimming and removing my trees, especially when I can benefit from it, so I like to do it myself.

FallenTree01

Most of the pictures in this post were taken by my wife, Rebecca. I greatly appreciate her help in putting this post together.

Our first thought was that the rabbits had escaped their hutch or were possibly dead. Amazingly, the rabbit hutch held and the rabbits were safe. The main problem was that we couldn’t get to them to feed them.

FallenTree02

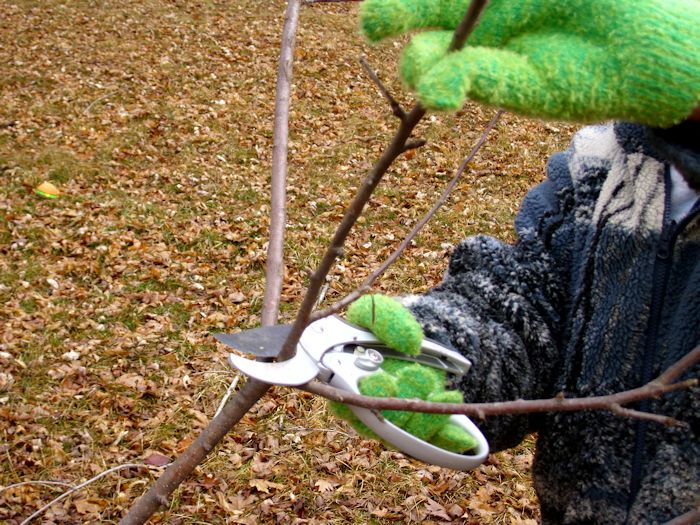
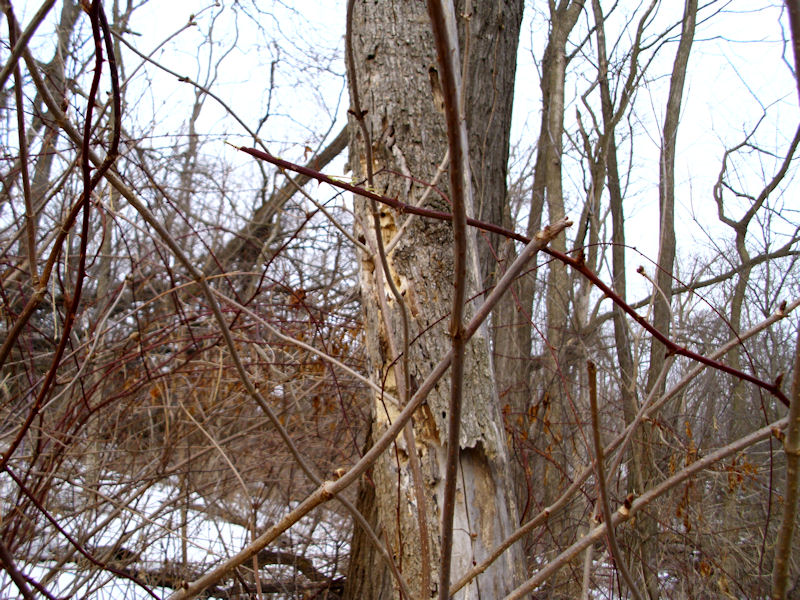
Unfortunately, cutting up a large tree is hot work and the heat index was well over 100 degrees that day (into the danger zone of the heat index chart). Let’s just say that it was sweaty work and leave it go at that. The tree was poised like a giant spring. The main trunk was actually split in two, but it was butted up against the rabbit cages in a way that didn’t let it fall completely, so I had to cut the tree with extreme care-starting with the branches.

FallenTree03

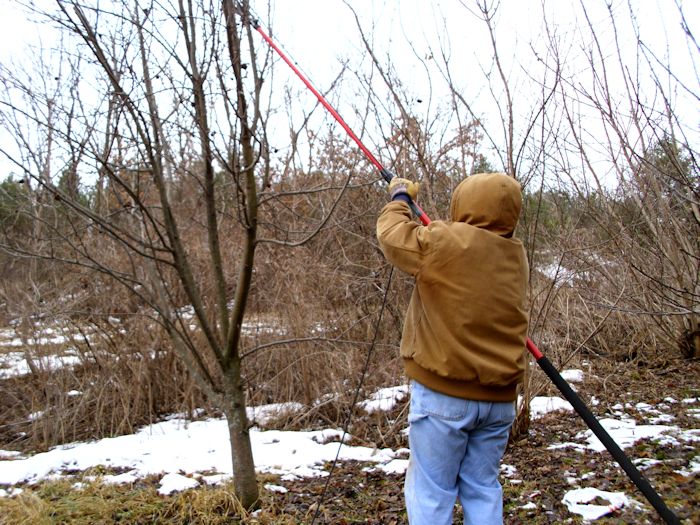
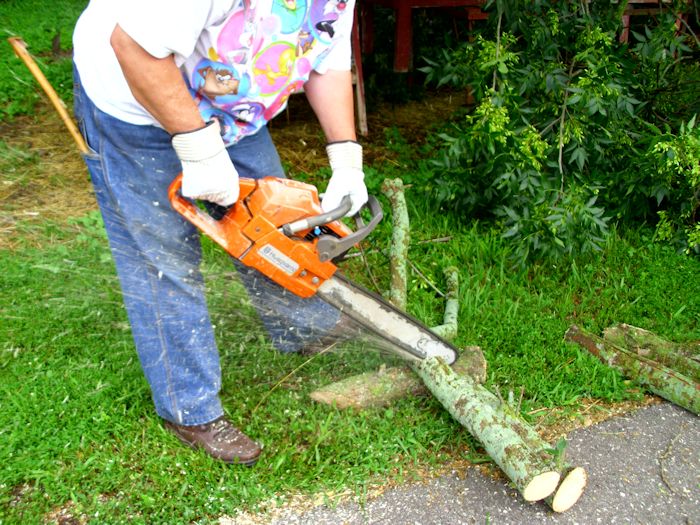
As I cut the branches, I separated the parts that I would later chip from those we would dry for firewood. The larger pieces were cut into lengths for stacking.

FallenTree04

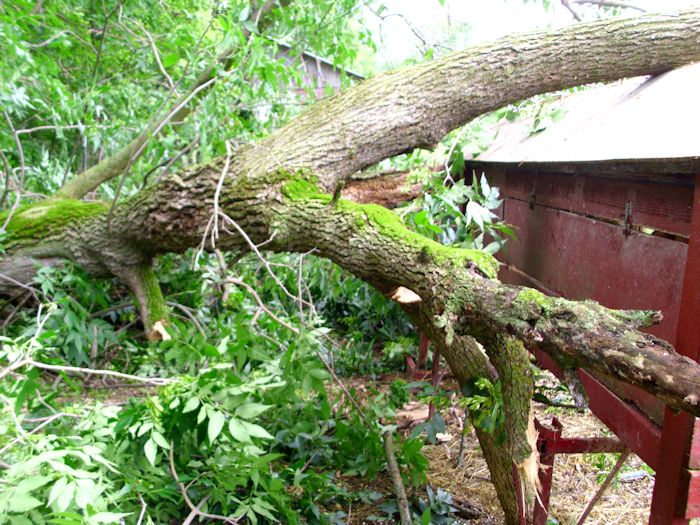
After a while, all of the branches were cut. The tree was as safe as I could make it. However, the main part of the trunk was still braced against the rabbit hutch, so we still couldn’t get to the rabbits to feed them.

FallenTree05

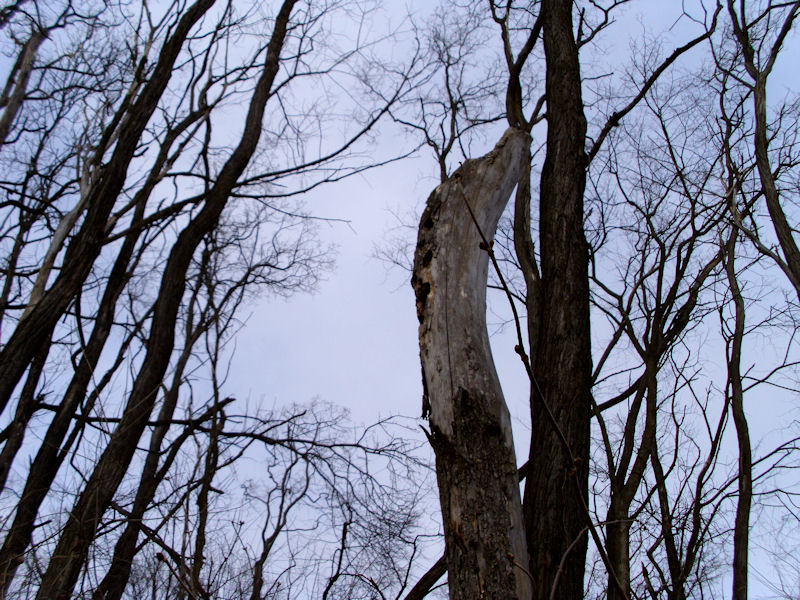
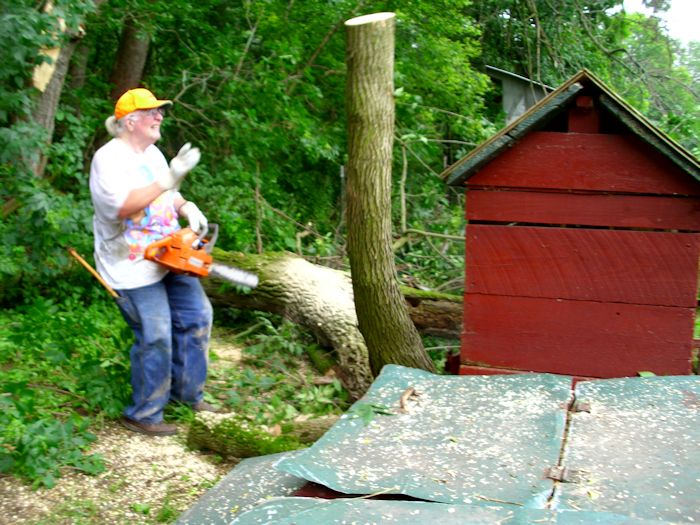
The most challenging moment came when I had to release the spring holding the trunk against the cages. The cut was extremely dangerous because I had to cut the tree enough to release the pressure, but not so much that it would flip in some unexpected way. What I needed was a slow release of pressure so that the tree would come to a safer position. I made the cut and the tree slowly started to move as expected. The spring completely released itself and the piece I had partially cut ended up standing straight in the air before falling to the ground. Perhaps if you have a similar situation but are not familiar with safe methods of removing the tree yourself, you could similar services to those found on treeserviceremoval.com to help you get rid of it without putting yourself in any danger.

FallenTree06

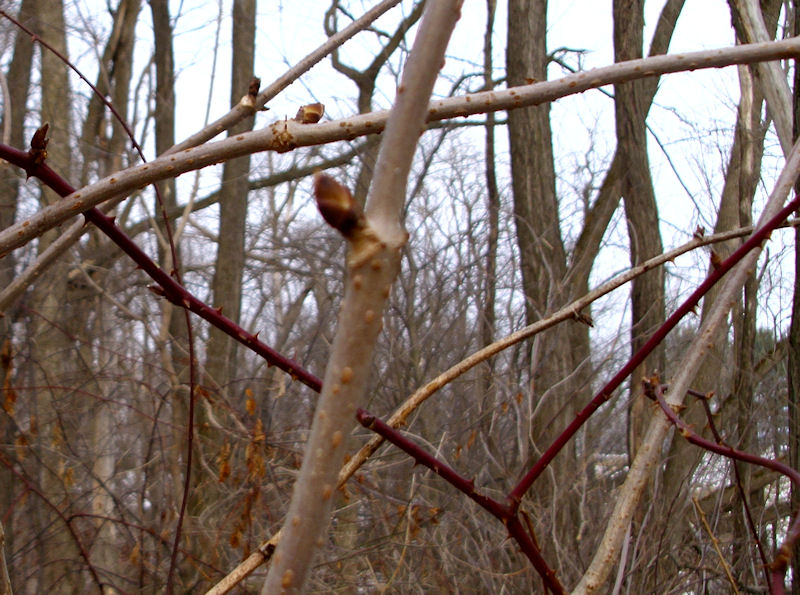
I still have a lot of tree to cut, but we’ve managed to make use of everything. The pieces of the tree I have already cut up are stacked and drying nicely.

FallenTree07

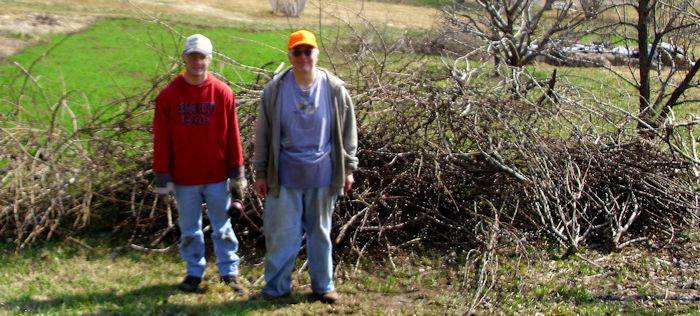
We also obtained a large stack of branches.

FallenTree08

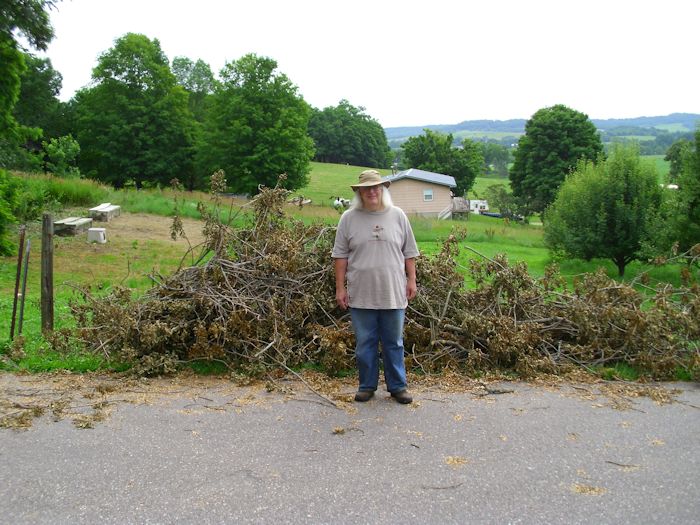
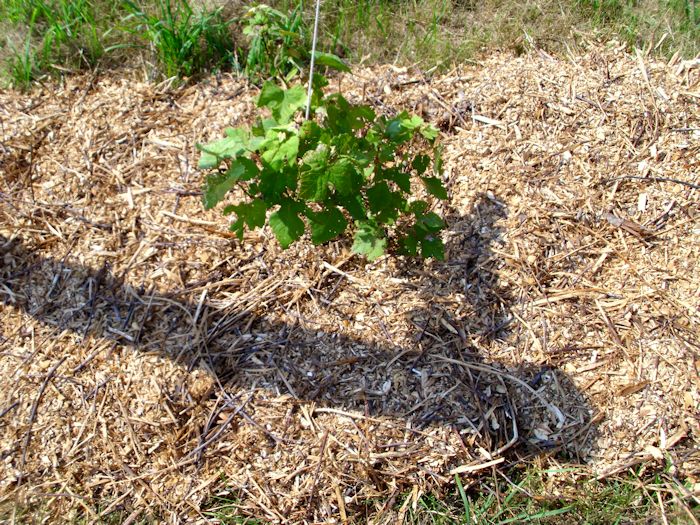
A lot of people would create a huge brush pile from the branches and burn them. However, doing so is really bad for the environment and wasteful of a useful part of the tree. I’m currently chipping the branches up and using them for mulch on our grapes. The mulch will keep the grapes moister, reduce watering costs, and make the grapes more productive because they won’t be battling weeds.

FallenTree09

In the end, what started as a disaster turned into an opportunity. Not every act of nature turns out this way, but we try to make the best of every situation. When did you last make an opportunity out of a natural event that started as a negative? Let me know at [email protected].

Maintaining Your Chainsaw

It’s wood cutting season and I’ve already been in the woods a couple of times. Nothing is quite as nice as a fresh breeze, wonderful scenes, the feel of nature, and the smell of freshly cut wood. I choose the wood carefully, as described in Choosing Wood Carefully. However, no matter how carefully you choose the tree, the task is only as easy as the condition of the tools you use. The tools must be the right size, fully maintained, and inspected carefully. Of the tools I use, the one I worry about most is my chainsaw. A failure of my chainsaw at the wrong time could mean death. This means that as well as thorough inspections, your chainsaw must be of good quality, like these top rated cordless chainsaws.

I know a lot of people maintain their saws personally. However, given that my small engine experience is limited, I normally take my saw to a professional for its annual maintenance. This includes everything from cleaning the air filter and changing the fuel filter, to making sure the saw is clean and has a sharp chain on it. This annual workup is enough for my needs because I’m not using the saw professionally. I cut just enough wood to meet my heating needs each year, plus stock up a bit of emergency wood.

However, I do perform certain types of maintenance every time I go out to cut wood, the kind that may need some stuff from safety equipment suppliers to perform safely. This frequent maintenance may seem like overkill, but I really don’t want to end up dead due to an equipment failure, so I perform these checks absolutely every time I use my chainsaw:

  • Clean the exterior of the saw.
  • Inspect the saw for damage.
  • Check the sharpness of the chain and replace it if necessary.
  • Clean the area that houses the chain when I have the chain off.
  • Verify the chain is at the proper tension.
  • Grease the bar sprocket.
  • Fill the chain lubricant reservoir.
  • Fill the gas reservoir.
  • Check my safety equipment, which includes safety glasses, hearing protectors, and heavy gloves.


Even performing all of these checks, it’s possible that you’ll have an equipment failure, but it’s a lot less likely. If you’re smart, you’ll continuously check for potential problems while you’re working in the woods. Make sure you check the saw every time you refuel it and always ensure that you add bar chain lubricant when you gas up. It also doesn’t pay to be cheap in this case-use high quality lubricant and make sure your gas is fresh and has the proper two-cycle engine oil in it.

It often amazes me that people don’t take more care when they prepare to go into the woods. Even though I feel that the woods are one of the most beautiful places on earth, I also give them the respect their due and you should too. Let me know your thoughts on chainsaw maintenance at [email protected].

Trimming the Trees (Part 3)

In Trimming the Trees (Part 2) I discussed some of the specifics of pruning trees. At this point, my trees are all pruned. However, there is still work to be done. For one thing, this is the time of year when I examine the trees for egg masses of the Eastern Tent Caterpillar. Despite what you may have heard, repeated infestations will definitely kill a fruit tree, especially if the infestation is severe enough. It only makes sense. If you remove all of the leaves from a tree that only gets one set of leaves per season, the tree can’t store energy for the winter months.

Our experience has been that they’re a nuisance with apple trees. Yes, the tent caterpillars will cause a problem, but if you get in there and squish all of the caterpillars in the tent (or better yet, get rid of those egg masses in the spring), the apple hardly notices. However, plum trees seem to attract tent caterpillars like magnets. All four of our plum trees were in danger from dying at one point because we simply couldn’t keep the caterpillars under control. I told my friend about my problem with the plum trees and he said I should work with someone like The Local Tree Experts or at the very least get their perspective on how to manage this problem so we could enjoy our plum trees again. They had some useful advice from what I hear. Trying a few sprays was the first suggestion.

We did try a number of sprays-all of which proved ineffective. Spaying the trees with a dormant oil spray in the spring helps only a little. By far the best strategy is to hunt down the egg clusters and destroy them. The secondary strategy is to look for the tents absolutely every day in the spring and summer after the trees have leafed out and destroy them by individually squishing the caterpillars by hand. We actually had two of our plum trees stripped of leaves in a single day by these pests.

While we’re looking for tent caterpillar egg clusters, we also look for other problems in the trees, such as disease, insect infestations, and so on. It’s easier to find problems after you’ve pruned the trees and there are fewer branches to check. Taking time now to check the trees will save you a lot of effort later.

Of course, now we have a pile of branches to deal with. This year we pruned our pear trees heavily because they’ve become a little overgrown. If pear trees get too overgrown, they’ll tend to prune themselves in heavy winds-usually not in a way you would have chosen. The pile of branches from all of our trees is quite high this year.

TreeTrimming0301

We’ll put all of these branches through the chipper and then use them for mulch. A lot of people would probably burn the branches up, but using them for mulch does save at least some money. I’ve been trying to figure out the environmental balance in this case. On the one hand, burning the branches would produce a lot of particulate smoke that would pollute the air for at least a while. However, using the chipper also produces pollutants, and some of those pollutants are harsher on the environment than the smoke from burning would cause.

If we had burned the branches, I would have placed the pile in the middle of the garden. That way we could have plowed the ashes into the ground where they would have provided fertilizer on top of the winter rye you can see growing in the background of the picture. So, either way, the branches wouldn’t have gone to waste. However, we really need the mulch more than the ashes, so we’re creating the mulch.

Our orchard is ready for spring at this point. Let me know about your tree pruning and bug eradication experiences at [email protected].


Trimming the Trees (Part 2)

I would like to start this by saying that I’ve had lots of experience and training when it comes to using the tools needed for trimming and cutting trees. I know what I’m doing so I know how to do it safely. I would never encourage any of you to cut your trees if you don’t have experience as this could lead to serious injury. Take a look on stamfordtreeservices.com if you’re wanting your trees serviced professionally.

Anyway, I’m starting to get down to the last few trees in the orchard (and I may not be able to get them because the sap is starting to run). When the pruning is light, I can get through all 33 of my trees in a couple of days-assuming I can work all day at it and the weather isn’t too cold (or hot). This year it’s taking a bit longer because I’ve had a number of personal issues that have kept me from working full days outside. Even so, I normally don’t get the trees finished until the end of March or beginning of April, so I’m getting done early this year. As mentioned in Trimming the Trees (Part 1), when to prune is a matter of much debate. Some people prune their trees in the fall, some in mid-winter, and some a bit earlier in the spring than I do.

Part of pruning your trees is knowing how to prune that particular tree. For example, I visualize an umbrella shape when trimming apples. In fact, a lot of home growers use this particular shape. An umbrella shape is quite strong and tends to ensure a good harvest. In addition, the umbrella shape is easier to pick. Commercial orchards use a variety of other shapes, some of which work best when the pickers are working from the back of flatbed trucks. Some people tie down water sprouts to obtain the umbrella shape, which tends to stress the tree. I prefer to look for branches that are already heading in the right direction and trim off everything else. Water sprouts are branches that grow straight up from joints in the tree. You need to trim these off as they’ll never produce any fruit.

Our pears and cherries are dwarf trees with a strong central leader. When pruning these trees, I visualize a flame shape. The tree should be topped to keep it from growing too high. Yes, you’ll get fruit all the way up, but the problem is figuring out a way to pick it without damaging the tree. Keeping the tree down to between 14 feet and 16 feet high ensures that you can reach all of the fruit in fall. Water sprouts aren’t a problem with the central leader trimming technique. What you want to do is ensure that none of the branches are crossing and that the limbs aren’t overextended. Cherry trees require a significantly lighter hand than pears do. In fact, pear trees are quite forgiving when you over-prune them. Cherry trees are also stronger than pear trees. If you don’t trim your pear trees heavily enough, the limbs have a habit of breaking off at the crotch, especially in high winds.

Plum trees are just plain messy looking. I don’t think I’ve ever seen one that I would consider a beautifully shaped tree (at least, not one that produces fruit). Plum trees are normally trimmed using the open center approach. This technique relies on three or four branches attached to a main trunk. You don’t trim the tree heavily. In fact, unless there is some sort of problem with crossing branches or water sprouts, you don’t trim at all. Of all the trees, prunes are the least forgiving when it comes to over-pruning. They grow slowly, so taking off too much this year means paying for several years. Two of my prunes actually look more like a bushes than trees and I trim them quite carefully to keep them that way.

Some trees produce well every other year. My apples are this way. They’ll produce quite heavily one year and then take a vacation the next. With this in mind, I establish a pattern of trimming heavier on off years and lighter on production years. This way, I maximize the amount of fruit I get from the tree and still maintain it properly.

I haven’t personally tried my hand at growing anything more than apples, pears, plums, and cherries. However, the basic techniques I use likely apply to most fruit tree types. My next project is to try my hand at growing some nut trees. Hickory nuts and butternuts grow well in this area, so I’ll try them first. Unfortunately, we can’t grow English walnuts or you can be sure I’d be planting them. We can grow black walnuts, which work well in baked goods. The only technique I haven’t tried so far is the trellis technique of pruning for fruit trees. I’d love to hear from anyone who has tried it at [email protected]. In my last post (for now) on this topic, I plan to discuss some of the things you should look at on the tree while pruning.


Trimming the Trees (Part 1)

There are many different theories about trimming fruit trees. Talk to five orchards and you’ll likely hear five completely different tales of the precise technique that someone should use for trimming fruit trees. My own personal theory is to trim the trees later in the winter or early spring, before the sap begins to run, but after the majority of the hard winter weather is gone. The idea is to have fresh cuts to encourage growth, but also to let the cuts heal before the sap runs so that the tree won’t “bleed” from the trimming. Other people get Greenleaf tree pruning in Austin to trim in the fall or at other times during the fall to winter season. One thing you never want to do is to trim your fruit trees after the sap begins to run because the tree will lose too many nutrients that way.

Rebecca normally does the majority of the lower cutting. It’s time consuming work because you have to decide just which twigs to cut. Every twig has the potential to bear fruit, so what you’re really doing is cutting off fruit before the tree even has a chance to produce flowers. We trim a little bit away from joints to help prevent disease as shown here:

TreeTrimming01

Rebecca prefers a ratcheted hand pruner. It helps amplify her hand strength so that trimming the tree isn’t quite so hard. In addition, you can generally prune larger branches using a ratcheted pruner than you can other hand pruner types. There are many different types of trimmers and you should choose the type that works best for you. I generally use an anvil-style hand pruner. It requires significantly greater hand strength to use, but in exchange, I get cleaner cuts, I can trim the tree faster, and the pruner itself wears longer. I strongly recommend against using bypass hand pruners on trees because the blades tend to bend and not produce a clean cut. A bypass pruner works much like a scissor and the tree branch can become wedged between the two blades.

In addition to hand pruners, your tree trimming kit should include a lopper, which is used to cut thicker branches. I highly recommend a long handled geared lopper because it will last longer, produce smoother cuts, and require less muscle to use. A good lopper will enable you to cut branches up to 2-1/2 inches in diameter in most cases. The idea is to use the lopper whenever possible because it produces a smooth cut that won’t bleed as much.

At some point, you’ll encounter branches that you can’t cut using a pruner or a lopper. In this case, you must resort to using a pruning saw. As with pruners and loppers, pruning saws come in all sorts of shapes and sizes. When working with fruit trees, you want to get a curved razor tooth saw so that the cuts are as smooth as possible and you have the fullest possible range of motion. Remember that when you cut with a saw, you start by making a counter cut on the opposite side of your final cut. Then you make the final cut. If you don’t provide a counter cut, the branch could break or the bark could end up peeled from the tree, inviting disease.

All of the tools mentioned so far will cut up to around five feet of the tree’s height, but even a short fruit tree is six or seven feet (most are more). In order to trim the rest of the tree, you need a tree pruner of the sort shown here:

TreeTrimming02

This particular tree pruner is 14 feet long. The pole telescopes so I can make it shorter or longer as needed. Believe me, the ability to adjust the length is essential. The longer the pole, the more strength required to hold it up. After a few hours of using this tool, your shoulders are guaranteed to ache. Unlike most tree pruners, this tree pruner relies on a chain for the clipper head, which means that it’s a lot less likely to become tangled in the branches or get twisted. The chain also reduces friction so you don’t use as much muscle to cut the branches.

The tree pruner also has a razor saw for cutting larger branches. You have to develop a technique for cutting the branches because when you get up this high, they tend to sway back and forth with the saw, rather than being cut by it. I find that moving my whole body in the correct rhythm (counter to the tree sway) does the trick.

If possible, get a fiberglass pole. Wooden poles tend to get heavy and can sometimes start getting weathered (making them splinter). This pole also includes a foam pad, which feels a lot more comfortable on the underarm when I’m cutting up higher than shown in the picture.

That’s the equipment needed for tree trimming: hand pruner, pruning saw, lopper, and tree pruner. If you want to be 100% safe to avoid any unwanted tree accidents, I would recommend hiring a tree service to remove/trim the trees for you, rather than attempting it yourself. Safety has to be a priority and hiring a tree service to cut your trees is a great way to prevent common tree accidents. If you want to have a go yourself, to keep from spreading disease between trees, make sure you wipe your equipment down with alcohol after cutting a diseased tree. However, the alcohol rub will cause your equipment to rust. To keep that from happening, make sure you apply oil after the alcohol rub. Let me know if you have any questions or thoughts about equipment at [email protected]. I’ll continue this post next week with some insights into pruning techniques and things you should look for as you prune.

Choosing Wood Carefully

All wood will burn eventually. There is no doubt about it. Create a hot enough fire and you can stick anything in the wood stove. It may not burn immediately or well, but it will burn eventually. However, if you’re heating your home with wood, you don’t want it to burn eventually, you want it to burn now. Burning the wrong sort of wood has these negative impacts.


  • The wood will burn inefficiently, which means you’ll need to cut more wood to obtain the desired number of calories to heat your home.
  • You’ll see additional soot accumulation, which could end up closing your chimney and causing carbon monoxide buildup in your home.
  • The wood stove will require additional costly maintenance because of the way wet wood doesn’t burn.
  • Wet wood tends to mildew, which isn’t particularly good for your health.
  • All of these factors tend to pollute the environment to a greater degree, increasing your carbon footprint.


The problem isn’t strictly confined to wet wood. Choosing the wrong wood can also cause all sorts of problems. For example, if you burn wood from conifer trees extensively, you’ll find that you use more wood and that your chimney tends to soot easily. The creosote produced by conifers is especially hard to remove from the chimney. Of all conifer trees, cedar tends to be the worst. However, even kiln dried construction lumber isn’t good for your wood stove. Although these woods smell wonderful as they burn, you’ll want to burn them with high heat hardwoods to reduce their negative impact. Never burn treated wood in your wood stove. The chemicals in treated wood are truly terrifying and you don’t want to pollute the air with them.

When obtaining hardwoods, make sure that the moisture content is low enough so that the wood will burn efficiently. If nothing else, use a moisture meter to check that the wood is in the 10 percent to 15 percent range before burning. Sometimes wood looks like it’s perfectly dry, yet contains a significant amount of moisture. One of the worst woods in this regard is oak. The wood can exhibit all of the characteristics of fully dried wood, yet contain enough moisture that it won’t burn well.

One of the questions you need to answer when looking for wood to cut is whether that wood is dry. Generally speaking, a tree is starting to dry out sufficiency when the bark comes off easily from the trunk. It should literally peel off in large pieces. Before that time, the tree is still quite green. If you get wood from someone else and that wood has tightly attached bark, make sure you check it with a moisture meter. The wood may be green and you’ll find that it won’t burn well. Some less reputable woodsmen will try to sell you green wood because they have run out of good dry wood to sell.

Cut and split the wood into the size chunks you want to use in your wood stove. Measure the moisture to determine whether additional drying is required. Some woods, such as black locust and most species of elm, are ready to use almost immediately after you cut up the trunk. The wood dries thoroughly without cutting it up. As mentioned earlier, oak always requires a drying period after you cut it up because the tree would rather rot, than dry, when in trunk form.

A few trees will burn acceptably at higher moisture content levels. Maple falls into this category. It doesn’t burn as well as fully dried wood, but it does burn well enough not to cause a creosote buildup on your chimney. Even so, you should never burn these woods with greater than 20 percent moisture content. Lower moisture content is always better.

Another way to tell if wood is properly seasoned is to look it over carefully. Wood that has been stacked for two or three years (the recommended drying time for most woods), is usually blackened on the ends. The cuts won’t look fresh. The wood itself will feel somewhat light; although, some woods, such as locust and oak, are heavy no matter how dry they get.

The weight of the wood is important. A heavier wood normally has more calories to offer when burned. Consequently, if you have two pieces of wood the same size and dried to 10 percent moisture content, the heavier piece is worth more from a heating perspective. Heavier woods tend to be hard to start, burn more like charcoal, and burn long. Maple, box elder, and other moderately light woods make good kindling for starting a fire based on these heavier woods. If nothing else, use some of that pine for starting your fire.

Some woods smell better than others do when burning. For example, oak and maple both smell wonderful. As previously mentioned, all conifers smell good, but there is a price to pay in this case for the good odor.

A few woods smell truly horrible when burning. For example, I’d rather not smell poplar or paper birch again. Fortunately, both of these woods tend to be light when dried, so they offer few calories than other wood types—making them good woods to avoid.

The best tests of the wood you cut yourself or obtain from a third party is seeing how it burns. A sample or two will tell you about the entire load in most cases. The wood should start relatively easy (keeping in mind that truly dense woods such as locust, hickory, and oak start harder than less dense woods such as maple). It should produce some amount of blue flame, along with the usual orange and yellow. The wood should leave little ash behind (less dense woods tend to produce more ash than denser woods).

The ultimate insult in getting wood from a third party is when they sell you punky (partially rotted) wood. This wood tends to be really light when fully dry. You can’t typically see the rings as well and the wood itself has a papery feel. The wood will start with extreme ease, burn brightly for an incredibly short time, produce little heat, and produce copious amounts of ash.

Sometimes you’ll find that wood sellers talk about a “load” of wood, as if that’s a precise measure of anything. Most places have statutes in place the define wood as being sold by the cord or measured faction (such as a half cord). A cord is 128 cubic feet and is typically stacked 4 feet high, 4 feet wide, and 8 feet long (although, any stack that measures 128 cubit feet is a cord). Beware of the seller with face cords. In this case, you’re only getting 64 cubic feet. When someone insists on selling you a load of wood, make sure you measure the tightly stacked load yourself and pay appropriately.

In short, if you thought all wood was the same, you’re quite wrong. Choosing the wood you use in a fireplace or wood stove carefully is extremely important. Don’t let someone sell you wood that’s wet, punky, or simply unfit for burning. Inspect the wood for insect infestations and make sure you know what kind of wood you’re getting. What sorts of experiences have you had obtaining wood in your area? Let me know at [email protected].


Many Hands Make Light Work

I’m not sure who first came out with this bit of wisdom, but it’s true. Dividing a task amongst many people does make the work a lot lighter. You get the task done a lot faster for a number of reasons, some obvious, some not. Of course, with multiple people doing the work, the task is completed faster and with less effort from each individual. The people working on the task can encourage each other and a gentle gibe can prompt less motivated individuals to work a bit harder. However, I’m not talking about a team here. Teams are organized and often rely on one really skilled person to carry other less skilled people along. What I’m talking about is a group of individuals, with relatively the same ability, getting together to accomplish a task without the usual trappings of the team environment. There truly is a difference.

I was reminded of this difference when I read the post of my friend Bill Bridges, entitled, “The Good Cheer Drive.” It’s precisely this sort of example that I’m thinking about when it comes to the expression, “Many hands make light work.” These people came together and in a dizzying array of disorganization managed to get food together for those who are less fortunate and need a bit of a helping hand during the holidays. There is no concept of team (and the associated ego) here—simply a group of people getting together for the common good. It sounds like my sort of event.

Self-sufficiency sometimes requires a touch of this sort of environment as well. Whenever I can, I try to get someone to help when I go into the woods. To do otherwise would be foolish. When I’m cutting wood, I fell old trees that no one is using (no animals or helpful insects have made the tree a home). The trees sometimes do unexpected things, especially when the crown is caught in the branches of another tree. If someone is there helping, they can at least go for help should a tree decide to fall on me. There is safety in numbers.

Trying to wrestle a large trunk is also quite an experience. It doesn’t take much tree to produce enough wood that it’s nearly impossible for even a well-muscled man to move it about. Since I don’t use any sort of heavy equipment, I have to rely on careful cutting techniques and the help of others to move some of these large trunks around. Most of the time, the time in the woods is spent with others who enjoy being out there as much as I do. We’re a group of individuals working together to get the wood down from the hill without disturbing other trees in the safest manner possible.

This year I’ve been relying on the help provided by a new friend, Cody. He’s been out at least once a week (and often twice) to help me get my wood in for winter. As a result, for the first time ever, I have almost all of the wood I need for the winter already stacked, and it isn’t even Christmas yet. Even Rebecca has been able to get out to help a little this year, so a number of us are involved in getting the wood done up. Many hands do indeed make for light work.

WoodCutting

When you start your self-sufficiency effort, consider the need to help other people and to ask others to help you as needed. Yes, you do need to do as much as you can, but when there would be an immense risk in doing the work by yourself, look for those individuals who are willing to help. Make sure they get something out of it too. Exchange labor as you would exchange products (see my Sharing and Swapping Food post for details). The most important gift you can get out of the exchange is a friend you can rely on and believe me, they’re scarce in today’s world.

How do you work with others? Have you ever contributed toward a group effort of the kind I explore in this post? Let me know at [email protected].


Working the Fall Schedule

There is a misconception that anyone who works in a farm-like environment simply takes a vacation once the crops are in (no matter what those crops might be). It’s true that I’m slightly less frantic now than during the summer months when I need to be doing three things (or more) at once. However, the work continues throughout the fall and winter. The fall period begins after the garden is cleaned up, tilled, and planted with winter rye. Our winter rye is just showing above the ground at this point. It’ll stay that way until spring, when it’ll take a growth spurt. The winter rye roots will keep our precious soil in place and also provide “green manure” in the spring when we till it under.

A lot of people are surprised to see the two buckets of what appear to be shriveled bean pods in our basement, alongside the potatoes and squash. They actually are dried green beans, which might seem like a less than helpful use for them. However, the beans you buy for soup in the store come from this source. When we’re done canning green beans for winter, we let the remaining beans dry on the vines. We then pick them off, shell them, and use them in soups or for baked beans. In fact, anywhere you’d normally use dried beans you can use the dried green beans from your garden. Our dried beans are a beautiful shade of brown this year. We’ve had speckled beans, solid black beans, and a number of other colors, all of which contribute to a colorful soup, even if they taste mostly the same. You simply remove the pod by shelling the dried green bean and you end up with handfuls of beans you can store without much fuss at all. In short, green beans are an extremely efficient way to produce food—you can eat them green or dried and they require no special storage when dried (an airtight container is helpful).

Of course, this is also the time of year that I start getting into the woods to cut wood for winter. I’m actually bringing down wood that I cut and stacked last year (or two years ago in some cases). It won’t be quite enough for the entire winter, but it’s a good start. I’ll look for dead, dry trees to cut up to complete our wood supply for the winter, and then begin on next year’s wood. Rebecca helps by carrying wood from the cart, wood pile, or from the edge of the woods and throwing it into the basementsaving me a ton of time. Some of the wood has to be split, a good job for my maul on days when it’s too windy to cut wood.

Self-sufficiency relies on a lot of equipment as well. During the summer months there is little time to maintain it. Yes, if something breaks, you have to take time out to fix it, but that’s not the same as maintaining it. During the fall and winter months, I’ll sharpen shovels and spades, repair equipment, change the oil, and tune everything up. These maintenance actions are essential if you want to have a good summer. Nothing is worse than trying to dig with a dull spade. Anything I can do to make our hand, electric-powered, and gas-powered equipment work better is money in my pocket and time to do something else. So these winter months are an essential time for me.

This is also the time I’ll be working on new projects. For one thing, Rebecca needs a bit more storage and better lighting in the larder. I’ve been wanting some shelving for my equipment for quite some time now and I may get to it this winter. The chicks need something better than a refrigerator boxI’m planning to build a box that we can use as a combination of brooder (to keep young chicks warm) and rabbit house (during the summer months after the chicks are put outside).

Still, nothing beats sitting by the wood stove after a day of cutting wood and feeling it’s warmth hit tired muscles. I’ll break out my Knifty Knitter to make some hats, scarves, blankets, and socks (you can see some of the things I’ve made in my Knitting for the Gentleman Farmer post). I may even engage in some latch hook this winter to make a rug or wall hanging. Winter is a time of crafting too! So, how do you enjoy the fall and winter? Let me know at [email protected].


Early Spring in the Woods

I’m sure many people are ready for spring. I know that I am. The ground is getting muddier by the second and the large drifts of snow have that decidedly tired and dirty look. Of course, winter will hang around for a while yet. We’re supposed to have another snow storm tonight. Just how much snow we get depends on the vagaries of nature. I don’t mind the snow; just don’t give me any ice.

Today was sunny and warm; well, warm for this time of year. I think the temperature got all the way up to 40 today, so there was more than a little melting underway. After checking my e-mail, getting all of my morning chores done, and making sure my wife didn’t need to go to town, I decided it would be a fine day to get up into the woods. I didn’t actually get there until afternoon, but I was still able to get quite a bit done. I keep cutting until the saw runs out of gas, then I start lugging the wood down the hill, 80 pounds at a time. Did I mention that my day in the woods normally involves walking six or seven miles (half of which involves lugging this 80 pound load)? It isn’t a bad workout for a 50+ year old man. This is the view from the hill where I’m cutting wood now.

WoodsToday

A day in the woods wouldn’t be complete though without some time spent looking at nature. I didn’t run into friend badger today. In fact, badger isn’t my friend and I try to give him a wide berth. I did see Woody though. Woody is the pileated woodpecker that hangs out in our woods. I tried to get a picture of him, but he’s shy. However, here’s a picture of his current favorite tree:

WoodysTree

Actually, Woody has a number of trees he attacks, most of which are snags like this one:

Snag

I have a personal rule that I don’t cut any trees that someone is using, so I’ll leave this snag in place. Eventually, someone will move into the holes that Woody has made. I’ve found all kinds of interesting things in trees over the years. We have several bee trees in the woods right now and I depend on the bees in them to help pollinate my garden and trees, so I definitely won’t cut the bee trees down.

One of the more interesting things I noticed in the woods today is that the buds on some of the trees are starting to swell. Of course, this is a sign that spring is near. The berry brambles are also turning quite red; another good sign. Here are some of the buds that I saw today:

SwellingBuds

I hope you enjoyed your tour of the woods today. I promise other trips as time allows. The woods is one of my favorite places to go. We not only get wood from there, but also a number of food items. I’ll show you some of them as I gather it this summer. Let me know about your favorite places in nature at [email protected].