
I’ve read a lot of truly awful comments from wood cutters about elm trees online. Yes, everyone admits that they’re quite pretty and the vase shape produces an amazing amount of shade. Elm trees are popular in cities because they can grow quite well in the pollution. The elm tree’s twisted internal structure means that even when the tree is hit by lightning, it often doesn’t split apart and cause significant damage. Of course, elm trees are susceptible to a number of beetles, including those that spread Dutch Elm Disease (DED). Wood cutters of all sorts now have experience with the twisted internal structure of the elm because DED has wiped out so many trees. This structure makes it incredibly hard to split the tree. In fact, some wood cutters will refuse to cut down an elm for wood simply because the tree is so incredibly hard to split.
Elm does have some redeeming features for someone who needs wood for their stove. Unlike my favorite, black locust, you don’t have to mix elm with other woods to keep your stove temperature under control. Elm will burn at a moderate rate for a long time. In addition, elm produces a lot of heat for the amount of wood you get, it isn’t hard to start, won’t produce a lot of sparks, and doesn’t produce an overwhelming amount of ash.
A friend recently helped me cut down two elms—one of which was threatening my house (the other would have threatened at some point if it had been left in place). These are mature trees that have the the classic signs of beetle infestation, but don’t appear to have the fungus associated with DED. Even so, all of the wood from the two trees will find a home in my wood pile at some point.
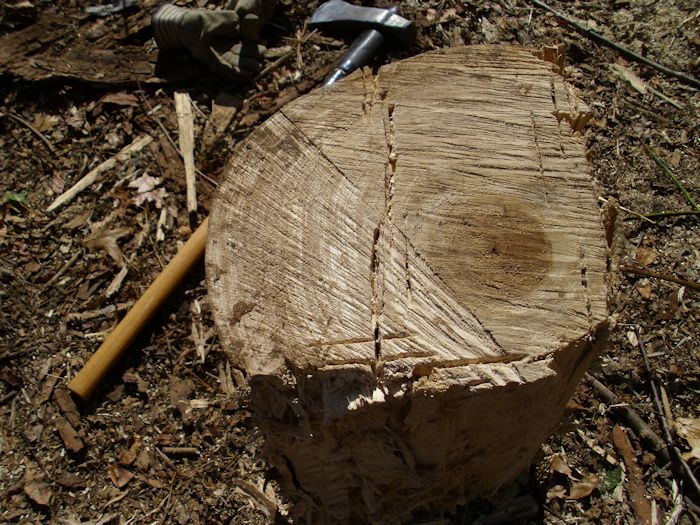
One way to deal with elms is not to split them in the first place. Most people think you have to cut trees into the classic log shape. I’ll cut elm into short logs that fit flat into the wood stove instead of as a log. You can continue cutting the tree up like this until the diameter of the log begins to exceed the depth of your wood stove. So, I’ve ended up with a number of logs that look like this, rather than the usual round shape.

At this point, I can see you scratching your head. You insert the wood like this into the wood stove. The height of this piece matches the height of the wood stove opening—the diameter is less than the length and depth of the wood stove, so the piece will fit just fine, even if it isn’t in the normal orientation. All the wood stove needs is a piece of wood that’s the right size to fit and it definitely doesn’t care anything about shape. The piece will burn just fine in this direction.
Warning: You may need to insert felling or bucking wedges to keep the cut open when working with thinner cuts like the ones shown in this post. Never use splitting wedges for this purpose. If the chainsaw chain hits a metal splitting wedge, the chain will likely break and could cause personal injury. Always use plastic or fiberglass felling or bucking wedges designed for use in holding open cuts instead.
The trees had a 20-inch diameter, which is just a bit bigger than my wood stove will allow, no matter how I want to orient the pieces. I chose to split the pieces in this case so they look a bit more like standard logs. However, elm is so tough to split, that just hitting it with a maul or an axe won’t work. I have a 20 pound maul and it simply bounces off the top unless I really want to pound on the log, in which case, I get a nice dent. To split this wood, you need splitting wedges. I used three wedges to split the 20-inch diameter pieces from this tree. When working with elm, you can’t have too many wedges. To start the process, create a stress line across the log like this.
What you’re seeing is about six hits with the maul to create a straight line through the early wood. Notice that I purposely avoided the late (heart) wood. If you try to split the heart wood, you may never get the job done.
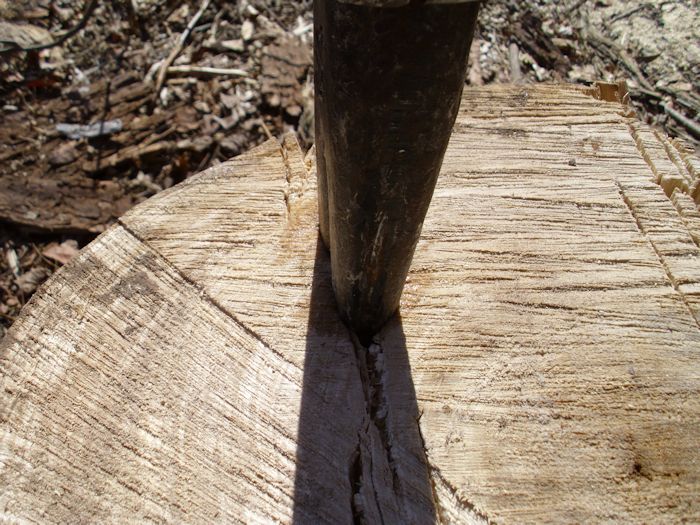
After you get the initial stress line created, pound in your first wedge. Given the size of this log, I chose to place the wedge about 1/3 of the way across to ensure the log would split all the way down the side. Again, you really want to avoid that heart wood if at all possible.
Some people like to wait until elm is completely dry to split it. What I have found is that elm continues to harden and the interlocking becomes worse as it dries. I prefer to split the logs when the bark has come off, but before the tree is completely dry. Normally I see some wetting around the wedge as I pound it in as shown here.
Even with the lubrication provided by the moisture, getting the wedge all the way down can prove difficult. The first wedge is the hardest. Splitting the wood in sub-zero weather will give you a small advantage in some cases—it depends on how interlocked the fibers are. I chose to split this wood in warmer weather because I want it to start drying out.
After I get the first wedge all the way down, I pound in a second wedge 1/3 of the way from the other side. I end up with two wedges in the first end like this.

Warning: Make sure you dress your wedges properly! The two wedges shown here have been used to split a number of trees and are mushrooming out at the top due to being hit by the maul. The maul is made of harder metal than the wedges, which are designed to mushroom out like this as they’re being hit to reduce the risk of shattering (metal hitting metal). At some point, little pieces of the wedges will break off and could cause physical injury. Dressing the wedges using a grinder will keep the mushrooming under control and reduce the risk of physical injury. Of course, you should always wear the proper safely equipment when using a maul, which includes safety goggles (an OSHA approved face mask in addition to the safety goggles is better), long sleeves, heavy pants (adding wood cutting chaps is better), and heavy gloves.
As you can see, even with two wedges in place, this log refuses to split. At this point, you turn the log over. Create a stress line across the log using your maul that reinforces the current split. If you’re really lucky, you may be able to get the log to finish splitting this way, but don’t count on it. In my case, I needed a third wedge, so I put it in like this.
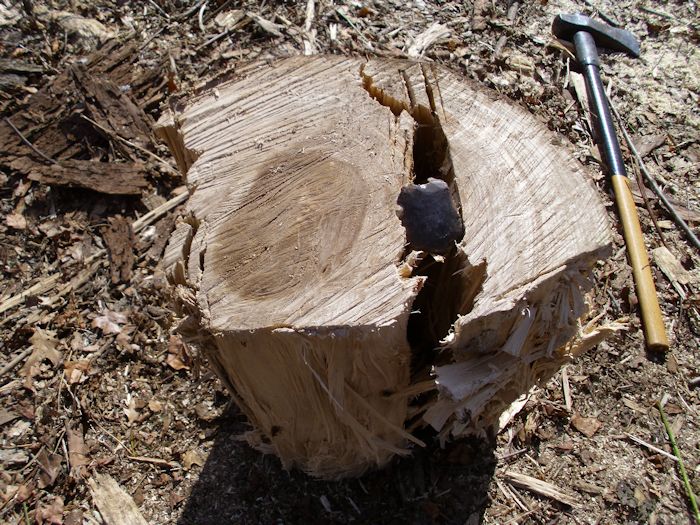
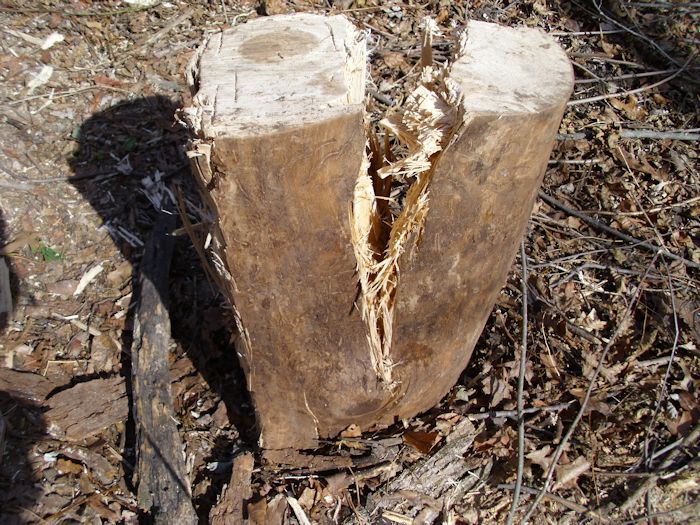
I now have a crack from top to bottom, but the crack doesn’t go all the way through the log and it still isn’t split. At this point, you turn the log over on it’s side and break the center by striking it with the maul. Make sure you hit directly in the middle and not on either end. If you hit the ends, you’ll also hit the wedges and dull your maul. When the split is complete, your log looks like this.
You can remove the two wedges at this side now. What you have is a split side and a hinge (connected) side. All you have in place in the second wedge on the top of the log at the hinge side. Turn the log over so that the bottom is up and the hinge side faces you. Use the maul to break open the bottom of the hinge as shown here.
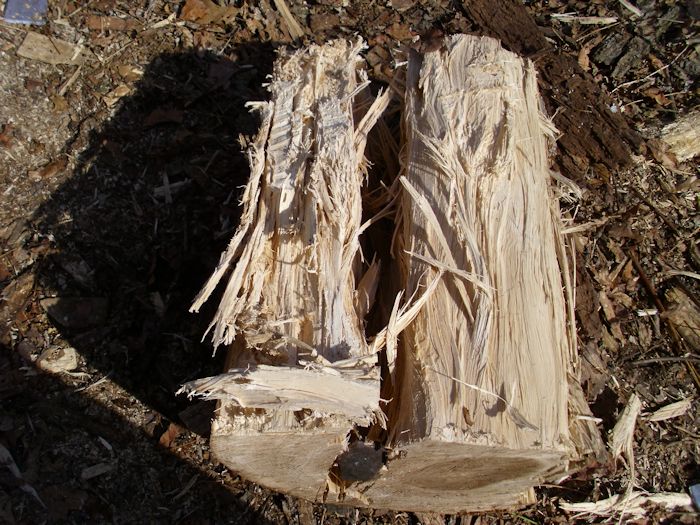
This action should free the third wedge. At this point, you can place the top end up and finish the final split with the maul. You now have a split piece of elm as shown here.

In my experience, only elm splits this horribly, which is why many people avoid it. Yet, the wood does have some good characteristics and if you handle the tree right, you can get by without splitting most of it. Let me know about your elm splitting experiences at [email protected].