Creating Raw Juice for Wine Making

Earlier this year I created a series of posts about making wine using the cubicontainer technique that relies on a single container, rather than using two containers for primary and secondary fermentation. This approach requires that you use juice, and not raw fruit/vegetables, as the source for the wine. Most people think that you can make juice only from a raw source, such as crushing grapes. However, wine makers know that you can use both raw and cooked juice. This post shows how to work with raw juice—pears in this case. If you haven’t read the wine making series of posts, you can find them at:


When working with any fruit for raw juice, you need to pick the fruit at the peak of ripeness. In the case of pears, this means smelling the fruit for the distinctive pear odor. The fruit should still be firm, but crush easily in the hand. Taste the fruit and you should smell a strong pear odor, along with a high sugar content. Check the inside for an off white appearance. If the fruit seems starchy, the inside has yellowed or browned a bit, or seems mushy to the touch, it’s overripe and won’t make good wine. Likewise, if the fruit is still greenish in color, seems a bit too firm, or lacks the strong pear odor, it  isn’t ripe enough. Every fruit has its peak time for picking that typically last one or two days. That’s rightyou must check the fruit absolutely every day or you’ll miss the perfect time to pick it.

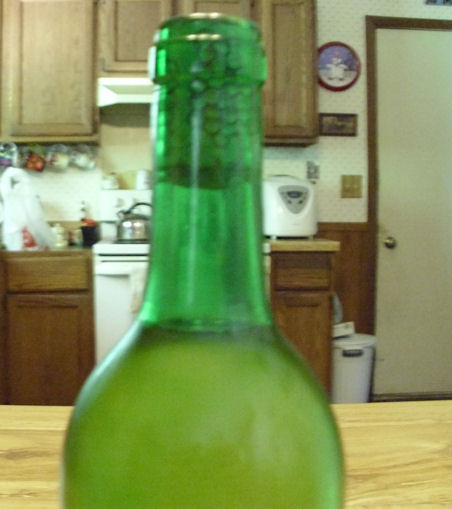
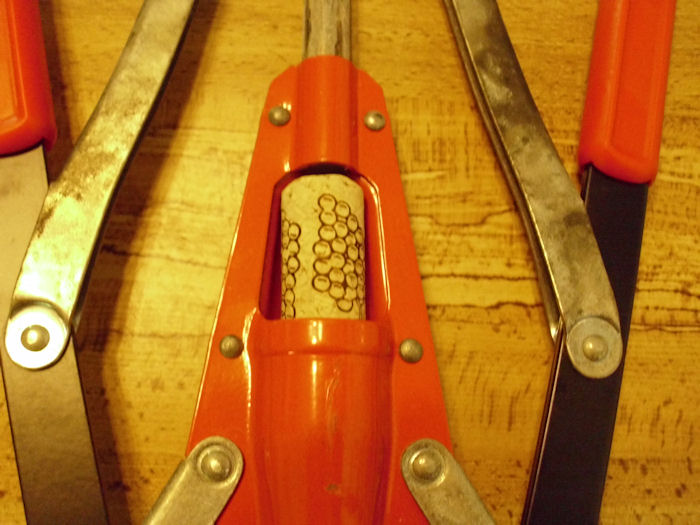
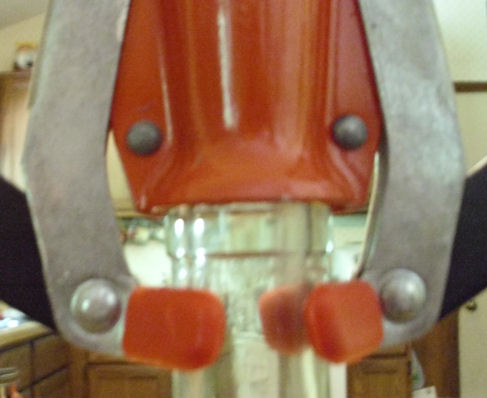
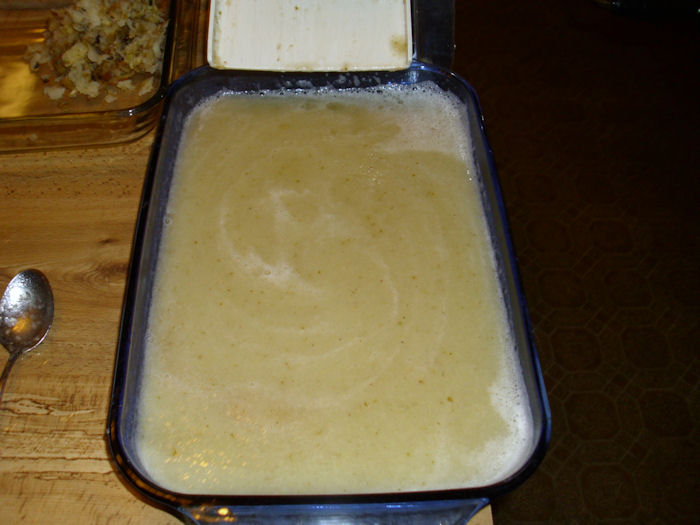
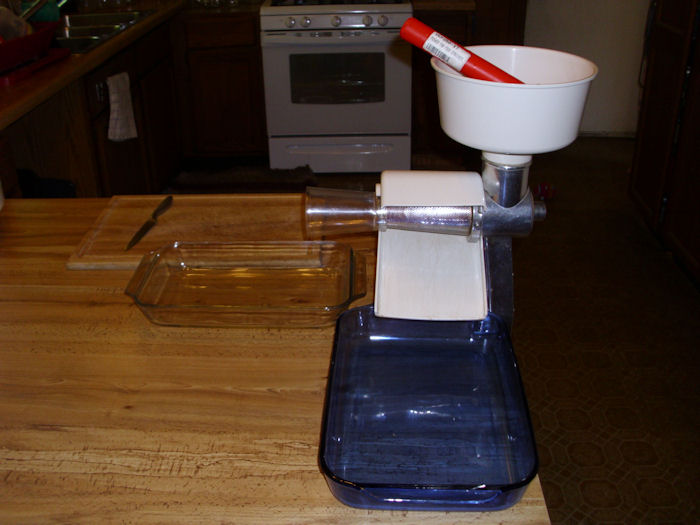
In order to create the juice, you begin by running the raw pears through a Victorio Strainer. You need to be absolutely certain that the pears are ready for use in wine. Pears that aren’t ripe could damage your strainer. Normally, the juice turns a bit brown as you strain it due to oxidation and the presence of bacteria. In this case, you’ll prevent that from occurring by adding a campden tablet to the output of the Victorio Strainer and stirring the juice from time-to-time as you strain the juice. The result should be a slightly greenish yellow juice as shown here.

RawJuice01

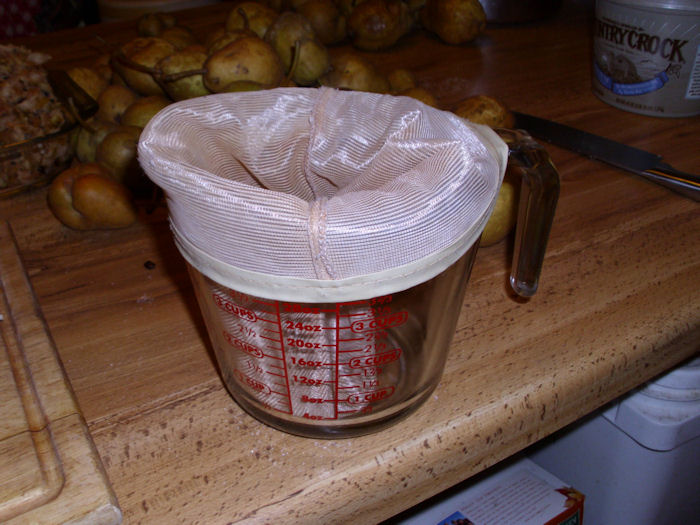
However, this juice isn’t ready for wine making yet. It still contains a substantial amount of pulp. You need to make at least 2 quarts of strained pear juice to obtain 1 quart of juice ready for wine making. The next step is to place a jelly bag over a 1 quart measuring cup like this:

RawJuice02

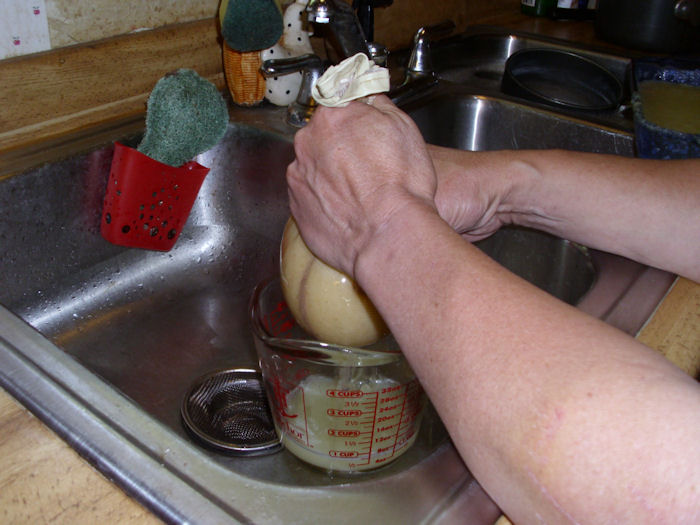
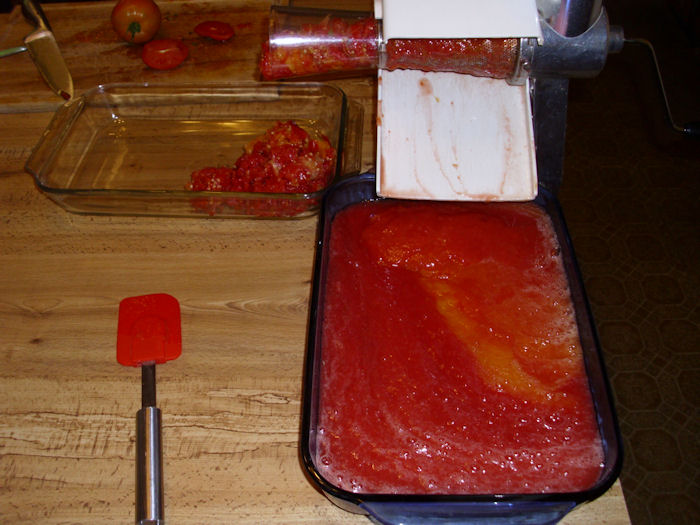
Pour as much of the strained juice into the jelly bag as possible. Now you’ll squeeze the bag to separate the pulp from the juice like this:

RawJuice03

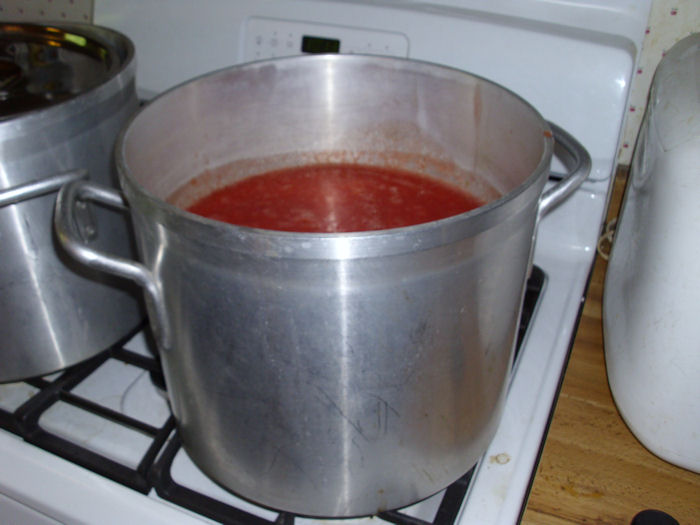
Once you have a quart of juice, you can use it immediately to make wine or freeze it for later use. A quart of pear juice will make one gallon of wine using the wine making techniques I discussed earlier. If you decide to freeze the juice, make absolutely certain that you mark it for wine use only because the juice already has the campden tablet in it.

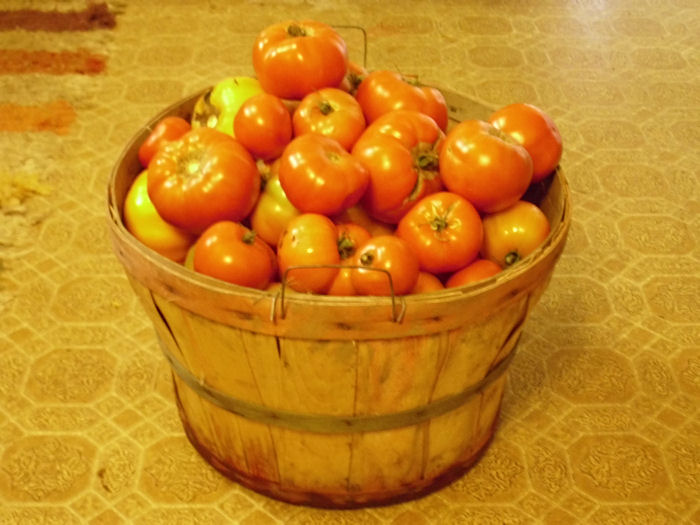
This same technique works fine for any fruit that gets soft enough when ripe to put through the Victorio Strainer. For example, it works great with berries. However, I haven’t ever gotten this technique to work properly with applesmost apples are still too crisp when picked to get through the Victorio Strainer successfully. Apple wine requires the use of a cider press or the cooked juice method. Other fruits, such as rhubarb, require the cooked juice method. You can use this technique for some vegetables as well. This is the technique I use to make tomato wine. If you want to work with a harder vegetable, such as beets, then you need to use the cooked juice method. (I’ll describe the cooked juice method in a future post.) Let me know if you have any questions about this technique at [email protected].


Making Tomato Juice

One of the ways in which we store food is as juice. Rebecca makes juice out of a number of items including tomatoes, apples, pears, and grapes. Of all of the juice sources, however, tomatoes are probably the easiest to work with. We’re having a stellar tomato year, so Rebecca decided to make tomato juice today. Of course, the tomato juice starts out with tomatoes. We used an entire bushel as shown here.

TomatoJuice01

If you know how big a bushel basket is, you can see that our tomatoes are quite large this year. Fortunately, they’re also quite meaty. If you’re going to work with this many tomatoes (and believe me, this is only the beginning), you need some way to convert them to juice quickly. There are a number of tools available to perform the task, but our tool of choice is a Victorio Strainer:

TomatoJuice02

In order to use the Victorio Strainer properly, you need to provide two containers. The first holds the juice and it sits right below the output tray (the blue dish in the picture). The second holds the seeds and skin and it sits right below the strainer horn (the clear dish in the picture). Using glass works best for high acid foods such as tomatoes; otherwise, you can get a metallic aftertaste in the juice. Below the strainer (out of view of the picture) is a 5 gallon bucket to hold any liquid that comes out of the strainer (some leakage will occur) and to provide a place to put tomato that is cut out because it’s damaged in some way.

We use a two-person setup. One person (usually me) cranks the Victorio Strainer, while the other uses a knife and cutting board to cut up the tomatoes and place them in the hopper. A two-person team can whip through a bushel of tomatoes quite quickly. We did it in just over an hour this morning (and that included some cleanup and other chores, such as moving the juice to the stove).


I usually run the skins and seeds through the Victorio Strainer a second time to get all of the juice out of the tomatoes. Using this approach today netted an extra quart of juice. The downside to running the skins and seeds through a second time is that you could end up with extra seeds in the juice, along with bits of skin that many people dislike. The leftovers didn’t go to waste. After running the skins and seeds through a second time, I took the remains out to the chickens who were only too happy to eat every last bit.


The tomatoes today included a mix of red and orange tomatoes. Our garden has several varieties that compliment each other. As with a fine wine, a good tomato juice is the result of mixing several kinds of tomato together. Generally, if you have good tomatoes, you’ll get mostly juice and pulp, with very little in the way of waste as shown here.

TomatoJuice03

You’ll need a spatula to get the juice and pulp off the output tray. It also pays to clean off the outside of the strainer (the part with all of the holes in it) from time-to-time. A full bushel of tomatoes will easily fill a large pot like this one with space left over. (We asked a friend in the restaurant trade to purchase this professional quality pot for us, but the selection from Winware is quite nice.)

TomatoJuice04

Rebecca uses the instructions found in the Ball Blue Book to can the juice. That means raising the temperature of the tomato juice to 190 degrees. While the juice is cooking, Rebecca adds a little salt (not much is needed) and spices. Before she pours the juice into the jars, she adds two tablespoons of lemon juice to each quart jar to raise the acidity level. The juice doesn’t require pressure canning. Because this is an acid food, you can use a boiling water bath like the one shown here.

TomatoJuice05

In order to ensure the juice won’t spoil, you process it for 40 minutes after the water comes to a boil. Normally you can fit seven jars into a large pot like this one at a time. You could also use a canner, but we found that we kept burning the bottoms out of the pot and it was costing more than buying a good pot to begin with.

The result is these lovely quart jars of juice. One bushel of tomatoes produced 17 quarts of juice.

TomatoJuice06

After the jars have set for a while, you’ll notice some separation. It will look as if the water in the juice has separated from the pulp. This is perfectly normal. Just shake the quart before you open it to recombine the water and the pulp. Making tomato juice is an exceptionally healthy way to enjoy tomatoes anytime. You don’t have to use any particular kind of tomato to make juice. In fact, the juice usually tastes better (fuller) if you mix several kinds of tomatoes together, so you can make juice out of odds and ends used for other purposes. Let me know if you have any questions at [email protected].


Making Use of Those Oversized Zucchinis

You find it stashed beneath some leaves and it’s gargantuan—a zucchini that somehow missed your attention earlier. What do you do with this massive thing? Well, for one thing, you could eat it as normal. When you look at the nutritional benefits of the baby zucchini that most people eat, you might as well drink a glass of water for all the good it does you. The plant puts all its effort into the seeds, which aren’t developed at the time most people pick their zucchini. In fact, the seeds are simply packed with all kinds of good nutrition, including the highly sought Omega-3 and Omega-6 fatty acids. So, eating a larger zucchini has significant health benefits.

The secret is to learn when to pick your zucchini. We wait until they’re about 2 or 3 inches in diameter and the seeds are well developed, but you can still push a thumbnail through the skin. If you wait too long, the skin gets pretty tough. Yes, you can peel the skin off, but then you lose all of the wonderful fiber that zucchini can provide.

However, the subject of this post is to tell you about something interesting you can use those oversized zucchinis for. We use them to make a substitute for potato chips that provides some significant health benefits, yet taste absolutely amazing. Our technique isn’t completely healthy, but I’ll take them anytime over the store purchased chips. You begin by thinly slicing your Zucchini as shown here and placing them in a dehydrator.

Zucchini01

We sprinkle the tops of the zucchini with popcorn seasoning that we buy in bulk from a local store. The popcorn seasoning comes in four flavors: cheese, sour cream/onion, ranch, and bacon/onion. The cost for the product is extremely low when you buy in bulk quantities like this:

Zucchini02

A one pound container of the topping cost us $4.65 at the local bulk goods store. You don’t need to use a lot of the topping. Just a dusting will add a bit of wonderful flavor to the resulting chips as shown here:

Zucchini03

You can use any sort of zucchini to produce the chips. As you see, we have a variety in the dehydrator right now. However, our friends introduced us to the Clarinette Lebanese Squash, which has a light green exterior, and produces a superior chip. The chip retains its crispiness far longer and the zucchini itself is a better shape for chips in that it tends to grow bigger around in a shorter period without getting a hard skin.

To perform the drying, you set the dehydrator to 155º. Check the dehydrator every few hours. When the chips are crispy (in about six hours), the drying process is done. Rebecca packages the initial chips in resealable bags until she has enough, then she uses the Food Saver to store the chips in sealed bags that contain a little air to prevent chip breakage. Normally, she makes me two five-gallon containers of chips for the winter (along with two more five-gallon containers of apple chips that I’ll describe later). Here’s the preliminary result:

Zucchini04

We’ve never had any of our chips go bad. They should last at least a year if you seal them properly. So, what is your favorite alternative way to use zucchini? Let me know at [email protected].


Drying Herbs

This is the time of year when Rebecca starts drying the herbs that have been growing since early spring. Most of them have gotten quite tall. I’ll discuss one of my favorites in this post, lime mint, but she’s working on a host of other herbs as well. Of course, the drying process starts by picking the herbs. She started with a relatively large bunch of lime mint like this:

DryHerbs01

In order to dry herbs, you need some means of drying them. Some people use their ovens, which can sometimes damage the herbs. It’s possible to dry the herbs in the sun, assuming you have a nice place to do it and the temperatures are high enough. We use an American Harvest dehydrator like the one shown here.

DryHerbs02

It’s such a handy device that we own three of them and sometimes all three of them are in use drying various items. Rebecca makes vegetable chips and apple chips for me to use as snacks (among other items). She has also made venison jerky for me using one of these devices. Two of our dehydrators have the top mounted heater and fan, while the third is bottom mounted. When it comes to drying herbs, there really isn’t any advantage over using one or the other.

In order to dry the herbs, the leaves are stripped from the stem and then placed in a fairly shallow pile in the dehydrator trays. It’s perfectly acceptable to put the younger tops in whole, but you don’t want the really stiff stems in with the rest of the herbs. Here’s how a typical tray will look.

DryHerbs03

After you’ve finished filling trays with the herbs, you’ll need to set the dehydrator for 105 degrees. It takes about 6 hours to dry the herbs. During that time, you’re treated to the most exotic smells. The entire house was filled with the smell of fresh mint this morningit’s indescribable. The stack of herbs you saw earlier filled nine trays like this:

DryHerbs04

You’ll want to take the lid off from time-to-time to check the herbs (don’t do it any more than about once an hour). About halfway through the process, you’ll want to rearrange the trays, placing the bottom ones year the top (and vice versa) to ensure the herbs dry evenly. The herbs will look like this about halfway through the process.

DryHerbs05

When the herbs are completely dry, they’ll be a dark green. They’ll also crumble quite easily. Don’t be too shocked by the amount of herb you get for the initial investment. Here’s the completed lime mint from that entire bunch that you saw earlier (about 1/3 of a quart).

DryHerbs06

There is nothing quite so nice as home dried herbs. You’ll use quite a bit less of them than the herbs you get from the store. Rebecca places any extra herbs in a sealable bag, uses a Food Saver to vacuum seal the bag, and then places it in the freezer. This approach keeps the herbs extra fresh. Growing and preserving your own herbs makes for amazing meals and drinks (think herbal teas of your own design). Wouldn’t it be nice to be nice to be able to use your own herbs whenever you wanted? Let me know what you think at [email protected].


Making Brussels Sprouts Palatable

Rebecca and I grow a large assortment of vegetables. There are many reasons to grow a variety of vegetables, but you can distill them down into several important areas:


  • A balanced diet requires diversity because each vegetable has something different to offer.
  • Each grown year comes with different challenges and you can’t be assured that a particular vegetable will grow well in a given year.
  • Local nurseries will offer different choices in a given year, so unless you start absolutely every vegetable in your own greenhouse, you’re reliant on what the greenhouses have to offer.
  • Biodiversity ensures that your garden’s soil won’t be able to concentrate any particular pathogen.
  • Crop rotation is known to help garden soil by keeping any particular element from becoming depleted.

There are likely other reasons for growing a large variety of vegetables, but this list will suffice for the purpose of this post. I eat every vegetable we grow. In fact, I’ve never had a problem eating vegetables, having had insistent parents when I grew up who ensured I developed a taste for everythingeverything thing that is except Brussels sprouts. No matter how hard I tried, I just couldn’t convince myself that the little cabbages were good tasting. As a child, I’d swallow them whole to avoid tasting them at all (since eating them wasn’t an option).

Imagine my surprise then, when I got married and found that the one vegetable that my wife loved best was Brussels sprouts. Given a chance, she probably would have eaten them at every meal, leaving me wondering what to do next. So, I embarked on a quest to make the Brussels sprout more palatable while begging my wife’s indulgence in eating them only occasionally until I found a solution.

A good part of overcoming any vegetable dislike is to find a way to prepare them. Simply boiling Brussels sprouts in water and serving them with a bit of butter preserved the bitter taste all too well. My first discovery was that boiling Brussels sprouts (or any other vegetable for that matter) is simply a bad idea. Simmering tends to reduce the bitterness. I also discovered that lemon juice and garlic salt make the bitterness of many vegetables appear considerably less. So, here is my first Brussels sprouts recipe that made the vegetable at least sort of palatable.


Plain Brussels Sprouts


3 tsp

Garlic Salt

1/2 cup

Lemon Juice

3 tsp

Butter

2 cups

Brussels Sprouts

1/2 cup

Parmesan Cheese


Just
barely cover Brussels sprouts with water. Add lemon juice, garlic salt, and
butter. Simmer Brussels sprouts slowly until tender (don’t boil them). Remove
from heat and dish out into a bowl. Let cool for about 5 minutes. Coat top with
parmesan cheese. Serves 4.

Later I discovered that the method used to grow Brussels sprouts makes a huge difference. Most people pick them during the hot summer months. We found that by letting the Brussels sprouts continue to grow until late fall and only picking them after the second frost, that the Brussels sprouts were not only much larger, but also considerably sweeter. Since that time, we’ve found a few other vegetables that benefit (or at least survive) a light frost, including broccoli. (Most vegetables don’t like frost, so this technique does come with risks.) The combination of the new growing technique and my recipe made Brussels sprouts a somewhat regular visitor to the table, much to the happiness of my wife (who had waited patiently for many years for the day to arrive).

Recently I experimented with a new Brussels sprouts recipe that makes them taste even better. In fact, I’ll go so far as to say, I like them enough to eat them more often now. Here’s the fancier Brussels sprouts recipe.


Fancy Brussels Sprouts


1/2 tsp

Lemon Peel

3/4 tsp

Corriander

2 tsp

Garlic Salt

1/2 cup

Pomegranate Balsamic Vinegar

1/2 cup

Water

2 tsp

Butter

1/4 cup

Parmesan Cheese

2 cups

Brussels Spouts


Mix
the water, lemon peel, coriander, garlic salt, pomegranate balsamic vinegar,
and butter together in a pot. Bring the mixture near a boil, but not a full
boil. Add Brussels sprouts. Reduce heat to a simmer. Simmer Brussels sprouts
until tender. Remove from heat and dish out into a bowl. Let cool for about 5
minutes. Coat top with parmesan cheese. Serves 4.

Now you know my secret methods for dealing with Brussels sprouts. However, there are some important lessons here for the self-sufficient grower. First, make sure you pick your vegetables at the optimal time because timing is everything when it comes to taste. Second, the manner in which you choose to cook a vegetable is important. Taking time to make your vegetables taste good is an essential part of learning to like them. Let me know about your vegetables eating experiences at [email protected].

Growing Herbs (Part 1)

We have a number of gardens on our property and some of them are quite specialized. For example, Rebecca grows a wide variety of mint. She has the usual spearmint, of course, but she grows a huge number of other mints. My personal favorite is lime mint. It actually a lime flavor underlying the mint taste. I find it refreshing during the winter months. Lime mint shares most of the same characteristics of other mints. It looks like this:

LimeMint

Some of the mints she grows don’t even have mint in the name. Of course, there’s catnip, a form of mint enjoyed mainly by cats. However, there is also lemon balm, another favorite of mine because it has a perky flavor that’s good during the daylight hours (lime mint is more for the evening to relax). You can see by this picture that the two mints look similarthe best way to tell mints apart is to look at the leaf size and shape, and then rub a bit on your fingers and sniff.

LemonBalm

In addition to these mints, we also have orange mint, chocolate mint, and others. Rebecca will wait until these plants grow a bit taller and then take some (but not all) of the stalks inside for drying. She picks the individual leaves off and dries them in a food dehydrator. Another post will discuss this technique. We’re both strong advocates of dehydrating as a way of saving on storing costs and producing fat-free treats.

Lest you think our herb garden is entirely devoted to mint, we grow a wide variety of other plants as well. A favorite for soups is lovage, which has a strong celery taste. It grows as tall stalks with sparse leaves. Near the middle of the season the lovage plant will produce flowers. You can use the seeds as celery seed. Here’s what lovage looks like (we keep it in a tomato cage so it doesn’t blow over).

Lovage

I use a lot of rosemary and thyme in my cooking, so Rebecca grows quite a bit each year. Rosemary has somewhat thick, almost cylindrical leaves and a strong aromatic odor. It does amazing things for chicken, lamb, and pork. Because we eat a lot of chicken, we use a lot of rosemary. Here’s what the young rosemary plant looks like:

Rosemary

By the way, just in case you’re wondering, yes those are nut shells. We don’t waste anything, not even nut shells. They actually make a fine addition to the herb garden soil and keep it loose. Eventually, the nut shells rot down and make nice compost for the herb garden.

Most people don’t realize it, but there are several different kinds of thyme. This year we have lemon, lime, and orange thyme. All three have a thyme taste and small, but with subtle differences. The plants actually look quite different, so it’s somewhat easy to tell them apart. Here’s the lemon thyme:

LemonThyme

Notice that the lemon thyme has bits of yellow on its leaves. The leaves are also a bit rounder than other kinds of thyme. Compare the lemon thyme to the lime thyme shown here:

LimeThyme

The lime thyme leaves are larger, brighter green, and a little elongated when compared to the lemon thyme. These leaves also last the yellow spots on them (making it a less pretty form of thyme in my opinion). Our newest kind of thyme is the orange thyme, which looks sort of like the lime thyme as shown here.

OrangeThyme

However, as you can see, the leaves of the orange thyme are much darker. In addition, the stems have a significant reddish cast to them. All three are thyme, but each has subtle differences that will make a big difference in cooking. We’ll use all three types with meat dishes, just like the rosemary.

I can’t do our herb garden justice in a single post, so expect to see more as the summer progresses. In the meantime, let me know if you have any questions at [email protected].


Making Wine – Day 31

Welcome to Day 31the best day of the process . The previous post, Making Wine – Day 28, described how you can clear your wine. At this point, your wine should be clear. It may not be pristine, but you shouldn’t see more than a few particles here or there. If you see a bit of pectin haze, you probably won’t be able to clear it easily at this point and will need to amend your recipe to obtain better results in the future. However, if you’re seeing more than a few particles, wait a few additional days before bottling. If the particles don’t clear up in two or three more days, you might want to repeat the Day 28 processing. Professional wineries actually have a filtering system they use to improve the clarity of their winethe home wine maker has only time and technique to rely upon.

Assuming that your wine is clear, you’ll want to sterilize enough bottles to hold it. A single gallon container will normally provide four bottles of wine, plus a little leftover. These dregs are usually drinkable as long as you don’t pick up too much sediment, but you don’t want to bottle them. Choose good quality wine bottles. The type with the screw top don’t hold up well and you could even break the bottle during the corking process. Use the one-step sterilizer to wash the bottles and make sure you get any sediment out of the bottles. It helps to have a bottle brush designed specifically for wine bottles.

Before you can bottle your wine, you need to have a supply of corks and a corker. Many kits come with tasting corks that are absolutely worthless for storing your wine. These corks are probably good for three or four months worth of storage in optimal conditions and look like this:

WineDay31_1

What you want instead is an actual wine cork that looks like this:

WineDay31_2

You can find them in several sizes and in a number of materials. My personal preference is actual cork, but I know of many people who are able to use the plastic corks with good results. It’s essential to choose a cork that fits the bottle you usea #8 cork fits the standard bottle used by wineries and normally found in kits. You may have to use a different size if you choose to store your wine in a 1.5 liter bottle. The choice of cork determines the corker you use. Even a cheap floor corker (required to use anything larger than a #8 cork) will cost you a small fortune. That’s why I chose standard sized bottles, the #8 corks, and a Portuguese twin lever corker that looks like this one:

WineDay31_3

The problem with this corker is that it does require a fair amount of arm strength to use. Some people much prefer the Gilda compression hand corker, which is moderately priced and requires about half the strength, or a bench model corker, which is whopping expensive and requires even less strength to use. The kind of corker you get is also dependent on how many bottles you plan to cork. Since I only make 2 gallons at a time, I get by corking 8 bottles and using the corker that I do works fine.

A problem that many new wine makers encounter is overfilling the bottle. If you overfill the bottle, you’ll find it nearly impossible to cork. In addition, the cork won’t seat fully (making spoilage more likely). It’s even possible that you could crack the bottle; although, I’ve never personally had this happen. Use the racking technique described on Day 10 to fill the bottles right to the point where the neck and shoulder meet like this:

WineDay31_4

After you fill the bottle, insert the cork into the corker. Normally, the corker will have a slot you use to load it as shown here:

WineDay31_5

When you place the corker on the bottle, make sure it sits squarely and fully on the bottle top as shown here:

WineDay31_6

Push down on both handles (or on the single handle as determined by your corker) with an even, steady pressure. Eventually, the cork will seat properly and fully in the bottle. At this point, you can label your bottle and dress it up a bit (if desired). Even though your wine is drinkable at this point, you’ll normally wait three to six months for it to continue mellowing and settling. Store your wine in a wine holder designed to keep the cork wet in a cool, dry place. That’s ityou’ve completed the wine making process in a mere 31 days! So, are there any questions about day 31? Let me know at [email protected].

This post ends my basic series of posts about wine. Of course, there are all kinds of other topics I can cover. Let me know if you have a personal preference on what I discuss next in this blog.


Making Wine – Day 28

At this point, it doesn’t appear that there is any activity in your wine container, but activity still exits. Yes, the fermentation process is complete, but the wine is still in an early state. When you remove the air lock and take a whiff, you smell something with a distinct wine odor. It’s even possible to drink the wine now and you might possibly enjoy yourself, but you’d be cutting the process short.

The next step is a seemingly odd one because it requires a certain amount of wizardry on your part. You might have noticed that your wine is still a tiny bit cloudy and that it doesn’t quite have the taste you wanted. That’s what this post addresses. This is the fit and finish phase of your winethe phase that turns your homemade wine into something that could rival the best wine on the market.

Begin by racking the wine using the same procedure found on Day 10. Make sure you clean your container after you pour its contents into another container. Once you have the wine in a suitable container, put a small amount in a small glass. If you want to follow the fancy way of doing this, you’ll swirl the wine around a bit, inhale deeply, and then sip it gingerly. Personally, I find that taking a good deep smell and then tasting the wine using smallish sips is much better. If you used the Montrachet yeast, you’ll find that your wine has a nice odor, but that it’s probably too dry and that the flavor hasn’t quite come out. In short, the wine will be a little disappointing.

To overcome this problem, you add sugar to your wine. Now, remember that your wine is stabilized at this point, so you don’t want to make the wine horribly sweet (a problem I’ve noted in more than a few homemade wines) because there isn’t any yeast to clean up the excess. Add a little sugar at a time and then repeat the smelling and tasting process. Small sips are best. If you find that your nose is working less efficiently by the third or fourth try (I always do), give it a bit of a rest. Inhale some coffee grounds (if you have it around), then try again. The sugar you add at the end of the process is one the place where no one can offer you truly useful adviceeveryone has a different standard.

Now that your wine is properly sweetened, you need to perform one more step. This particular step caused me no end of consternation when I first tried it. It’s time to clarify your wine. Clarity problems come in three forms:

  • Pectin Haze: Pectin found in many fruits will cause a haze in your wine if not removed during the fermentation process. The haze is nearly impossible to remove at this point, but this step will help a little. However, most people won’t even notice it. The haze is slight in most cases. Amend your recipe to use more pectic enzyme (see the Day 1 post for details).
  • Free Floating Particles: Some wine ingredients, such as pumpkin (makes a wonderful warmed wine), will leave particles behind. The best way to avoid this problem is to filter your ingredients initially, before you add them to the wine. You can also use a two-step fermentation process that takes significantly longer than my wine making technique. This step will remove at least some of these free floating particles. Letting the wine rest for an extended period will also help.
  • Yeast Cells and Tanin Complex Materials: Your wine will almost certainly have yeast cells and other materials left over after the fermenting process. These particles are smaller than the larger particles left over from the main ingredient (such as pumpkin) This step always resolves this sort of clarity problems.


You need to obtain some Sparkolloid powder. Not every supply store stocks it, but the effort of getting this product is more than repaid by a superior wine. Add 1 tablespoon to 1¼ cup of vigorously boiling water and stir for five minutes (keep the pan on the stove while you stir). When I first started using this product, I tried all sorts of other time intervals, but you really do need to stir it for the full five minutes to obtain optimal results.

This action doesn’t apparently do muchat least, not much that you can see. What you’re actually doing is creating a static charge in the mixture (hence the need for vigorous stirring). This static charge will help clear your wine, much like an ion filter cleans the air in your house. The fine particles floating around in your wine are attracted to the charged particles in the Sparkolloid powder and drop to the bottom of the container. Interestingly enough, you’ll also find that this step improves both the taste and smell of your wine.

After you stir the Sparkolloid powder for five minutes, add 1/6 cup (8 teaspoons) of mixture to each gallon of wine. Mix it in thoroughly and pour the wine back into the container. Close the container using the airlock as usual. Put the wine containers in a cool location. That’s it! So, are there any questions about day 28? Let me know at [email protected].

Making Wine – Day 23

If you’ve been following this series of posts, you’ll know that Monday was actually day 23, but I’m posting today about it due to some scheduling conflicts. The last post was on Day 10. At that time, the wine fermentation was slowing down, but still active. By the time you get to Day 23, the wine has basically stopped fermenting. You might see a line of tiny bubbles at the top of the container, but that’s about it.

You still don’t have drinkable wine. If you tasted it at this point, nothing terrible would happen, but it wouldn’t have a good wine taste just yet. In fact, your wine may still have a yeasty odor to it. The step you perform today is important because it helps stabilize your wine so you start getting the right odor and flavor.

First, look at the bottom of the container. If there is little or no sediment, you don’t have to rack your wine again. However, if you see more than 1/8-inch of sediment, consider racking your wine using the same instructions as Day 10.

At this point, pour about 1/4 cup of your wine into a cup. Add 1/2 teaspoon of potassium sorbate per gallon to the wine. Potassium sorbate is a yeast inhibitor and will help stabilize your wine. It doesn’t stop active yeast from working, but it does stop the fermentation process from restarting. The potassium sorbate mixes with extreme ease. Pour the wine back into the container and stir it using the handle of your spoon. Because the potassium sorbate mixes easily, you don’t have to stir the wine a lot.

Replace the airlock on your container. Move your containers to a cooler location (between 40 and 60 degrees Fahrenheit) to aid in stabilization. That’s it! So, are there any questions about day 23? Let me know at [email protected].


Wine Making – Day 10

At this point, your wine has been perking away for ten days. The number of bubbles you see is decreasing quite a bit. If you’re still seeing one bubble come from the air lock every ten to fifteen seconds, the wine is doing great. However, if the wine stopped bubbling before you reach this point, the batch is stuck and you need to follow the procedure in my Wine Making – Unsticking a Batch to fix it. Allow some extra time for the wine to ferment properly.

Normally, this is the time when you start your secondary fermentation. In order to do that, you rack the wine, which means using some type of tubing to siphon the wine out of the fermentation container into another sterilized container. Sterilize this second container completely using a one-step sterilizer designed for wine making. Never use a container that isn’t absolutely clean to store your wine.

You can use a second fermentation container, or do what I doempty the contents into a sterilized pan, sterilize the original container, and then use a funnel to pour the wine back into the container. The purpose of this activity is to get rid of the sediment that has accumulated at the bottom of the fermentation container and to stir the wine up so that the yeast can get to the remaining sugar.

You have several options when it comes to siphons. Some people use a racking cane (tube) to perform the taskothers use a siphon kit. I have a semi-rigid piece of tubing that came with my kit and it looks like this.

WineDay10_1

Notice the tip on the right side. This is a racking tip and it keeps the end of the cane out of the sediment. The flow is redirected upward so that you get as little as the sediment as possible from the fermentation container, yet maximize the amount of clear wine you get. Here is how the tip looks close up.

WineDay10_2
WineDay10_3

The end of the tip is angled so that you can move it right into the bottom of the container. Notice how the end of the tip grabs the tube, yet leaves space for the wine to flow through.

Never taste the wine at this point. It contains live yeast and you’ll get a bellyache for your efforts!

In short, Day 10 is basically a time to start clearing the wine and ensure you get the maximum value for your efforts. It may seem like a simple step, but it’s critical to the success of the wine. So, are there any questions about day ten? Let me know at [email protected].