Finding the Right Zucchini Seeds

Over the years, I’ve had a number of people write me about my zucchini posts, especially the one entitled, Making Use of Those Oversized Zucchinis. A few people have pointed out that their particular kind of zucchini didn’t work well for chips. It’s true. You can’t use certain types of zucchini for chips. Especially bad are the yellow crooked neck squash that turn hard unless you pick them exceptionally small. The common straight zucchini works quite well, but you must ensure the skin is still soft enough before you make chips. If you can easy stick a fingernail through the skin, you’re probably fine—no matter how big the zucchini is physically (and bigger really is better).

The kind of zucchini I like best is the Lebanese Summer Squash. My previous posts had pointed to a place where you could get the seeds for this type of zucchini, but unfortunately, even though the link still works, the site shows that the seeds are constantly out of stock. The new link in this post will help you find the seeds you need to get started. Unlike many kinds of zucchini, this particular plant grows quickly and you still have time to get your seeds planted. You don’t have to start them in the house—just plant them in the ground and make sure you keep them watered.

Zucchini chips are a healthy alternative to the kinds of chips you get in the store and they’re absolutely delicious. Of course, you can make other sorts of chips too, something I discuss in Making Dehydrated Chips. Let me know if you have any questions about making them at [email protected].


Herbal Harvest 2014

Every year I dry the herbs found in the herb garden for use during the winter months. You can see the technique used in the Drying Herbs post. I’m still using my American Harvest dehydrator to get the job done. However, since the time I wrote that original post, I’ve found a way to improve the potency of the resulting dried herbs. Each layer now has a solid sheet on the bottom. The solid sheet is supposedly designed for fruit leathers and for drying other liquids. The reduction in air flow means that the drying process takes longer, but it also means that fewer of the oils (and other useful elements) found in the herbs are wafted away by the air flow. As a compromise, you can always use the screens instead. The screens keep small particles from falling through, but they also reduce the air flow that robs your herbs of their flavor. The most important issue when drying herbs is to ensure you check their status often and keep the temperature at 95 degrees Fahrenheit (35 degrees C). A higher setting will cause the oils in the herbs to dry out and make your herbs less effective as a result.

I’m also finding that keeping the herbs as whole as possible for storage prolongs their life. You can’t store the herbs very well without crumbling them a little, but keeping the leaves as large as possible appears to help retain the oils. Crumble the leaves or even grind the herb to powder immediately before you use it to maximize the flavor. The less you process the herb, the longer it’ll store.

This year’s herb garden didn’t do well in some areas, but it did exceptionally well in others. The lime, orange, and chocolate mints were all quite potent this year. I tried a few cups of tea to see how they’d brew and I ended up using less than normal. My personal favorite is the lime mint. The chocolate mint is suitable for use in tea, cooking, and jellies—lime and orange mints are characteristically used for tea.

Herb potency varies from year-to-year based on environmental factors, so it’s essential to consider potency as part of using the herbs. I’m thinking about trying to come up with some sort of rating system that I can put right on the package before I store the herb so I have some idea of how much to use later. As a contrast to these three mints, the grapefruit mint hardly tasted like mint at all. Given that it has proven hard to grow, I’m thinking about using the space for another kind of herb.

Sage also had a wonderful year this year. The plants grew fairly large and are robust in flavor. I grew both golden pineapple and common sage. The golden pineapple sage has larger leaves and a stronger taste. It also takes a lot longer to dry than the common sage. In most years, it appears that the common sage actually produces more output, but this year the golden pineapple sage was the winner.

The thyme and rosemary were disappointing this year, but still usable. I actually have three kinds of thyme: lime, lemon, and common (also known as English thyme). Of the three kinds, the lime has the strongest taste when used fresh, but the common works best for cooking. I find that the lemon has a subtle flavor, but can be hard to grow. Unfortunately, I didn’t get any lemon thyme this year, but I did get enough of the other two to make up for it. The only kind of rosemary I can grow is common rosemary. I’m thinking about trying again with some other varieties next year, but the rosemary definitely doesn’t overwinter here in Wisconsin (as contrasted to thyme, which overwinters just fine).

I’ve talked about lovage before (see the Loving that Lovage! post for details). This year I ended up with a whole pint of seeds that I’ll use for canning and for dishes like cole slaw. It was also a decent year for leaves that will end up in soups and other kinds of cooking where a strong celery flavor is desirable.

Weather, soil, and overall care of your herb garden all determine what kind of crop you get each year. Working with herbs can be quite fussy, but also quite rewarding. The quality of herb you get from your own garden will always exceed anything you buy in the store, so the effort is worth it when you want the best results from cooking. Let me know about your herb experiences at [email protected].


Making Dehydrated Chips

Rebecca dehydrates several kinds of chips for us to eat during the winter months. I talked about the technique used to create zucchini chips in the Making Use of Those Oversized Zucchinis post. The techniques in that post also work well for vegetables such as eggplant, which has a slight peppery taste when dehydrated. We have found that the American (globe) and Italian eggplants work best for the purpose—the thinner varieties, such as the Japanese eggplant, tend to get tough. There are a lot of different kinds of eggplants, so make sure you choose a variety that will dehydrate well.

Along with eggplant, Rebecca has made dehydrated potato chips for us and I’m sure will try other vegetables as time permits. The same technique used for zucchinis works just find for any globular vegetable that has a moderate level of moisture. You want to be sure that the chips are crispy dry when finished to ensure they have the maximum storage time and have a satisfying crisp feel when chewed. Try to get the chips as evenly sliced as possible. Rebecca used a mandoline for the purpose. I particularly like the Kitchenaid model that she has because it includes a guard to keep her fingers safe and some attachments for additional cutting methods, such as julienne.

It’s also possible to make fruit chips. For example, if you use an apple peeler, you can create spiral cut apples. Cut through the spiral (top to bottom) and you end up with individual apple slices that you can dry as chips. The basic technique for drying apples is the same as zucchini, but there are a few things to consider.

Rebecca dehydrates apples using two flavorings. Of course, the sugar cinnamon combination is a must have selection. Last year she tried using cheese powder on some apples and we liked it so much that it has become the second favorite. The cheese powder makes the apple chips taste like an apple pie with a slice of cheddar on it. In both cases, you must alter the zucchini technique a little to obtain usable results.

The first difference is that you absolutely can’t use a dehydrator with the motor on the bottom. The fruit chips will produce copious amounts of liquid that will get into the motor and cause the premature death of your dehydrator. When drying apples and other fruit, use only a dehydrator with a top mounted motor so that the liquid won’t cause problems. In fact, we highly recommend placing the entire dehydrator on a tray, just to make sure that any liquid that leaks out doesn’t make a mess.

The second difference is that you don’t dip the chips as you might do with vegetable chips. Dust the top of the fruit with the flavoring of your choice. Using this approach makes the resulting product more enjoyable because it isn’t overly sweet (or sometimes bitter). It also reduces the amount of liquid the chips produce as they dry. You get just as much flavor by lightly dusting the top as you would by dipping the fruit, but at a significantly reduced cost. When the fruit produces copious liquid, the extra flavoring you used ends up in the tray anyway, so there is no point in overindulging.

The third difference is that fruit chips tend to a be little flexible when completely dry. They won’t dry crispy like vegetable chips will. Think more along the lines of dried fruit or a fruit leather. So far we haven’t noticed any difference in longevity. The fruit chips will most definitely last a year when kept in an appropriate container.

A number of people have asked how we store our chips to keep them fresh. We use five-gallon-food-grade-buckets with tear tab lids. Make absolutely certain you use food grade buckets because buckets made with other sorts of plastic could contaminate your food. These are the same buckets used by your local restaurant for everything from pickles to potato salad. In order to get the lids off, you must have a bucket lid wrench. Trying to get the lid off otherwise will be difficult to say the least. Even with the wrench, you must work carefully around the lid top to get it off. These buckets seal extremely tight and they provide great storage even in a basement or other less than ideal setting.

Dehydrated food in the form of chips makes for ready, delicious, and nutritious snacks. None of our chips has the slightest amount of oil or preservatives in them. We’ve tested this technique for up to two years with great results. The two biggest considerations are that you must make absolutely certain that the chips are completely dry and that you seal them in an airtight container, such as the five-gallon-buckets we use. Using this approach is also good for the planet because you don’t use any electricity to keep the food usable. Once the food is dehydrated, you simply open the bucket, grab what you want, and eat.

What sorts of vegetables and fruits do you think you might try to store using this approach? Is this an approach that you find appealing? Let me know your thoughts at [email protected].


Fun is Where You Find It! (Part 3)

Anyone can create work, but it takes some effort to create fun at times. It wasn’t very long after we started becoming self-sufficient that I discovered there would be a time each year where I’d need to work full time at helping Rebecca preserve the food from our orchard and garden. Of course, most people turn such events into work. After all, you’re working relatively long hours lifting heavy things in high temperatures and humidity. This is coupled with the repetitive motions needed to peel fruit and mixed with a bit of boredom waiting for things to happen—at least, that’s what happens if you’re most people. We’ve turned the event into Harvest Festivala party of sorts that we have every year. It has turned into my second favorite week of the year, right behind Christmas week, which will always remain my favorite.

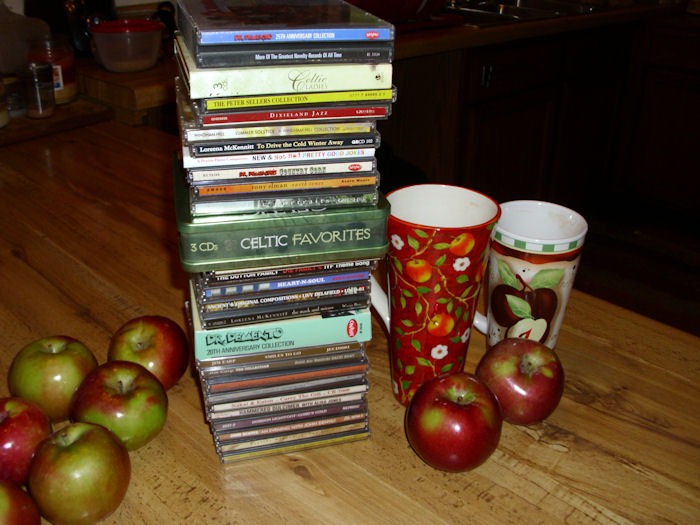
So, what makes this week so special? Well, it starts out with some special mugs and music. We use festive mugs during Harvest Festival that we don’t really use any other time of the year, except when we’re performing other food preservation tasks. In short, these mugs are special. The music is similarly special. Yes, we do listen to some of it at other times, but the collection as a whole is reserved for Harvest Festival. Rebecca also sets the mood with scented candles that give the house a warm feeling.

HarvestFestival01

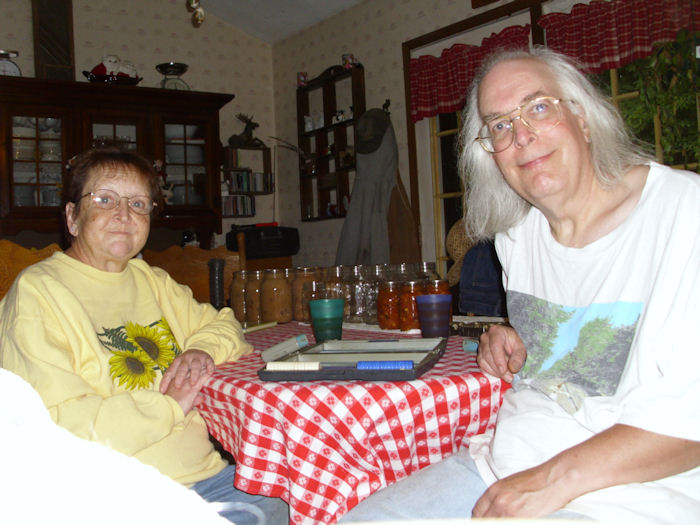
There are also times where we’re waiting for something to happen. We could probably get other work done, but we’re already working pretty hard, so some fun is in order. Rebecca and I play an interesting sort of Backgammon called Acey-Ducey that I learned while in the Navy. It’s easy to learn and a lot of fun to play. The games are short, so you can play a number of them quickly. Because the game is a mix of skill and chance, no one has the corner on winning. Of course, we have to drink some apple cider while we’re playing.

HarvestFestival02

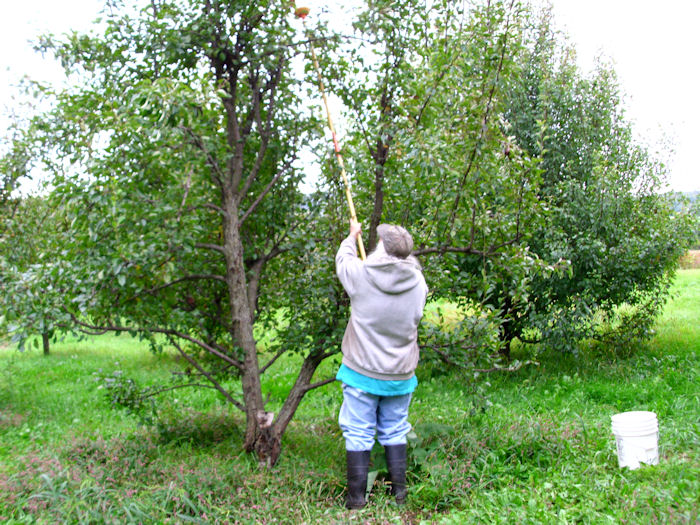
The festival begins by picking the fruit from our trees. In fact, the entire first day is spent outside at the fruit trees. Some of the fruit is quite high, so I have to use a fruit picker to get it.

HarvestFestival03

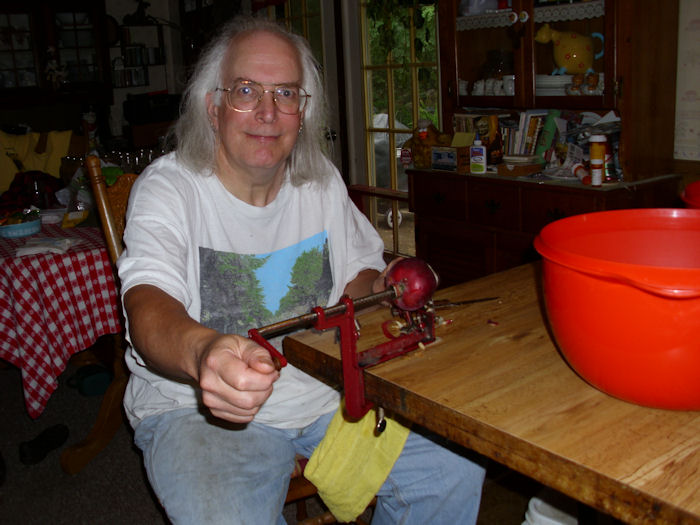
After the fruits and vegetables are in the house (or at least enough to get started), we’ll start processing it. Just how we accomplish that task depends on what we’re making at the time. Rebecca started this year with pear-sauce (think applesauce made with pears). We also made pear chunks, applesauce, apple chips, apple rings, apple jam, and a host of other fruit-related confections for the larder.

HarvestFestival04

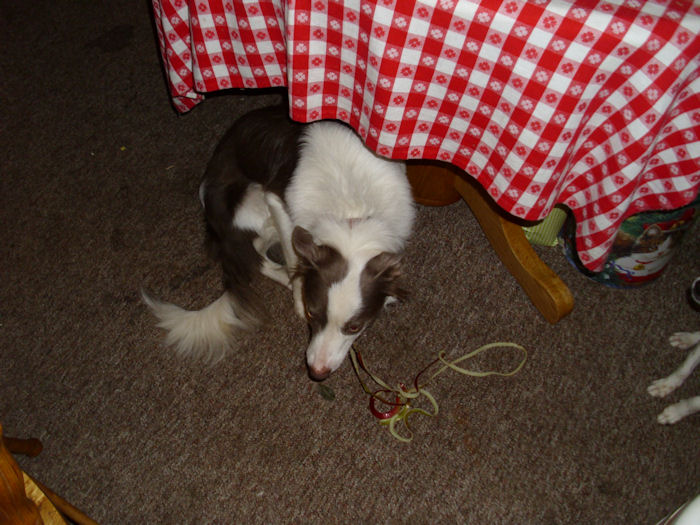
Our “kids” get involved with Harvest Festival too. The dogs are especially fond of apple spaghetti, which is the long streamer of peel that comes off of the apple. Here’s Shelby enjoying some apple spaghetti.

HarvestFestival05

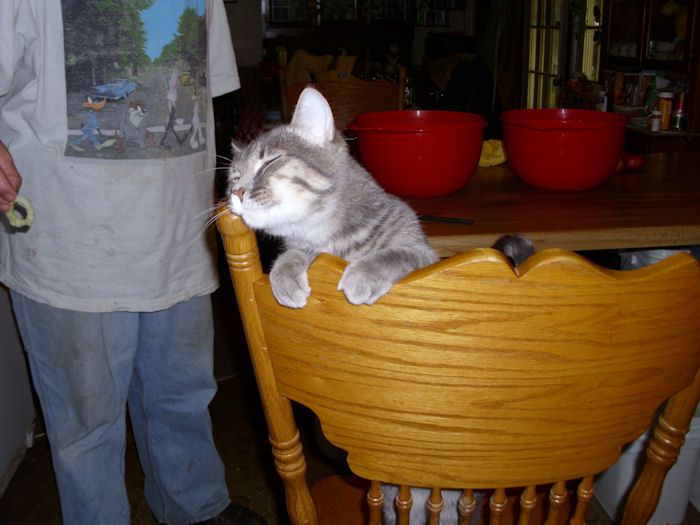
The kids are known to do all sorts of cute things during Harvest Festival. Sometimes they’ll sit with us; other times they’ll make strange noises or grab attention in some other way. Smucker decided that he was going to be extra cute to get snack from us.

HarvestFestival06

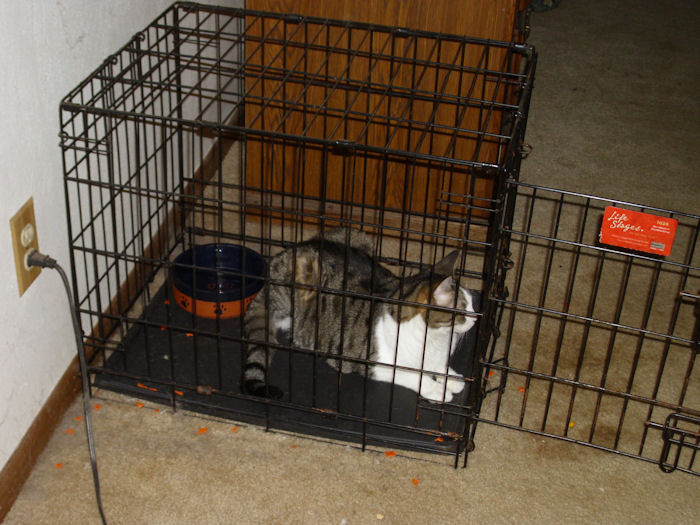
Bubba has decided that he really likes Reese’s kennel, which has Reese confused, but us laughing. We found Bubba in the kennel quite a few times during Harvest Festival.

HarvestFestival07

Because the stove is being used to process food, we don’t have any place to cook—at least, not in the house. I try to barbecue each day during Harvest Festival so we have special food as well. Normally, we don’t get any beef, but I decided to make some really thick and juicy burgers for us one day. There is also plenty of nibbling going on with all of the available fruit. Although we keep some fruit for fresh eating, I think we eat the most fresh fruit during Harvest Festival, which makes the week quite special for that reason alone.

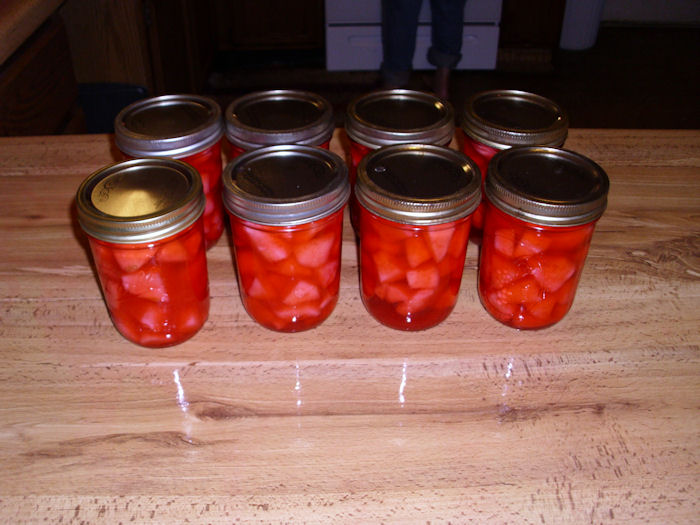
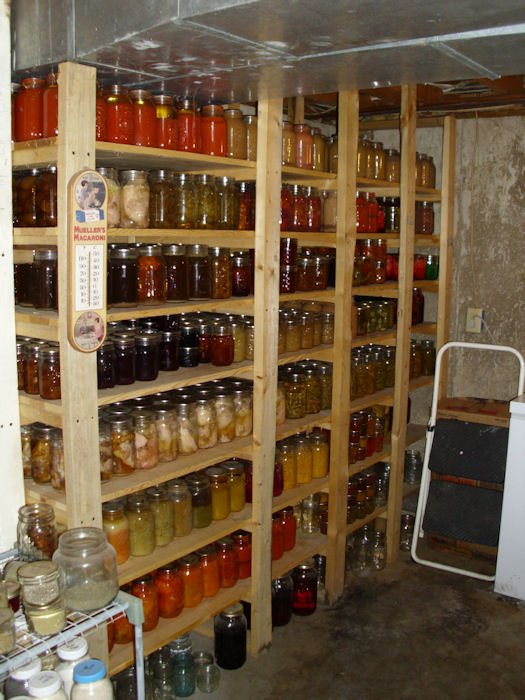
The result of all our work is jar upon jar of food for the larder. One of my favorites this year is the pear chunks. Rebecca makes regular, minted, and spiced. They’re all different colors to make them easy to find on the shelves.

HarvestFestival08

This year we processed 500 pounds of fruit, 480 pounds of tomatoes, 72 pounds of chicken, too many zucchinis to count, and a variety of other items all in one week. The result is that our larder is looking pretty nice (this is just half of the shelveswe also have two freezers and dry storage areas).

HarvestFestival09

There is still more to process in the garden. The beans are drying at this point. We’ll also be digging potatoes soon. I’m sure the zucchinis will produce a little more and the winter squash needs to be picked. However, Harvest Festival is our big push for the season and we have a lot of fun getting the food from our gardens and orchards to the larder. If you’re planning on a self-sufficient lifestyle, you’ll probably find a similar need for a “big push” week at some point during the season, depending on what you grow. Let me know if you have any question at [email protected].


Making Use of Those Oversized Zucchinis

You find it stashed beneath some leaves and it’s gargantuan—a zucchini that somehow missed your attention earlier. What do you do with this massive thing? Well, for one thing, you could eat it as normal. When you look at the nutritional benefits of the baby zucchini that most people eat, you might as well drink a glass of water for all the good it does you. The plant puts all its effort into the seeds, which aren’t developed at the time most people pick their zucchini. In fact, the seeds are simply packed with all kinds of good nutrition, including the highly sought Omega-3 and Omega-6 fatty acids. So, eating a larger zucchini has significant health benefits.

The secret is to learn when to pick your zucchini. We wait until they’re about 2 or 3 inches in diameter and the seeds are well developed, but you can still push a thumbnail through the skin. If you wait too long, the skin gets pretty tough. Yes, you can peel the skin off, but then you lose all of the wonderful fiber that zucchini can provide.

However, the subject of this post is to tell you about something interesting you can use those oversized zucchinis for. We use them to make a substitute for potato chips that provides some significant health benefits, yet taste absolutely amazing. Our technique isn’t completely healthy, but I’ll take them anytime over the store purchased chips. You begin by thinly slicing your Zucchini as shown here and placing them in a dehydrator.

Zucchini01

We sprinkle the tops of the zucchini with popcorn seasoning that we buy in bulk from a local store. The popcorn seasoning comes in four flavors: cheese, sour cream/onion, ranch, and bacon/onion. The cost for the product is extremely low when you buy in bulk quantities like this:

Zucchini02

A one pound container of the topping cost us $4.65 at the local bulk goods store. You don’t need to use a lot of the topping. Just a dusting will add a bit of wonderful flavor to the resulting chips as shown here:

Zucchini03

You can use any sort of zucchini to produce the chips. As you see, we have a variety in the dehydrator right now. However, our friends introduced us to the Clarinette Lebanese Squash, which has a light green exterior, and produces a superior chip. The chip retains its crispiness far longer and the zucchini itself is a better shape for chips in that it tends to grow bigger around in a shorter period without getting a hard skin.

To perform the drying, you set the dehydrator to 155º. Check the dehydrator every few hours. When the chips are crispy (in about six hours), the drying process is done. Rebecca packages the initial chips in resealable bags until she has enough, then she uses the Food Saver to store the chips in sealed bags that contain a little air to prevent chip breakage. Normally, she makes me two five-gallon containers of chips for the winter (along with two more five-gallon containers of apple chips that I’ll describe later). Here’s the preliminary result:

Zucchini04

We’ve never had any of our chips go bad. They should last at least a year if you seal them properly. So, what is your favorite alternative way to use zucchini? Let me know at [email protected].