Harvest Festival 2016

This has been an interesting year in the garden. In looking at the Harvest Festival 2015 post, I see a year that offered me what I would call the standard garden items. Not so this year. The problems began with a late frost that wiped out my grapes and pears. In fact, it nearly wiped out my apples as well, but I learned a curious lesson with the fruit this year because of the apples. All the outer apple trees had no fruit, but those in the center of the orchard did have some fruit. In other words, the trees on the outside protected those on the inside. I didn’t get a lot of fruit this year, but it isn’t a big deal because my larder is setup to provide multiple years’ worth of any particular item. The lesson I learned was not to prune too heavily when the weather is uncertain (as it was this year). In fact, the reason the apples survived as they did was because I didn’t have time to prune them much at all.

The garden also behaved quite oddly this year due to the weather. The Wisconsin winter was semi-mild this year without nearly as much snow as normal, so different bugs survived than normal. In addition, the weather was either hot or cold, without a lot of in between this summer. It has also been the fourth wettest summer on record. All these changes produced prodigious amounts of some insects that I don’t normally see and the vegetables didn’t produce as expected.

As an example of odd behavior, I normally have a hard time growing cauliflower. This year I grew huge cauliflower and one plant is attempting to grow a second head, which is something that never happens here. On the other hand, broccoli, a plant that always does well, didn’t even produce a head this year. All I got were some spikes that didn’t taste good (they were quite bitter). The rabbits didn’t even like them all that well. The cauliflower is usually plagued by all sorts of insects, but this year there was nary a bug to be seen. The point is that you need to grow a variety of vegetables because you can’t assume that old standbys will always produce as expected.

Two other examples of odd behavior are okra (which normally grows acceptably, but not great) and peppers (which often produce too well for their own good). This year I’m literally drowning in beautiful okra that gets pretty large without ever getting tough, but the peppers are literally rotting on the plant before they get large enough to pick. I’m not talking about a few peppers in just one location in the garden either—every pepper plant completely failed this year.

Location can be important and planting in multiple locations can help you get a crop even if other people are having problems (and I didn’t talk to a single gardener this year who didn’t have problems of one sort or another). One example in my case were potatoes. I planted six different varieties in six completely different locations in the garden. Five of those locations ended up not producing much of value. A combination of insects destroyed the plants and tubers. All I got for my efforts were rotting corpses where the potatoes should have been. The last area, with Pontiac Red potatoes, out produced any potato I’ve ever grown. The smallest potato I took out of this patch was a half pound and the largest was 1 ¼ pounds. I didn’t even find any of the usual smallish potatoes that I love to add to soup. The potatoes were incredibly crisp and flavorful. The odd thing is that this patch was in an area of the garden that doesn’t usually grow potatoes very well.

A few of my garden plantings didn’t seem to mind the weather or the bugs in the least. My peas did well, as did my carrots. I grew the carnival carrots again because the colors are so delightful and even canned, they come out multiple colors of orange, which dresses up the shelves. I also grew of mix of yellow wax and green beans this year. The two beans work well together canned. They have a nicer appearance than just yellow or just green beans in a can. However, because the two beans have slightly different tastes, you also get more flavorful meals out of the combination.

I still stand by the statement I made long ago when starting this blog, every year is both a good and a bad year. Because I planted a wide range of vegetables and ensured I didn’t plant all the vegetables in a single location in the garden, I ended up with more than enough vegetables to can or freeze. No, I didn’t get all of the vegetables that I had hoped to get, but I definitely won’t starve either. My larder is quite full at this point. Let me know your thoughts on ensuring a garden has a significant variety of items in it to ensure success at [email protected].


Harvest Festival 2015

Harvest Festival is one of my favorite holidays of the year. What, you haven’t heard of Harvest Festival? Well, it happens each year sometime during September. The date isn’t precise because you just can’t hold Mother Nature to a specific time to make the majority of the fruits and vegetables ripe. That said, the harvest does happen every year and it’s a time to celebrate, even though it also means hard work. I’ve presented Harvest Festival in the past:

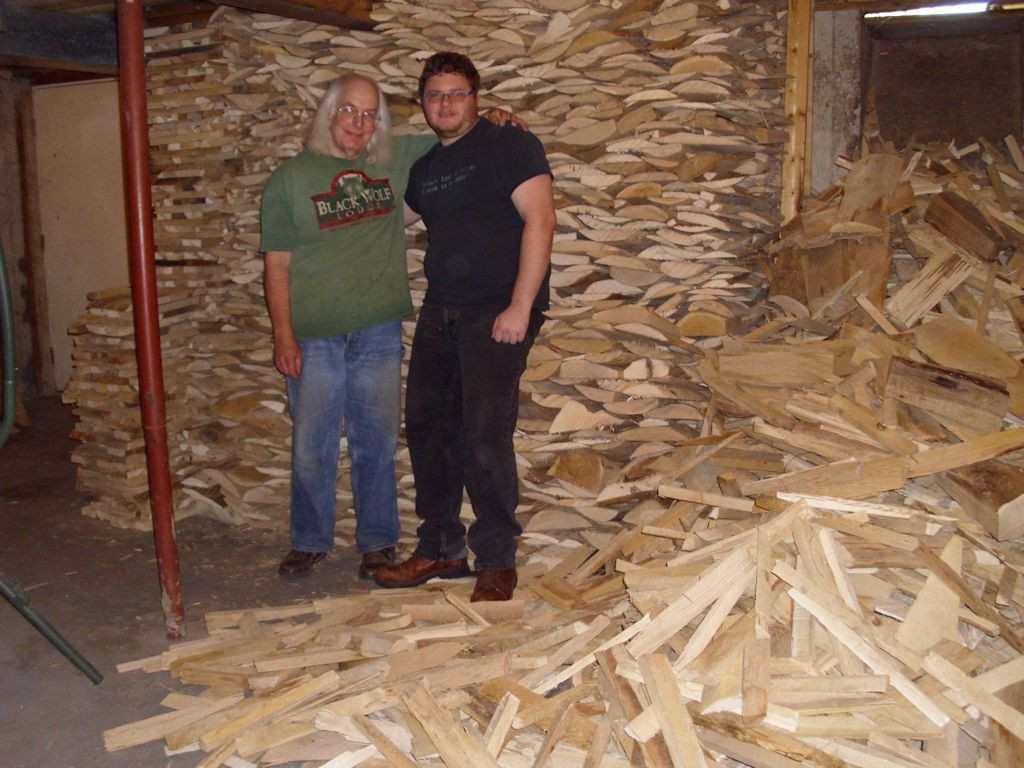
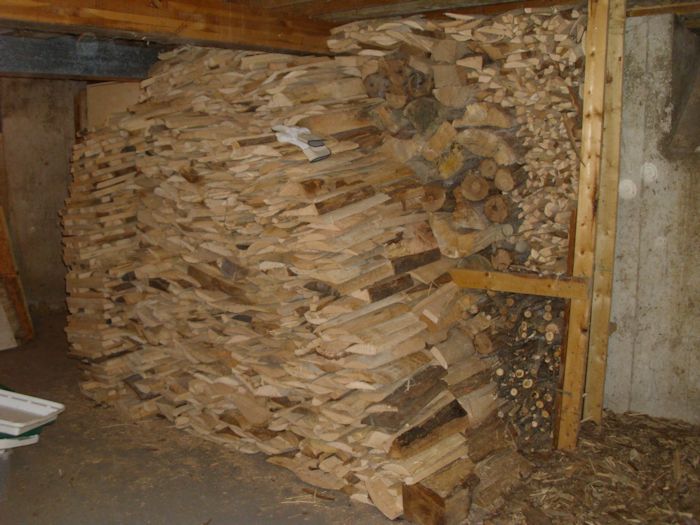
What made this Harvest Festival different is that I did the majority of the work on my own. There was lots to do, of course, and I plan to talk about some of the things I did in future posts. This year the Harvest Festival included getting some of my wood for the winter into the basement. My friend Braden helped me get the wood down there—it’s a big job even for two people. I now have five cords down there and two cords outside. Seven cords will take me through most winters, but I’ll cut another cord just in case things get extra cold. The wood you see in the picture is mostly slab wood, with about a cord of logs underneath.

John and Braden standing next to a huge pile of wood.
Getting the firewood stacked in the basement was a big job.

This year the apples ended up as chips for the most part. I also saved some for eating. The larder already has all applesauce, juice, pie filling, and odd assorted other apple products I could use. The remaining apples ended up with friends. I did make up pickled crab apples this year and did they ever turn out nice. I also made a crab apple vinaigrette salad dressing and canned it. The result is quite nice. For once, my pears let me down. The weather just wasn’t conducive to having a good pear crop. I did get enough pears for eating and a few for sharing as well.

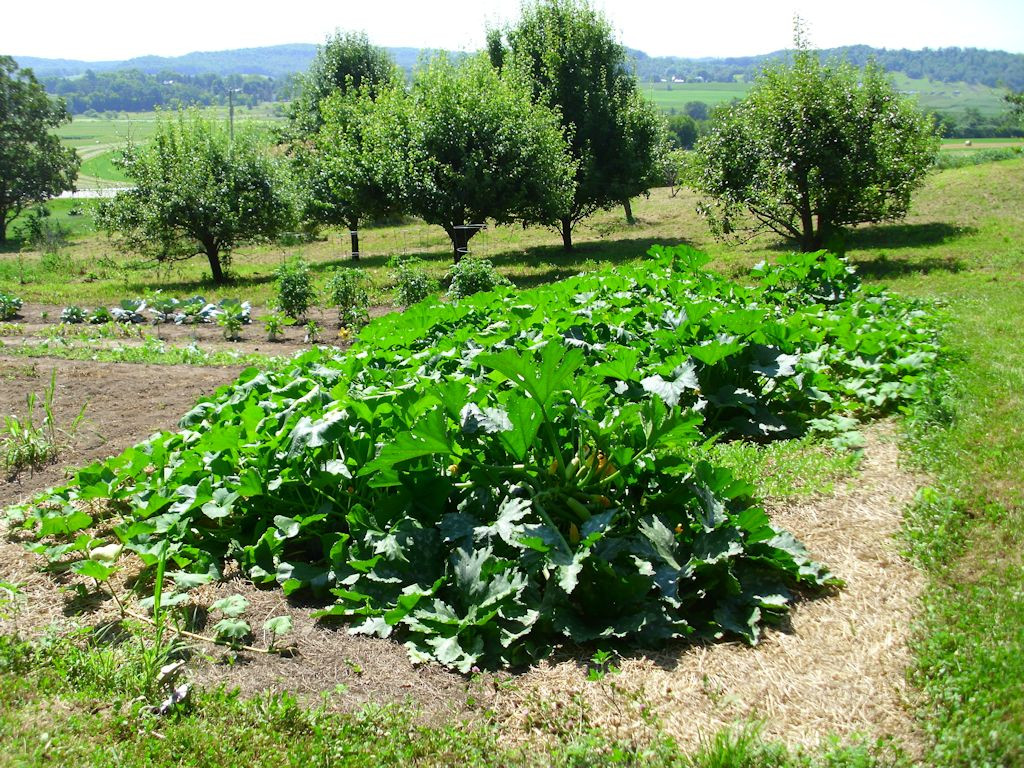
Every year is good for something though and it was a banner squash year. The squash vines grew everywhere. At one point, the squash was chest high on me—I’ve never seen it grow like that.


A largish squash patch with chest high squash plants.
The squash grew like crazy this year!

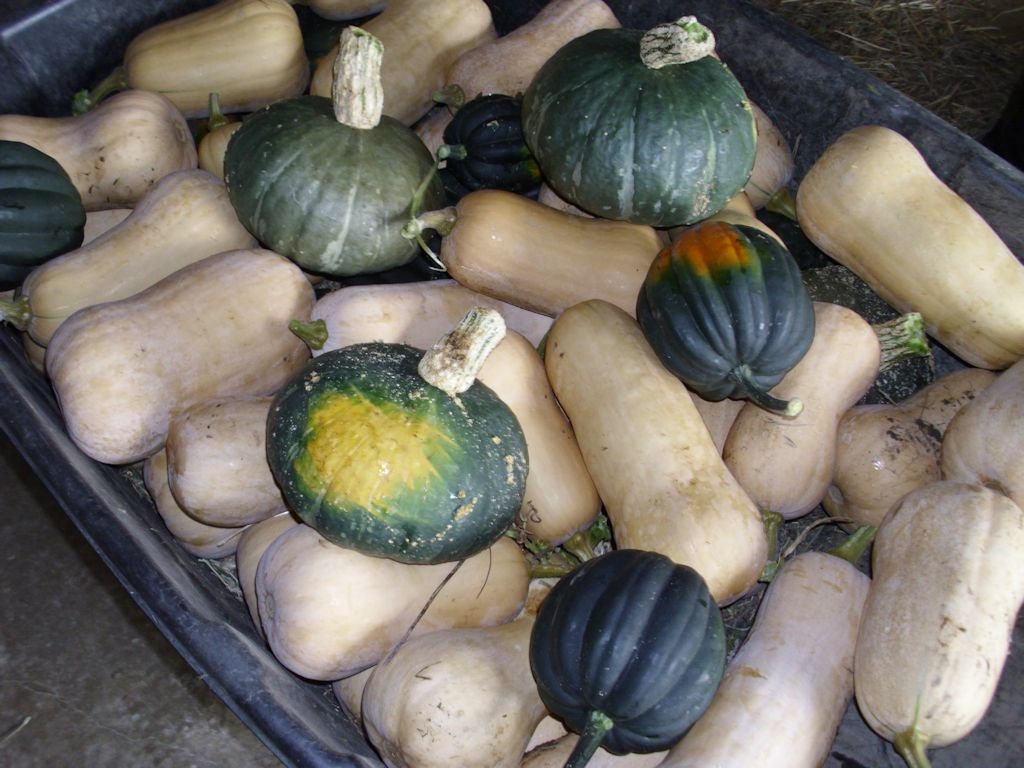
The picture shows the squash about mid-summer. By the end of the summer they had grown into the garden (overwhelming the tomatoes) and into the grass. The squash also grew larger than normal. I ended up with a total of 700 pounds worth of squash (much of which has been preserved or distributed to friends). Here is some of the squash I harvested this year.


The squash patch produced three kinds of squash in abundance this year.
A cart full of squash.

The largish looking round green squash (one of which has a yellow patch on it) are a Japanese variety, the kabocha squash. So far, I’m finding that they’re a bit drier and sweeter than any of my other squash. I think I could make a really good pie with one and they’ll definitely work for cookies. Unlike most winter squash, you can eat the skin of a kabocha squash, making it a lot easier to prepare and it produces less waste. Given that I received these squash by accident, I plan to save some of the seeds for next year. The squash I was supposed to get was a buttercup squash. The two look similar, but are most definitely different (especially when it comes to the longer shelf life of the kabocha).

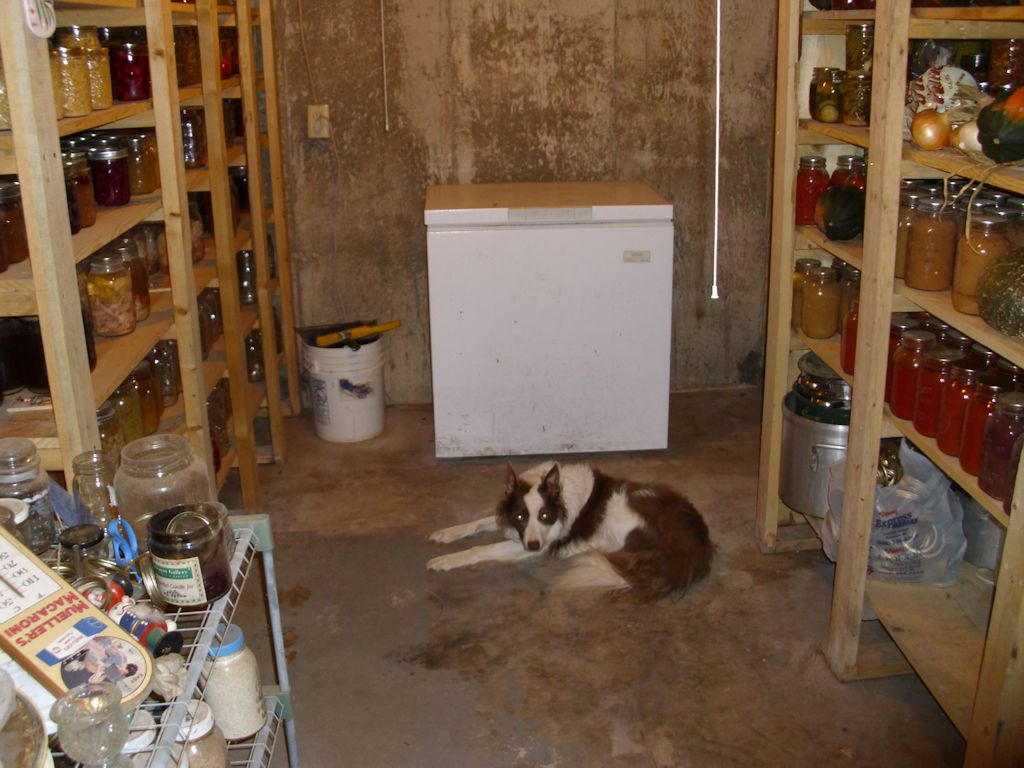
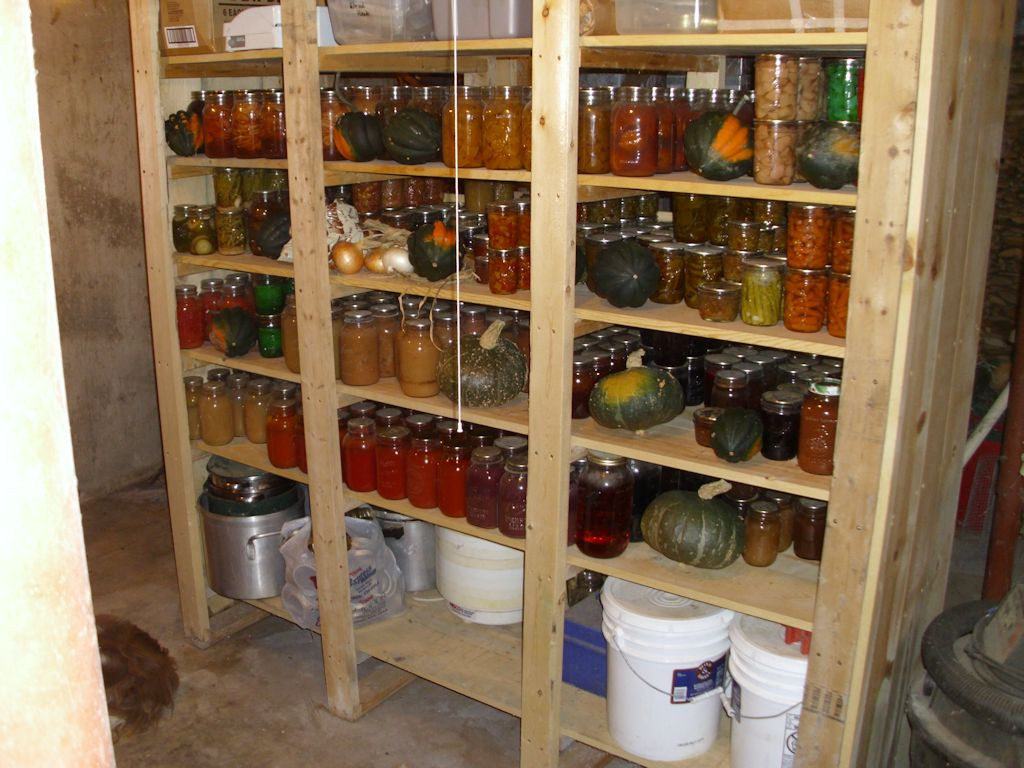
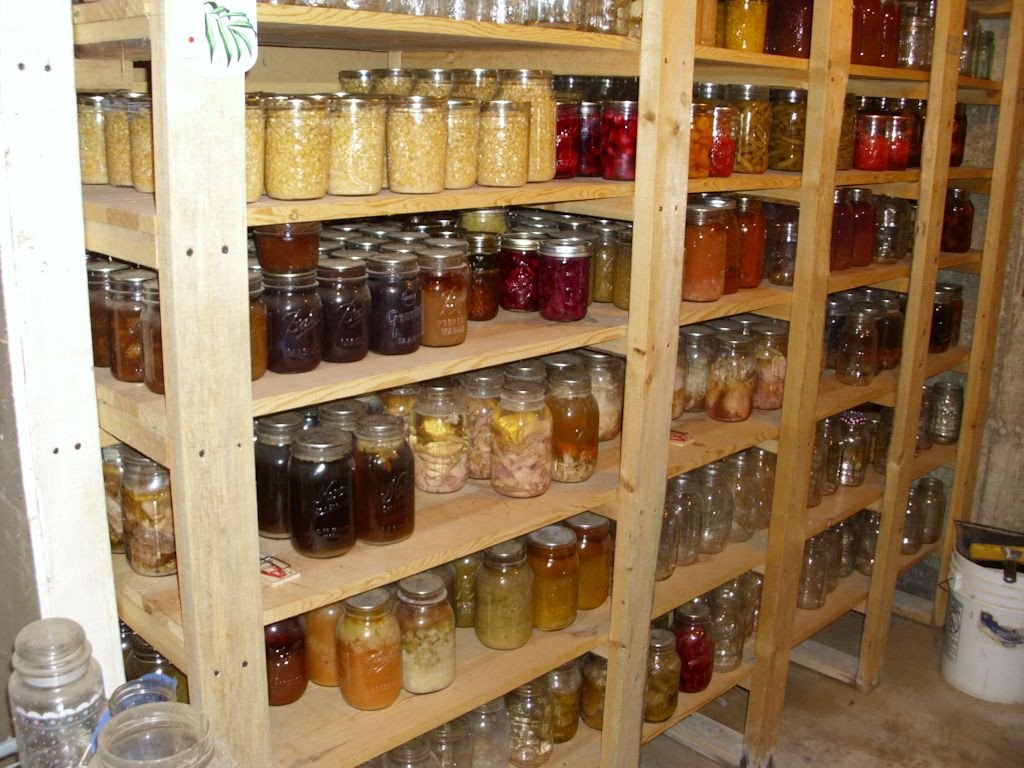
Canning season was busy this year. I’ve started filling in all the holes in the larder. For one thing, I was completely out of spaghetti sauce. Even though making homemade spaghetti sauce is time consuming, it’s definitely worth the effort because the result tastes so much better than what you get from the store. I also made a truly decadent toka plum and grape preserve and grape and pear juice. I’ve done hot water bath canning by myself before, but this was the first year I did pressure canning on my own. Let me just say that it all comes down to following the directions and not getting distracted. My two larder shelves are looking quite nice now (with Shelby on guard duty).


The larder contains two shelving units and a freezer.
A view of the larder from the front.

The right shelving unit contains mostly fruit products of various sorts and condiments. Yes, I even make my own ketchup and mustard. Of course, some of the squash also appear on the shelves, along with my cooking equipment and supplies. Let’s just say there isn’t a lot of room to spare.


Fruit products dominate the right shelving unit.

The left shelving unit contains mostly vegetables and meats. In years past I’ve canned venison, pork, and chicken. This year I thought I might try canning some rabbit as well. Canning the meat means that it’s already cooked and ready to eat whenever I need it. The meat isn’t susceptible to power outages and it lasts a lot longer than meat stored in the freezer. Even though canning meat can be time consuming and potentially dangerous when done incorrectly, I’ve never had any problem doing so.


The left shelving unit contains mostly vegetables and meats.

Harvest Festival 2015 has been a huge success. The point is that I have a large variety of different foods to eat this winter, which will make it easier to maintain my weight and keep myself healthy. I had a great deal of fun getting everything ready. There was the usual music, special drinks, and reminiscing about times past. What makes your harvest preparations joyful? Let me know at [email protected].


Wood Stove Cleaning Day

It’s February and the wood stove has seen a lot of use this season. It’s easy to forget that the wood stove needs maintenance while you use it. I discussed annual and regular maintenance of a wood stove in my Care and Feeding of a Wood Stove post. However, a wood stove requires more maintenance to continue to work properly. A reader was asking me the other day just how much maintenance I recommend and that’s a really hard question to answer. It depends on how much you use your wood stove and what sort of wood you burn in it. You also need to consider the wood stove type and its age.

I actually do maintenance twice weekly during the heaviest usage portion of the season. During the twice weekly cleanup, I make sure the wood stove is completely out and empty the ashes. The ashes actually work quite well when spread on icy areas. The grit in the ash keeps you from slipping. It’s a bad idea to put the ashes where they could cause a fire, such as your compost heap, unless you’re absolutely certain that they’re out. Even then, you must exercise extreme care.

As part of my maintenance, I sweep down the outside of the wood stove using a foxtail broom. This includes the stove pipe and any other surfaces that could become encrusted with dirt, dust, or cobwebs. Not only does such cleaning enhance the appearance of your stove, but it can also help (slightly) with its efficiency and potentially reduce any fire hazard.

Cleaning any glass on the front doors is helpful. You can’t manage the fire as well if you can’t see it. I’ve tried a number of cleaners. Mr. Clean is my current choice. It seems to do a better job with the buildup on the glass. I know some people use the stuff to clean other glass around their homes, like the frameless shower doors in their bathrooms for instance. If someone else comes up with a good selection, please let me know (but please try Mr. Clean first for comparison purposes).

Chimney fires are something to avoid at all costs. Burning hardwoods that are completely dry help quite a lot. A little creosote can still build up through and you really do want to get rid of it. All the chimney sweep should find in your chimney is a little ash. To help keep things clean, I spray Anti-Creo-Soot into the stove once a week. Make sure you follow the instructions on the bottle precisely. If you don’t, you might find yourself dealing with an uncontrollable fire that could cost you a lot more than your home. If the fire doesn’t get that far, you may still have to deal with fire damage, requiring the aid of a fire restoration service similar to Service Master by Zaba (https://www.servicemasterbyzaba.com/fire-restoration) that may be able to help you with fire damage repair.

Keeping things clean will help you enjoy your wood stove longer and to use it safely. A few minutes spent cleaning your wood stove may save you a lot of grief later. Let me know about your cleaning tips at [email protected].
Getting Wood for Winter

It’s that time of year again-time to get the wood ready for winter. Of course, cutting, splitting, and stacking wood warms you twice: once when you do it and again when you burn it. With our weather being so beautiful, I really did get quite warm over the last couple of weeks getting my wood ready. It is definitely easier if you use quality wood axes, though, and now the piles are finally finished. I have a little over two cords of wood outside and four cords in the basement. I’ll eventually bring the outside stack up to three cords.

As I mentioned in The Many Appearances of Firewood, I use three different cuts of wood for my pile: slab, log, and disk. Each kind of wood has its own advantages. For example, it’s extremely easy to get slab wood started as long as it isn’t wet. In addition, I buy slab wood, rather than cut it, so the slab wood is less work because I only have to stack it. Logs, the traditional firewood, are easy to stack and burn at a moderate rate, which makes them a good option for maintaining a fire. Using disks has the advantage of a slow, long lasting burn of larger pieces without having to split them. I generally put a disk in the wood stove before I start it up in the morning to keep the fire burning at a nearly even temperature. Larger disks are hard to add later, but you can easily add smaller disks to a wood stove.

Of course, there is the question of what precisely a cord is. A full cord is always 4 feet deep, 4 feet high, and 8 feet long (128 cubic feet). I generally cut my logs 2 feet long, so my cords are usually some combination of dimensions that add up to 128 cubic feet. For example, my outside stack is 2 feet deep, 4.5 feet high (actually, a little higher), and 14 feet long. The stack in my basement is 2 feet deep, 8 feet high, and 8 feet long. Any set of dimensions that adds up to 128 cubit feet is one cord. Purists will insist on the standard measurement, but really, the wood doesn’t care how its organized.

Ask specific questions when you buy wood. Some sellers will try to tell you that they’re selling you a cord of wood when you’re really getting a face cord, which doesn’t have a precise size. Most face cords are one-third to one-half the size of a full cord. The pieces of wood are sometimes only 16 inches long to accommodate smaller wood stoves and fireplaces. You need to ask how much you’re getting when comparing prices between sellers. If a seller won’t tell you how much wood is in a load, it’s probably a good idea to go somewhere else.

Beware of the fluffy load. Someone will drive up with what looks like a full load of wood, but the wood is ill stacked with a lot of air gaps in it. A poorly stacked load won’t contain as much wood as you might think it will. Another trick that some wood cutters use is to include a lot of smaller pieces that tend to add air gaps and don’t burn very well. You can obtain your own kindling with relative easy, so look for sellers who provide larger pieces of wood in a well-stacked form so that you know the amount you’re actually getting.

When I cut wood, I know precisely what kind I’m getting. This year I’ll be burning a combination of American oak and white elm. There is a little maple and black locust mixed in, but the majority of the wood is oak and elm. The wood you get determines how much heat you get. After you find out what kind of wood you’re getting for your stove, make sure you consult a wood heating chart. A load of wood with great burning characteristics may actually be a better deal, even if it costs more, because you get more heat from it. As an example, let’s say that one seller offers you a cord of white oak at $120, while another seller offers you a cord of birch at $100. The white oak is a better deal because it only costs $4.124 per million BTU (120 / 29.1 million BTU), compared to $4.808 per million BTU for the birch (100 / 20.8 million BTU). You also want to verify that the wood is actually dry (some people will try to sell you green wood, which won’t burn well).

Some people neglect to factor in the amount of smoke and ash that the wood creates. Of the two, the amount of smoke is the most important factor because you have to call a chimney sweep if your chimney gets clogged by wood that produces too much smoke. This kind of hassle often leads people to make the decision to have central heating installed, from a site similar to this one, rather than having to buy and chop firewood. However, I think a wood-burning stove creates a kind of homely atmosphere you can’t replace with a heating system. The ash is an annoyance, but you can always clean the ash out of the wood stove as needed. Even so, getting wood that produces less ash means less ash for you to clean up later. Let me know your thoughts about getting your winter wood supply together at [email protected].
Rhythms of Fall

It’s the beginning of fall here in Wisconsin—my favorite time of the year. Everything is getting that tired look to it and the evening temperatures are beginning to dive a little more often into the 50s and 60s. The leaves are starting to change just a little. Soon I’ll be up in the woods cutting up dead trees for winter. It’s not nearly cool enough for the first fire yet, but that will come too. Soon I’ll have the smell of woodsmoke permeating the house as I enjoy the cool fall evenings in front of my wood stove.

Last week I began picking my grapes and apples. Both have produced abundantly this year. In fact, just one cane produced a little over 40 pounds of grapes. The apples are smaller than normal, but plentiful, weighing the trees down. The pears this year suffered from a lack of activity from helpful insects and an overwhelming quantity of the harmful variety. The point is that it’s a time for picking things and preserving them for the winter. There is a certain feeling that comes over you as you begin to bring things into the house and see the larder shelves swell with all you’ve produced. Most of the fruit will go into juice this year, which means my Victorio Strainer will work overtime.

As part of my fall preparations, I’m starting to dry the herbs that have grown all summer. My herb garden is a little limited this year because the weather just didn’t cooperate as much as it could have. Still, I have plenty of celery (actually lovage) seed to use, along with the dried leaves. The rosemary, two kinds of sage, and two kinds of thyme have all done well (though the rosemary is not quite as robust as I would have liked, it’s quite flavorful). The dehydrator is up and running now, helping me preserve the herbs I need for cooking this winter.

Of course, the herb garden produces more than just herbs for cooking—it also produces a robust number of items for tea. Right now I four kinds of mint growing: lime, lemon, chocolate, and spearmint. The first three are definitely used for drinking teas only because their subtle flavors are lost in other sorts of uses. The spearmint is used for tea, cooking, and mint jelly—that essential add-on for lamb meat. Rebecca actually had eight different kinds of mint growing at one time, but they have gotten mixed together over the years or were hit especially hard by this last winter. The herb garden will need some focused attention this upcoming spring to get it back into shape.

In some respects, the combination of a hard winter, a late spring, and a cool summer conspired to make this year less productive than most. It’s the reason that you really do need a three-year plan for stocking your larder to ensure that you have enough food for those years that are a little less plentiful. Fortunately, my larder has an abundant supply of everything needed to sustain life (and quite a large number of things we made purely for pleasure as well).

There are some fall-specific things that I’ll eventually take care of. You already know about the work part of it, but there is time for pleasure too. For example, I’ll take time for my usual picnic at Wildcat Mountain after the fall color begins to peak. So, how are your fall plans shaping up? Let me know at [email protected].
 

Late Snow

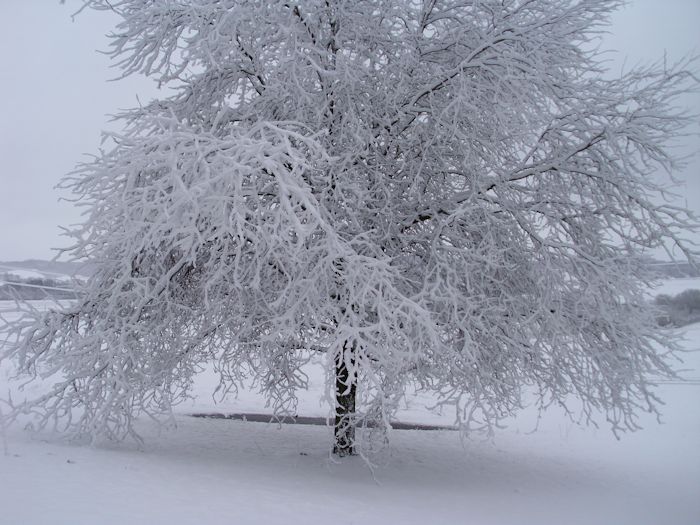
Early spring is the time for snow. However, it’s not just any snow. The snow in spring can be magical at times. It drapes itself onto the trees and other plants in ways that reveal new ways to look at the mundane. The trees and other plants take on a new appearance.

We recently had a spring snow and I took a few pictures of it. For example, here’s one of my favorite trees viewed in a new way.

A honey locust tree draped with snow.

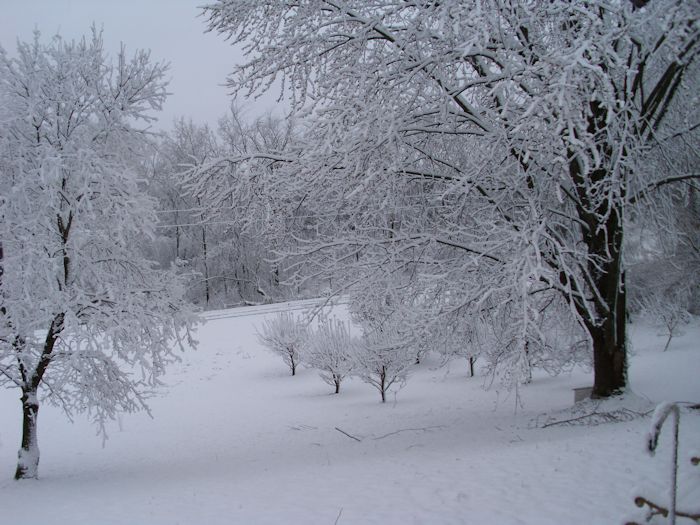
Everywhere I looked, the snow had done amazing things to the landscape. Even our orchard looks magnificent with its coating of perfectly white snow. (This is a view of our apple orchard from the house.)

Maples and an apple orchard (background) draped with snow.

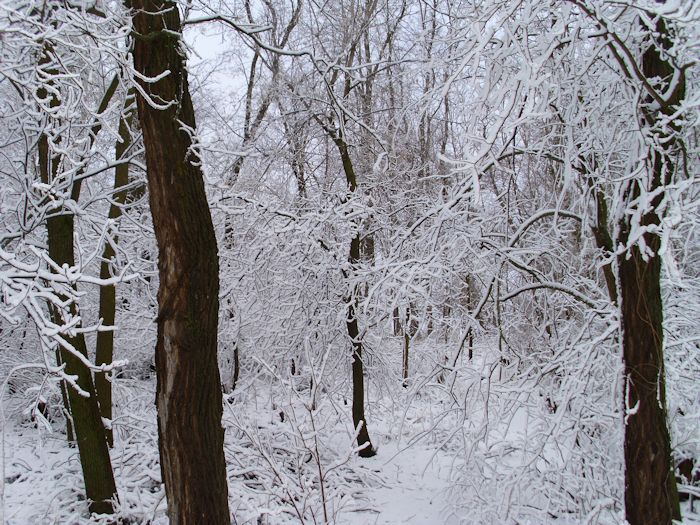
The woods can be exceptionally pretty. They take on a mystical appearance. Paths all but disappear, but are still visible when you look closely enough.

A group of trees in the woods draped with snow.

Of course, my favorite thing about springtime snows is that you get to enjoy all this beauty without any of the usual shoveling. The spring weather dictates that the snow melts sooner, than later. Anytime I get a beautiful scene from nature without any work on my part, I’m overjoyed. What is your favorite thing about springtime snows? Let me know at [email protected].
 

Keeping Warm in the Cold Winter Months

Most people know that this has been one of the colder winters in recent memory. In fact, I’ve been taking enough heat about my views on global warming that I wrote a post entitled, Where is the Global Warming?. The effects of the cold have been serious enough to drastically raise the price of propane and to create local shortages. In fact, a few of my neighbors have been paying upwards of $6.00 a gallon for propane that normally costs around $2.50 a gallon. What this means is that a house that normally requires $300.00 per month to heat now costs $720.00. Most people can’t afford the price increase. More than a few people feel that the propane industry is engaged in price gouging. At issue is the need for propane to keep warm.

We heat our home for the most part using our wood stove. Wood heat is a lot better than propane because a wood stove will heat not only the air, but also the floor, walls, and ceiling. You get a mix of both direct and radiant heat. In addition, wood is a renewable resource. Carefully managed woods produce an abundant supply of wood that won’t ever run out as fossil fuels will. However, due to some unexpected circumstances, we’ve been using the furnace a bit this winter as well and feeling the pinch just a little.

There are some long term fixes for some of the problems with heating in the works. For example, there is a movement now to improve the standards for furnaces. The technology exists to improve the efficiency of furnaces from the current 80 percent to nearly 98 percent. In addition, newer furnace fans can save substantially on the electric bills. Unfortunately, even though the technology exists, you’d be hard pressed to find any furnaces like this for sale-they simply aren’t available today. If your home does require a new heating unit, you may want to approach a furnace installation business in your area to do this in time for the Winter months. There are lots of brilliant companies around who could fit a replacement furnace for you, so you just have to take the time to find a good local company. For example, learn about a Furnace Installation in Durham if that is where you are based. It’s as easy as that!

So what do you do to improve fuel usage in your home today? We’ve been experimenting with various strategies over the years. For one thing, we turn the thermostat way down at night-we’re talking 47 degrees. Blankets are a lot less expensive than fuel and we’ve actually found we sleep more soundly. I’m not sure anyone has ever done a study on the proposed benefits of sleeping cool (if you find such a study, please let me know). A programmable thermostat can get the furnace started up just a few minutes before you begin your day. If you haven’t already got a furnace installed or you need a new one, Boulden Brothers are highly recommended for Furnace Replacement. I do know that we both sleep better and feel more refreshed when the house is kept warm during the winter months. A furnace is essential in my opinion!

One of the more interesting aspects of most homes is that the bathroom actually warms quickly and is usually high on the priority list for getting heat. Even though the rest of your house is now at 47, you can run into the bathroom, close the door, and enjoy a nice warm early morning experience quite quickly. Just take your clothes with you (I certainly do) and dress inside. If you set up a schedule, other family members can just remain cozy in bed until it’s their turn to keep warm while dressing in the bathroom. Actually, it’s a technique that people have used for hundreds of years. I still remember my father telling me about running from the bedroom down to the kitchen where he’d dress in front of the woodstove in the morning.

We’ve found that running the furnace for one long period is far more efficient than running it over several short periods. An engineer who specializes in such things could probably produce the math required to tell you precisely why this is the case, but simply observing the monthly costs has shown us that long burns are more efficient. A long burn also provides some of the same radiant heat benefits that our wood stove provides. So, we get the house up to temperature in the morning and then turn the thermostat down while we work. When it’s time to sit and relax, we heat the house back up again and then turn it down about 2 hours before we go to bed (the house will most definitely maintain temperature long enough for you to get cozy beneath the blankets). Using this cycled method of maintaining house temperature can reduce the heating bill by as much as 30 percent when used correctly. Given that we work in our house, the cycled method does mean making comfort choices, but the savings are just too great to pass up. If you’re working outside the house, using the cycled approach is a given.

I doubt that there is a perfect solution to any heating problem during the winter months. If you are using central heating, make sure you’re covering up any gaps in the house that are letting in a draught. If you have double glazed windows, this should help with insulation too. On the topic of insulation, a friend of mine had a foam roof repair and he saved up to 50% on his heating bills due to the insulation benefits. This is something you might also want to consider if you want to lower the cost of your bills. The important thing is that you’re staying warm even when it’s cold outside!

Have you come up with any interesting solutions to the heating problems for your home? Have you ever tried a cycled approach? Let me know your thoughts at [email protected].
Exercising Care in the Woods

It’s fall and the woods are quite beautiful. For the most part, the bugs have started packing it in, even though we haven’t had a frost yet. I can spend hours in the woods, enjoying a soft breeze, with nary a bite to show for it. There are times where I just sit on one of my stumps up there and wait for something to happen (it usually does). I never run out of interesting things to see in the woods, despite the fact that they really aren’t all that large.

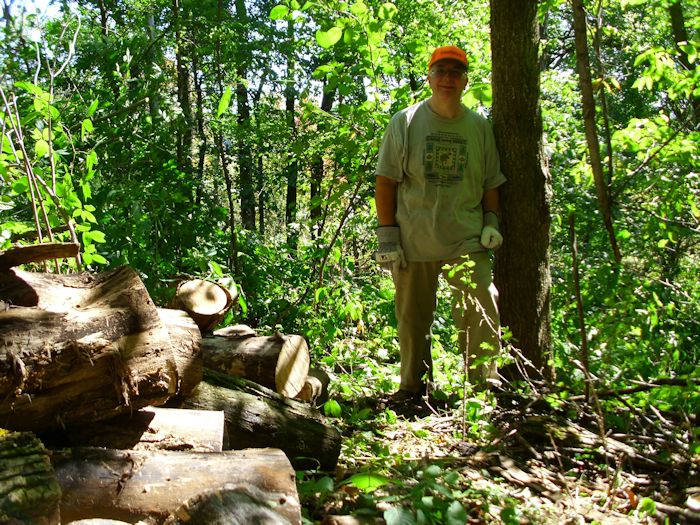
Of course, it’s also the time of the year when I’m cutting wood for winter. So, I often go up with my chainsaw in hand, looking for wood to cut up. The first priority is to keep the woods clean, so I start by cutting anything that is already lying around. Even small wood burns, so I’m not too particular about what size the logs are. Sometimes I find a log that is quite dry and burns nicely lying right there on the ground. In fact, that’s where I found these piece that I cut up.

CarefulWoodCutting01

There is an equal mix of slippery elm and black locust in this case. Both woods burn quite nicely. These pieces are quite dry, but not rotted. Even if there were some rot, I’d take the wood because it’s better to keep the woods cleaned up whenever possible and wood with a little rot still burns just fine.

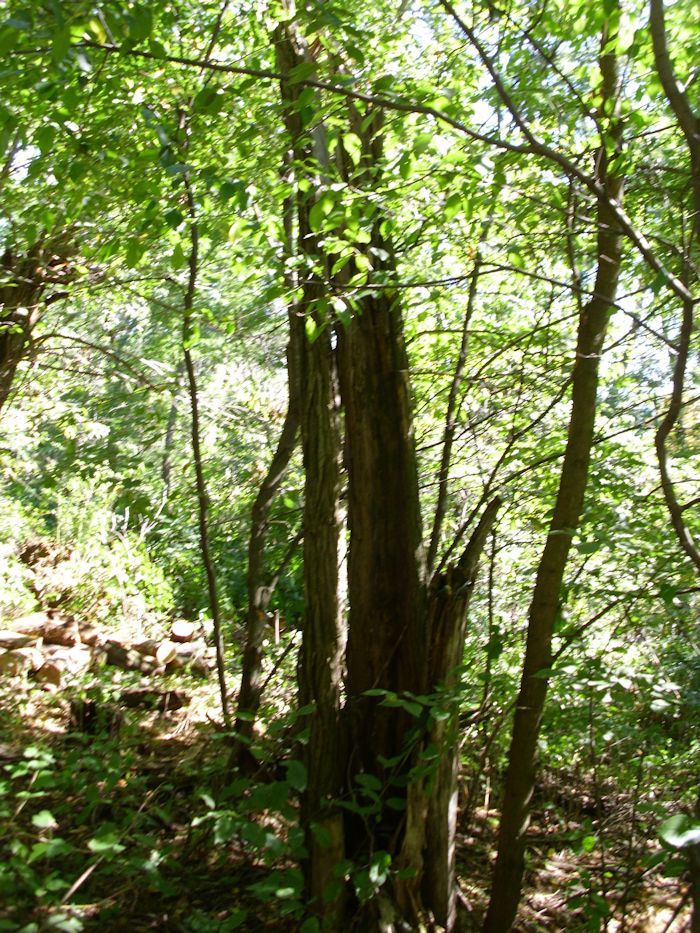
After I get done looking for fallen wood, I find any snags (trunks that lack limbs) that no one is using. It’s important not to cut down every snag because owls and other birds often nest in them. In addition, it could be a matter of self-preservation because bees will also nest in the snags at times. (For this reason, I actually put my ear up to the trunk and listen for a while.) On this particular day, I found a wonderful piece of black locust to cut up.

CarefulWoodCutting02

This snag looks like a mess. It doesn’t appear to be usable. The inside has rotted out and there are shards where the tree was hit by lightning. However, this is black locust and the wood is actually quite good. Cutting into it, I found that the outside had indeed rotted a little (up to a half inch), but the inside was both sound and dry. so, the snag ended up on the wood pile along with everything else.

On this particular day, I found everything I needed on the ground or as a snag. However, there are some days when I do need to cut a tree down. When this happens, I look for trees that are already completely dry (the bark has come off of its own accord) and no one is using. Even with these restrictions, I usually find all I need. All it takes is a little looking and given the beauty of these woods, looking is something I like to do.

Notice that these pictures show that the woods is intact. It’s what I try to achieve when I cut wood for winter. I leave all of the young trees and anything that’s alive intact as much as possible. Even the ground vegetation is left intact except for the narrow path I create for myself. (All the wood is carried down by hand to minimize damage.) Using management techniques like these ensures that the woods will continue to look beautiful and produce wood well into the future.

Have you taken a stroll through a woods lately? Let me know your thoughts about careful management techniques at [email protected].
 

The Many Appearances of Firewood

Most people are used to viewing firewood as simply cut up logs. The logs are then stacked in cords (128 cu. ft) and proudly displayed outside the home. They have the old homestead or wild west view of wood, with the healthy young male whacking away with an axe and turning perfectly good chunks into kindling. However, real firewood comes in a variety of forms, not just logs. In addition, the wood is often stored in a basement or other area inside the home for easy access and to keep it dry. We actually have firewood in three forms:


  • Logs: The old time view of wood cut across the natural growth of the tree. However, unlike the television view of logs, our logs are generally 24″ long and up to 10″ in diameter. No one really takes a huge log and splits it down into kindling (unless absolutely necessary)—they use the copious branches of the tree for that purpose.
  • Disks: A wood stove doesn’t care how the wood is oriented. If you put a piece of wood into the stove, it will eventually burn (assuming the wood is dry). In Splitting the Dreaded Elm I discuss how to avoid splitting elm by cutting the tree into disks that will fit into the wood stove sideways. This means we can burn a tree up to 24″ in diameter without splitting it. Most trees that someone looking for firewood encounters aren’t that size.
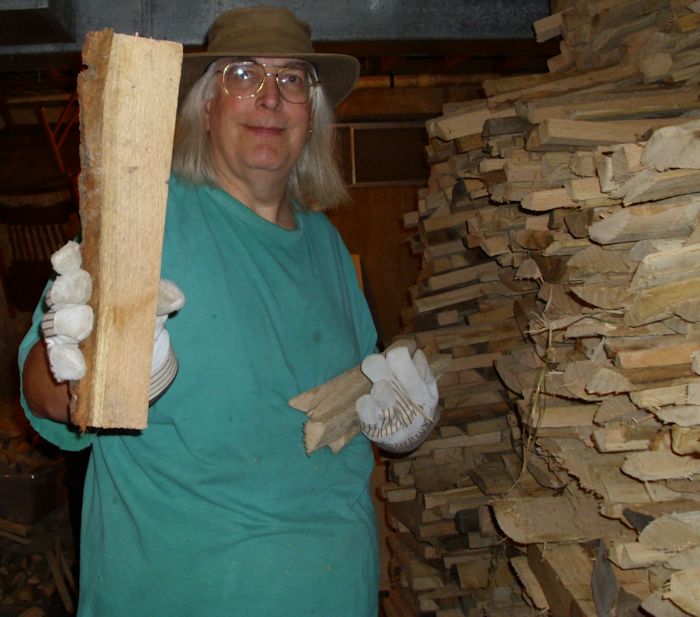
  • Slabs: This kind of firewood is actually the focus of this post. Slab wood is what remains when you turn nicer hardwood logs into boards for furniture or other uses. The slabs are bundled together and you cut them to length with a commercial table saw or a chainsaw.


Slab wood is the sort of firewood that you won’t find at your local store and you generally can’t get it delivered by someone who sells firewood. You actually need to know someone who has a sawmill and is willing to sell you the remnants as firewood. What you receive doesn’t really look much like firewood at all. It doesn’t look like a board either—it looks like wood scrap, which is what it is.

Firewood01

The advantages of slab wood are many:


  • It costs a lot less than a cord of logs (usually about half).
  • It’s guaranteed dry.
  • The presence of flat surfaces makes it easy to stack.
  • You know you’re getting quality hardwood that won’t clog your chimney.
  • It’s unlikely that the wood will contain any serious pests such as carpenter ants.


Slab wood also has some serious deficiencies:


  • It isn’t readily available from most sources.
  • You normally can’t buy just one cord.
  • There is the problem of cutting the slabs to length.
  • It’s absolutely essential that the wood not get wet because it soaks up water like a sponge.
  • You must mix slab wood with other kinds of wood because it tends to burn both hot and quickly.

Our wood pile currently contains all three kinds of wood we use. The pile in the basement of our home has mostly logs and slab wood. The outside pile contains logs and disks. Most of the outside wood currently contains pests, such as carpenter ants. After a good freeze, the ants will be gone and we’ll be able to bring the wood inside a little at a time to burn. In the meantime, we have a wonderful assortment of wood inside to use during the cool autumn months.

Firewood02

So, how do you like your wood (slabs, disks, or logs)? What kinds of wood do you prefer to burn? Let me know at [email protected].
 

Making an Opportunity from Falling Trees

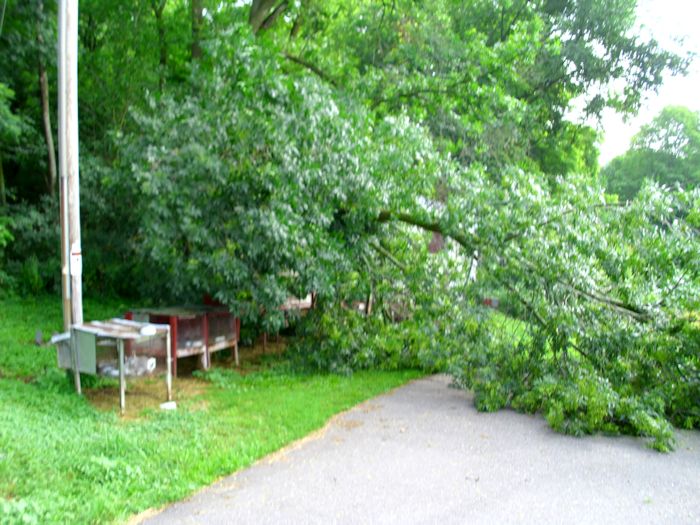
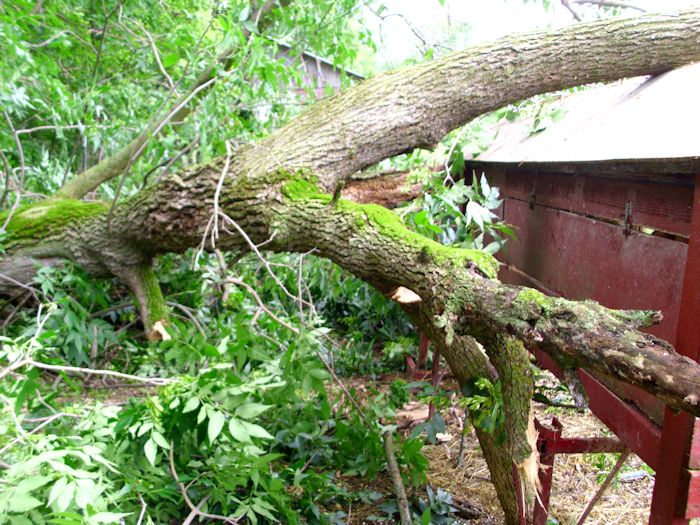
No matter where you have them, trees eventually fall and you’ll end up needing to get rid of the dead tree or get a tree removal denton service. Parts of our property are heavily wooded, so falling trees are expected and happen fairly often. Winds will blow a tree down, lightning will crack it, insects will kill it, woodpeckers will weaken it, or old age will simply take it. No matter the cause, the tree lands somewhere and in most cases, the landing is benign from our perspective. However, we recently experienced a less benign falling tree. The woodpeckers had weakened it, birds had nested in the holes, and carpenter ants had drilled a hole through the center. A lightning strike and high winds finished the job. After the storm we got up to see a rather large tree draped across our rabbit hutches.

Now of course, I don’t expect everyone reading this to have the resources required to remove a tree, let alone one of this size. When most people need Tree Work done, they just call the professionals. But I quite enjoy trimming and removing my trees, especially when I can benefit from it, so I like to do it myself.

FallenTree01

Most of the pictures in this post were taken by my wife, Rebecca. I greatly appreciate her help in putting this post together.

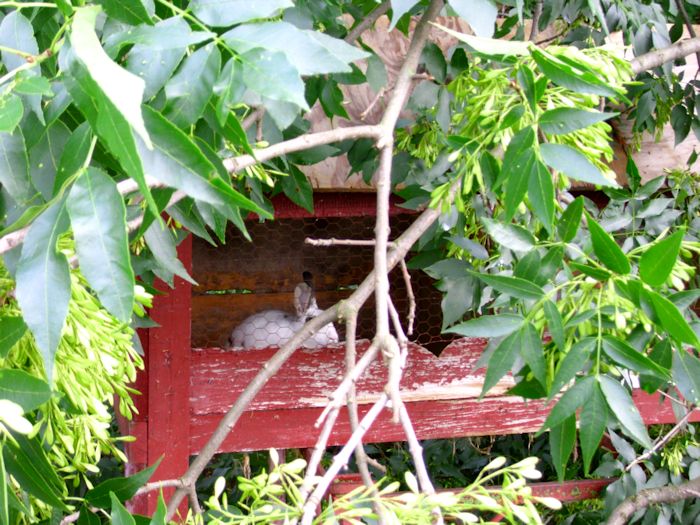
Our first thought was that the rabbits had escaped their hutch or were possibly dead. Amazingly, the rabbit hutch held and the rabbits were safe. The main problem was that we couldn’t get to them to feed them.

FallenTree02

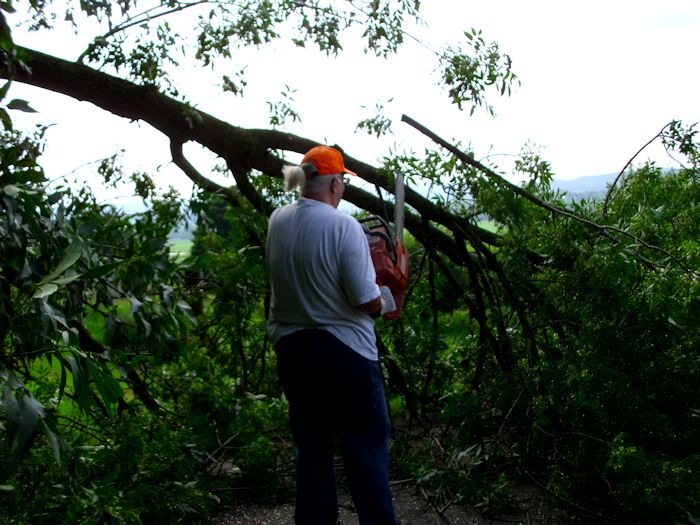
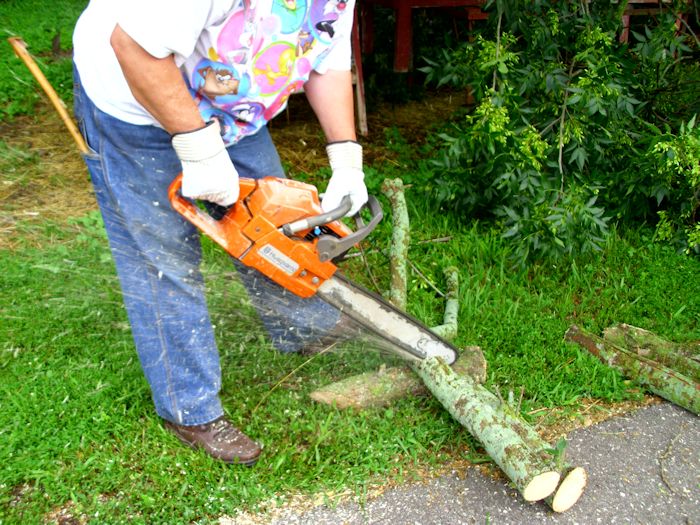
Unfortunately, cutting up a large tree is hot work and the heat index was well over 100 degrees that day (into the danger zone of the heat index chart). Let’s just say that it was sweaty work and leave it go at that. The tree was poised like a giant spring. The main trunk was actually split in two, but it was butted up against the rabbit cages in a way that didn’t let it fall completely, so I had to cut the tree with extreme care-starting with the branches.

FallenTree03

As I cut the branches, I separated the parts that I would later chip from those we would dry for firewood. The larger pieces were cut into lengths for stacking.

FallenTree04

After a while, all of the branches were cut. The tree was as safe as I could make it. However, the main part of the trunk was still braced against the rabbit hutch, so we still couldn’t get to the rabbits to feed them.

FallenTree05

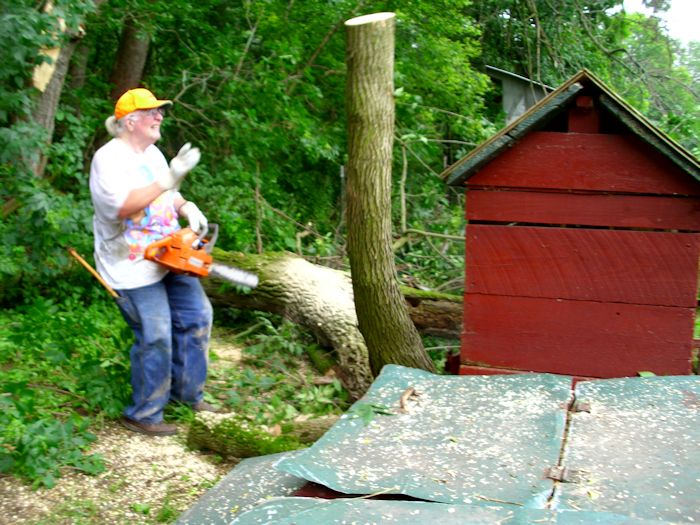
The most challenging moment came when I had to release the spring holding the trunk against the cages. The cut was extremely dangerous because I had to cut the tree enough to release the pressure, but not so much that it would flip in some unexpected way. What I needed was a slow release of pressure so that the tree would come to a safer position. I made the cut and the tree slowly started to move as expected. The spring completely released itself and the piece I had partially cut ended up standing straight in the air before falling to the ground. Perhaps if you have a similar situation but are not familiar with safe methods of removing the tree yourself, you could similar services to those found on treeserviceremoval.com to help you get rid of it without putting yourself in any danger.

FallenTree06

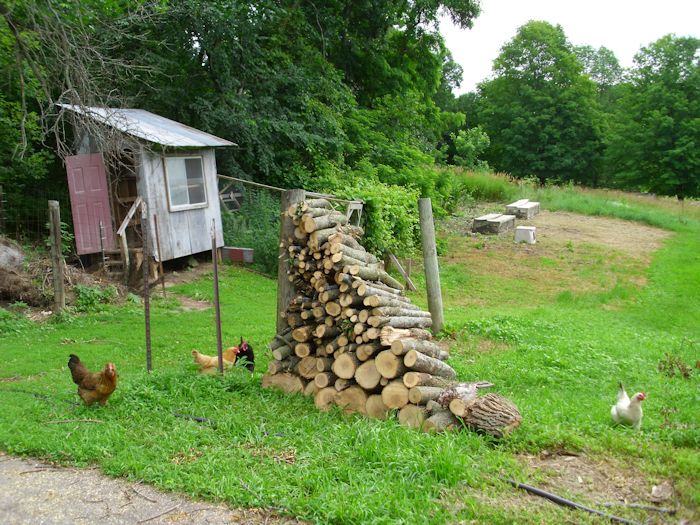
I still have a lot of tree to cut, but we’ve managed to make use of everything. The pieces of the tree I have already cut up are stacked and drying nicely.

FallenTree07

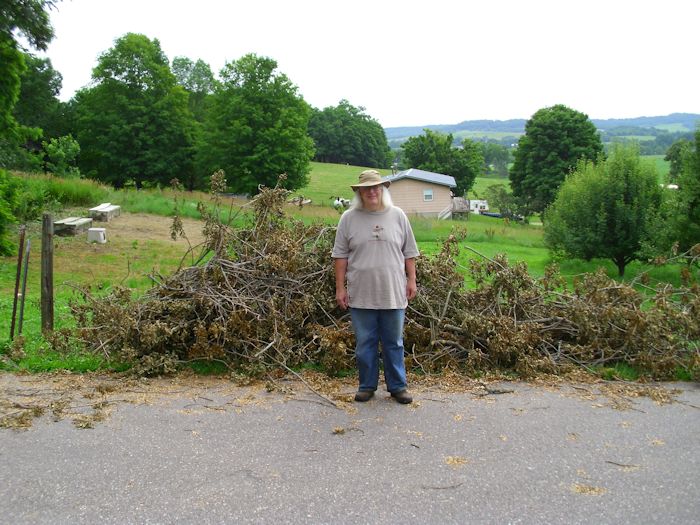
We also obtained a large stack of branches.

FallenTree08

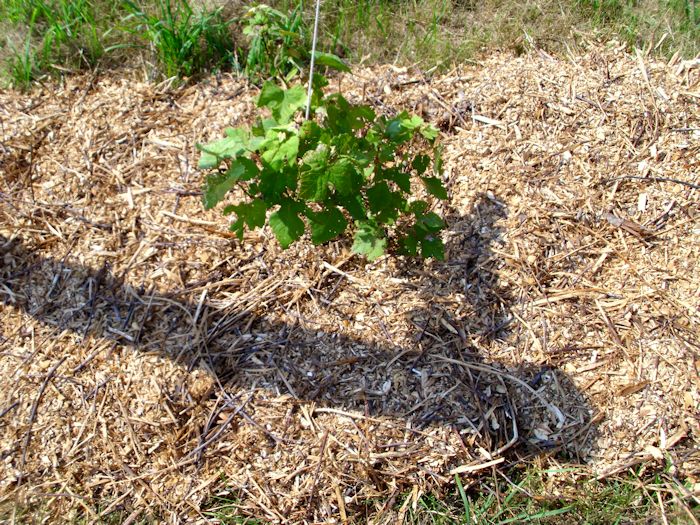
A lot of people would create a huge brush pile from the branches and burn them. However, doing so is really bad for the environment and wasteful of a useful part of the tree. I’m currently chipping the branches up and using them for mulch on our grapes. The mulch will keep the grapes moister, reduce watering costs, and make the grapes more productive because they won’t be battling weeds.

FallenTree09

In the end, what started as a disaster turned into an opportunity. Not every act of nature turns out this way, but we try to make the best of every situation. When did you last make an opportunity out of a natural event that started as a negative? Let me know at [email protected].