Pruning Your Grapes After a Major Freeze

Previous posts, Pruning the Grapes (Part 1) and Pruning the Grapes (Part 2), have discussed techniques for pruning your grapes. In most cases, these two posts contain everything needed to prune your grapes using the four-cane Kniffin system. However, pruning grapes sometimes involves more than simply dressing them up. In general, your canes can remain fully productive for many years, but sometimes mother nature steps in and causes severe damage. In my case, all of my young caned died completely and there was nothing to do about it. In addition, two-thirds of the mature canes suffered above ground loss, which is what I want to talk about in this post.

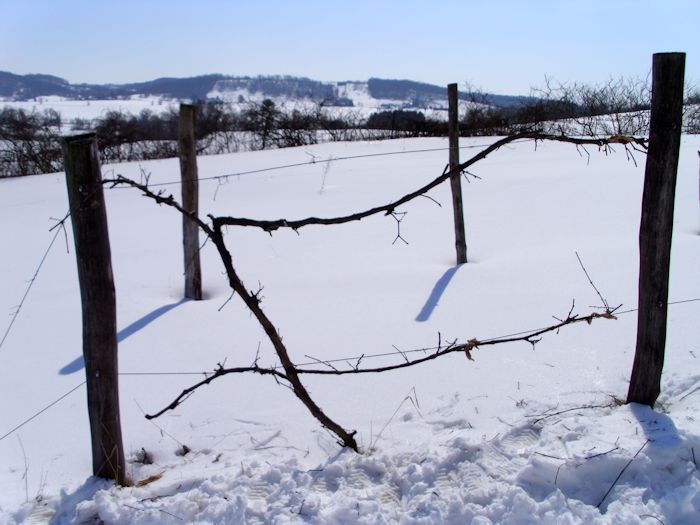
Good hearty canes will come back after a major freeze that kills the top of the plant. No, you won’t get anything in the way of grapes after the top is killed off, but the root stock is well-established and coming back after the freeze is a lot faster and easier than planting new canes. The spring after the freeze will see the old canes looking like gray skeletons and you might think everything is lost, but give your plants time. Look carefully at the ground around the old canes.

The first year after a major freeze will see all sorts of suckers coming out of the ground. Just leave them be. Let them climb up using the old canes as support. What you’ll end up with with look like a horrid mess. The new canes will grow everywhere. That’s fine, just don’t look too often if the mess offends you.

In the spring of the second year, carefully work with the mess. Remove the skinny trunks. One or two the trunks (with their associated canes) will look quite hearty. Leave both for the time being. Also remove the old, dead, trunk and associated canes with extreme care. You don’t want to damage your new canes, which may very well end up resting on the ground for a while. It takes time, but work slowly and carefully. (I find that working through the mess usually requires an hour or perhaps two per plant, so allocated plenty of time and don’t rush.) Eventually, you’ll clean up everything but the two strongest canes.

Now that you’re down to two contestants, carefully look at the canes attached to each of the trunks. You need to consider which trunk has the heartiest canes placed in the right positions for the trellis system you’re using. In my case, I looked for the best trunk with four canes—two upper and two lower. Cut off the trunk you don’t want to use.

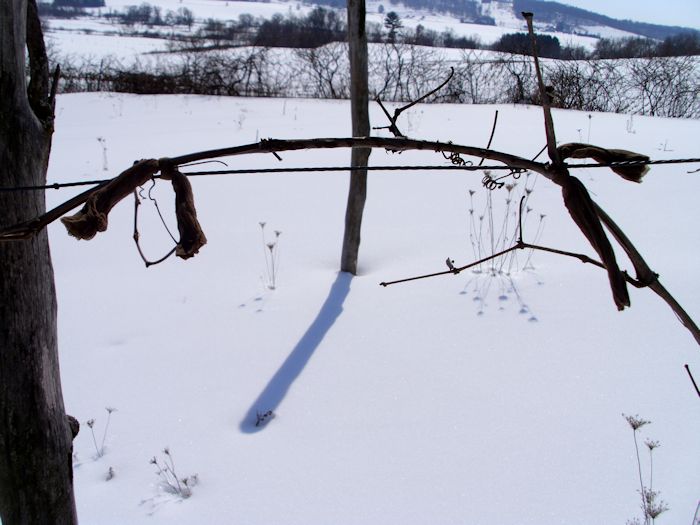
It’s important to remember that your plant is frozen and won’t be very flexible during this time of year. Carefully tie the canes to the trellis using a stretchy material that won’t harm the canes. I cut up old, clean pantyhose. It’s stretchy, holds up moderately well in the sunlight, and is inexpensive. Plus, it tends to dry out quickly after getting wet, which means you won’t introduce mold to your plants. You’ll likely need to work more with the canes later in the spring, after they defrost, but before they become productive.

In most cases, mother nature won’t kill your plants. The roots will survive even if the top of the plant is completely dead. Unlike most orchard plants, you don’t normally need to worry about grafts when working with grapes, so using those root suckers is a great way to get your grapes back after being killed off. Instead of the seven years required for new plants, you could potentially get grapes from the restored plants in as little as three years, so the time spent coddling the damaged grapes is well worth the effort. Let me know your thoughts on grape pruning at [email protected].


Harvest Festival 2015

Harvest Festival is one of my favorite holidays of the year. What, you haven’t heard of Harvest Festival? Well, it happens each year sometime during September. The date isn’t precise because you just can’t hold Mother Nature to a specific time to make the majority of the fruits and vegetables ripe. That said, the harvest does happen every year and it’s a time to celebrate, even though it also means hard work. I’ve presented Harvest Festival in the past:

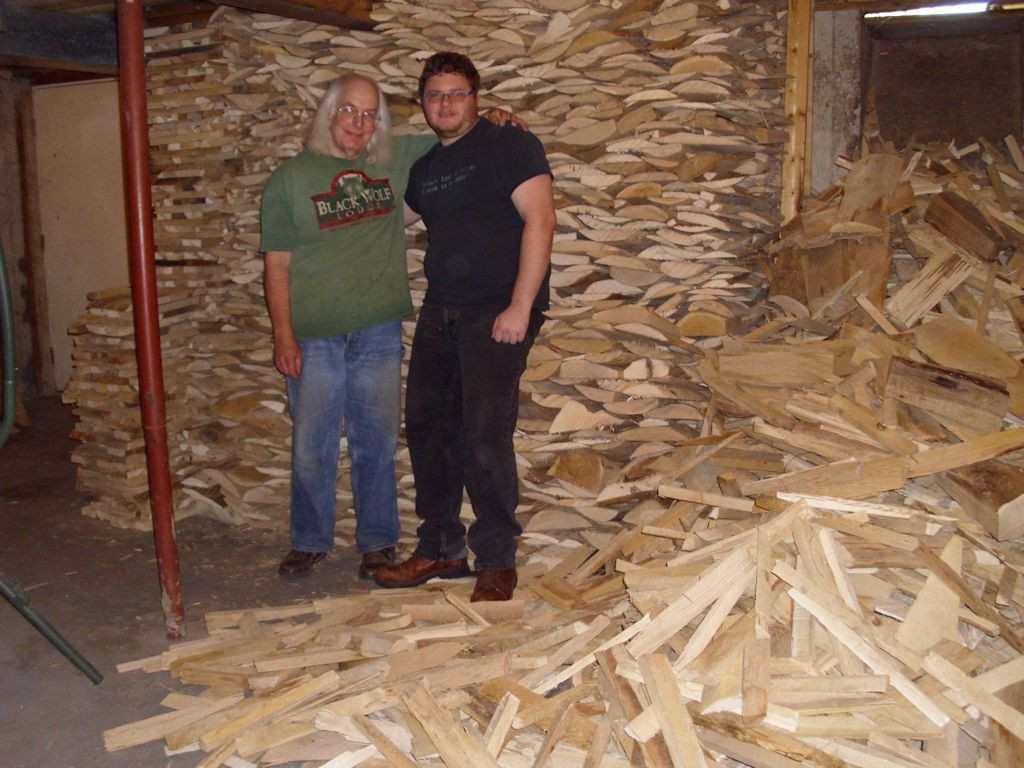
What made this Harvest Festival different is that I did the majority of the work on my own. There was lots to do, of course, and I plan to talk about some of the things I did in future posts. This year the Harvest Festival included getting some of my wood for the winter into the basement. My friend Braden helped me get the wood down there—it’s a big job even for two people. I now have five cords down there and two cords outside. Seven cords will take me through most winters, but I’ll cut another cord just in case things get extra cold. The wood you see in the picture is mostly slab wood, with about a cord of logs underneath.

John and Braden standing next to a huge pile of wood.
Getting the firewood stacked in the basement was a big job.

This year the apples ended up as chips for the most part. I also saved some for eating. The larder already has all applesauce, juice, pie filling, and odd assorted other apple products I could use. The remaining apples ended up with friends. I did make up pickled crab apples this year and did they ever turn out nice. I also made a crab apple vinaigrette salad dressing and canned it. The result is quite nice. For once, my pears let me down. The weather just wasn’t conducive to having a good pear crop. I did get enough pears for eating and a few for sharing as well.

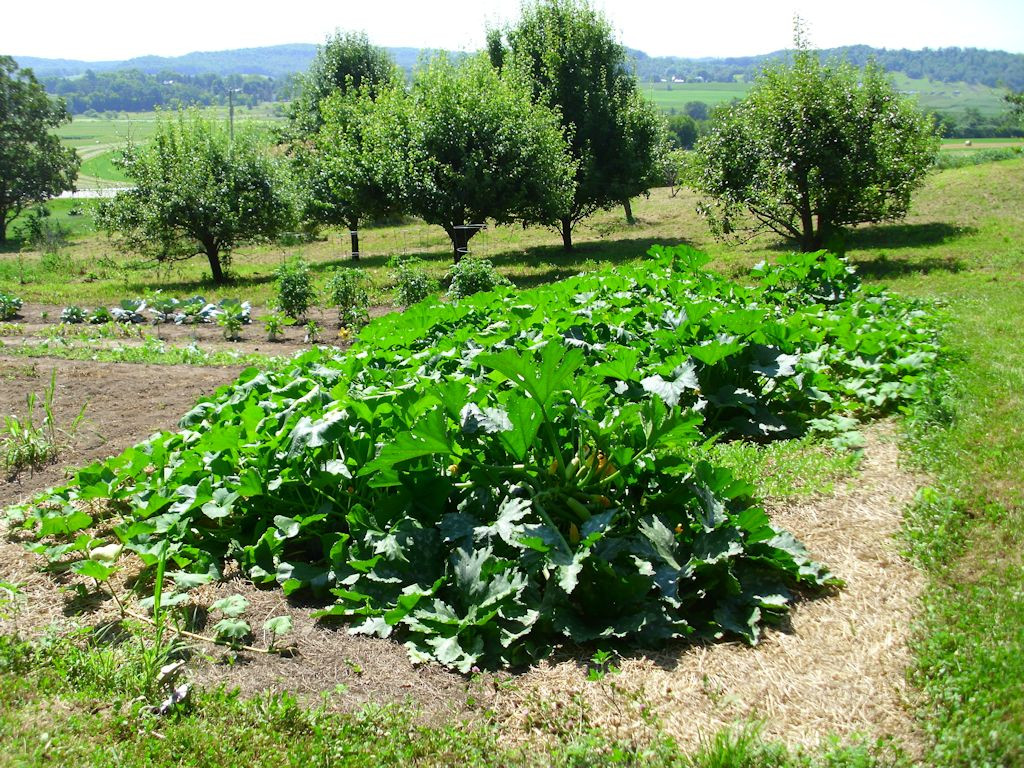
Every year is good for something though and it was a banner squash year. The squash vines grew everywhere. At one point, the squash was chest high on me—I’ve never seen it grow like that.


A largish squash patch with chest high squash plants.
The squash grew like crazy this year!

The picture shows the squash about mid-summer. By the end of the summer they had grown into the garden (overwhelming the tomatoes) and into the grass. The squash also grew larger than normal. I ended up with a total of 700 pounds worth of squash (much of which has been preserved or distributed to friends). Here is some of the squash I harvested this year.


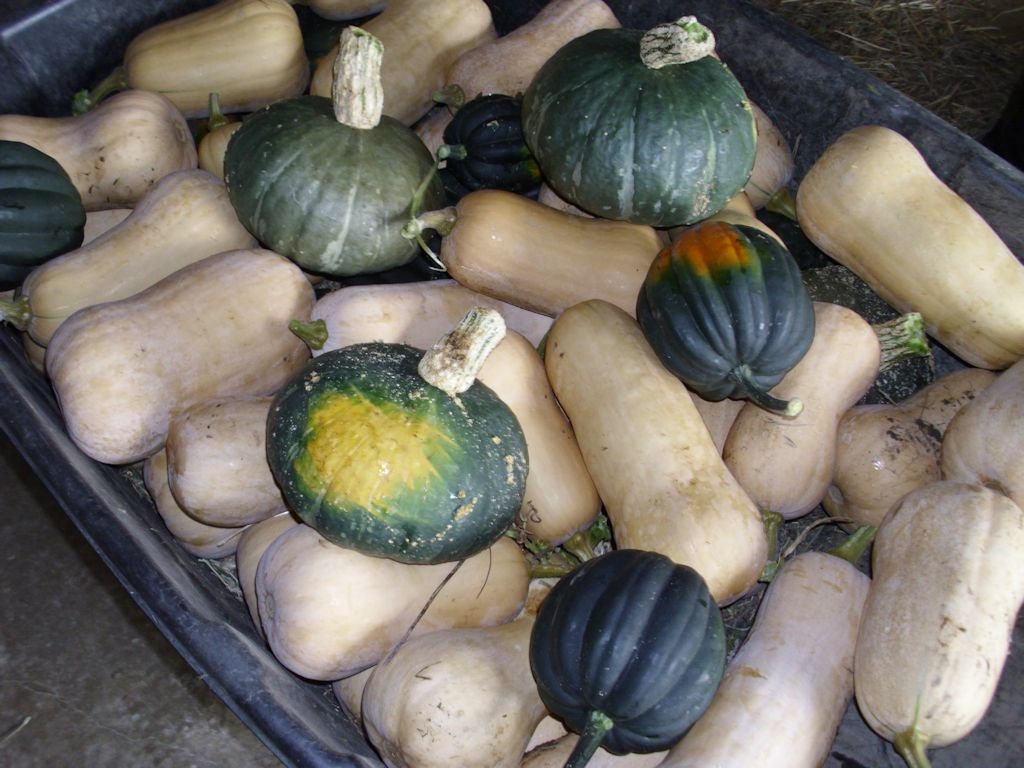
The squash patch produced three kinds of squash in abundance this year.
A cart full of squash.

The largish looking round green squash (one of which has a yellow patch on it) are a Japanese variety, the kabocha squash. So far, I’m finding that they’re a bit drier and sweeter than any of my other squash. I think I could make a really good pie with one and they’ll definitely work for cookies. Unlike most winter squash, you can eat the skin of a kabocha squash, making it a lot easier to prepare and it produces less waste. Given that I received these squash by accident, I plan to save some of the seeds for next year. The squash I was supposed to get was a buttercup squash. The two look similar, but are most definitely different (especially when it comes to the longer shelf life of the kabocha).

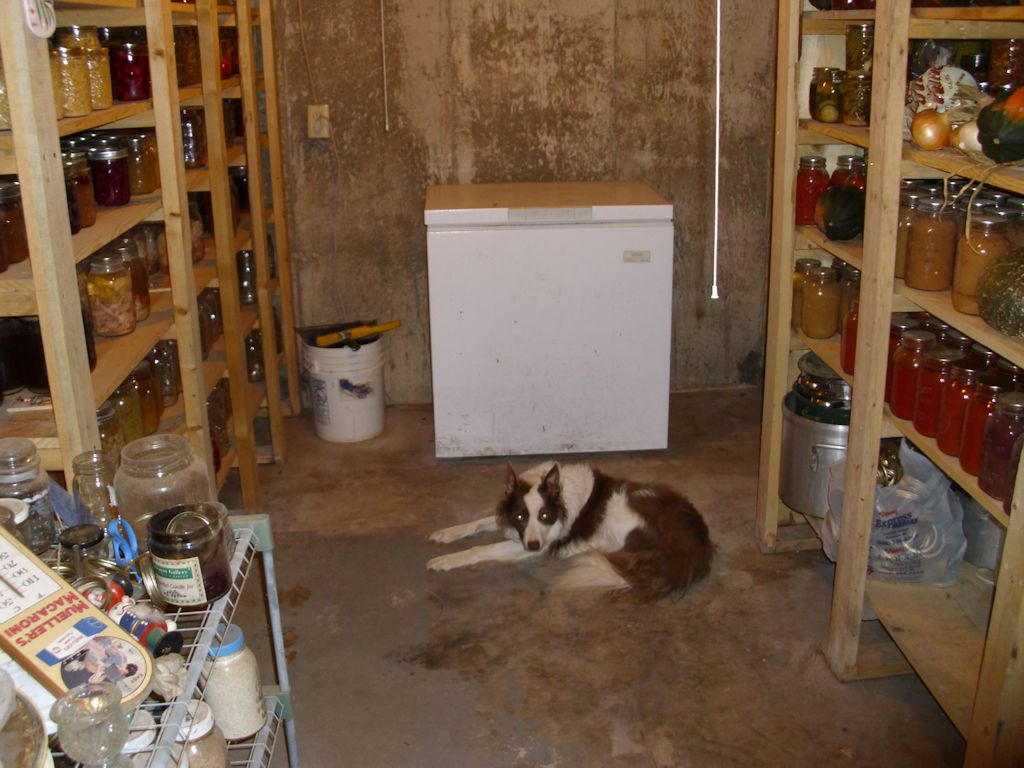
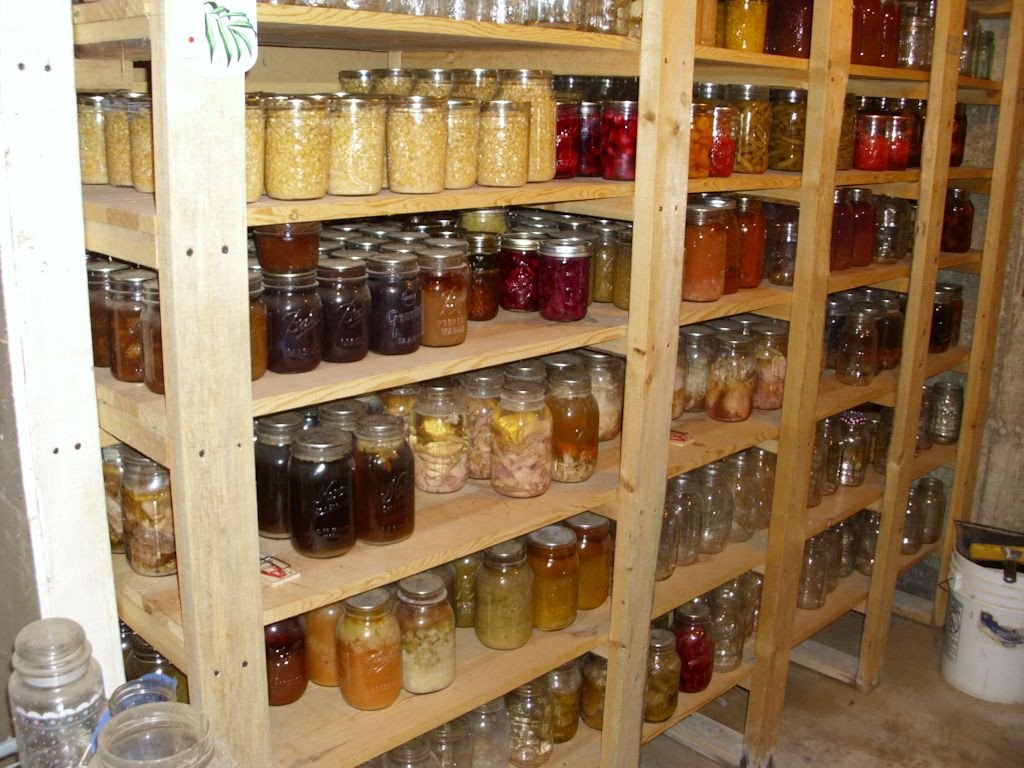
Canning season was busy this year. I’ve started filling in all the holes in the larder. For one thing, I was completely out of spaghetti sauce. Even though making homemade spaghetti sauce is time consuming, it’s definitely worth the effort because the result tastes so much better than what you get from the store. I also made a truly decadent toka plum and grape preserve and grape and pear juice. I’ve done hot water bath canning by myself before, but this was the first year I did pressure canning on my own. Let me just say that it all comes down to following the directions and not getting distracted. My two larder shelves are looking quite nice now (with Shelby on guard duty).


The larder contains two shelving units and a freezer.
A view of the larder from the front.

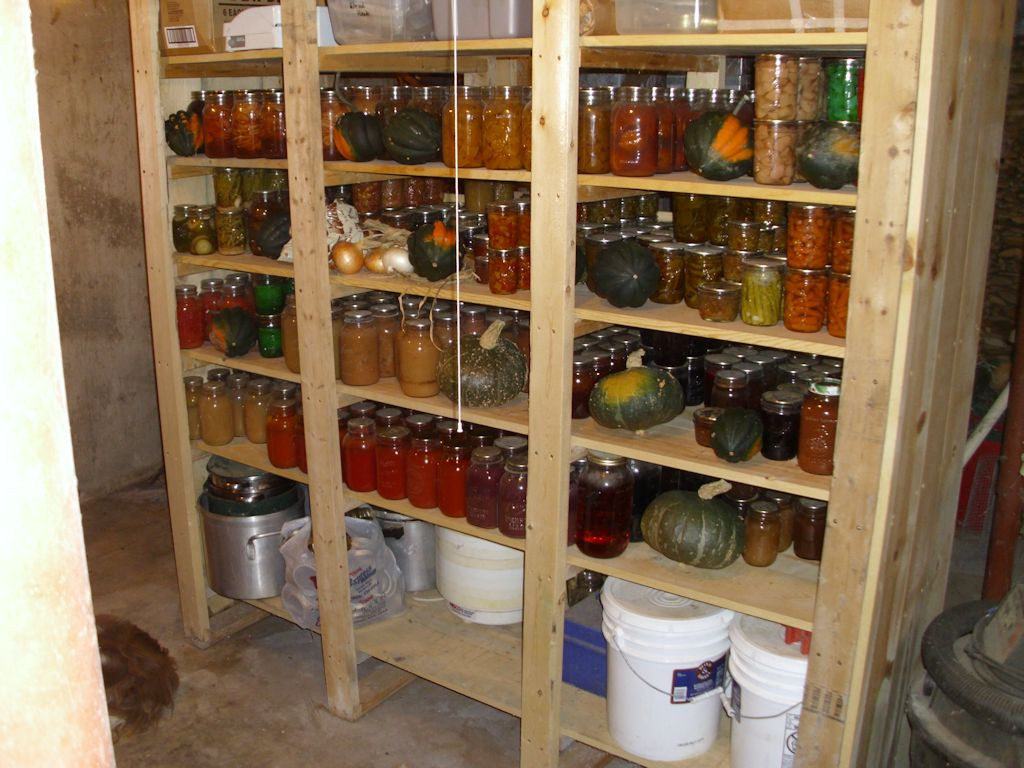
The right shelving unit contains mostly fruit products of various sorts and condiments. Yes, I even make my own ketchup and mustard. Of course, some of the squash also appear on the shelves, along with my cooking equipment and supplies. Let’s just say there isn’t a lot of room to spare.


Fruit products dominate the right shelving unit.

The left shelving unit contains mostly vegetables and meats. In years past I’ve canned venison, pork, and chicken. This year I thought I might try canning some rabbit as well. Canning the meat means that it’s already cooked and ready to eat whenever I need it. The meat isn’t susceptible to power outages and it lasts a lot longer than meat stored in the freezer. Even though canning meat can be time consuming and potentially dangerous when done incorrectly, I’ve never had any problem doing so.


The left shelving unit contains mostly vegetables and meats.

Harvest Festival 2015 has been a huge success. The point is that I have a large variety of different foods to eat this winter, which will make it easier to maintain my weight and keep myself healthy. I had a great deal of fun getting everything ready. There was the usual music, special drinks, and reminiscing about times past. What makes your harvest preparations joyful? Let me know at [email protected].


Winter Warmup

Winter weather is anything but predictable. It’s not consistent either. Every year we prepare our property for the worst but sometimes you can barely tell it’s winter! Last year we made sure we got our heating looked at. It’s always best to get everything checked by professionals, so they can spot issues before they’ve even happened. You could get premierhvacservicesllc.com/heating/ to have a look at everything even though you can’t see or hear anything wrong with it. We also got a roofing company in to look at our roof because we didn’t want any leaks happening over the winter and then it only snowed about 4 inches all season.
This doesn’t mean we won’t do the same this year though – if it’s been a while since you had your roof checked out then I recommend hiring a company like Action Roof Repairs & Roof Restorations Canberra so you know whether or not you need to do any repairs before winter. The only true statement you can make is that the weather is interesting. Exciting might work as another term for it. So, I’m not at all surprised that November turned out quite cold with temperatures well below normal, and now December is turning out a bit warm. In fact, we’ve had a number of days that have been above freezing. From a personal perspective, I’m not complaining even a little. My wood pile continues to look nice too. In fact, the house got a bit too warm last night using the minimum amount of wood. I may not even start a fire this evening given that I used one this morning to dry my clothes (hey, driers cost money to operate-clothes racks are pretty much free except for the initial investment).

Just because I personally like the weather though, doesn’t mean there aren’t concerns. When the weather is like this, the ground doesn’t freeze completely. Bugs that are overwintering in the ground and on plants aren’t killed off when the weather is too warm. In fact, I’m thinking if the weather doesn’t get colder soon, I may end up with a bumper crop of tent caterpillars this spring.

Even though people don’t like the cold winds of winter, the plants need it to remain viable. Nature has evolved to require the presence of extreme cold in order to keep insects under control. When the insects aren’t controlled, the plants have a hard time surviving (normally it’s the plants you want most that die the easiest). For example, tent caterpillars can easily strip my plum trees and because the trees don’t get a second set of leaves, the trees are bald for the entire summer (resulting in their death).

Unfortunately, the weather can also get too cold. Last winter we experienced day after day of colder than usual temperatures. The result was that about half of my grape vines died. Interestingly enough, the grape roots survived and new vines came up from the root. I’ll still have to wait for three or four years to get my first batch of grapes from the new vines, but it won’t be as long as if I had to replant them using new plants. The point is that there is a range of temperatures that plants expect during the winter months and when those temperatures aren’t met, the plants die or the insects overwhelm them.

A number of people have asked where global warming is given the temperatures we’ve been having for the most part. Global warming is a technically correct, but misleading term. The more I read, the more I come to understand that the overall warming of the earth’s temperature causes wider variations in climate, not necessarily overall warming. While we have experienced colder weather here in Wisconsin, overall, the earth has continued to warm. I was reading about the effects of the warming in other areas of the world just this morning.

I’ll eventually provide some additional input regarding global warming because there seems to be a great deal of confusion about things. I do believe there is some level of global warming based on the weather I’ve seen personally. Whether global warming is due to natural climatic variations or the result of mankind’s mistreatment of the planet remains to be seen (although, fouling the planet’s atmosphere, water, and soil is a bad idea no matter what the effect might be). No matter the cause, I look for the effects to become more prominent in the future. Let me know your thoughts about our interesting winter weather at [email protected].

Rhythms of Fall

It’s the beginning of fall here in Wisconsin—my favorite time of the year. Everything is getting that tired look to it and the evening temperatures are beginning to dive a little more often into the 50s and 60s. The leaves are starting to change just a little. Soon I’ll be up in the woods cutting up dead trees for winter. It’s not nearly cool enough for the first fire yet, but that will come too. Soon I’ll have the smell of woodsmoke permeating the house as I enjoy the cool fall evenings in front of my wood stove.

Last week I began picking my grapes and apples. Both have produced abundantly this year. In fact, just one cane produced a little over 40 pounds of grapes. The apples are smaller than normal, but plentiful, weighing the trees down. The pears this year suffered from a lack of activity from helpful insects and an overwhelming quantity of the harmful variety. The point is that it’s a time for picking things and preserving them for the winter. There is a certain feeling that comes over you as you begin to bring things into the house and see the larder shelves swell with all you’ve produced. Most of the fruit will go into juice this year, which means my Victorio Strainer will work overtime.

As part of my fall preparations, I’m starting to dry the herbs that have grown all summer. My herb garden is a little limited this year because the weather just didn’t cooperate as much as it could have. Still, I have plenty of celery (actually lovage) seed to use, along with the dried leaves. The rosemary, two kinds of sage, and two kinds of thyme have all done well (though the rosemary is not quite as robust as I would have liked, it’s quite flavorful). The dehydrator is up and running now, helping me preserve the herbs I need for cooking this winter.

Of course, the herb garden produces more than just herbs for cooking—it also produces a robust number of items for tea. Right now I four kinds of mint growing: lime, lemon, chocolate, and spearmint. The first three are definitely used for drinking teas only because their subtle flavors are lost in other sorts of uses. The spearmint is used for tea, cooking, and mint jelly—that essential add-on for lamb meat. Rebecca actually had eight different kinds of mint growing at one time, but they have gotten mixed together over the years or were hit especially hard by this last winter. The herb garden will need some focused attention this upcoming spring to get it back into shape.

In some respects, the combination of a hard winter, a late spring, and a cool summer conspired to make this year less productive than most. It’s the reason that you really do need a three-year plan for stocking your larder to ensure that you have enough food for those years that are a little less plentiful. Fortunately, my larder has an abundant supply of everything needed to sustain life (and quite a large number of things we made purely for pleasure as well).

There are some fall-specific things that I’ll eventually take care of. You already know about the work part of it, but there is time for pleasure too. For example, I’ll take time for my usual picnic at Wildcat Mountain after the fall color begins to peak. So, how are your fall plans shaping up? Let me know at [email protected].


Fermenting Fruit and Animals

Every year a certain amount of fruit falls from our trees and ends up rotting on the ground. For some people, that would be the end of the story. A few others might clean up the resulting mess. However, we choose to leave it in place. The fruit actually ferments and produces alcohol. Even through many people don’t realize it, fermentation is a natural process that would happen quite easily without anyone’s help. In fact, some of the best tasting foods, such as sauerkraut, are naturally fermented (most sauerkraut you buy in the store isn’t naturally fermented and you’d be able to taste the different readily if it were).

It turns out that the animals in the area enjoy imbibing in a little fermented fruit. Our experience isn’t uncommon either-it happens all over the world. There is never enough fruit left over to make the animals terribly drunk (as happened recently to a moose in Sweden). Most of the time they appear to get a bit happy and go on their way. Until the other day, all I had ever seen eating the fruit were the rabbits and deer in the area. So, it surprised me a little to see our laying hens swaying back and forth on their way to the coop. I couldn’t help but think of those teenagers you see on TV who have used a fake id from somewhere like https://fakeyourdrank.com/ to buy cheap booze and have drunk more than they can handle. Rather than going to an unscrupulous liquor store, however, It seems that the hens also enjoyed the fermented pears lying on the ground.

All of the fruit we grow (apples, pears, plums, cherries, and grapes) will ferment given time. You might wonder how the fermentation takes place. The easiest way to see the start of fermentation is to look at unwashed grapes, especially wild grapes. If you look carefully, it appears that they’re covered with dust. That’s not actually dust, it’s wild yeast. When the fruit is ripe enough and the yeast is able to breach the skin, fermentation begins.

If it’s so easy to create alcohol from natural sources, you might wonder what all the hubbub is about in buying yeast. Different yeast have different properties. When you rely on a wild yeast, you get varying results. Cultured yeast has known properties, so it works better when making bread or wine. The results are repeatable. In addition, using a cultured yeast makes it easier to stop the natural conclusion of the fermentation process, which is always some type of vinegar-like substance (more specifically, lactic acid).

At issue here is how much responsibility a landowner has to nature when it comes to fermented fruit. Because we pick the vast majority of our fruit, the animals in our area get a little happy and that’s about the extent of what happens. When you leave full trees of fruit to rot though, it could become a problem for the wildlife in your area, such as that moose in Sweden. If you can’t pick your fruit for whatever reason, try to find someone who will. Otherwise, you might find yourself trying to correct the errant judgements made by the wildlife in your area when it gets drunk. Let me know your thoughts about fermentation and animals at [email protected].


Harvest Festival 2013

Normally Harvest Festival is a well-organized event for us. I plan the time carefully and include a week out of the office to ensure I have time to harvest the last of the garden and all the fruit without problem. However, all the planning in the world won’t account for the vagaries of nature every time. Even though the Harvest Festivals in 2011 and 2012 went off precisely as planned, the Harvest Festival this year ended up being one emergency after another. It started when our fruit ripened three weeks sooner than expected—make that half the fruit. The other half of the fruit is ripening this week on schedule. The odd ripening schedule points out another potential issue with global warming, but more importantly, it demonstrates the requirement for flexibility when you’re self-sufficient. Yes, it’s possible to plan for a particular outcome, but what you get could be an entirely different story.

This year’s Harvest Festival was stretched out over three weeks while I continued to write and do all of the other things I normally do. (Fortunately, Rebecca was able to put many of the tasks she needs to perform on hold.) Of course, the dual work requirements made for some really long hours. Creating an enjoyable work environment is one of things that Rebecca and I work really hard to obtain. It’s part of our effort to make our close relationship work. So, this Harvest Festival included all of the usual music and other special environmental features we normally have. Lacking this year was much in the way of game playing, but it was a sacrifice we needed to make.

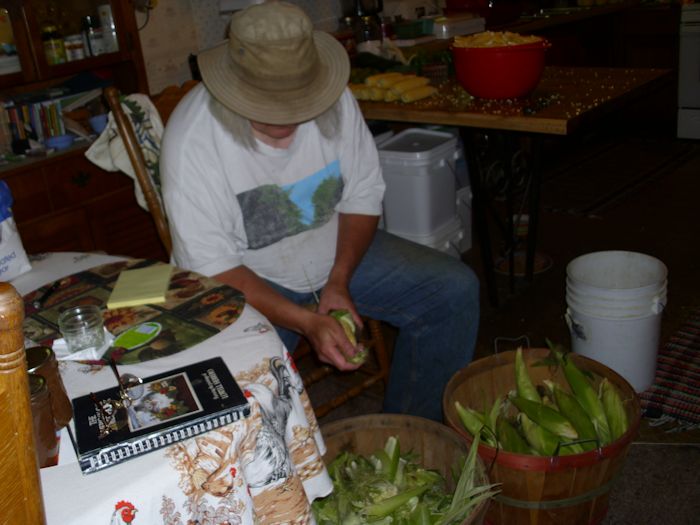
One of the bigger tasks we took on this year was processing four bushels of corn that someone gave us (all in a single day). Actually, the corn came from a few different sources, but the majority came from a single contributor. Of course, we started by husking the corn and getting all of the silk off.

HarvestFestival011

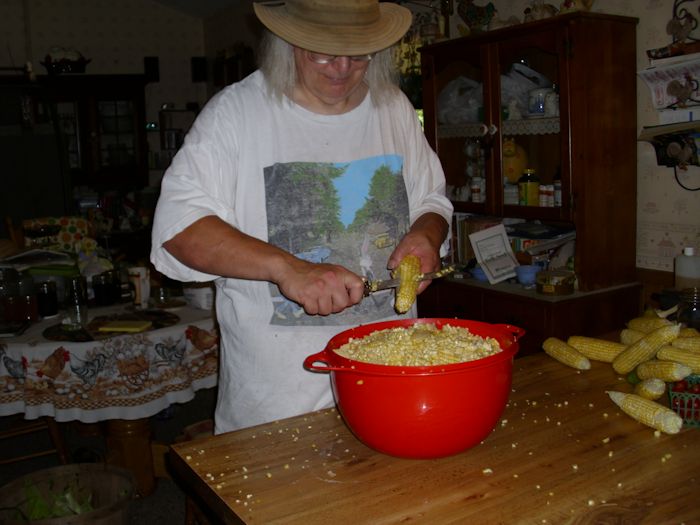
The next step is to cut all of the corn off the cob. This step can be a little tricky. You need a moderately sharp knife around 8″ long. If the knife is too sharp, you’ll take off some of the cob with the kernels. A knife that is too dull will damage the corn and make a huge mess. The knife needs to be long enough so that you can remove the kernels safely—a pairing knife would be an unsafe option.

HarvestFestival021

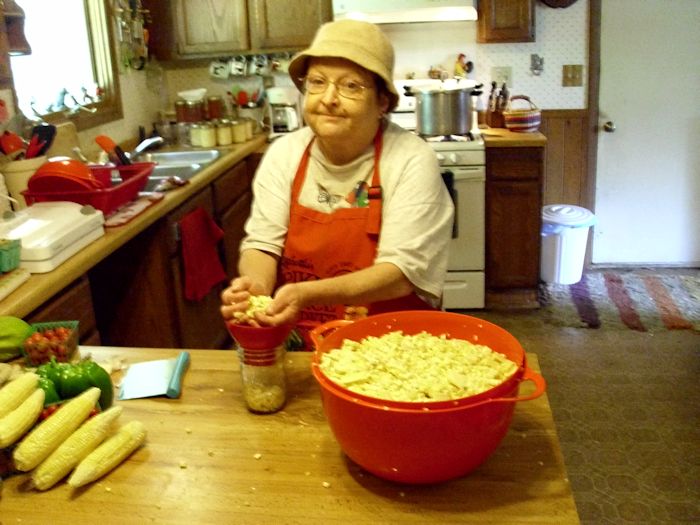
We use a raw pack approach when working with the corn. You want to be sure to pack the corn firmly, but not crush it. Rebecca always takes care of this part of the process because she has just the right touch.

HarvestFestival031

Each pint or quart is topped off with boiling water at this point. We don’t add anything else to our corn. The corn needs to be processed in a pressure canner because it’s a low acid food (the processing time varies, so be sure to check your canning book for details, we rely on the Ball Blue Book and have never had a bad result).

HarvestFestival041

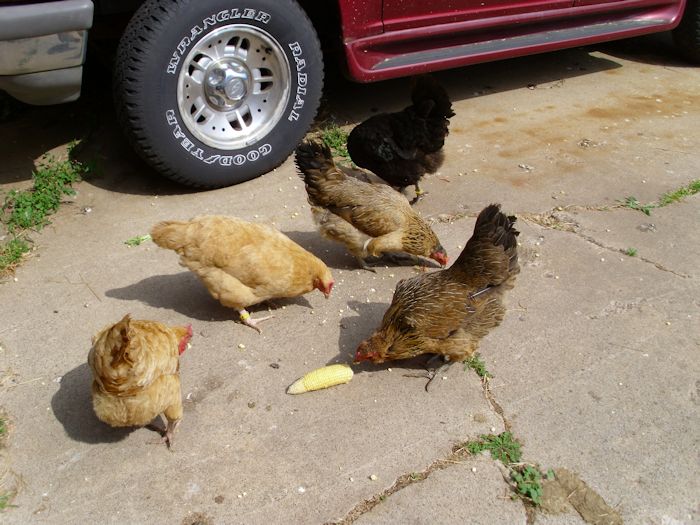
We had four fresh meals from the four bushels of corn. There is nothing quite so nice as corn roasted on the barbecue. We also gave the chickens an ear (plus all of the cobs). They seem to have quite a good time pecking out all the kernels.

HarvestFestival051

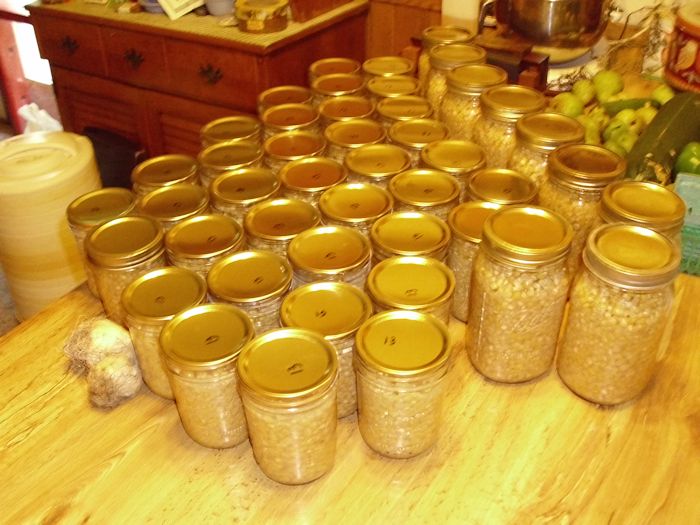
Even with these few subtractions, we ended up with 42 pints (each pint will last two meals using the recommended serving size of ½ cup) and fourteen quarts (used for soup and for company) out of the four bushels of corn. As a result, we have enough corn in the larder now for about 1½ years (a total of 140 servings).

HarvestFestival061

Our Harvest Festival this year included processing pears, grapes, apples, a wide variety of vegetables, and even some of the meat chickens (125 ¾ pounds worth on a single day). The point is that we did get the work completed and we did it while still having as much fun as is possible. We’re both admittedly tired and still resting up. Still to come is the garden cleanup and the wood cutting, and then we’ll have an entire winter to rest up for next spring. Let me know about your latest self-sufficiency emergency at [email protected].


The Making of a Grape Fence

I have spoken a few times about our grapes (see Pruning the Grapes (Part 1) and Pruning the Grapes (Part 2) for details). A few people have asked for details about our four-cane Kniffin system setup. You can see some pictures of the setup in my posts and there is line art available that shows the setup various places online. However, most posts don’t provide details about the actual construction of the setup.

In my case, I used seven large black locust posts cut from trees my grandfather planted. I debarked the logs using a draw knife and then let them dry for a year before putting them into the ground. Black locust is naturally rot resistant and incredibly hard—even the woodpeckers don’t like it. However, carpenter ants will infest your logs given the chance, but even in this case, they hollow out the center and leave the outside intact. So far, I haven’t encountered a problem with carpenter ants because the grape fence is located far enough away from the woods. Because the posts I’ve used are so strong, I didn’t add the angled end posts shown in a lot of illustrations of grape fences. If you were to buy your posts from a lumber hard, you’d want sturdy 4″ diameter or larger posts. Each post is 9′ long and you bury 3′ of the post in the ground.

The cabling is 1/8-inch galvanized wire rope. You want to use wire rope because it’s made up of many small wire fibers and is quite flexible—making it easier to work with. This size cabling will support six to ten canes without any problem. Make sure you read about the weight capacity of the cabling. Each cable must be able to support a minimum of 50 pounds per cane per cable. So, if you have six canes in a row, the cable must be able to support at least 300 pounds (more is better). Otherwise, you have the risk of the cable breaking as the fruit ripens.

You’ll need some method of clamping the cabling. The method for attaching the cable to the earth anchors and turnbuckles is to create a loop and then clamp the loop. Some people will try to use crimping sleeves because they’re easy to work with and inexpensive. This solution works fine for fencing, but not for grapes. As your setup flexes and breaks into the task of supporting the grapes, you’ll need to make adjustments and tighten the cables. For this reason, you want to use wire rope cable clip clamps instead. I’ve found that the 3/16″ or 1/4″ sizes work best for the cabling used on my setup.

Two turnbuckles help tighten the cables. One turnbuckle for the upper wire and one for the lower wire. The turnbuckles make it possible to make small tightening adjustments as the season progresses (you normally make major adjustments in spring, before the canes become active). You want to keep the cables as tight as possible to help support the canes properly. I prefer a 5/16″ × 9 turnbuckle because it provides enough adjustment potential in most cases. Make sure the turnbuckles you choose can support the weight of the wire rope and canes.

The wire rope is ultimately supported by two earth anchors—one at each end. Both rope wires can go to the same earth anchor. It’s a mistake to assume that you can use a short earth anchor because it will pull out over time. In order to ensure that your setup will remain sturdy, you need a large earth anchor. My setup uses 6 × 48″ earth anchors with attached auger for maximum strength.

An earth anchor the size of the one discussed in this post requires a fair amount of muscle to put into the ground. I highly recommend having a piece of metal pipe to use to help get the anchor into the ground. My piece of pipe is about 30″ long. You put the pipe through the eye in the earth anchor and use it to turn the earth anchor as it goes down into the ground.

The final piece of the puzzle are the screw eyes used to hold the cable at each post. The screw eyes are attached at heights of 30″ and 60″ on my setup. Each screw eye must be able to support the weight of all of the canes and the wire rope. A 2-1/16″ screw eye (size 104) will probably work, but I prefer a larger 3″ screw eye to ensure it will hold up.

This is all that you need to setup a grape fence of the type I use. There are ways to make the fence using other materials and I’m not saying my method is the only method available, but it has worked well over the years we’ve had grapes. Let me know your thoughts on grape fence construction at [email protected].


Pruning the Grapes (Part 2)

It has been a while since I wrote Pruning the Grapes (Part 1). Of course, the grapes were actually pruned long ago. In fact, the biggest impediment to my pruning the grapes was the knee deep snow in many areas of the orchard. We still have some snow, but it has greatly diminished since then. In that first post I described some of the conclusions I had reached from pruning our own grapes and watching others work with their canes. I also mentioned that we use a four-cane Kniffin system for pruning purposes. I decided to grab a few pictures of the pruning process, in part, because the pictures in books sometimes make it hard to see precisely what you should do. This is just one method of how to prune grapes, but there are several other ways of doing so. If you’re wanting to learn to prune grapes, then carry on reading for my version –

There are actually two kinds of buds on a grape cane. The first is sharp and pointy like the one shown here.

PruningGrapes0202

This bud type produces the leaves later in the season. The second is rounder, almost globular like the one shown here.

PruningGrapes0203

This bud type produces the flowers that will eventually produce the grapes. The concept that completely eluded me at the outset was that a grape won’t produce any more buds for the current year after the previous year’s growing season. In other words, the buds you grow this summer are for next year’s fruit. When you prune, you must prune with the idea that the buds you have now are the only buds you’re going to get, so you need to prune carefully. A lot of the books also fail to point out that you want to keep the buds nearest the main branch so that the grapes receive sufficient water and nutrients. Finally, each spur should have only two or three fruiting buds-the globular ones. The spur can have any number of leaf buds-more is better in this case.

Some of these pictures are a bit hard to see because the light was intolerably harsh on the day I worked on the vines. However, there are a few things you should notice in this picture:

PruningGrapes0201

Notice that the spurs coming off the main cane don’t necessarily point down as it always seems to show in the pictures in books. The spurs will eventually point in the right direction because the grapes will pull them down. Don’t worry about spur direction-look instead for the spurs that have the nicest fruiting buds.

Also notice that the canes are tied to the steel cable. You need to put the canes in contact with the cable to promote attachment to it. Those curlicues coming from the cane are actually quite strong and will hold it in place, but only if they actually curl around the steel cable. You can’t use anything harsh to tie the canes in place. We actually use old pairs of pantyhose that have been cut up into usable pieces. The pantyhose are quite inexpensive and last several years (as many as five) before they start to disintegrate too badly. The most important part though is that they hold well without causing damage to the cane. Using a steel cable manufacturer you can trust is important to make sure your machinery is working properly and efficiently for you.

When you get done, your cane won’t look quite as pretty as the ones in the book. In fact, grape vines tend to look a bit gnarled. Here is how the pruned vine looked this year when I got done with it.

PruningGrapes0204

You can see the trunk, the four fruiting canes, and the spurs coming from the canes. The canes are looped or tied to the steel wire as needed. I’ll actually retie the lower left cane when the season progresses. At the time I pruned the cane, I was a bit worried about breaking it, so I left it as is. The upper right cane will also require a bit more support. Again, I chose to wait until it warms up a bit and the cane is more flexible. This grape vine will likely produce sixteen nice sized clusters of medium-sized grapes that I’ll eventually use to make wine or Rebecca will use for jelly or juice.

This is my approach to pruning grapes. Of course, there are many schools of thought on the issue. However, what I do hope is that the combination of pictures and some insights will help you get better grapes out of your vines. Let me know your thoughts on grape pruning at [email protected].
Unexpected Drought Consequences

I’ve written a number of posts about the effects of global warming from a personal perspective. It does make a difference in how I view the whole issue of global warming. Whether global warming is a matter of cyclic world changes, human interaction, natural sources, or some combination of thereof isn’t the point-the point is that the earth is getting warmer, which is causing changes of various sorts that affect me as a person. Your best way to deal with these changes is to make a list of how they affect you and come up with effective strategies for dealing with them.

This summer saw a drought come to our area. There is more than a little evidence to say that the drought is just another effect of global warming. People focus on droughts during the summer months because crops are affected, grass dies, and the heat becomes oppressive. The television, radio, and newspaper blare pronouncements of impending doom from dawn till dusk each day. However, the winter effects of drought can become even more devastating than those in summer.

Consider the fact that snow acts as an insulating blanket for the earth. It helps retain some of the heat in the deep layers. When there is a lack of snow, frost tends to go further into the ground and cause all sorts of nasty consequences, especially during a heavy freeze. My reason for writing about heavy freezes is that we’re experiencing one here in Wisconsin and I’m concerned about the potential of damage to either my well or septic system. Nothing is quite as exciting as living almost four miles from town and not being able to use any water because your septic system is frozen. Once frozen, you need to call a professional to thaw the system so you can use it again. If your professional is especially busy, you may be waiting for a few days.

The problems of deep frost aren’t limited to the well or septic system. A deeper frost creates more heaving-water freezes and the resulting ice displaces some of the earth underground. The most conspicuous result of heaving is that any pavement on your property buckles and doesn’t last nearly as long as it could. It’s possible to assign an actual dollar amount to the lost longevity of your sidewalks and driveway. The effects can also profoundly affect your house’s foundation.

Heaving also causes myriad other problems for the self-sufficient person. For example, those posts you put in for your grape vines will become misaligned-forcing you to spend time readjusting the cables and possibly damaging the vines. A deep frost can kill tree, vine, and permanent bed plant roots. You’ll also have the pleasure of picking more rocks from the garden come spring because heaving brings them to the surface (despite the perception that they grow there during the winter). I’m also wondering how a deep frost will affect our new chicken coop (despite having put the posts as deeply as we could in the ground, heaving will still have an effect on them).

There is also the direct heating costs to consider. A blanket of snow on your roof acts as additional insulation. When this blanket is removed completely, your house loses more heat. If you do find that you are losing a lot of heat from your roof, you might want to consider looking at some cedar park roofing companies to come and assess for any damage. Of course, there is also a problem when there is too much snow on your roof (causing damage from the weight) and the whole issue of ice dams. Winter is the worst time to be struck with a roofing emergency so if you suspect any signs of damage, you may wish to contact someone at trusted-roofing.com promptly. Although it can be nice to have that extra heat in your home, there are dangers of having a thick layer of snow on your roof. To prevent any future damage, you might want to ask a company (like this roofing austin service) to check that your roof hasn’t become vulnerable after having that layer of snow on it throughout winter.

Drought causes serious problems during the winter as well as the summer. No matter where you live, you have to consider the effects of drought on your property and the structures it supports. What sorts of winter drought effects have you seen in the past? I’ve seen cases of areas with sustained droughts end with torrential rainfall, the issue in this particular case of a friend of mine… I was told their property was drenched by rainfall after searing heat for weeks, the problems they came to face was a pooling of water in places near their home where they’ve never experienced it before, and caused water damage to their basement and foundations. The issue being, their homes’ gutters hadn’t been used in weeks and therefore became clogged with all sorts, because of the heat they had completely forgotten about the gutters. Either way, once they got in touch with a company like this Clean Pro Gutter Cleaning Denver area (Of course it was Colorado!) they had their gutters cleaned out, the pooling of water drained and their properties structure checked over for repairable damage – so in this case, their extreme drought caused them some serious water damage in the coming weeks. This leads me to the question, do you think the increased number of droughts is due to a natural cycle in the earth’s weather pattern or from global warming (or possibly a combination of both)? Write me about your drought observations at [email protected].

Pruning the Grapes (Part 1)

Previously I had written about trimming our trees. We normally perform tree trimming in March or possibly April in a really cold year. The snow is gone and the temperatures, even though they’re still quite cool, are warm enough to work in without suffering frost bite. Pruning grapes seems to be a different story. Past experience has shown us that pruning grapes in March almost assures that we won’t obtain much in the way of a harvest because the cuts don’t have time to heal properly before the grapes start pumping water into the stems. What you end up seeing is water dripping from all of the cuts if you prune grapes that late.

We’ve also tried pruning our grapes in the fall. Unfortunately, the winter air damages the cut ends, leaving more dead material than we would like. It also seems as if the wildlife takes the fresh cuts as an invitation for further pruning. We actually had several vines trimmed to unusable nubs by the local deer. Obviously, fall pruning doesn’t work for us either.

As with many other self-sufficiency issues, this one is a learning experience. We know that if we keep at it long enough, eventually we’ll have a good system down for our grapes. You can read all you want and ask everyone who has any idea at all about how to do things, but your plot of ground is different from any other plot of ground out there. When you’re self-sufficient, you have to be prepared to experiment. So, undaunted by previous failures, this year we’re pruning our grapes in mid-January. The timing will allow the grape ends to heal before spring takes hold, but should present less opportunity to the local wildlife for extra trimming and the weather won’t have as much of an effect either.

The approach you use for pruning your grapes depends on your weather and the method you use to train them. We use a four-cane Kniffin system. The approach yields a relatively large number of grapes, is easy to maintain, and doesn’t tend to have problems with mildew due to lack of airflow (as is the case with arbors). Picking can be more time consuming than when working with arbors and you need a source of rot resistant posts. Fortunately, we do have a native source of rot resistant posts in the form of the black locust trees that grow in our woods. Farmers actually planted them to use as fence posts.

Most of the books we have say that it takes seven years for grapes to grow to sufficient size to start producing well. Our own experience says that it’s more like ten years, especially if you have wildlife constantly nibbling at the canes. We finally ended up staking out one of our dogs to keep the wildlife at bay one year so the vines could grow unmolested.

We’ve chosen to plant a number of grape varieties: Niagra (white), Catawba (red), Concord (purple), Delaware (pinky purple), and King of the North (blue). Each cultivar has specific properties to recommend it. For example, the Delaware produces an outstanding wine grape, while the Concord is better for jelly production. The King of the North is a good juice or table grape. We prefer the Niagra for table and juice uses, but it should also make for a nice wine. The Catawba has yet to produce sufficient quantities of grapes for us to test it for various uses, but we’re assuming that we’ll use it for wine. When choosing grapes for your own vineyard, make sure you pick from a variety of cultivars. A single mature trunk can produce a significant number of grapes (upwards of 40 pounds), so you need a plan for using them.

It’s also a mistake to prune every year. I had noticed some of our local vineyards don’t trim their canes absolutely every year. When I started pruning every other year, our harvest went up significantly without reducing the vitality of the vines. It may be that some locations require yearly pruning, but this doesn’t seem to be the case here.

What are your experiences with grapes? Do you favor particular cultivars over others? Let me know your thoughts at [email protected].