Appreciating the Value of Microclimates

There is probably something odd about your house and you might not be aware of it. In fact, there was something odd about my house and it took me a while to discover it. Houses create microclimates in the right conditions. Such is the case with my house. The thermometer on the back porch is often warmer in the fall months than the thermometer on the front porch. Given there is no sunlight hitting the back porch, the only explanation I originally came up with was that one thermometer was off. However, moving the thermometers around proved this assumption wrong. The temperature really was higher in the back where the sun didn’t hit. What I was seeing is the effect of a microclimate.

The temperature differential isn’t very large. On a really good day, it can be up to five degrees. It also doesn’t last indefinitely—the differential between front and back temperatures eventually evens out. The microclimate is formed by a combination of the house and the overhanging trees. It’s almost as if there is a kind of blanket over that area so that it stays cool longer in the summer and warm longer in the fall. The rate of temperature change is slower, which creates a condition favorable to certain kinds of growth.

An interesting part of the microclimate is that I just finished picking the last tomato, radish, and green pepper from my container garden on the 23rd. Yes, there had been several frosts before this time, but the microclimate kept the temperature at the back of the house just warm enough to prevent these container vegetables from freezing until this major frost. Everything in the main garden and the areas outside this little microclimate had died out for the winter long ago. So, microclimates can help you continue producing vegetables long after everyone else has stopped picking for the year.

The microclimate is also the reason that I think herbs do so well behind the house. Instead of suffering the extremes they would encounter in other areas of my property, the herbs are treated to a more or less constant temperature that makes them grow well. The constant temperature also reduces stress, so I have fewer pests and it seems to intensify the flavor of the herbs. In short, microclimates can improve whatever you’re growing as well as allow it to grown longer.

A lot of people have microclimates available to them, so they could grow items far into the fall. Good candidates are items that have a longer growing period after pollination (such as green peppers and tomatoes) and items that don’t require pollination (such as radishes). The items also need to be able to grow in a container so that you can move them as needed. To find these microclimates around your house, use thermometers to measure the temperature at a specific height above ground. Make sure every thermometer is at the same height or you won’t get a true reading. You may be surprised at what you find.

The best place to find a microclimate is an area that is sheltered somewhat like the area between my house and the woods. Look for overhanging trees. You could also check south facing areas of the house where the sun can provide a heating effect in the fall months to extend your growing season. Appreciating the value of your microclimates is one way to get more out of your investment in plants. Let me know about your microclimate experiences at [email protected].

How to Butcher a Pumpkin…

When I was growing up, it was my uncles’ job to wield a big knife and peel the raw pumpkin so that my mom could bake pumpkin pie and make filling for canning. Watching one of “the boys” handle the knives while trying to carve away the skin of a raw pumpkin was usually a little scary and sometimes hilarious. It all depended on who was careful and who was just cutting up! When I moved into a home of my own, I had to learn a different way to separate skin from the flesh of a pumpkin because I am married to a man who loves pie, made from scratch, and he likes his pumpkin made that way as well.

Besides, it’s very cheap and easy to do. So here’s how to butcher a pumpkin in seven steps:

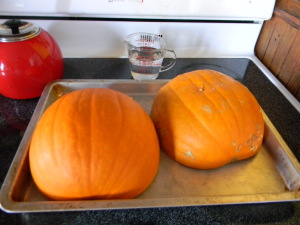
  1. Be sure that your pumpkin will fit inside the shallow baking sheet that you are going to be using. It doesn’t matter if both halves fit but you want to have the edges of the pumpkin completely inside the baking pan. Choosing the right sized pumpkin for this process is very important.

    Cut Side down in shallow baking sheet

    Be sure that the edges of the pumpkin are inside the pan.
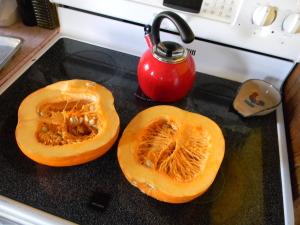
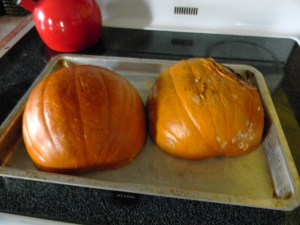
  2. Cut your pumpkin in half.

    Raw Pumpkin halves
    Raw Pumpkin Halves
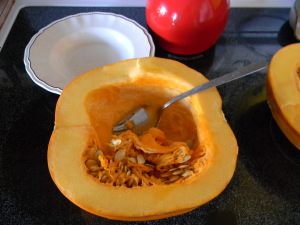
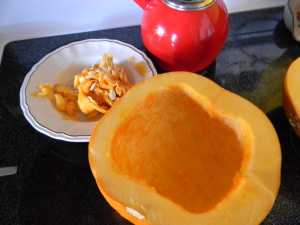
  3. Carefully scoop out the seeds with a spoon. If you have kids that want to help, this is a great chance to include them—handling the guts and seeds is really fun (and gross)! The seeds can be washed and baked with seasoning for an added treat.

    Scooping out the seeds
    Scoop out the seeds with a spoon
    Save the seeds for roasting later!
    Save the seeds for roasting later!
  4. Flip the pumpkins cut side down and place them onto a shallow baking sheet with a lip all the way around the pan. I used an Air-bake pan because it is double layered and gives improved stability while loading and unloading the heavy pumpkin from the hot oven.

    Cut Side down in shallow baking sheet
    Place Pumpkins Cut Side Down
  5. Add a small amount of water to the baking sheet. Just enough to cover the surface of the pan about 1/4 inch deep. The water will boil and steam the pumpkin inside while the oven is baking it from the outside.
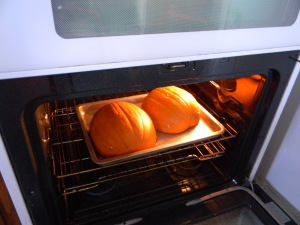
    Pumpkins in 350 F oven
    Pumpkins in 350 F oven
  6. Bake in a 350F oven until you can pierce the skin of the pumpkin with a fork. If you want the pumpkin to be more puree-like bake it longer. You may need to carefully add water while the pan is in the oven, but bake the pumpkin until it is as soft as you want it to be. The halves may collapse just a little bit as the insides get soft.
    Fork tender is done enough for chunky pumpkin
    Fork Tender is done enough for chunky pumpkin
  7. Finally, let the whole thing cool down. When it is cool enough to handle, peel the skin from the flesh and discard the skin. Then you can use it however you like. My last experiment was a simple blend of fresh apple chunks, some pumpkin chunks and curry powder to taste. No sugar and no recipe. I just mixed up what I had and popped it back into the oven to soften the apples. It was delicious!

This method of processing pumpkin is economical, healthy and easy. There are absolutely no additives or preservatives so the only thing that you will taste is pumpkin. It also works for winter squashes of all kinds.

So, if you decided NOT to carve your pumpkin for Halloween, consider Butchering and Eating It! You’ll be glad you did!

If you have any pumpkin tips or stories, I would love to hear from you! Please respond to this blog or email John at [email protected].

Interesting New Words

Every day I learn at least two new words. On some days I learn more. A lot of those words are interesting, but I probably won’t use them very often, if at all. However, they at least tell me something about English and provide some food for thought on how to use words in the text that I write to convey specific meanings. I’ve written about this topic before in Not Mere Words and again in Power Words. However, it’s a theme that needs to be repeated because people often find it hard to convey their thoughts due to a lack of words in their vocabulary. The result is often garbled, with the hearer not really understanding what the speaker wants to say.

I learned two new words this week that I could potentially use at some time. The first is metathesis, which is a mispronunciation due to the transposition of letters or syllables in a word. The most common metathesis for me is saying Calvary instead of cavalry. The transposition of the letter l is the problem in this case. It turns out that some words in our language are actually created because of metathesis. For example, the word mullion (a vertical divider, such as a piece of wood in a window) comes from the metathesis of the word munial. It doesn’t surprise me that there is a word to describe an error that most people make, but until now I didn’t know what it is. The funniest word that I’ve learned is formed from metathesis is girn, which is a kind of grimace or snarl. Of course, the source term is grin.

The second word is biovermiculation, which refers to lines drawn on a surface by a microbial community. I read about this word in a National Geographic article entitled The Hunt for Life Beyond Earth. I found the implications of the article amazing, but the addition of a new word to my vocabulary is a bit more practical. Without the proper word to describe this phenomena, it would be difficult for me to understand that biovermiculation on another planet could possibly point to life on that planet—at least, sometime in the past. Knowing the proper words gives you the power to convey specific meanings and provides you with an advantage over someone whose vocabulary is less comprehensive (and therefore, less precise).

I build my word power through a number of sources. Of course, National Geographic and Smithsonian both provide me with new words that appear with surprising regularity in my writing. However, for those two daily words, I look to A.Word.A.Day and Word of the Day. In addition, I build my word power through all sorts of technical sources, including other books. There are many places where you can find interesting new words to use when writing or simply speaking to someone else. What new word have you learned today? Tell me about your positive (and G rated) word learning experience at [email protected].


Considering the Human Face of 3D Printing

A lot of my posts discuss the technical side of issues such as 3D printing. They’re a clinical treatment of a technical topic—devoid of sentimentality. Of course, this is a natural outcome of the kind of writing that I do. Most of my books contain accessibility aids in them because I strongly believe in the power of the computer to level the playing field for those who need a little extra help to be productive. Some of the things I’ve seen during my career have just amazed me and I’m sure that I’d be even more amazed were I to see it all. However, the technology I present is often faceless and lacks that human touch that really is needed to convince people about the validity of using technology to make life easier for those around us. That’s why a recent Parade article, How 3-D Printing is Transforming Everything from Medicine to Manufacturing, struck such a chord with me.

No longer is the technology faceless. You hear about how 3D printing has helped a real little girl live a normal life. The look on Anastasia Rivas’ face tells the whole story. It’s the same look that I’ve seen before when people’s lives are transformed by accessible technologies and it’s the same look that continues to drive me to cover accessibility in every book I write, in every way I possibly can. For me, technology isn’t about games or productivity software; it’s about making a difference in people’s lives—helping them do more with every asset they have. It’s the reason that I’d love to see fully secure, ultimately reliable, and easy to use software sometime in my lifetime, even though such a goal seems absurdly unrealistic today.

The point of this post is that the software you develop has real implications for real people. There is a tendency by developers to view software as an abstraction—as something that simply exists. In fact, there is a tendency to view software simply as a means to an end, but software and the hardware it runs on is so much more. I usually leave out the specific “who” part of an article to help you better concentrate on the technology you’re using. However, after seeing the Parade article, I just had to say something about a specific person affected by the technology that we all use and create as developers.

When you write software, make sure you consider the specific “who” of that software. Specifically who will use the application and what are the needs of that specific person? It’s a question we all need to answer despite the tendency to view software in the abstract. Let me know your thoughts about the human face of technology at [email protected].


Death by Connected Device

The title for this post is dramatic on purpose. In my book, Accessibility for Everybody: Understanding the Section 508 Accessibility Requirements, I describe all sorts of useful technologies for making the lives of those with special needs better. In fact, this particular book has received so much attention that I’ve expanded its coverage significantly by devoting forty (and counting) posts to it. The fact is that implanted devices will continue to be a part of our lives and their use will only increase, which is why articles, such as Cyber crime: First online murder will happen by end of year, warns US firm, have me more than a little concerned. The fact is that we’re all in line for a major wake-up call at some point if something isn’t done to secure the Supervisory Control and Data Acquisition (SCADA) systems we all rely on to connect devices to the Internet today. The hardware, software, and other functionality required to make everything happen is encapsulated in a technology known as the Internet of Things (IoT). Soon, everyone will know about IoT, but few people will know or understand the underlying SCADA systems that goes with it.

The part of the articles that I’ve read so far that intrigues me most is that politicians and others in the know have been disconnecting themselves from the Internet. Note the mention of Dick Chaney disconnecting himself from the wireless part of his implanted device in the aforementioned article. If the devices and their connections were secured, our former vice president wouldn’t be quite so worried. Unfortunately, the rest of us probably won’t be quite so lucky unless we refuse to have the devices implanted at all (which would seem to be a self-defeating stance to take). I’ve actually been discussing this issue for quite some time now. The latest significant treatment of the topic appears in my An Update On Special Needs Device Hacking post. I’ve also broached the topic in Determining When Technology Hurts. The point is that this issue isn’t new, but we certainly haven’t done anything about it.

Will it actually require a slew of front page news stories depicting people assassinated through their implanted devices for someone to get the idea that there are really awful people out there who would like to kill someone (anyone) with impunity? It seems to be the case. So, now we’re seeing stories about the event actually taking place sometime soon. Even if we don’t see someone killed, I can see a situation where people have money extorted from them by hackers who have gained illegal access to their implanted devices.

I’m all for the advancement of technology that has significant potential to help people. I’ve written more than a few posts on the topic. Helping people to walk, see, hear, touch, and have generally better lives is a great idea in my book. However, the time is long past for securing these devices in a meaningful way so that only those who really need access will actually get it. Just why there hasn’t been any legislation regarding this need is beyond me. Our politicians are obviously aware of the problem and have done the work required to protect themselves, but they don’t see to be in much of a hurry to protect their constituents.

Given what I’ve seen in the past, I’m sure the medical community won’t be in any hurry to secure these devices because security has been a legislated requirement in the past. With this in mind, what do you feel needs to happen with these devices to make them a better deal for those who need them? Let me know your thoughts about the lack of security for implanted devices and devices connected to IoT in general at [email protected].


Get Fluffy!

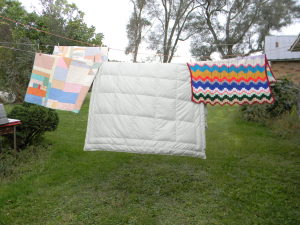
Quilt, Comforter and Afgan

A Quilt, a Comforter and an Afghan meet on the clothesline…

When I was a kid, October was the month for the “Autumn Airing of the Quilts”. My best friend’s mother had a wide range of quilts and comforters, many of which had been passed down for generations. On a sunny Saturday afternoon we would take them all out of their storage chests. Then we would repair any damage. If they smelled musty, we would wash the bedding and let it dry in the fresh air. Anything that was brightly colored was carefully monitored so that it could be taken off the clothesline just as soon as it was dry so it wouldn’t fade in the sunshine. After that was done, all of the beds in the house were made up with winter sheets, clean blankets and these heirloom quilts and comforters.

As a result, comfort came home!

As it is with anything that you want to last, proper storage and care is necessary for bedding. In order to provide proper care, it is important to know what you have. Knitted and crocheted items are called afghans and require a different type of care than quilts and comforters. Comforters, quilts and blankets are made from fabric like a repurposed t shirt, as well as other materials that make the comfort level very high. My personal favorite being a Minky Fleece blanket. I think that they’re relatively popular, so it’s very likely that you have seen this before on beds, or by people who like to use a weighted blanket to help give them that sense of security that they’re struggling to find elsewhere. But simply knowing what fabric these items are made out of will do wonders for you in the long run. It’s also important to know when washing these bedding items. Additionally, whilst they’re being washed, it might be worth finding another set of bedding to put on the bed. My friend’s mother used to get her bedding from Target, so it might be worth looking online to see what bedding they have. There are also coupons available on this page here, so make sure to use those discounts if they apply. Now, let’s get washing our current bedding.


  • When the item is made of fabric there are several ways it could be made:
    • A quilt is made of pieces of fabric sewn together in a pattern with a top, middle and bottom layer sandwiched together and then sewn.
    • A comforter is made by sewing two sheets of fabric together and filling the inside with something fluffy often feathers or down.
    • A blanket is a single layer, traditionally cotton or wool and in modern times, microfibers.
  • Ask yourself: Is the item supposed to be fuzzy,smooth or satiny? Different fabrics require different treatment to keep them in the best condition through the years.
  • Were these given to you from someone as an heirloom or is it simply a hand-me-down? Heirlooms command much more respect and warrant special attention due to the emotional attachment that comes along with it.

Here are some considerations for airing your own comforters, quilts and blankets.

  • Check over the bedding carefully and mend any seams before attempting to clean the items. Remember the quote from Poor Richard’s Almanac “A stitch in time saves nine”? It is certainly true when it comes to mending bedding.
  • Be certain of the material that the item is made from. Wool must be cleaned differently than cotton. Microfiber can be treated differently than sateen. Look for fabric tags. If there are care instructions, follow them carefully for best results.
  • Be careful with bedding if anyone in the home has pollen allergies. While bedding is outside on a line, the pollen and pollutants from the surrounding countryside can settle on it. If there are allergies in your household, you may choose to tumble your bedding in a drier instead of airing it on a line.
  • Do not crowd bedding in the drier. For a large comforter it is worth the time and money to take it to a laundromat to use large capacity machines. If you decide to dry your bedding in a home machine, add small items to create movement in the dryer. Be sure that the items are completely dry before folding or storing to prevent mildew.
  • Filled comforters, with down or manmade materials inside, should always be tumbled dry. For fluffiness, add a couple of tennis balls or similar item (I wash and use my dog toys) in the drier. A comforter is warmer when fluffy, because the down captures and holds warm air inside the layers.

It will soon be blustery and frigid outside. Although it takes time to make sure that your bedding is cleaned, mended and ready for winter, the investment will keep you warm and snuggly all winter long!

If you have any stories about your experiences with quilts or comforters, or pictures to share, I would love to hear from you! Please add a comment to this post or contact John at [email protected].

Using 3D Printing for Urgent Medical Needs

The uses for 3D printing technology continue to amaze me. For example, it’s estimated that 2/3 of manufacturers now use some type of 3D printing technology. This technology has the potential for significantly changing how doctors practice medicine. More importantly, it has the potential for changing how emergency services are offered. I actually started this series of posts by looking at some potential uses for 3D printing in the Thinking About 3D Printing Technology post. In fact, this is my sixth post about 3D printing technology.

The interesting thing about 3D printing technology is that it can be used to create body parts that won’t suffer rejection because the parts are made from the recipient’s own DNA.The latest use of 3D printing technology is to create skin for burn victims and others that will completely match the person’s own skin. The interesting part is that the skin can contain hair follicles and sweat glands, just as the original skin did. This means that there is a potential for creating new skin that looks completely natural because it won’t actually be any different from the person’s original skin.

It won’t be long and people will be able to get a replica of nearly any body part printed for various uses. Of course, the first use that comes to mind is as a replacement part when an older body part because dysfunctional. However, the uses go well beyond simple part replacement. By creating replicas of existing body parts, a doctor can test for drug interactions and other potential problems before starting a patient on a course of treatment. Many of the issues that patients face today will go away simply because the treatment can be tested fully before it’s applied to the person in question.

What intrigues me most is how this technology will eventually affect emergency services. Imagine what would happen if a first responder was able to apply a bandage created from skin printed from a person’s DNA right in the field. The temporary skin has the potential for decreasing all sorts of problems that people experience today because bandages sometimes just can’t do the job fully. A recent Smithsonian article, Inside the Technology That Can Turn Your Smartphone into a Personal Doctor, put an even stronger emphasis on things for me. When you think about the potential for advanced diagnostic equipment in the field combined with the incredible potential of technologies such as 3D printing, you start to understand that things are going to change in a big way in the next ten years or so. You may not even recognize today’s paramedic any longer. A paramedic may carry a tricorder-type device, rely on a robotic helper coupled to a doctor at a hospital for advice, and perform life saving measures that we can’t even dream of today.

I sometimes look at how computers, computer hardware, and other kinds of technology are being combined today and I’m just amazed. Even though many people view 3D printing as a fad that won’t last very long, I’m beginning to think that it will eventually become an essential part of daily living. Just as PCs were once viewed as toys (useless toys at that), some of the technologies that are in their infancy today will eventually prove themselves.

Where do you think 3D printing is heading? Let me know your thoughts on the matter at [email protected]. What I’d like to hear about most is how you’d like to see this technology covered in upcoming books (or whether you have any interest in it at all).


Herbal Harvest 2014

Every year I dry the herbs found in the herb garden for use during the winter months. You can see the technique used in the Drying Herbs post. I’m still using my American Harvest dehydrator to get the job done. However, since the time I wrote that original post, I’ve found a way to improve the potency of the resulting dried herbs. Each layer now has a solid sheet on the bottom. The solid sheet is supposedly designed for fruit leathers and for drying other liquids. The reduction in air flow means that the drying process takes longer, but it also means that fewer of the oils (and other useful elements) found in the herbs are wafted away by the air flow. As a compromise, you can always use the screens instead. The screens keep small particles from falling through, but they also reduce the air flow that robs your herbs of their flavor. The most important issue when drying herbs is to ensure you check their status often and keep the temperature at 95 degrees Fahrenheit (35 degrees C). A higher setting will cause the oils in the herbs to dry out and make your herbs less effective as a result.

I’m also finding that keeping the herbs as whole as possible for storage prolongs their life. You can’t store the herbs very well without crumbling them a little, but keeping the leaves as large as possible appears to help retain the oils. Crumble the leaves or even grind the herb to powder immediately before you use it to maximize the flavor. The less you process the herb, the longer it’ll store.

This year’s herb garden didn’t do well in some areas, but it did exceptionally well in others. The lime, orange, and chocolate mints were all quite potent this year. I tried a few cups of tea to see how they’d brew and I ended up using less than normal. My personal favorite is the lime mint. The chocolate mint is suitable for use in tea, cooking, and jellies—lime and orange mints are characteristically used for tea.

Herb potency varies from year-to-year based on environmental factors, so it’s essential to consider potency as part of using the herbs. I’m thinking about trying to come up with some sort of rating system that I can put right on the package before I store the herb so I have some idea of how much to use later. As a contrast to these three mints, the grapefruit mint hardly tasted like mint at all. Given that it has proven hard to grow, I’m thinking about using the space for another kind of herb.

Sage also had a wonderful year this year. The plants grew fairly large and are robust in flavor. I grew both golden pineapple and common sage. The golden pineapple sage has larger leaves and a stronger taste. It also takes a lot longer to dry than the common sage. In most years, it appears that the common sage actually produces more output, but this year the golden pineapple sage was the winner.

The thyme and rosemary were disappointing this year, but still usable. I actually have three kinds of thyme: lime, lemon, and common (also known as English thyme). Of the three kinds, the lime has the strongest taste when used fresh, but the common works best for cooking. I find that the lemon has a subtle flavor, but can be hard to grow. Unfortunately, I didn’t get any lemon thyme this year, but I did get enough of the other two to make up for it. The only kind of rosemary I can grow is common rosemary. I’m thinking about trying again with some other varieties next year, but the rosemary definitely doesn’t overwinter here in Wisconsin (as contrasted to thyme, which overwinters just fine).

I’ve talked about lovage before (see the Loving that Lovage! post for details). This year I ended up with a whole pint of seeds that I’ll use for canning and for dishes like cole slaw. It was also a decent year for leaves that will end up in soups and other kinds of cooking where a strong celery flavor is desirable.

Weather, soil, and overall care of your herb garden all determine what kind of crop you get each year. Working with herbs can be quite fussy, but also quite rewarding. The quality of herb you get from your own garden will always exceed anything you buy in the store, so the effort is worth it when you want the best results from cooking. Let me know about your herb experiences at [email protected].
 

Getting Wood for Winter

It’s that time of year again-time to get the wood ready for winter. Of course, cutting, splitting, and stacking wood warms you twice: once when you do it and again when you burn it. With our weather being so beautiful, I really did get quite warm over the last couple of weeks getting my wood ready. It is definitely easier if you use quality wood axes, though, and now the piles are finally finished. I have a little over two cords of wood outside and four cords in the basement. I’ll eventually bring the outside stack up to three cords.

As I mentioned in The Many Appearances of Firewood, I use three different cuts of wood for my pile: slab, log, and disk. Each kind of wood has its own advantages. For example, it’s extremely easy to get slab wood started as long as it isn’t wet. In addition, I buy slab wood, rather than cut it, so the slab wood is less work because I only have to stack it. Logs, the traditional firewood, are easy to stack and burn at a moderate rate, which makes them a good option for maintaining a fire. Using disks has the advantage of a slow, long lasting burn of larger pieces without having to split them. I generally put a disk in the wood stove before I start it up in the morning to keep the fire burning at a nearly even temperature. Larger disks are hard to add later, but you can easily add smaller disks to a wood stove.

Of course, there is the question of what precisely a cord is. A full cord is always 4 feet deep, 4 feet high, and 8 feet long (128 cubic feet). I generally cut my logs 2 feet long, so my cords are usually some combination of dimensions that add up to 128 cubic feet. For example, my outside stack is 2 feet deep, 4.5 feet high (actually, a little higher), and 14 feet long. The stack in my basement is 2 feet deep, 8 feet high, and 8 feet long. Any set of dimensions that adds up to 128 cubit feet is one cord. Purists will insist on the standard measurement, but really, the wood doesn’t care how its organized.

Ask specific questions when you buy wood. Some sellers will try to tell you that they’re selling you a cord of wood when you’re really getting a face cord, which doesn’t have a precise size. Most face cords are one-third to one-half the size of a full cord. The pieces of wood are sometimes only 16 inches long to accommodate smaller wood stoves and fireplaces. You need to ask how much you’re getting when comparing prices between sellers. If a seller won’t tell you how much wood is in a load, it’s probably a good idea to go somewhere else.

Beware of the fluffy load. Someone will drive up with what looks like a full load of wood, but the wood is ill stacked with a lot of air gaps in it. A poorly stacked load won’t contain as much wood as you might think it will. Another trick that some wood cutters use is to include a lot of smaller pieces that tend to add air gaps and don’t burn very well. You can obtain your own kindling with relative easy, so look for sellers who provide larger pieces of wood in a well-stacked form so that you know the amount you’re actually getting.

When I cut wood, I know precisely what kind I’m getting. This year I’ll be burning a combination of American oak and white elm. There is a little maple and black locust mixed in, but the majority of the wood is oak and elm. The wood you get determines how much heat you get. After you find out what kind of wood you’re getting for your stove, make sure you consult a wood heating chart. A load of wood with great burning characteristics may actually be a better deal, even if it costs more, because you get more heat from it. As an example, let’s say that one seller offers you a cord of white oak at $120, while another seller offers you a cord of birch at $100. The white oak is a better deal because it only costs $4.124 per million BTU (120 / 29.1 million BTU), compared to $4.808 per million BTU for the birch (100 / 20.8 million BTU). You also want to verify that the wood is actually dry (some people will try to sell you green wood, which won’t burn well).

Some people neglect to factor in the amount of smoke and ash that the wood creates. Of the two, the amount of smoke is the most important factor because you have to call a chimney sweep if your chimney gets clogged by wood that produces too much smoke. This kind of hassle often leads people to make the decision to have central heating installed, from a site similar to this one, rather than having to buy and chop firewood. However, I think a wood-burning stove creates a kind of homely atmosphere you can’t replace with a heating system. The ash is an annoyance, but you can always clean the ash out of the wood stove as needed. Even so, getting wood that produces less ash means less ash for you to clean up later. Let me know your thoughts about getting your winter wood supply together at [email protected].

Warm Apple Cake


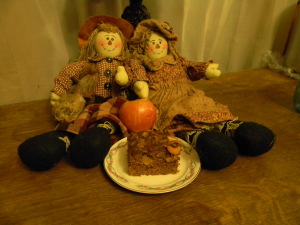
When I came home tonight, there was a warm apple cake
Home made, with mixed nuts, that my lover just baked.
How did he know that I would need such a treat
To finish the day with such comfort and sweet?

He had gone off to bed but had left me a note
With a sweet little message that he personally wrote.
As I toddle my way to my own warm repose
Such sweet dreams will I enjoy that no one else knows.

The sweetness of mind comes from knowing for sure
That the man that I married has the ultimate cure
For the trials and frustrations that are part of the day
When he shows me he loves me in this special small way.

So I came home tonight to a warm apple cake.
I will sleep in such peace from the love that I take
Up to bed with me now. I will plan while I lie.
Cause I know that his favorite dessert is fresh PIE!

Copyright 2014, Pegg Conderman

 
Warm Apples Cake 001

 The original recipe was found in a St. Mary’s Catholic Church cookbook from Muscatine, IA printed in 1988. 

My husband adapted it and I am sharing his version below (as he remembers it).

Fresh Apple Cake

Ingredients:

2 cups sugar and 1 cup butter or margarine. (Cream together)
2 eggs

In a separate bowl, blend or sift together:

2 teaspoons Baking Soda
1/2 teaspoon Salt
3 cups of flour
2 teaspoons of cinnamon
1/8 teaspoon of ginger
1/8 teaspoon of ground cloves
1/8 teaspoon nutmeg
1/8 teaspoon of allspice

Set aside and cool 1 cup of coffee

Dice 4 cups of fresh apples into small chunks and set aside with a little lemon juice on them. 

Topping:

1/2 cup of any kind of nuts mixed with 3 Tablespoons of sugar and a pinch of each spice used in the batter.

Instructions: 

Beat the sugar and butter until they are very creamy. Add eggs and blend well. 

Alternately add the cold coffee and the dry ingredients to the bowl, mixing them between additions. Be careful not to overbeat the batter, because this cake batter will be naturally lumpy. 

Drain moisture from the apples. Fold them into the batter. Pour into  13×9 cake pan that has been coated with grease (or Pam) and flour. 

Bake at 350 F for 50 to 60 minutes. Check for doneness by inserting a toothpick into the center  of the cake until it comes out clean.

This recipe is best served to a loved one while it is still warm with a little ice cream or whipped cream. And it is also great cold for breakfast, like Pizza!