Social Networking Traps

I recently read an article on ComputerWorld entitled, “‘Girls Around Me’ shows a dark side of social networks.” It isn’t the first time that FourSquare and Facebook have gotten press for their lack of respect for user privacy and it won’t be the last. Even the social network I use, LinkedIn, has received more than a few black eyes in the privacy arena. Any time you engage in any sort of social network, everything that you upload is going to be treated as someone’s personal data source. You have no choice about it. Absolutely everything you upload, from your name and picture, to the last time you updated the list of things you’re interested in, will be used by someone for some purpose other than the one you envisioned—count on it!

Yes, these social networks help you maintain your relationships with friends and they do provide a means of creating professional networks with others. However, if you think that these companies are running these social networking sites out of the goodness of their hearts, think again. These companies run these sites to obtain any personal information about you that they can. The information is used to generate demographics, to spam your inbox with e-mail you never wanted, and to keep outsiders informed about your activities. If you engage in any sort of social networking, someone is spying on you and they’re doing it with the blessing of the company that hosts your page. In short, if you don’t want someone misusing a piece of your information, keep it to yourself because these organizations have no self-control in misusing your information.

What does surprise me is that anyone things that this old news is even worth printing. Do people not understand that the naked pictures they posted of themselves at an illegal party will have long lasting effects? If you think that there is any help coming from the government, think again. In the US, at least, there isn’t any chance whatsoever that the government will take a stand on employers and others probing every dark secret you’ve ever posted. Lest you think that you can take a stand and simply not allow information to your information, think again. People have gotten fired for refusing to share their secrets. Anything you post also lasts forever, like some sort of terrifying tattoo that you can’t scrub clean. I’ve used special search engines like the Wayback Machine to dig up material that the author was certain was scrubbed from the Internet forever. Get used to the idea that once you upload a picture, make a statement, or do something else weird on the Internet, the material is going to last forever whether you want it to or not and someone is going to dig it up to embarrass (or harass) you at the most inconvenient moment.

I’ve used social networking professionally. It helps me make contacts with other professionals so that I can get consulting or editing jobs. With this in mind, I keep my posts professional. I try not to post anything I think could be embarrassing later. Obviously, I’ve made mistakes, just like everyone does, but nothing of a gross nature. Still, these little errors have crept up in the past when talking with others. It begins innocently enough…but you said, “So and So” on your LinkedIn page. Didn’t you really mean that? As much as a misstatement makes me shuffle in my seat, I can only imagine the terror of someone finding a picture that was supposed to be viewed by friends alone.

The short version of all this is that you need to use social networking carefully. Share only what you want people to see forever. Write your posts and save them as drafts—let them sit a day or two before you actually publish them. Don’t think that your Web site or blog are safe either; both are often used as weapons against their authors by unscrupulous people. It’s a new world out there. Social networking as made it possible for more people to find out more information about you faster than ever before. The life you ruin could be your own! Let me know your viewpoint on social networking and privacy at [email protected].


Adding Walls to the Chicken Coop

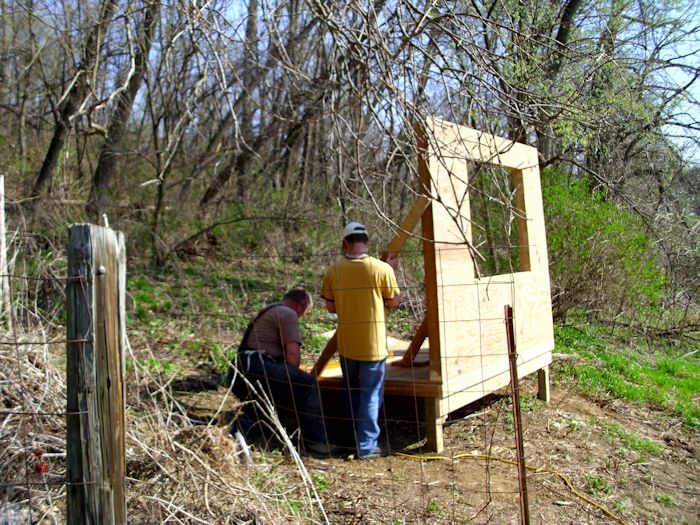
Last week saw the completion of the chicken coop foundation (see Building the Chicken Coop Foundation). Of course, the logical next stop is to add some walls to the foundation. As with the foundation, we built the walls in place for the most part and then carried them to the chicken coop. Kevin decided to build the only wall with a window first, the front wall. Adding a window to the front wall, the one that faces south, will help heat the chicken coop in the winter because the sun will be able to shine on the inside almost all day long. During the summer months, the window will allow the breeze that comes up from our valley to move air around on the inside of the chicken coop.

ChickenCoop0401

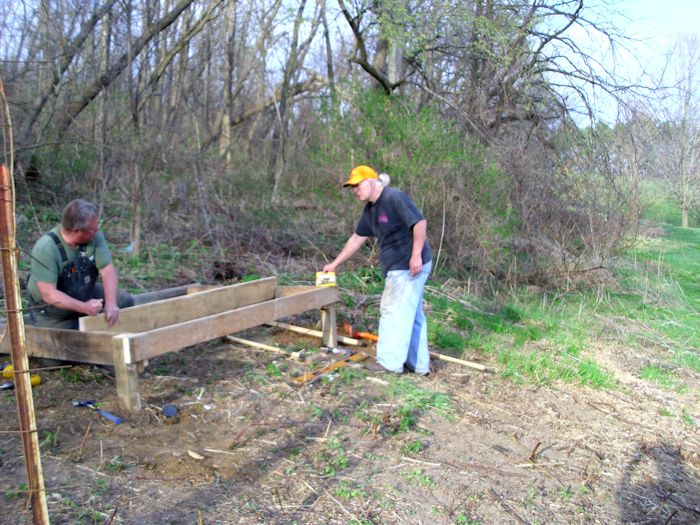
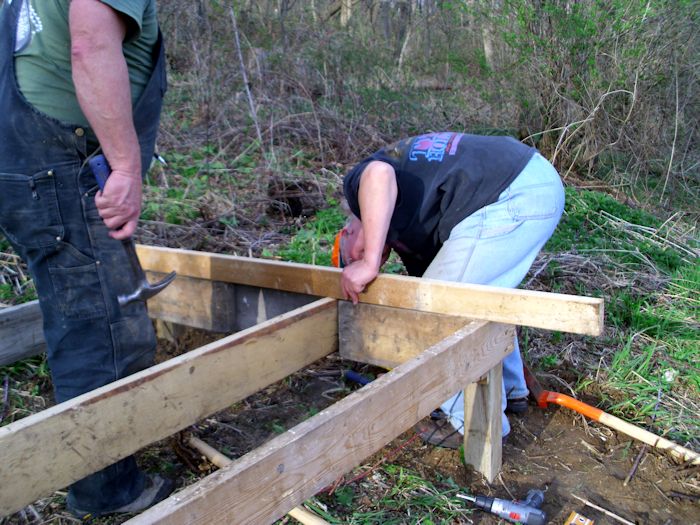
In this picture, Kevin and Cody are just finishing up on the braces to support the wall during the building process. I’m off the shot doing some work on the next wall to go up.

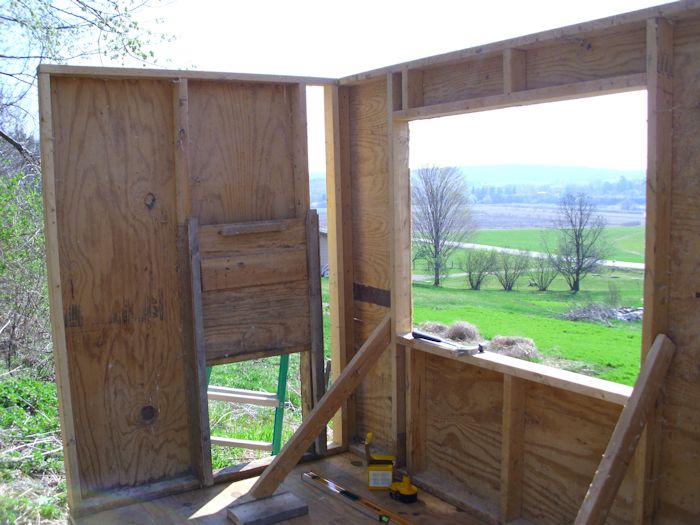
The second wall faces toward the east and it contains the door the chickens will use to access their run outside of the coop. We did this wall next to provide a square corner on which to build the rest of the coop structure.

ChickenCoop0402

We’ll use a piece of plywood to close in the right side of the second wall later. The most important part now is to get the structure in place. The door you see simply slides up to let the chickens out. At night we’ll close the door to keep predators out. You can’t see it easily in the picture, but there is a little latch that holds the door up. We can swing the latch to keep the door closed as well.

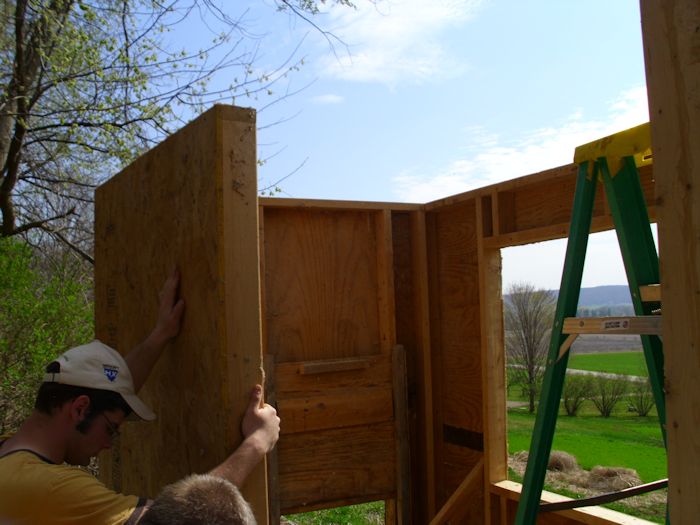
The third wall to go up is on the north side. It will eventually have a window in it near the top to provide ventilation in summer. This wind will blow straight through the coop to keep things cool. The trees from the woods will provide shade during the summer months as well.

ChickenCoop0403

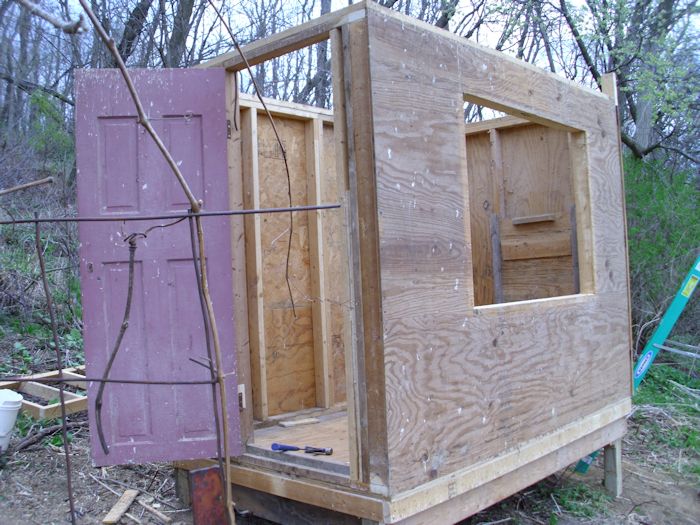
The fourth wall, the one facing west, contains the coop door. After this wall is added, we’ll take out the bracing from inside of the coop since all of the walls are now supporting each other.

ChickenCoop0404

The door is simply an old door from a house. Eventually, the door will be double hung. The screen door will go on the inside of the coop to keep the chickens from simply running out through it during the summer months when the main door will be kept open during the day to provide ventilation.

The walls are bolted into the floor and into each other at this point, so we have a solid framework for the roof. That’s what I’ll talk about next week. In the meantime, let me know if you have any questions at [email protected].
 

Fun is Where You Find It (Part 5)

Last year about this time, I posted the original Fun is Where You Find It! where I discussed the egg decorating kit we purchased for Easter. Of course, it’s a fun activity, so we did it again this year with Paas Basket Buddies egg decorating kit. Imagine seeing the cutest kittens and puppies on your Easter eggs and you’ll have an inkling of the results of using this kit. The online price of $4.99 is a little more than the $3.99 price we paid at our local store. The kit is on par with last year’s price. Eggs are a lot more expensive though at $1.59 for large eggs.

FunisWhereYouFindIt0505

The dyes used in this kit are a bit better than last year’s kit—I’m not sure why. It could be that the tie dye kit instructions were designed to produce better mixed results. We did use the vinegar method described on the box and soaked the eggs for around thee minutes each to obtain the results shown here.

FunisWhereYouFindIt0501

For once, our results actually matched those on the package for the most part. The six colors are: red, blue, green, yellow, orange, and pink. No matter what we tried, we couldn’t get the pink to turn out right. You can see the single pink egg in this dozen is speckled. It’s a pretty egg, but not the results we anticipated.

This is the kit to use if you have young children and don’t want any kind of a mess. Except for dipping the eggs, there really isn’t much risk of creating any sort of damage to clothing or furniture and an adult could perform the dipping part. The kit does come with 9 Eggarounds, which are wraps you put around your eggs, and then shrink into place. The Eggarounds look like this initially.

FunisWhereYouFindIt0502

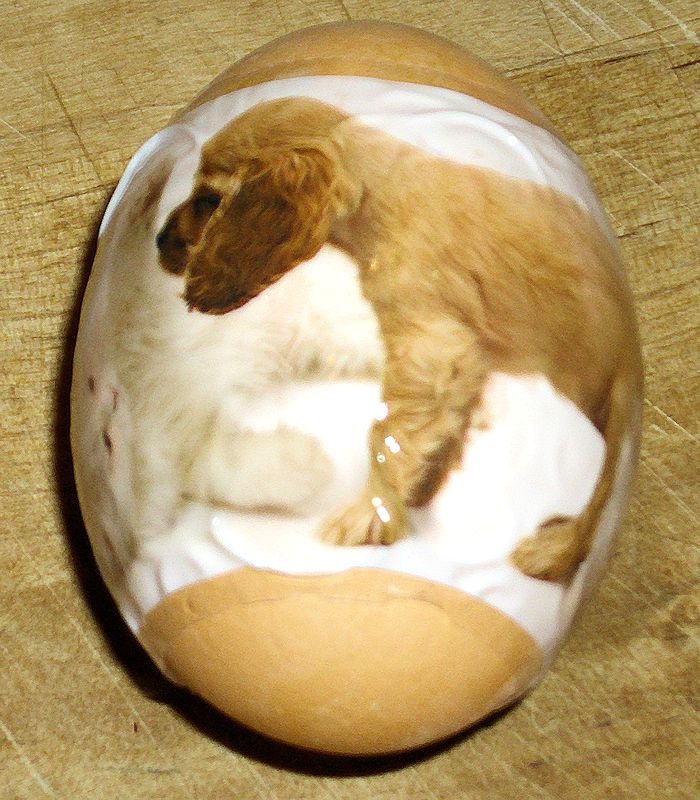
Notice the somewhat tight fit. You have to use large eggs with the Eggarounds because they won’t shrink enough for medium eggs. On the other hand, some large eggs proved a little too large. Still, in the two dozen eggs we made up, there were plenty of eggs the right size. The box talks about two methods of working with the Eggarounds—the water shrinking method is messy and proved unsatisfactory. Using a blow dryer works as advertised. Here are the results we obtained from our eggs:

FunisWhereYouFindIt0503

You can see that our first egg has a few ripples in the surface. Playing some with the technique produced smoother results as we went along. I don’t think it’s possible to get a completely smooth surface without a lot of practice. However, the results are eye pleasing and fun to work with.

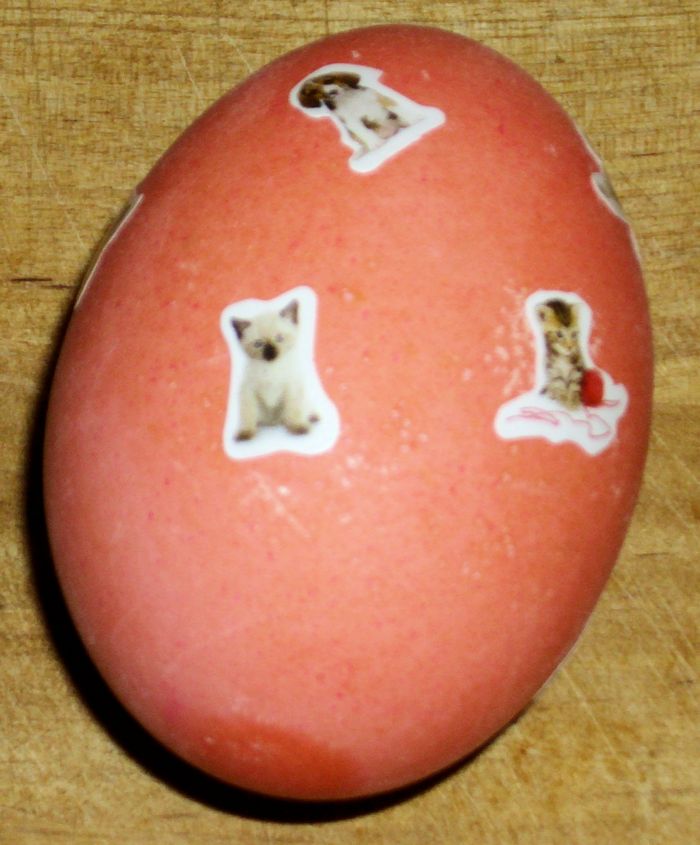
The kit also comes with 90 stickers. The Eggarounds took care of the decorating needs for 9 of the 24 eggs we cooked up. That left 15 eggs or six stickers per egg, which really isn’t enough to do the job. We decided to leave the pink eggs as they were, speckled, because they really are eye pleasing that way. Using eight to ten stickers per egg produces a nice result. Here is a typical result using eight stickers:

FunisWhereYouFindIt0504

Overall, we found this kit extremely easy to use. It required about 2 hours worth of effort for us to complete the 24 hard boiled eggs—making for some extremely cheap fun that we can benefit from later. The kit won’t support more than 24 eggs unless you don’t mind having some undecorated eggs at the end (colored, but without stickers). What sort of results do you get out of the egg decorating kits that you’ve tried? Let me know at [email protected].
 

Building the Chicken Coop Foundation

At the end of my post about the chicken coop last week (see Moving the Chicken Coop Parts), we had moved all of the required components to our house from wherever they were stored at the time. After we found a few discount chicken coops, it was time to start putting the chicken coop together, which meant clearing a spot for it and building a foundation.

The place where Rebecca and I live is absolutely gorgeous, but also completely devoid of anything approach flat. So, finding a place to put the chicken coop was less a matter of space and more a matter of finding something flat enough to use. In addition, the place had to be close enough to the house to feed the chickens in winter (putting it out in the middle of the orchard would have been a bad idea) and also close enough to the compost heap to make clearing the chicken coop of waste matter easy. With all of these factors in mind, I cleared as much brush as possible from the location next to the compost heap. The chicken coop is now on the right of the compost heap, while the rabbit cages are to the left.

To keep the chicken coop from sliding off into oblivion, we started by digging two post holes and adding a board between them.

ChickenCoop0301

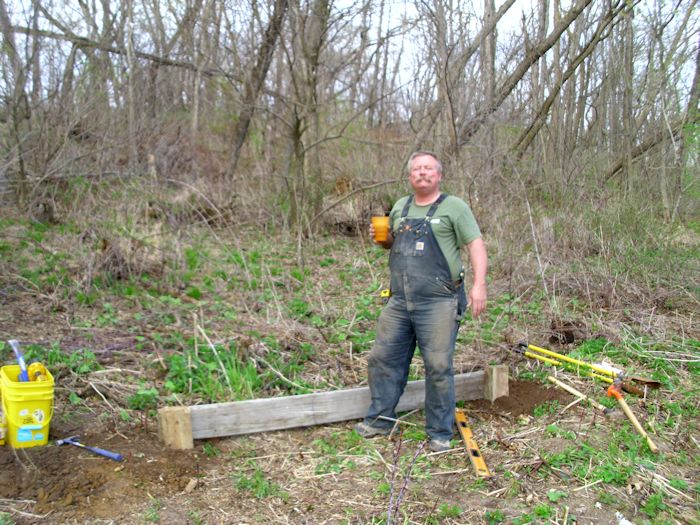
After making sure this starting point was completely level (despite the fact that things looked quite uneven due to the unevenness of the terrain), we added two more posts, one at a time. All four posts were tied together with boards and made level. After that, we started adding two additional boards in the center to reinforce everything as shown here.

ChickenCoop0302

Make sure everything is even and well-secured is important. We took the time to check and double check everything at this point.

ChickenCoop0303

The posts we’re using are pressure treated 4 X 4 stock. The joists and other framing members are 2 X 6 stock. All of this lumber was recovered from the old chicken coop. In a few cases, we not only had to remove old screws or other hardware, but also clean the stock before we could use it.

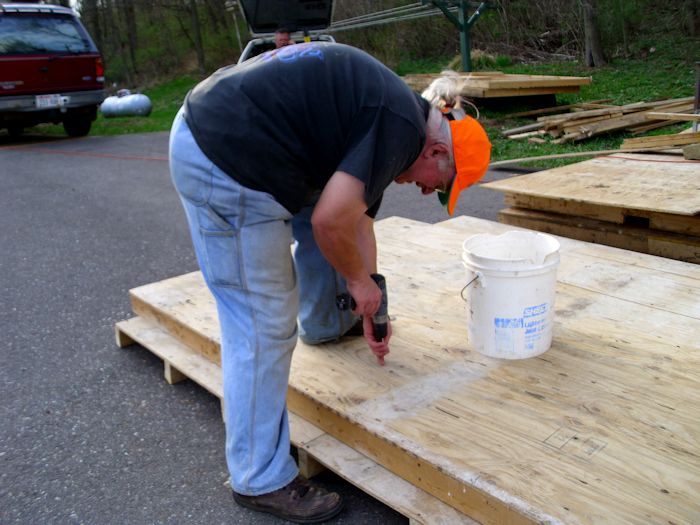
We had actually built the floor from a piece of existing wall used in the old chicken coop. Keven made a few changes to the wall design and strengthened it, but the floor was moved intact from the existing site to its new home. Floor space is important for good chicken health. The chicken coop will eventually hold ten chickens and we allowed 4 square feet per chicken inside the coop. (The chicken run allocates an additional 20 square feet per chicken.) Because the floor will take a lot of abuse, we used a double layer of 1/2 inch exterior grade plywood for the floor. The second layer was screwed on at 90 degrees to the first layer right before we moved it to the foundation.

ChickenCoop0304

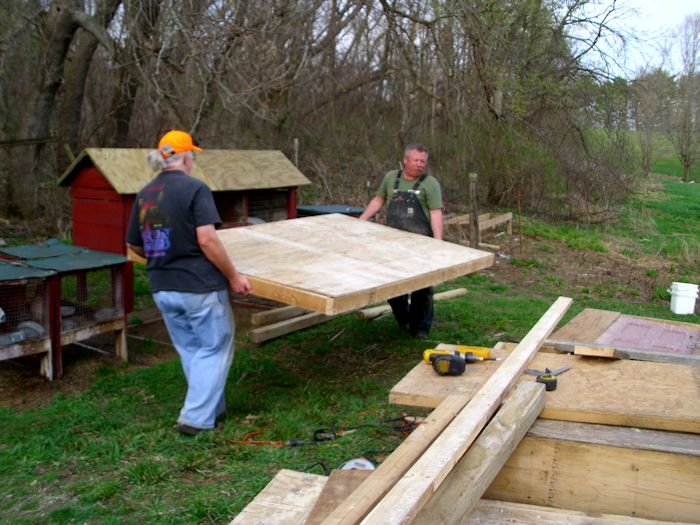
The floor framing is 2 X 4 stock, but it’s heavily reinforced. Once the floor was ready, we moved it to the platform we had built earlier.

ChickenCoop0305

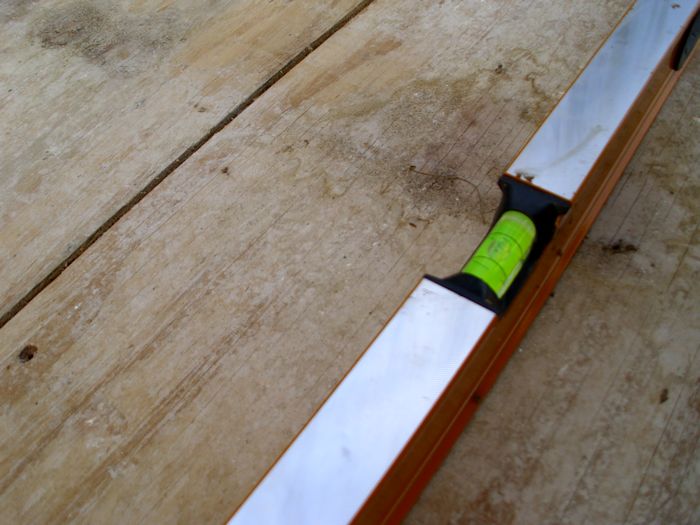
With the floor in place, we secured it to the platform. Of course, the final check was to make sure everything was still level.

ChickenCoop0306

The next step is to start putting up walls. We’re going to build them in place and move them in whole sections as well. You’ll learn the details in next week’s post. In the meantime, let me know if you have any questions about this phase of building the chicken coop at [email protected].
 

Review of the Sword of Truth Series

The Sword of Truth series is written by Terry Goodkind. It features a number of interesting characters, but the focus is on two characters, Richard and Kahlan. Richard’s grandfather, Zedd, also plays a major role in the book series, but not in the way Richard does. Richard is the Seeker of Truth, which would be an auspicious goal for any hero. The other characters come and go as needed to fill out the various scenes. It’s not that the book series lacks depth due to too few characters—quite the contrary, the book series is actually quite detailed and rich. The series consists of these books (in the order that you should probably read them):


Anyone familiar with the series will see that I left Debt of Bones out of the list. Yes, this book is also part of the series, but take my advice, save it for later. The eleven books that contribute to the main part of the series will take quite a while to read and reading Debt of Bones does present a few spoilers that I would rather not have known. It’s a good book to read after the fact, much like watching Legend of the Seeker (the ill fated television series based on the book) adds to the experience. It’s possible that there are other additions to the Sword of Truth series, but this review doesn’t discuss any of them.

I’m going to try hard not to spoil anything for anyone who hasn’t already read the series by providing a detailed overview of the plot. If you really want to spoil your reading experience, read the reviews on Amazon. However, the series does contain everything needed for a good fantasy. There are the usual heroes and villains. The hero has a pretty girl to protect. As in any good fantasy, magic is a must and you’ll eventually encounter mystical creatures such as dragons.

Terry is a great writer in many ways. His writing style reminds me quite a bit of Tom Clancy, another favorite author of mine. Rather than gloss over the details, Terry writes about them with vigor. It almost feels as if you’re seeing the fantasy world through a camera—the vivid details are nothing short of fantastic. However, reading the details isn’t everyone’s cup of tea, so you’ll see lots of complaints that Terry doesn’t move the plot along quickly enough. It’s true, the plot does seem to drag at times because you’re reading about details that may not matter much to the story. From my personal perspective, I greatly enjoyed the detail because it helped me envision the world of Richard and Kahlan in ways that would have been impossible otherwise.

A problem with the series is that it runs across so many books. Terry must repeat details for readers who could read the books out of order and not know about details in other books. I tried reading one book out of order and the repetition wasn’t a problem at all. However, reading the books in order did leave me feeling at times like I was getting buried in repetition. The series would have been far better if Terry had limited it to four or possibly five books. Leaving out a little of the non-essential detail and all of the repetition would have accomplished the task in a far more elegant manner. However, this is a minor nit that plagues an otherwise well-written series.

Some people have complained that Pillars of Creation should never have been included in the series. I disagree. Part of the reason that this series has kept me interested is that Terry takes side quests. You wander about the four main lands of the series: Westland, The Midlands, D’hara, and The Old World and really examine things. If Terry had never used the material from Pillars of Creation in other parts of the series and used that material effectively, I probably would have said that the book didn’t belong in the series either, but the fact is that Terry does use that material to good effect. It’s one of those situations where you must read with the idea that the author requires time to develop part of the plot for you.

A few people were appalled by some of the graphic detail in the books. I must admit that I could have probably done without a little of that detail myself. There is only so much that I want to know about the blood, gore, broken bones, and other horrors that the protagonist has faced. In this case, the exquisite detail of Terry’s writing didn’t serve to make the series more enjoyable, not unless you’re of the Marquis de Sade persuasion. There were a few small sections that I scanned briefly because I didn’t relish the graphic details in them.

Richard represents many good elements that I have found in few books. His emphasis on loving life and living it to the fullest because you want to do so is presented in unique fashion. Terry does seem to get on the stump at times and I found the long diatribes distracting, but I did approve highly of the way in which Richard presented the facts to others and encouraged them to live their lives. In fact, I’ll go so far as to say that these passages often motivated me to grasp life a bit more strongly and robustly.

The sign of a great author is the ability to do the unexpected—to entertain in a way that surprises the reader. I feel that Terry has succeeded to a high degree in this regard. His solutions to the problems created for the hero and his associates to overcome in the book series are interesting and incomparable. The fact that readers got so worked up about some of the solutions that many of them chose to write reviews about them tells me that the author has achieved that rarest of goals—a strong emotional response. The readers are obviously engaged and fully appreciate the characters that Terry has provided.

Now that I have finished the series, one of the biggest questions I must answer is whether I’d read the series again. A book series of this sort is best when it attracts a second or third reading. I must admit that I’m going to put Richard and Kahlan away for a while, but I definitely plan to take them for another stroll in a few years after I have forgotten enough book details to make the reading enjoyable once again. This is the kind of series where the surprises that the author has included are a distinct part of the series as a whole. You want to read because you don’t know what the author will do with the characters next.

Is this a good book series? It’s not Tolkien, in that the styles are different and the sort of fantasy differs as well. Terry produces a great book that’s an easy read and something that will most definitely entertain, but I don’t really feel it’s a classic. Of course, time could easily prove me wrong. Given what I know now, I’d still buy the books and I’d still enjoy them. I hope that Terry sees fit to produce another series—perhaps one that omits a few of the fit and finish problems with this one.


Get Ready…Get Set…Garden!

Every year Rebecca and I go to a special educational event called Get Ready…Get Set…Garden! In fact, I reported on it in my Ongoing Education post last year. We both feel that ongoing education is a gardener’s best friend. Otherwise, you don’t learn new ways of doing things that could save time or effort. For that matter, new techniques often help you produce food that is more nutritious or lasts longer in storage. Sometimes, the education is just fun (as it was for the hosta course we took last year), but this year was all business.

This year was supposed to start with a session entitled Growing Small Fruits. We’re having a few problems with our blueberries and I had hoped to ask the instructor some questions about them. It turned out that the instructor never showed up. Instead, we received a master gardener short course called, “Vegetables A to Z.” A lot of the information was already familiar to us, but we picked up some tidbits of information. I especially appreciated some bug management tips for our zucchini and confirmation that the technique we use to plant asparagus is still correct (see Planting Asparagus – Part 1 and Planting Asparagus – Part 2). It turns out that we may not actually be planting our peas early enough and the winter planting of spinach should work better than it did for us (more on that later). The poor woman was roped into giving the impromptu speech, so I could hardly fault her for any flaws in presentation. Still, it’s wasn’t the usual smooth presentation and her persistent cough made things less enjoyable for everyone. Overall, we did get our money’s worth, but didn’t receive the information we really wanted.

The next session was phenomenal. It was a short course entitled, “Native Prairie Flowers and Grasses.” As a result of that course, I plan to obtain some native plant seeds and redo our septic mound. In fact, I have several really good reasons for undertaking the project now:


  • The mound will be less inclined to get wet because the native plants will use up the excess water more efficiently.

  • The flowers will attract helpful insects such as bees to pollinate our vegetables and fruits and parasitic wasps to deal with some of the bugs on our plants.

  • Our mound is impossible to mow in some areas due to the incline and ruggedness of the terrain—using the native plants makes mowing unnecessary.
  • Using native plants will reduce the eyesore factor of the septic system as it currently exists.


The only problem with this particular session is that the instructor had way too much information to give us in a single session. He should have requested a double session. I certainly would have paid extra for the valuable information I received. As it was, the instructor was most definitely rushed and I’ll have to refer to the handout he provided for some information regarding my septic system upgrade.

The third session, Dehydrating Fruits and Vegetables was more pertinent to Rebecca since she does all of the dehydrating in our house (I help, but she’s the one doing most of the work). I do know that she received some valuable information, such as how to preserve the color of her herbs a bit better. I may eventually write a post about the things she has learned after she has had a chance to actually try them to see whether they work. I was able to brag on my wife a bit—Rebecca always makes me wonderful dehydrated snacks for the winter and spring months and I was able to share her approach with the rest of the class.

We had a wonderful time. No, I really shouldn’t have taken the day off, but it’s the only day of the year when we get this kind of educational opportunity and I really couldn’t pass it up either. It’s essential that you do take time to educate yourself. Feeding your mind is a critical part of the human experience and you’ll be a better person if you do it. Let me know if you have any insights into any of the topics covered by our latest educational experience at [email protected].
 

Enjoying the Spring Flowers

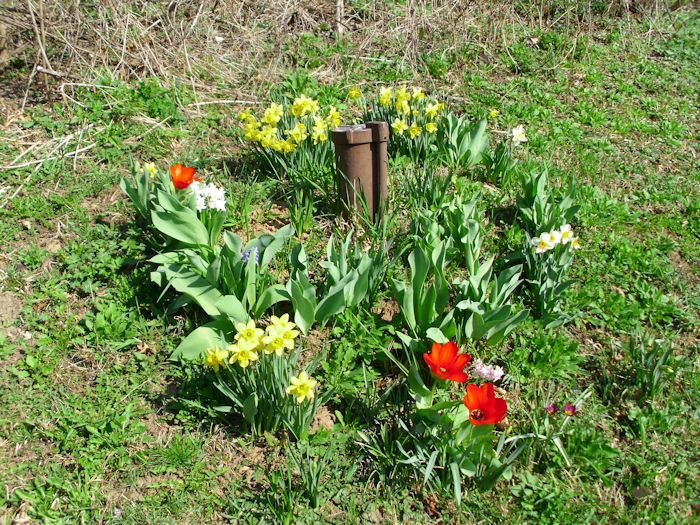
Spring has come incredibly early to Wisconsin this year. I’m amazed at just how fast everything has budded and flowered. We’ll actually make it to Easter this year after my spring flowers have blossomed and reached their peak. Given that we’re hustling to fit everything in, I haven’t taken a lot of spring flower pictures, but here are a few showing my tulips, daffodils, and grape hyacinth (amongst others).

SpringFlowers01

The flowers that appeal the most this spring are the grape hyacinth, which are especially fragrant for some reason. The odor is downright overpowering at times. It must be the unusually high temperatures that we’ve been experiencing. Interestingly enough, our crocus came up, bloomed, and are already gone for the season.

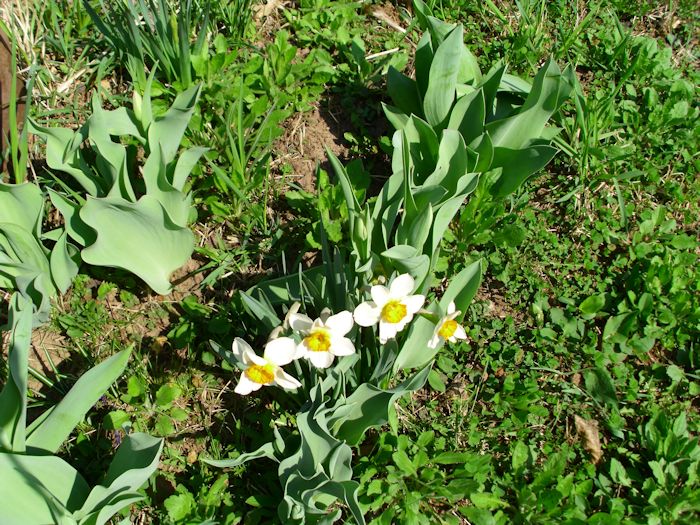
We have a number of different varieties of daffodils. A favorite of mine this year have white petals with yellow insides:

SpringFlowers02

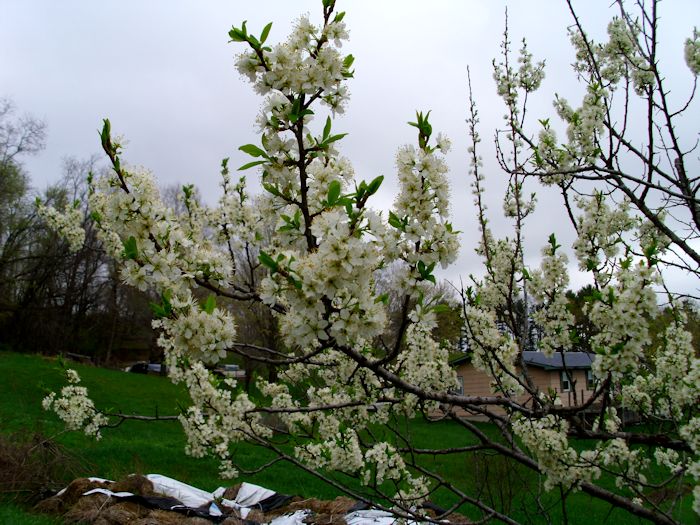
They look incredibly happy. Of course, the plum trees are blooming as well. This year they’re just loaded with blooms.

SpringFlowers03

I’m just hoping at this point that we actually get to keep some of the fruit. Wouldn’t you know it, the trees just start blooming well and the weatherman has to ruin everything with a prediction of frost. Our weather hasn’t been quite as nice the last few days as it was earlier in the month. That’s part of the problem with an early spring-the trees start blooming early, which exposes them to a greater risk of frost. If you want some tips and more information when it comes to blooming trees then take a look on tree service blooms as they’ve got good information on a lot of different types of trees flowering.

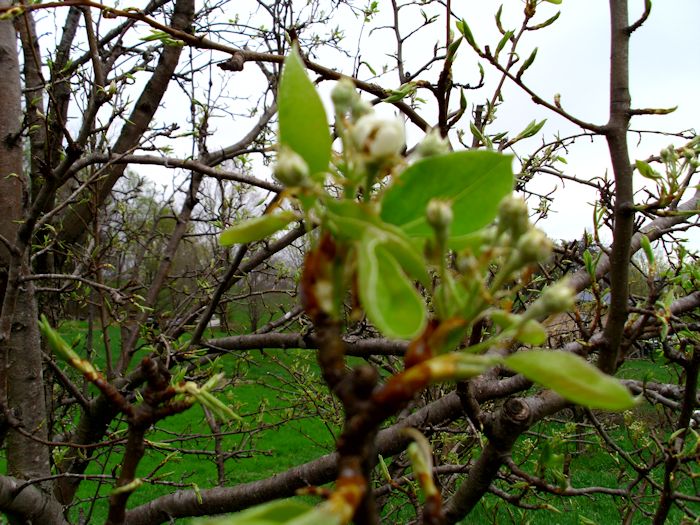
Fortunately, the pear trees are just starting to get ready to bloom. The buds have started to burst open a little, but they’re still closed enough that a light frost won’t hurt them.

SpringFlowers04

The apples aren’t even as far along as the pears, so there aren’t any worries with them. I really do hope my plums survive the night. A frost would probably ruin our harvest at this point. It doesn’t pay to worry. The weather will do what the weather will do whether I worry or not, so it’s best just to let things go the way they will. Every year brings it’s own special set of challenges.

So, are you experiencing an early spring this year? If so, what sorts of challenges are you facing? How do you plan to use the early spring to your advantage? Let me know at [email protected].
 

Moving the Chicken Coop Parts

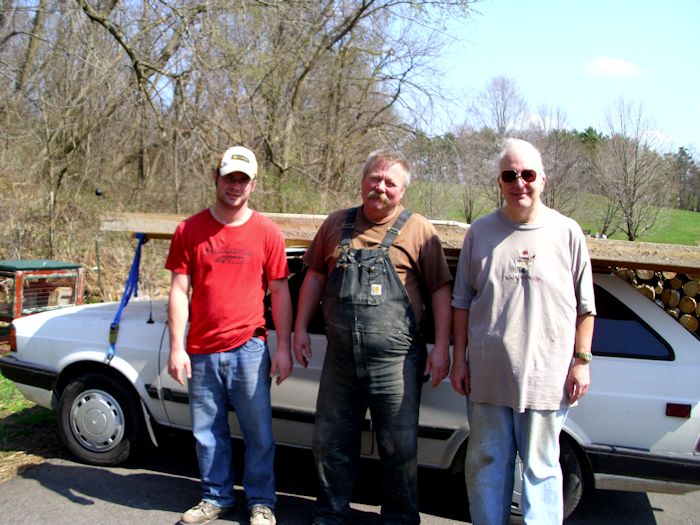
In my previous post about the chicken coop, Starting a Chicken Coop, I talked about some of the requirements I had looked at when getting the parts for the chicken coop I wanted to build. Three of us worked together to start taking the chicken coop at my friend’s house apart. We worked carefully because some of the parts really didn’t require any deconstruction. Here we are sitting in front of the car used to transport one of the walls intact:

ChickenCoop0201

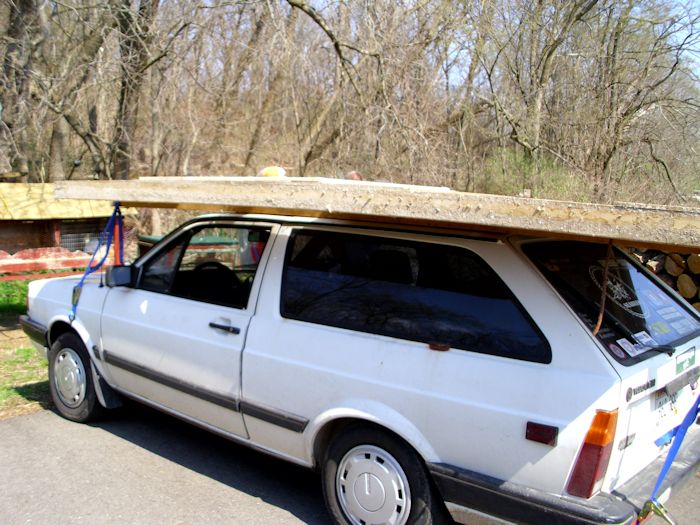
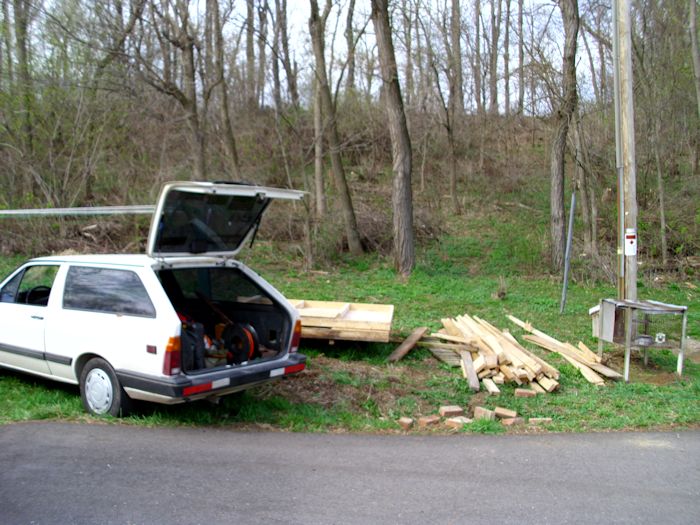
Cody, our intern, is standing on the left. Kevin, an ex-Seabee and also the brains of this operation, is standing in the middle. I’m on the right. The car was most definitely overloaded with that piece of wall on its back:

ChickenCoop0202

You can’t see it very well in the picture, but the car is definitely riding low. We also loaded up my Explorer and eventually we used my uncle’s truck. It took us a day and a half to break down the chicken coop and move it over to the house. We also obtained some corrugated roofing material from another friend. He had removed it from his house and saved the better looking pieces. By the time we were finished, we ended up with three distinct piles of parts:

ChickenCoop0203

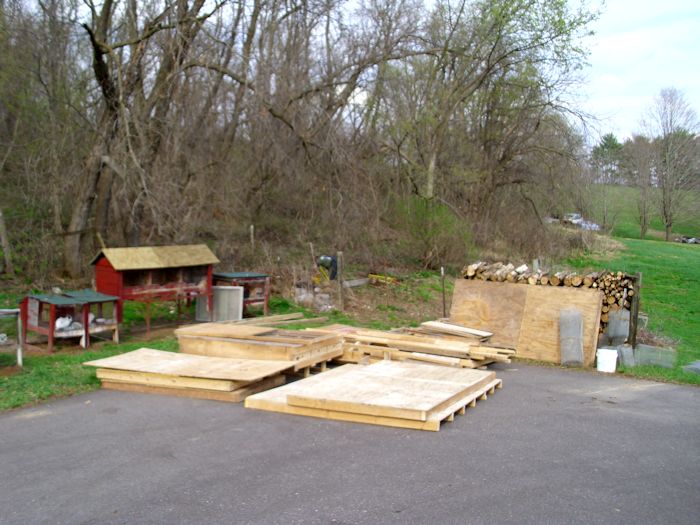
This pile contains some walls we thought we could use intact, the nesting box, some sheet goods, and a bit of fencing. There are also some other bits and pieces that we probably won’t use. For example, the feeding trough it way too long. I’ll deconstruct it and use the wood for another project-absolutely nothing goes to waste around here.

ChickenCoop0204

This pile contains an additional wall that we thought we might need, but weren’t sure about. It also contains some bricks (we probably won’t need them) and the 2 X 4 stock used to put everything together. In addition to 2 X 4 stock, we were able to salvage some 4 X 4s, 2 x 2s, 2 X 6s, and a number of other sizes of lumber.

ChickenCoop0205

This pile contains some fencing parts and the corrugated metal roofing. Actually, we’ll use that metal to surround the entire chicken coop, making it quite durable. The only new materials that the chicken coop will have are some screws (we’re reusing as many as possible) and some tar paper. Otherwise, this chicken coop is made up of pieces salvaged from everywhere, including my own basement (pieces from other projects). This is how recycling should work. Nothing will end up in a landfill anywhere-every component you see in these pictures will be used for something (even if it isn’t in this particular project).

Now that the pieces are assembled, we can start building the new chicken coop. I’ll fill you in on the details in a future post. In the meantime, let me know if you have any questions about the process we’re using at [email protected].
 

Starting a Chicken Coop

Sometimes life throws an opportunity your way and taking it is the only logical choice. Normally, we could never afford to buy all of the parts for a chicken coop at a price that would actually provide a payoff. Normally I try to get a five year payoff plan for anything we add to our property and a chicken coop simply requires too many parts to provide such a payoff when used in a self-sufficient manner.

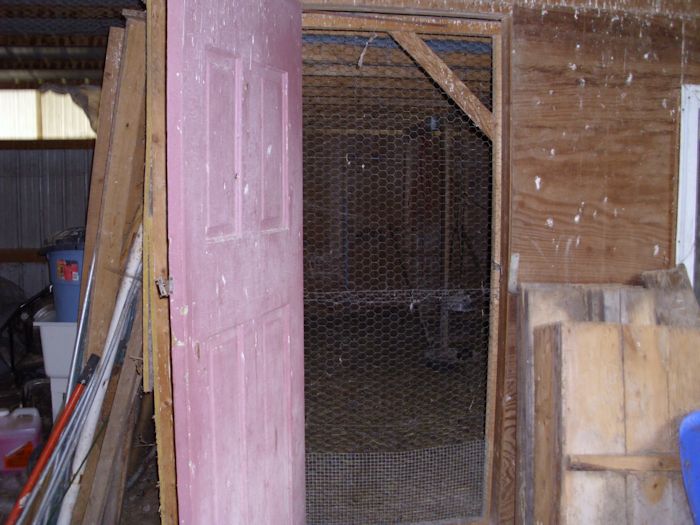
A friend of ours is selling her house, which actually sits on a small farm. In her pole shed is a chicken coop that she’s willing to sell for a reasonable price—a price that should provide us with that five year payoff plan we need. It’s not meant for outside use, but it does have many of the items that an outside chicken coop would require. Of course, that begins with a double door with the screen on the inside, rather than the outside, so that the chickens can get some fresh air during the summer months.

ChickenCoop0101

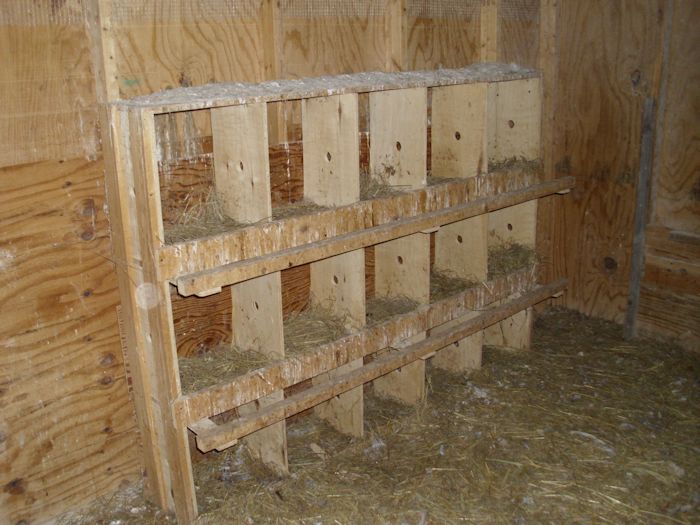
Inside the existing chicken coop, there is a roost and nest boxes. The roost provides a place for the chickens to sleep above floor level. The nest boxes provide a place to lay eggs.

ChickenCoop0102

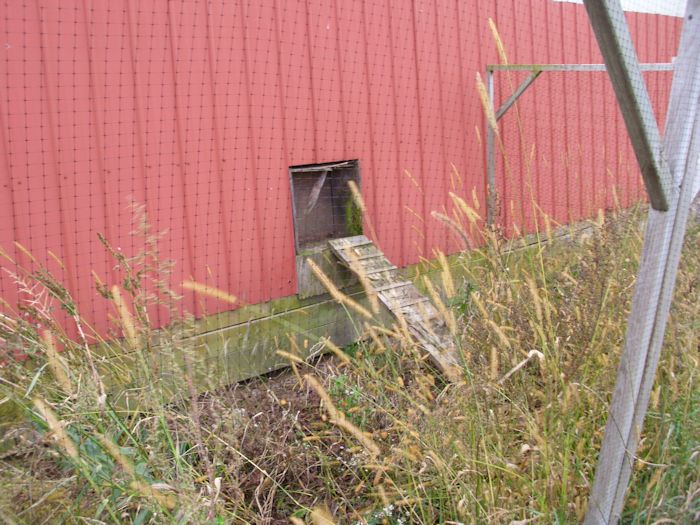
At one end of the existing chicken coop is a chicken-sized door. It leads outside to a ramp where the chicken can go into a fenced area for exercise and fresh air. We plan to make the fenced area large enough to ensure the chickens can get plenty of safe exercise (we’ve seen a few chickens get hit by passing cars when they’re not fenced in, not to mention foxes, weasels, racoons, hawks, and other predators).

ChickenCoop0103

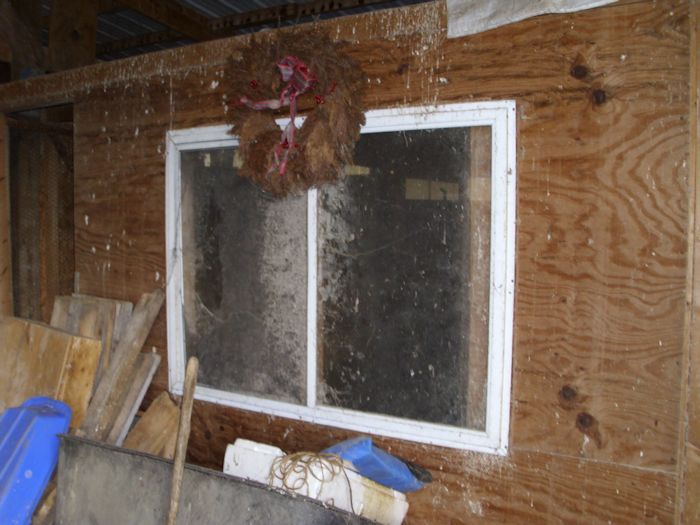
The existing chicken coop even includes a window so the birds get sunshine during the winter months. Given that we’re on a south facing slope, the window will allow not only sunshine, but a certain amount of heat during the winter months. Of course, we’ll need to include a heat lamp for really cold winter nights.

ChickenCoop0104

Of course, the first task is to take the chicken coop down and move it from its current location to our house. We’ll have to use the components we obtain to rebuild the chicken coop in a form that will work better outside (including the addition of a roof). I’ll keep you updated on our progress. In the meantime, let me know if you have any questions about our project at [email protected].
 

Trimming the Trees (Part 3)

In Trimming the Trees (Part 2) I discussed some of the specifics of pruning trees. At this point, my trees are all pruned. However, there is still work to be done. For one thing, this is the time of year when I examine the trees for egg masses of the Eastern Tent Caterpillar. Despite what you may have heard, repeated infestations will definitely kill a fruit tree, especially if the infestation is severe enough. It only makes sense. If you remove all of the leaves from a tree that only gets one set of leaves per season, the tree can’t store energy for the winter months.

Our experience has been that they’re a nuisance with apple trees. Yes, the tent caterpillars will cause a problem, but if you get in there and squish all of the caterpillars in the tent (or better yet, get rid of those egg masses in the spring), the apple hardly notices. However, plum trees seem to attract tent caterpillars like magnets. All four of our plum trees were in danger from dying at one point because we simply couldn’t keep the caterpillars under control. I told my friend about my problem with the plum trees and he said I should work with someone like The Local Tree Experts or at the very least get their perspective on how to manage this problem so we could enjoy our plum trees again. They had some useful advice from what I hear. Trying a few sprays was the first suggestion.

We did try a number of sprays-all of which proved ineffective. Spaying the trees with a dormant oil spray in the spring helps only a little. By far the best strategy is to hunt down the egg clusters and destroy them. The secondary strategy is to look for the tents absolutely every day in the spring and summer after the trees have leafed out and destroy them by individually squishing the caterpillars by hand. We actually had two of our plum trees stripped of leaves in a single day by these pests.

While we’re looking for tent caterpillar egg clusters, we also look for other problems in the trees, such as disease, insect infestations, and so on. It’s easier to find problems after you’ve pruned the trees and there are fewer branches to check. Taking time now to check the trees will save you a lot of effort later.

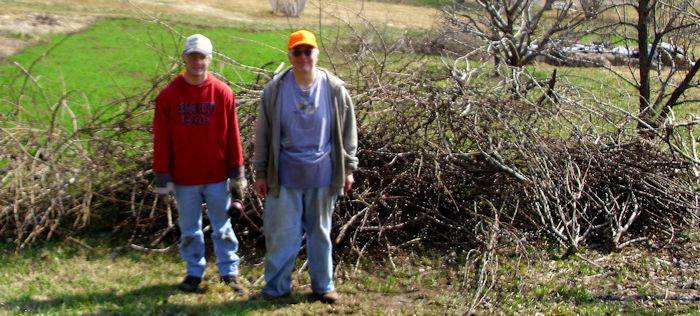
Of course, now we have a pile of branches to deal with. This year we pruned our pear trees heavily because they’ve become a little overgrown. If pear trees get too overgrown, they’ll tend to prune themselves in heavy winds-usually not in a way you would have chosen. The pile of branches from all of our trees is quite high this year.

TreeTrimming0301

We’ll put all of these branches through the chipper and then use them for mulch. A lot of people would probably burn the branches up, but using them for mulch does save at least some money. I’ve been trying to figure out the environmental balance in this case. On the one hand, burning the branches would produce a lot of particulate smoke that would pollute the air for at least a while. However, using the chipper also produces pollutants, and some of those pollutants are harsher on the environment than the smoke from burning would cause.

If we had burned the branches, I would have placed the pile in the middle of the garden. That way we could have plowed the ashes into the ground where they would have provided fertilizer on top of the winter rye you can see growing in the background of the picture. So, either way, the branches wouldn’t have gone to waste. However, we really need the mulch more than the ashes, so we’re creating the mulch.

Our orchard is ready for spring at this point. Let me know about your tree pruning and bug eradication experiences at [email protected].