Real World Global Warming

Every time I hear someone talk about global warming, they discuss the issue in terms that have no real meaning to me. Yes, I understand that the average temperature is going to increase as a result of global warming and that I’ll see weather pattern changes. However, what does it really mean to me? Why should I care? I don’t mean to appear uncaring, but prognostications of impending doom are better served with a dose of reality.

I’ve already discussed one direct result of global warming-the USDA has defined new hardiness zones as described in my Contemplating the Hardiness Zone Changes post. However, even this direct result of global warming doesn’t say much to me. It’s not an indicator that I see every day-something I can point to and say that it’s the result of putting too many of the wrong chemicals into the air. This is the case for a lot of people. As they aren’t seeing the direct consequences of global warming, they don’t consider it to be their problem. However, every person has a part to play in global warming. Global warming is always happening, and we are all partly to blame. Luckily, there’s still time and there are things we can do. One of the most popular methods to prevent global warming is tree planting. As trees absorb carbon dioxide, they can lower the amount of CO2 in the air. That’s why trees are so important. Thankfully, more companies are understanding the challenges of global warming and are trying to plant trees themselves to save the planet. Loveplugs.co are just one of the companies looking to build a greener community by planting trees, so members of the public might want to take a look at their products to help them in their quest to plant more trees.

However, this spring is providing something in the way of a wake-up call to me personally. Spring came early this year; very early. Odd spring weather is nothing new to Wisconsin-we get odd weather every year. In fact, it’s the variety and uncertainty of weather that attracts me to Wisconsin. However, no one can remember spring coming this early. Our spring has also been quite hot and dry. As a result, vegetables that normally do quite well in our garden, such as broccoli, are doing poorly.

In fact, all of our brassicas are doing poorly. I should have planted the brassicas earlier this year to accommodate the warm spring, but I didn’t. Local wisdom says not to plant too much, especially not tender plants, until Mother’s Day, which was simply too late this year. After talking to a number of other people, I find that I’m not the only one who planted too late. Everyone is complaining about how their broccoli has bolted without growing a head. Yes, you can pick the pieces and use them, but what you get is more like a second crop, rather than that perfect first crop in the form of a head.

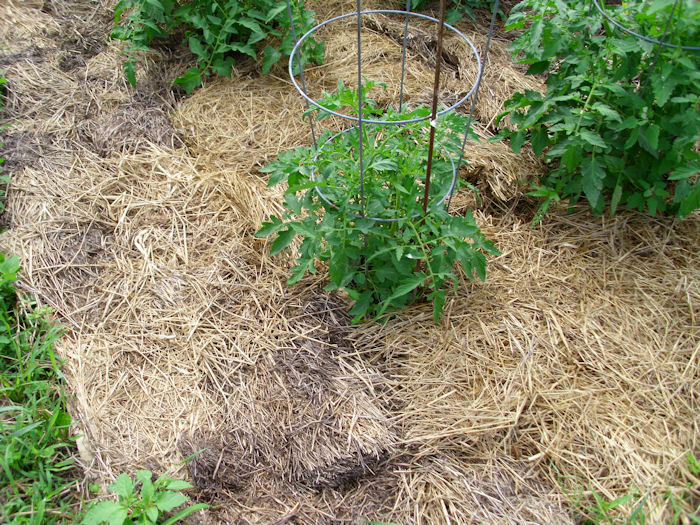
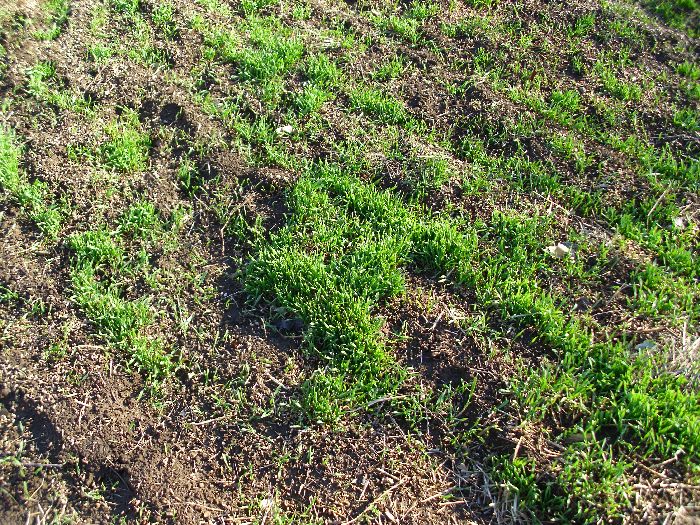
The weeds, however, are doing marvelously. Rebecca and I can hardly keep up with them. We’re grabbing bushels of weeds from the garden at a time when we’re normally looking at light weeds and are able to mulch to keep them controlled. This year, we’re battling the weeds with vigor and mulching as soon as we get a patch freed from their grasp. However, I’m thinking that the late summer weeds we normally get poking up through the mulch are going to appear by mid-summer this year, long before we’re ready to harvest some of the end of season offerings (assuming they grow at all).

Fortunately, the news isn’t all bad. We’ve just had the best asparagus season ever. Not only have we had spears vigorously poking their heads above ground, but the spears are thicker and more tender than usual. Rebecca has quite a few meals worth of asparagus already frozen because we can’t even contemplate eating it all without making ourselves sick. So, we’ve learned that asparagus loves exceptionally warm springs, but brassicas don’t.

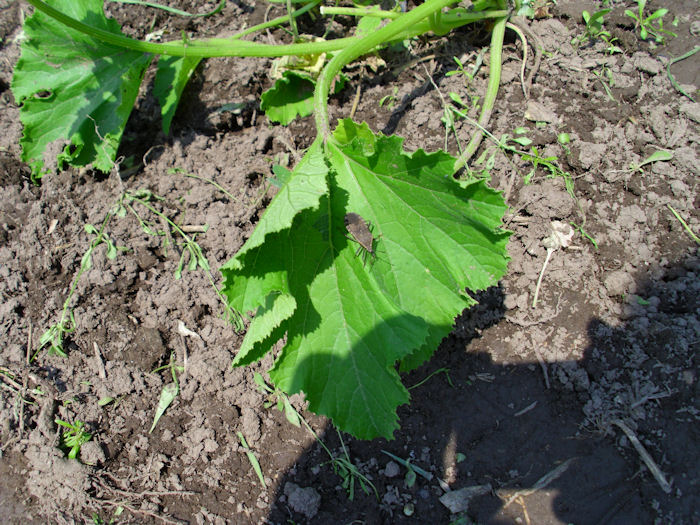
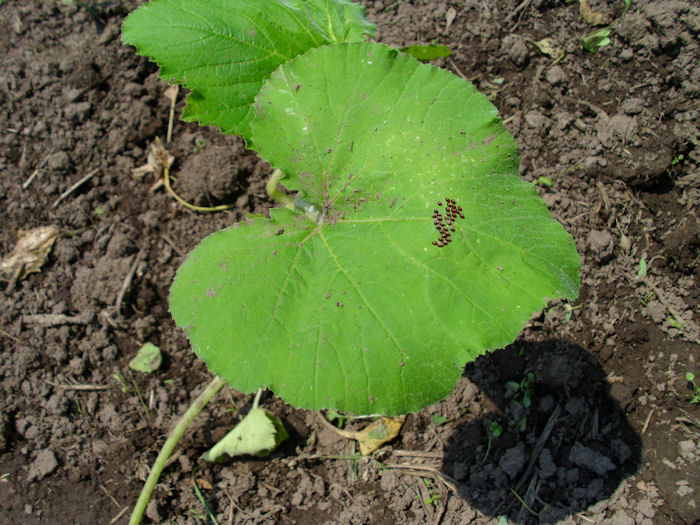
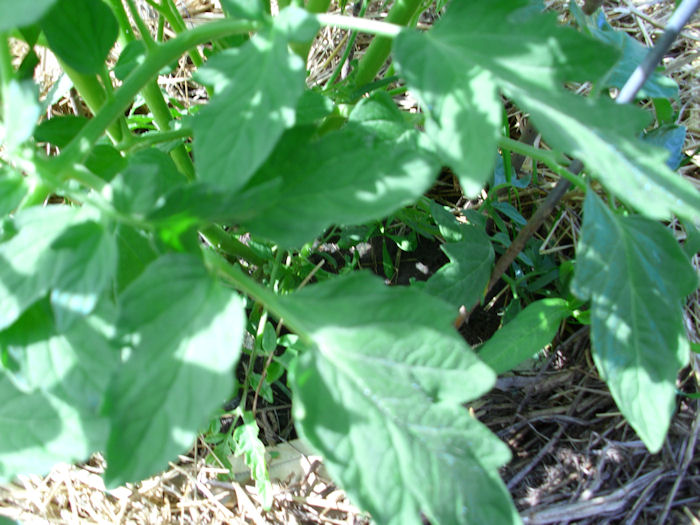
We’ve also had a pleasant surprise in the form of cantaloupes. Normally we have a hard time growing them, but we try anyway. The other day I noted that our cantaloupes are already flowering. They also appear quite vigorous this year, so I anticipate getting a lot of a cherished fruit that I often have to buy at the store as a “nicety” instead of picking it from my garden. This change in garden does lend credence to my number one rule of planting a wide variety of items to see what works and what doesn’t in a given year. Next year may very well prove to be the year the brassicas fight back, but this year I’m expecting a lot of broccoli soup.

I had mentioned in a previous post that our trees have also been affected by the spring weather. It turns out that our tree fruit harvest is just about ruined due to the odd weather because our trees simply aren’t used to it. We had thought we might get an exceptionally good berry harvest (the bushes are certainly full enough), but the exceptionally dry weather has already caused the black caps (a kind of raspberry) and the blueberries to fail. On the other hand, the grapes apparently love our spring and are putting out more than I’ve ever seen them put out. We can still hope that the blackberry and gooseberry harvests will be good too. The point is to look for the good and bad in the situation (as I described in my Every Year is a Good and a Bad Year post).

When you hear people discuss global warming in the news, it really doesn’t hit home. A degree or two temperature rise doesn’t quite make an impact. Even seeing the loss of ice at the poles doesn’t really hit the nail on the head like seeing your gardening conditions change so significantly that you never imagined they’d be the way they are now. Most scientists now accept global warming as a reality, but they continue to spout facts and figures that most of us can’t begin to relate to. What does global warming mean to you? How have you been affected by it? Let me know at [email protected].


Contemplating the Hardiness Zone Changes

Just in case you weren’t aware of it, the USDA has recently changes the hardiness zones for the United States. The hardiness zones help you understand what will grow in your area. Certain plants require warmer temperatures in order to grow and others require cooler temperatures. For example, if you want peaches, you need to be in a warmer zone. Our area has changed from 4B to 4A, which means that some types of trees that I couldn’t grow in the past will likely grow now. You can see an animation of how the hardiness zones have changed on the Arbor Day Foundation site.

Most people would agree that changes of this sort make global warming undeniable. Of course, it’s a misconception to strictly say that the effect is global warming, which is a misnomer. Yes, the planet has warmed up some, but a more correct assessment is that the weather is going to become increasingly chaotic. The point of this post is not to drag you into a discussion of precisely how global warming will affect the planet, what generalizations we can make about it, whether our scientists can define any long term trends about it, or anything of that sort. I’ll leave the discussion of how much man has contributed toward global warming to those with the credentials to make such statements. The point is that last year I was in Zone 4B and now I’m in Zone 4A. The long term weather changes have finally appeared in the form of new charts from the USDA, which after all, are only predictive and not infallible indicators of anything.

There are some practical considerations in all this and that’s what you need to think about when reading this post. The change in weather patterns means that you need to rethink your garden a bit. Not only do you need to consider the change in heat (the main emphasis of those hardiness zone charts), but also differences in moisture and even the effect on clouds. Little things are going to change as well. For example, have you considered the effect of increased lightning on the nitrogen levels in your soil? If not, you really should think about it. The weird science bandied about by those in the know has practical implications for those of us who raise food to eat after all.

Even if you aren’t into gardening at a very deep level, the changes in the hardiness zone chart has one practical implication that no one can escape. The literature on the back of those seed packets you buy from the store is going to be incorrect for this year as a minimum. The changes from the USDA came out after the seed packets were already printed. When everything else is said and done, the main reason for my post today is to help you understand that you can’t believe the seed package—at least, you can’t believe it this year. By next year the seed companies will have recovered and the documentation on your seed packets will be useful again.

Springtime is approaching. If you live anywhere near my area of the country, it seems as if we’re going to have an early spring indeed. I don’t normally need to trim the trees in the orchard until the end of March. This year I’ll trim my trees on March 1st, a lot earlier than normal and even then, I might be trimming a bit late. A few people in our area have already seen budding trees. So, if you’re used to waiting until April or May before you get out very much, it may be a good idea to take a walk around your property now to see if there are any changes that you need to know about.

Global warming is a reality. The effects it will have on your garden and orchard are also a reality. Just what those effects are and precisely what has caused them are still being debated by those in the know, but if you’re a gardener, you need to be aware that the garden you had last year may not work this year. Let me know about the global warning-related changes in your garden at [email protected].


Arrival of the Seed Catalogs

A special event takes place each year around this time—the seed catalogs arrive on our doorstep. Nothing says springtime like the arrival of these glimpses into the future. Rebecca and I wait for them each year with bated breath and eagerly anticipate what they’ll contain. The two major catalogs for us come from Jung’s and Gurney’s. We do receive other catalogs, but don’t look at them in detail quite as often as we do these two. The main reason is that these two catalogs generally contain everything we want to grow (and then some).

I’m sure that a few of you are already rolling your eyes and thinking, “Just how antiquated can you get? Why not look online?” I’ve been finding that online catalogs work great when you have some idea of what you want. If I want to buy a specific piece of software or computer hardware, a repair part for Rebecca’s vacuum, clothing, CDs, DVDs, and so on, then an online catalog works great. In fact, using one can save time. Growing a garden is a little different. Often, you don’t know that you’re going to grow something until you see it in a catalog. In short, viewing the catalog provides something online catalogs don’t provide as well—a glimpse of what you didn’t know you wanted.

Before someone places this sort of purchase in the impulse buying category, it’s good to consider how seeing new items can really help the gardener. The following list is my favorite reasons for looking at new items, rather than simply sticking with the old favorites:


  • Growing new items can help improve the nutrition the grower receives from the produce.
  • Different items take different nutrients from the soil, so growing new items can help keep the nutrients in your garden more balanced.
  • No one wants to get bored growing their own food.
  • The new items may have different resistance to pests, making use of pesticides less necessary.


These reasons won’t be enough for some people to consider going back to the paper catalog after establishing an affinity for the online version. There are other good reasons to get a paper catalog:


  • Some paper catalogs come with discount coupons that you don’t receive with the online version.
  • You can’t take a usable computer screen with you to show friends what you plan to buy (viewing gardening items on an iPad just doesn’t make it in my book).
  • It’s even hard for two people to view the catalog in the same way by sharing a computer display.
  • Using the online catalog often requires that you open your computer to potential virus attack in order to use JavaScript and those fancy multimedia features.
  • Catalogs make it easy to compare what you thought you were going to get with what you actually see in the garden.
  • The paper catalog is a handy reminder that you really do need to start thinking about your garden, even though winter still has a firm grasp.


Whether you get a paper catalog or not is up to you, of course. Some people will say that we’re wasting trees by continuing to get paper catalogs (we do recycle every last piece of paper that enters the house). Whether you use paper or online catalogs though, it’s time to start thinking about that garden. What will you plant this year? Let me know about your gardening ideas at [email protected].


The Garden in December

Most people don’t think about their garden after everything is harvested and cleaned up for the year-it just sits there, waiting for spring. However, your garden should actually be growing something this time of year, even if you do live in a colder climate like Wisconsin. You can look at getting mini greenhouses where you can grow things all year round, or find plants that are suited to the cooler weather. If your garden isn’t growing something, there is a good chance that you’ll lose some of your soil to erosion. I know that there are a lot of methods that can help, such as not tilling your garden, but the presence of a live root system holding the soil in place is a really tough act to follow.

Our garden currently has winter rye planted in it. Don’t confuse winter rye, the cereal, with perennial rye, the grass. Believe it or not, the winter rye will remain alive throughout the winter. I keep an eye on our winter rye (at least, until the snow flies), which is currently doing quite well.

WinterRye

It probably looks a bit sparse here, but this concentration of winter rye is more than sufficient. I plan to wait until the winter rye is about 12 inches tall in the spring, and then till it into the soil. Of course, this process seems a bit odd to anyone who doesn’t realize what I’m doing. Planting winter rye (or another ground cover like it) has some significant benefits and presents few problems.

  • The ground cover keeps erosion at bay.
  • Winter rye fixes nitrogen that will be released as the plant decomposes.
  • There are fewer weeds because the winter rye shades it out.
  • You can plant earlier because the winter rye soaks up excess water in the garden.
  • The tilled-in plants act as a natural fertilizer, which reduces your costs.

The biggest problem with winter rye is letting it get too big. You’ll have to work with winter rye for a while to know precisely when to till it in, but if you let it get too big, winter rye can quickly turn into a frustrating mess. The best advice I can provide is to mow the winter rye down and then till several times. Be prepared to work really hard with the tiller because once the roots grow to a certain size, they don’t till very easily. We only let it grow too big one timethe result was enough to ensure we didn’t let it grow too large ever again.

For now, the winter rye is doing its job of keeping the soil in place. The snow will fly soon (as early as tomorrow) and I’ll lose sight of it until next spring. When the snow melts, the winter rye will still be there doing its work. I’ll till it into the garden and then plant our vegetables. The results will be great. This particular change in my gardening technique was easy because the results are so good. For me, winter rye works really well, but it is quite labor-intensive. For those of you who may not have the time or ability to plant and mow and till, your best option is to look at some erosion control products such as jute or coir. You simply lie them over your soil, protecting it from heavy rain and meltwater. Many erosion control products are also made of natural fibers, so they conveniently compost down in the spring.

This year we are trying something new. Part of our small garden is planted in spinach. From what I’ve been told, the spinach will sprout extremely early next spring and be ready to pick long before I even have anything else planted. So, we’ll be having salads long before anyone else has even thought about planting their gardens. I’ll be sure to let you know how it works out.

One word of advice here. If you do decide to plant spinach, it doesn’t appear to act as a ground cover. You want to plant the spinach up hill of the winter rye so that the winter rye can still control any erosion. We planted our spinach in thin strips so that we could get to it easily, but the erosion wouldn’t be a problem. That’s one of the fun parts about gardeningtrying different things out to see how they work. Let me know if you have any questions at [email protected].

Sharing and Swapping Food

One of the centerpieces of self-sufficiency is, surprisingly enough, sharing and swapping food with neighbors. Yes, it’s possible to grow everything you need yourself, but absolutely everyone has a bad year in something. In addition, your soil and gardening techniques may produce copious quantities of one item, but prove dangerous, or even fatal, to other items. Your neighbors will have similar luck with other items. Consequently, swapping items between neighbors is one of the hallmarks of a self-sufficient community. The community as a whole benefits in such a situation because everyone ends up with a greater variety of food to eat. So, while you can grow what you need, you’ll eat better when you swap with someone else.

It isn’t just the garden though. Just about everything is swapped at times. One person may have an abundance of chickens and trade a chicken or two for some beef. These swaps aren’t done on a strict accounting system. People tend not to get too caught up on the price of the food—they’re more interested in exchanging something they have in excess for something they need. Of course, no one would swap an entire cow for just one chicken either . While the swaps aren’t strictly fair, they’re reasonably sono one tries to take advantage of someone else (otherwise, the community as a whole would stop swapping with them).

There are times when people simply share food, which is where the country ethic comes into play. We’ve shared wine, soap, or cookies with other people simply because we think they’re nice people and want them to enjoy something we’ve made. There is no other motive behind the act, other than seeing the smile on the other person’s face. It makes us feel good to see how others react when we do something nice for themacts of kindness are their own reward.

People have also shared with us. One winter we were extremely low on wood and I wasn’t able to get out and cut any. Our neighbors sent three cords of wood our wayan extreme act of kindness that we’ll never forget. We recently received a nice buck from some friends for nothing more than a smile. It isn’t often that you can fill your freezer with venison because of the kindness of someone else. The 65 pounds of meat is nice, being able to use the tenderloin for Christmas dinner is even nicer. I’ll make some lovely venison medallions (with wine we’ve made no less). It will be an extremely special Christmasone we’ll never forget.

Our swapping and sharing often extends outside our local village. Other good friends recently sent us a decadent cake that we’ll share with family and friends here. We’ll send a fruitcake their way later this week. I wish that our friends could have seen the smile on our faces when we received the cakeperhaps they felt the warmth of our feelings from afar (and certainly we’ve thanked them for their fine gift).

If you choose to become self-sufficient, don’t get the idea that you’re an island. No one is separate from the entire world. The more self-sufficient you become, the more you realize that the self-sufficiency of the community in which you live is important. It doesn’t matter if you live in the country, as we do, or in the city. The need to depend on others and also experience the joy of giving to those in need is possibly the best part of being self-sufficient.

Does your community swap and share? How are you experiencing the kindness of others during this holiday season? Have you done something kind, something totally unexpected for someone else? Let me know at [email protected].

Okra Pollination Problems

Every gardener faces the eventual problem that can’t be easily solved by talking with friends or looking online. This year presented one of those problems for us. We have big okra plants that aren’t producing any pods. Yes, there are a lot of flowers, but they aren’t producing anything. Instead, the flowers are opening, shriveling back up, and then dying as shown here.

Okra

You can see two flowers in this picture—both of which have dried up without producing fruit. All five of our okra plants are precisely in the same condition. They’re all nice big plants, but nothing to show for an entire summer’s worth of growth except some exceptionally beautiful leaves and dried flowers.

According to any number of sites, okra is self-pollinating in many cases. However, many of these sites also indicate that there hasn’t been any study done of the pollinators for okra and their effect on the plant. When I first noticed this problem, I spent time on a sunny day observing the plants carefully. A number of pollinators visited the plants, so it seemed at first that the issue isn’t one of pollinators.

However, I also noticed something else. On every other year, the okras in our garden are infested with ants. This year, there is not an ant to be found anywhere near our okra. A number of sites seem to indicate that the ants have no purpose for okra, but everyone complains about them. Now I’m starting to wonder whether the ants are pollinators or somehow help the plant in other ways. The okra certainly seems to put out a nectar that attracts ants like crazy.

The only other change in that particular part of the garden this year is that the patch has tomatoes in it. The okra is growing in row 4 of that patch and the tomatoes are growing in rows 1, 2, and part of 3. Last year, the okra was in row 1 of the same patch. Checking for relations between okra, tomatoes, and ants online proved fruitless. In short, there is no quick or easy answer for this particular problem except to say that it exists.

Our summer has been hot enough for the okra to grow quite large, so I’m sure it’s not a problem with heat. The okra has also been mulched and watered, so moisture isn’t a problem. Because the okra has been moved to a new row and that patch also received a nice layer of new mulch this past spring, it can’t be nutrients. I’ve checked the flowers and each one is producing the same amount of nectar as normal. I keep coming back to the lack of ants or some deleterious effect of putting tomatoes and okra in close proximity. If anyone else has a thought on this issue, please contact me at [email protected].


Every Year is a Good and a Bad Year

It’s easy to become discouraged in the garden sometimes. During the early spring you plant everything that you’ll hope will grow and produce plentifully. By August, you know which plants will fair the best and which didn’t survive at all. This year has been especially tough because I ended up getting gallbladder surgery first, and then, because we do everything together, Rebecca ended up getting gallbladder surgery as well. So, with both of us on our backs, our garden had a true test of being weed-bound. Unfortunately, that means that some plants didn’t live at all and some won’t produce well. Our corn was nice and tall, right before the wind blew it over. Many of our peas succumbed to the weeds.

Still, it’s a good year in many respects and that’s the aspect I choose to focus on. Good years fill larders with interesting vegetables and fruits. Apparently, this is a bean year. We planted the normal amount of green beans and Lima beans. However, the plants decided to grow twice as tall and twice as wide as normal. We’re now inundated with green beans and will soon have a bumper crop of Lima beans as well.

GardenEnough01

Not every year is a good year for every vegetable. In my Dealing with Overabundance post, I discussed how some years produce so much that you can hardly fathom what to do with it all. Last year and the year before were horrible blight-filled years for tomatoes. This year isn’t just good, it’s amazing. Our tomatoes have never looked quite this good.

GardenEnough02

Those are the same diminutive plants I wrote about in Mulching Your Garden. They’re over five feet tall now and loaded with so many tomatoes that we’re going to try pickling some green tomatoes this year. (Remember to try different preservation techniques whenever you can to discover new ways of dealing with overabundance.) The plants have obviously overgrown the tomato cages and are threatening the other plants in that plot. Unlike previous years, there is absolutely no sign of blight, even at the bottom of the plants (which are usually brown by now). Sometimes in this case it is better to buy things like new mulching heads for skid steers so we can effectively clean up the area for a more serious overgrowing problem.

Many of our plants are late, but will most definitely produce. The egg plants and okra are of sufficient size that we’ll get the normal amount from them, or perhaps just a bit more than usual. As in most years, the egg plants are constantly under attack from flea beetles, but the lacing of their leaves hasn’t reduce their vigor much and we expect the normal crop from them.

GardenEnough03

The beets and kohlrabi look good this year as well. We fully expect to harvest enough to replenish our larder and even provide a little extra for next year. So, many plants are producing enough that we’ll most definitely not starve. It’s best to avoid focusing on the lack of corn this winter in the larder or the fact that there won’t be much in the way of broccoli (we will have an abundance of Brussels sprouts though).

It’s important to remember diversity in gardening. Don’t plant just one or two items-plant a variety of items so that at least a few of them produce well. This is our year for tomatoes and beans. Next year might be a corn year or the year of the mutant squash (we’ve had one of those lately and are still eating squash from that year). Each year is a good year for something, and an equally bad year for something else.

There is actually a health benefit to all of this. If every year produced copious quantities of whatever you planted, there would be no incentive to try something new. Gardens force people to moderate what they eat and to try new things. As someone once said, “Variety is the spice of life!” So, what has grown well for you this year? Let me know at [email protected]

Drying Herbs

This is the time of year when Rebecca starts drying the herbs that have been growing since early spring. Most of them have gotten quite tall. I’ll discuss one of my favorites in this post, lime mint, but she’s working on a host of other herbs as well. Of course, the drying process starts by picking the herbs. She started with a relatively large bunch of lime mint like this:

DryHerbs01

In order to dry herbs, you need some means of drying them. Some people use their ovens, which can sometimes damage the herbs. It’s possible to dry the herbs in the sun, assuming you have a nice place to do it and the temperatures are high enough. We use an American Harvest dehydrator like the one shown here.

DryHerbs02

It’s such a handy device that we own three of them and sometimes all three of them are in use drying various items. Rebecca makes vegetable chips and apple chips for me to use as snacks (among other items). She has also made venison jerky for me using one of these devices. Two of our dehydrators have the top mounted heater and fan, while the third is bottom mounted. When it comes to drying herbs, there really isn’t any advantage over using one or the other.

In order to dry the herbs, the leaves are stripped from the stem and then placed in a fairly shallow pile in the dehydrator trays. It’s perfectly acceptable to put the younger tops in whole, but you don’t want the really stiff stems in with the rest of the herbs. Here’s how a typical tray will look.

DryHerbs03

After you’ve finished filling trays with the herbs, you’ll need to set the dehydrator for 105 degrees. It takes about 6 hours to dry the herbs. During that time, you’re treated to the most exotic smells. The entire house was filled with the smell of fresh mint this morningit’s indescribable. The stack of herbs you saw earlier filled nine trays like this:

DryHerbs04

You’ll want to take the lid off from time-to-time to check the herbs (don’t do it any more than about once an hour). About halfway through the process, you’ll want to rearrange the trays, placing the bottom ones year the top (and vice versa) to ensure the herbs dry evenly. The herbs will look like this about halfway through the process.

DryHerbs05

When the herbs are completely dry, they’ll be a dark green. They’ll also crumble quite easily. Don’t be too shocked by the amount of herb you get for the initial investment. Here’s the completed lime mint from that entire bunch that you saw earlier (about 1/3 of a quart).

DryHerbs06

There is nothing quite so nice as home dried herbs. You’ll use quite a bit less of them than the herbs you get from the store. Rebecca places any extra herbs in a sealable bag, uses a Food Saver to vacuum seal the bag, and then places it in the freezer. This approach keeps the herbs extra fresh. Growing and preserving your own herbs makes for amazing meals and drinks (think herbal teas of your own design). Wouldn’t it be nice to be nice to be able to use your own herbs whenever you wanted? Let me know what you think at [email protected].


Squash and Pesticides

Rebecca and I avoid pesticide/insecticide use whenever we can. However, I regret my laissez-faire attitude towards pesticides when we allowed a large family of termites to move into our home. If you find yourself in a similar position, you should be aware that a service provider like this termite control can help you deal with your pests in a sustainable way. Pesticides cost money, are costly to apply, and tend to ruin our health. They also kill pollinators, which are already in short supply. In fact, we’re able to use other solutions for every pest in the garden other than the squash bug. There is a host of bugs that will attack your squash, but the squash bugs seem to be the worst in this area.

Most other bugs are easily picked off (such as the tent caterpillars we squash by hand in the spring), drown in standard dish washing soap, killed using an environmentally safe method, like searching “terminix iowa” on Google and finding the best and closest pest control to you! Mulching (see my Mulching Your Garden post) can also help control bugs, as will keeping your garden weeded. One of the few good reasons to mow your lawn is to keep all sorts of pests under control by reducing the places they can hide. If you read this guide on mole control, you’ll see that mowing the lawn is one of the ways to rid your garden of moles, so it’s worth making the effort to maintain your lawn. (That being said, I’m a strong advocate of mowing the lawn less often to reduce mower emissions and to make the grass a length usable for purposes other than filling the landfill.)

The squash bug will infest a squash or cucumber patch quickly in spring and will continue infesting it until every plant is completely destroyed. Adult squash bugs are incredibly difficult to kill. The pictures I’ve seen online don’t quite depict the monsters that we have in our area:

SquashBug01

I happen to catch this picture of one of our squash bugs. A single counting on one plant turned up 42 of themall breeding. As you can see, the picture here shows a bug considerably bigger than the bugs you’ll find on most sites online. I’m not sure why ours grow so large, but they are quite vigorous.

The eggs also aren’t limited to the underside of the leaf. The bugs seem quite happy to put them on both sides of the leaf and in large clusters. Here is just one cluster:

SquashBug02

As you can see, this cluster is on the top of the leaf and it isn’t in the V pattern discussed in online sources. The point is to examine the plant thoroughly for squash bugs because they’re determined to destroy your plants.

To keep pesticide use at a minimum, check the leaves regularly for these clusters. Trying to pick the eggs off won’t workyou’ll end up damaging the leaf and it’ll die. The eggs hatch in one to two weeks and get darker as they get nearer to hatching. These eggs are just about ready to hatch, so yesterday I applied Seven (Carbaryl) to the affected plants. I’ve been looking into some of the more environmentally friendly solutions, but so far Seven is the solution that works best. If you have a bug infestation, try some of these other solutions first, before you use Seven.

You can’t apply Seven three days before harvest (more if you want to be careful). In fact, once the plants start blossoming robustly, you don’t really want to use any sort of pesticide (it’s essential to look after pollinator health). The best idea is to look for the squash bugs early in the season and attack them vigorously so that you start with a strong vine. If you see eggs after the blooms start, try drowning them using a limited application of neem oil. Insecticidal soap is completely ineffective on hard bodied squash bugs. Smash adult bugs using your fingers if there aren’t too many of them.

There is a point each season where we lose the bug battle. The squash bugs simply overwhelm every defense we can mount. However, by that time our squash have grown quite large and produced well for us. The vines die too early, but not before they produce usable output for us. To ensure we get enough squash, we simply plant more plants knowing that they will die too early from the invading plague. Yes, we could keep them completely under control using Seven, but only at the cost of our own health and the health of our pollinators, so this approach represents a good compromise that ensures an adequate harvest. Let me know if you have any questions at [email protected].

Mulching Your Garden

Mulching is an extremely important part of maintaining your garden. Even if you don’t have time to mulch everything or have items that don’t mulch well (such as carrots and beets), anything you can mulch should be mulched. Using mulch has the following benefits:

  • Reduces the need to water
  • Keeps weed at bay
  • Reduces the pathogens that can splash up from the ground onto vegetables
  • Adds nutrients to the soil
  • Helps worms stay nearer to the surface where they benefit the garden
  • Lessens the chance of extreme temperatures damaging vegetables

There are many theories on the proper technique for mulching. This post doesn’t compare them because the bottom line is that any sort of mulching is better than none at all. If you find a technique that works for you, by all means, use it. My technique works well for me because I can get the materials at a very low cost.

Our mulching begins by laying down two sheets of non-advertisement newspaper. There are some things you should consider about the newspaper you use. First, make sure the newsprint is printed with soy or a similar non-toxic ink. Second, never use the glossy advertisements. Even if they aren’t printed with toxic chemicals (they often are), the glossy paper tends to repel water and takes a very long time to break down. Third, make sure the paper is large enough to overlap.

Make sure the newspaper does overlap by about an inch or so as you lay it down. Otherwise, the weeds will immediately spring up through any gaps. In the past, we’ve doused the newspaper in water before laying it down, but it works just as well dry as long as it isn’t windy.

Lay hay or dried grass on top of the newspaper. Make sure the grass is absolutely dry–brown is best. If you want to use this second technique, let your grass get a little long, let the newly mown grass dry a day or two, use a rake to move it about, and then let it dry for several more days before you rake it up to use it as mulch. We allow a full 2-inches of grass or hay on top of the newspaper. Here’s what our small garden looks like with mulch in place.

Mulch01

My uncle supplied us with some square bails of hay. They work quite nicely for mulch. The hay had been rained on, which ruined it for animal fodder. You may be able to find a farmer in your area who has some ruined or third cutting hay that you can buy for a pittance. Notice how the hay covers very square inch of the garden.

There is one addition trick you must employ. The mulch absolutely can’t touch the plants. For example, look at this tomato plant:

Mulch02

The newspaper and hay end in a small circle around the base of the plant. If the mulch touches the plant, it will cause the stem to rot and you’ll lose the plant. Rebecca and I didn’t know about this little problem during our first few years and we lost quite a few plants to mildew or rot.

The small spacing we allowed still provides all of the benefits of mulching. Tomatoes are especially prone to black spots. When it rains, the rain hits the soil, picks up pathogens, and splashes these pathogens onto the tomatoes. The mulch keeps the rain from splashing. The tomatoes can still get spotted from other sources, but it’s less likely.

As I mentioned previously, some vegetables don’t lend themselves to mulching very easily. For example, both carrots and beets are planted so closely as to make it impossible to mulch between the plants. You can mulch around the area in which the carrots and beets are growing though. Potatoes are planted further apart, so they mulch just fine. In fact, unless you plan to take time to hill your potatoes, mulching them is essential to prevent the potatoes from turning green (we don’t hill our potatoesit’s much easier to lift the mulch and the end of the season and almost pick them up off the surface).

Some mulching depends on the season. For example, bush green beans mulch fine during a hot and dry summer. They’re prone to mildew during a cool, wet summer. You need to allow a little more distance between the mulch and the bush green beans (or any other bush-style bean for that matter) to allow air flow. Pole green beans and peas don’t require this spacing because the majority of the plant is on a pole or a fence.

There are a lot of interesting ways to mulch a garden. For example, some people use cardboard for the task, while others use bark. The chocolate smell of cocoa hulls is quite enticing (assuming you can afford the high cost). Some materials provide properties that our hay mulching technique doesn’t provide. However, you have to be careful in choosing a material because some materials, such as bark, will actually leach important nutrients out of the soil (using bark can leach all of the nitrogen and also make the soil acidic). We actually do use bark for our blueberries and grapes because they require an acid soil, but we never use bark in the garden. Let me know your thoughts on mulching at [email protected].