Cleaning the Coop in December

It’s December and time to check on your outside animals to ensure they remain comfortable. The rabbits are relatively easy. All you really need to do is ensure the cages are remaining reasonably clean (wire brush those bunny pellets from the cage’s hardware cloth) and that any protective measures, such as the window plastic you put in place to keep the wind at bay, are still in place and in good condition. The entire process will likely take less than an hour (if that long—my six cages took about 15 minutes).

The chickens are another story. You need to check the weather carefully and try to find a day when the temperature will get above freezing, if possible. The manure in the coop will be a lot easier to get up if you can get it to defrost a little. You want to clean out all of the old hay and manure. Unlike your fall cleanup, you won’t wash the nest boxes. In fact, this is a really bad time to do anything with water in the coop (except for the chicken’s drinking water) because it won’t dry properly. The idea is to clean as much as possible by scraping up the manure and getting it out of the coop onto your compost heap. I find that a combination of a barn shovel and a wide bladed putty knife do the job quite well.

This is also the time to check for air leaks again. Your chickens can keep cozy if your coop is relatively air tight.  You don’t want to close it up so tight that the ammonia fumes build up and hurt the chickens, but you also don’t want anything like a strong breeze in the coop.  The chickens will normally keep warm by huddling together at night on top of their nest box or other roosting area you provide. So, it’s essential that you keep the air leaks under control.

When replacing the hay, make sure you pack each nest box a little more than you would in summer to give each chicken a nice place to lay her egg. I’ll use regular alfalfa hay during the summer months because it’s stiffer and breaths better. However, during the winter months I use grass hay. It’s softer and provides better warmth. You must make sure the hay you use is completely dry and mildew free because it absolutely won’t dry during the winter months and you don’t want your chickens to acquire respiratory diseases.

Because it is winter, the chickens are more likely to keep you entertained as you clean the coop. Remember that the coop is their home, so you need to be patient as you work with them. During the cleaning process, one chicken proceeded to scold me, but another pecked at my feet (apparently trying to get off all the snow). A third kept insisting that she needed to be held and petted (slowing my progress). All this attention is quite normal during the winter cleanup.

Keeping the coop clean is quite important if you want to maintain your chicken’s health. That means getting out in winter, when conditions for cleaning are less than ideal. Working on the one or two days during the winter when the temperatures get a little higher will make things a lot easier, but even so, you’ll be trying to clean the coop with a bulky jacket and gloves on, so it’s going to take more time than in the summer months. Let me know your thoughts about cage and coop cleaning at [email protected].


Preparing Eggs for Sale

It may not seem like a particularly important topic at first, but if you plan to sell some of your eggs, you must prepare them for sale properly. Otherwise, you’ll quickly lose your customer base. No one will say anything to you about the reasons for not buying your eggs—they simply won’t buy them. After a while, you’ll be left with a lot of eggs on your hands and no buyers.

When you get the eggs from the coop, make sure you wash them. This might seem like an obvious thing to do, but some people have actually tried to sell unwashed eggs, which is hazardous to a customer’s health, as well as unappealing. I normally use Dawn Antibacterial soap to wash the eggs and then rinse them thoroughly. The soap ensures that the outside of the egg is free of pathogens. Of course, you need to perform this process carefully or else you’ll end up with a lot of unsellable eggs.

After you allow the eggs to air dry (or dry them carefully with a towel), you need to inspect them carefully. Any flawed eggs go into my personal pack. Eggs with cracks are cooked thoroughly and fed either to the dogs or cats. There isn’t a good reason to waste good protein, but if the egg has any cracks at all, you can’t vouch for the integrity of the content. A mix of egg, rice, and leftover meat makes for a dandy addition to your pet’s daily food. Sometimes I throw in a few leftover vegetables as well.

We don’t have any roosters. If we did, we’d also need to candle the eggs to ensure there were no embryos inside. Because we buy our chicks from other places, we won’t ever have roosters for our laying hens. You need to decide on whether to keep roosters based on your particular egg laying needs. However, it’s still possible that our eggs could have a blood spot in them. We simply offer our customers a replacement egg should this happen. So far, it never has, but it could happen given that our chickens are free range. Theoretically, you can candle the eggs to find this sort of problem, but it’s still possible to miss it, so having a replacement policy is the best way to go.

At this point, you have a number of washed eggs that lack flaws. It’s time to weigh them using an egg scale. I generally keep small eggs for my personal use. Medium-sized eggs are sold at a discount, traded for something I need, or given to friends and neighbors. The large and jumbo eggs are placed into cartons and sold at full price.

Create an attractive display for your eggs. For example, I’ve set up kid friendly egg cartons. The cartons will contain an attractive mix of blue, green, brown, tan, and speckled eggs (the range of colors the hens lay). Placing the eggs in some sort of pattern also helps. Even though the inside of the egg is the same in all cases, the eye catching patterns really help to sell your eggs to the public. Of course, adults may prefer a less colorful display, which means grading the eggs by color and placing like colors in a carton. The point is to make your eggs look especially nice.

Preparing your eggs properly will help keep you in sales. In fact, a combination of high quality and classy presentation will usually net you more customers than you can accommodate as long as your prices are also in line with what the market will allow. Let me know your thoughts on egg preparation at [email protected].


How Cold is Too Cold for Animals?

In many ways, we follow some relatively old fashioned methods of animal husbandry. For example, a lot of people now use heated barns or other enclosures to protect their animals from winter. Of course, there are a lot of benefits to this approach, such as maintaining productivity during winter and reducing animal stress. One way to help reduce animal stress is to get some cbd for pets, this can help calm them and keep them mellow for a period if they are in distress.

However, there are also disadvantages that you must consider from a self-sufficiency perspective. For example, heating an environment for the animals incurs an additional cost that is unlikely to be repaid with additional productivity. In addition, such an approach is harder on the environment because the heat is normally provided by some sort of fossil fuel. Unfortunately, the biggest problem is the effect on the animal. If there is a power outage or similar issue that causes a loss of heat, the animal is going to be adversely affected in a serious manner because it isn’t used to the cold and hasn’t had any time to develop a fat layer. We can put on additional layers of clothing when the heat fails-animals typically don’t have this advantage. Animals also tend to have natural cycles, just as we do. The change in seasons helps keep an animal’s internal clock in sync.

Of course, it gets pretty cool here in Wisconsin. We do winterize the animal cages in various ways. For example, the rabbit cages receive a covering of plastic sheeting over the front to keep the wind at bay and also reduce some heat loss. Likewise, the chicken coop window receives a plastic sheet and the back window is both closed and secured. You can’t make the cages airtight, however, because doing so would trap harmful gasses from animal feces that would eventually prove detrimental to animal health. Even during the winter months, animal cages must have at least a little air movement to promote good health.

During the winter months, we also feed the animals food with a higher fat content that provides additional calories to help keep them warm. In most cases, this means adding more corn and oats to the rabbit food and providing them with additional high energy food treats (such as carrot scraps). The chickens receive various types of seeds with their feed, along with high protein sources such as meal worms. This approach follows what happens in nature. The seed heads of plants are exposed above the snow, so animals eat these high energy sources of nutrients during the winter months.

Our chickens love the forage all throughout the year. During the summer months they go out every day unless the weather is absurdly harsh (the weather service is predicting tornadoes). In the winter the chickens only go out on warmer, sunnier days. During the cooler days we keep them inside where they can huddle together to preserve warmth.

Part of our strategy is also to use the natural environment to our advantage. For example, all of the cages and the coop are south facing so that any sunlight tends to warm the interior of the cage or coop. There are times when we open the coop door and feel a surge of warmth come out simply because of the effect of the sun on the interior. So, it’s possible to rely on some level of passive heating to help keep animals warm.

Beside the other measures we take, we ensure we check the animal’s water more regularly during the winter to ensure the animals all have liquid water (not iced over in any way) to drink during much of the day. A good source of high energy/high calorie food and water are both essential to animal health during the winter months. All of our animals drink less during the winter, so giving the animal less water, but filling the water trays more often, is the best strategy to follow.

If the weather were to get terribly cold, we also make provision to keep the animals short term in the garage or basement of our home. Neither area is warm enough to stress the animals, but is warm enough to keep them from getting frostbite (a real problem for chicken combs). What sorts of things do you do to make your animals more comfortable and maintain their health in winter? Let me know at [email protected].


Engaging in the Fall Cleanup

For many people, fall is a time when they cut the grass the last time, take their car to the mechanic for winterization, check for air leaks in the windows, and ensure the furnace will run. These common chores affect anyone involved in self-sufficiency as well. For example, you still need to get your car ready—assuming you have one.

However, fall cleanup requires a lot more from anyone engaged in self-sufficiency because there are more facets to their environment. For example, fall is the time when you need to ensure your animal cages are completely cleaned. (Yes, you also clean them at other times, but fall is when you take everything apart and really clean it up.) If some of your animals are outdoors, you need to ensure they’ll have sufficient cover for the winter months. For us, that means scrubbing down every one of the rabbit hutches and letting them dry before we put a rabbit back inside. In addition, we add any manure under the cages to the compost heap. The chicken coop needs to be cleaned completely, the old hay replaced, and the windows closed. I also make sure I wash the window so the chickens can see out. It turns out that chickens like a nice view too.

Of course, you take the garden down after picking any remaining goodies and plant your winter rye to prevent erosion. The fall is a good time to look for potential soil issues and possibly get a soil test so that you know how to deal with problems the following spring. Likewise, your herb and flower gardens require attention so that any perennial plants will make it through the winter. However, don’t put mulch on immediately. Wait until the garden is frozen and then put the mulch on. Doing so will ensure that the plants are properly prepared for the winter.

You may not have thought of it, but all of your equipment has taken a beating during the summer months, including all of the equipment used for canning. This is a good time to scrub your pots and pans up and ensure they’re in good shape before you put them up. Make sure your pressure canner receives particular attention. Check to see if the gasket is in good shape, along with the rubber plug used for emergency pressure relief. Your stove will need a thorough cleaning and may require maintenance as well. Make sure everything is put away correctly so that you don’t have to waste a lot of time trying to find it in the late spring when you begin using it again.

Don’t think you’re finished yet. Now is the time to start walking the grounds looking for problems in your orchard. For example, it’s relatively easy to find pests that hide on trees during this time of the year. Make sure you check trees for problems associated with stress. For example, pear trees are prone to crack at the joints. You might need to mark some areas for special pruning in the spring. If a problem seems especially serious, you may want to address it now, rather than later.

Being self-sufficient means ending as well as you began. During the spring there is an excitement that builds that makes it easy to prepare for the new gardening season, but by the end of the season, all you really want to do is flop down in front of the wood stove. The time you take to prepare now will pay significant dividends in the spring. Let me know about your fall preparations at [email protected].


Encouragement, A Self-sufficiency Requirement

I’ve received more than a few e-mails over the years about the seeming impossibility of working closely with a spouse in our self-sufficiency efforts. Actually, husband and wife working together toward a common goal used to be the normal experience—working separately is a modern event and one that probably isn’t very good for relationships at all. In Making Self-Sufficiency Relationships Work I talk about the need for respect. Doing simple things that mean so much when it comes to displaying your respect for the other person and not simply assuming the other person knows that you respect them. As important as respect is to a self-sufficiency relationship, encouragement is even more important.

Rebecca and I encourage each other daily in both small and large ways. A peck on the cheek when the other person looks down is just the tip of the iceberg—sometimes the other person needs a hug instead. Being the other person’s cheerleader is a major part of keeping the other person active so that the two of you can meet the requirements you’ve set for your self-sufficiency efforts. A little encouragement goes a long way toward making an impossible goal quite achievable. Doing the impossible with less than nothing at times has become a somewhat common occurrence in our relationship. Believing that you can do something is an essential element in actually doing it. Knowing the other person believes in you too tips the scales in your favor.

Of course, the other person can fail despite the best encouragement we can provide. When failure occurs, it’s time to think about the failure and assess what went wrong. There are actually benefits to failure and failure is a natural part of life. Sometimes a little more encouragement will help the person get back up and try again. Other times, you must conclude that you’ve learned one more way to avoid failure and move on to something new. The point is that failure doesn’t mean the encouragement or idea were ill conceived or wasted—it simply means that you need to do something different. The world is full of untried possibilities, so pick one and give it a try.

When it comes to self-sufficiency, partnering with someone who understands the benefits of both respect and encouragement is a far smarter choice than choosing someone with skills. Anyone can learn a skill—not everyone can encourage another person and there is most definitely a lack of respect between people today. If you’re just starting your self-sufficiency efforts, don’t become discouraged. Anything worth doing takes time and patience, and requires a partner who both encourages and respects you. Certainly, the two of us have done both for each other over these many years. Let me know your thoughts about encouragement and respect at [email protected].


Getting Ready for the Crafting Months

I’m not quite ready to kick back and enjoy the wood stove yet, but I may be getting there. The wood pile is starting to look mighty nice and the cool evenings are definitely inviting. In a week or two, I imagine that we’ll need to start having evening fires and that’s when the crafting will begin. Of course, I participate in a number of crafts, but this winter I plan to focus on making some socks. Warm socks are a must have item during the cold winter months.

In Knitting for the Gentleman Farmer you see a pair of socks I made using my Knifty Knitter, but I’d like to do more. The socks I’ve made so far are more akin to slippers, than something you’d put on your feet before your shoes. So, I recently purchased Loom Knitting Socks: A Beginner’s Guide to Knitting Socks on a Loom with Over 50 Fun Projects (No-Needle Knits), which is a book designed for us who like to avoid needles because they’re a tad hard to handle. This book tells you quite a lot about making socks in just a few pages. For example, you discover how to size your socks properly so they don’t slide around on the wearer’s feet (as mine are prone to do).

The book uses looms of various sorts, one of which is the Knifty Knitter. I may end up getting a few other loom types, which wouldn’t bother me at all. It would be nice to create socks that I could wear anywhere with shoes and that simply isn’t possible using the Knifty Knitter. Fortunately, I already have some print socks (socken bedrucken in German) that are very versatile. I’ll also have to get used to working with thinner yarn and possibly add a bit more light so I can actually see what I’m doing.

What I like best about this book is that the author takes time to demonstrate how you can create an amazing array of patterns using a loom. The Knifty Knitter instructions only show how to create a straight knit-nothing very fancy at all. I’ll be able to use the techniques I learn in this book to create nicer looking hats, blankets, and scarves as well (generally, I don’t make other items, even though I certainly could). If you’re looking at getting into crafting, but aren’t sure where to start, you can find some quilt ideas here.

Unlike a lot of books on the market, this one provides realistic levels for each of the patterns. In addition, there is a nice mix of models (young, old, male, and female). It gets tiring to see books that feature all of the patterns being worn by a young woman. Seeing a guy wear some of the items is a nice change for me and will make me feel more comfortable giving those particular sock patterns to my male friends.

Now all I need is a full tea kettle and some of Rebecca’s amazing herbal teas. With the fire started, tea in hand, and some music playing, my Knifty Knitter (and other looms yet to be purchased) will see a lot of use this winter. I’ll provide updates on some of the other looms I try later in the winter.

Exercising Care in the Woods

It’s fall and the woods are quite beautiful. For the most part, the bugs have started packing it in, even though we haven’t had a frost yet. I can spend hours in the woods, enjoying a soft breeze, with nary a bite to show for it. There are times where I just sit on one of my stumps up there and wait for something to happen (it usually does). I never run out of interesting things to see in the woods, despite the fact that they really aren’t all that large.

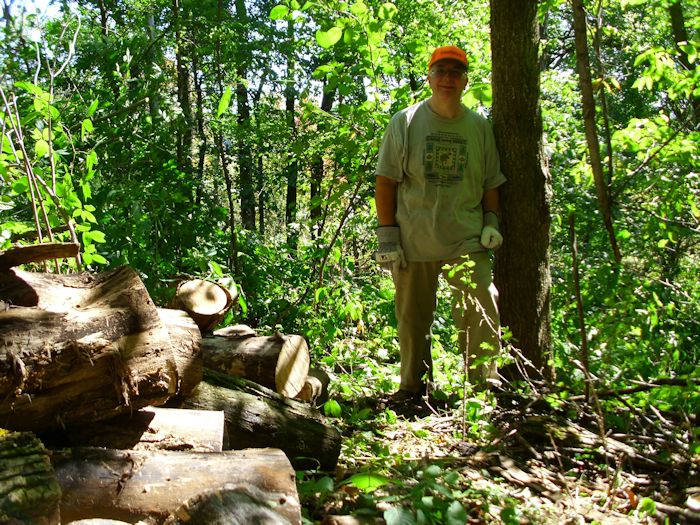
Of course, it’s also the time of the year when I’m cutting wood for winter. So, I often go up with my chainsaw in hand, looking for wood to cut up. The first priority is to keep the woods clean, so I start by cutting anything that is already lying around. Even small wood burns, so I’m not too particular about what size the logs are. Sometimes I find a log that is quite dry and burns nicely lying right there on the ground. In fact, that’s where I found these piece that I cut up.

CarefulWoodCutting01

There is an equal mix of slippery elm and black locust in this case. Both woods burn quite nicely. These pieces are quite dry, but not rotted. Even if there were some rot, I’d take the wood because it’s better to keep the woods cleaned up whenever possible and wood with a little rot still burns just fine.

After I get done looking for fallen wood, I find any snags (trunks that lack limbs) that no one is using. It’s important not to cut down every snag because owls and other birds often nest in them. In addition, it could be a matter of self-preservation because bees will also nest in the snags at times. (For this reason, I actually put my ear up to the trunk and listen for a while.) On this particular day, I found a wonderful piece of black locust to cut up.

CarefulWoodCutting02

This snag looks like a mess. It doesn’t appear to be usable. The inside has rotted out and there are shards where the tree was hit by lightning. However, this is black locust and the wood is actually quite good. Cutting into it, I found that the outside had indeed rotted a little (up to a half inch), but the inside was both sound and dry. so, the snag ended up on the wood pile along with everything else.

On this particular day, I found everything I needed on the ground or as a snag. However, there are some days when I do need to cut a tree down. When this happens, I look for trees that are already completely dry (the bark has come off of its own accord) and no one is using. Even with these restrictions, I usually find all I need. All it takes is a little looking and given the beauty of these woods, looking is something I like to do.

Notice that these pictures show that the woods is intact. It’s what I try to achieve when I cut wood for winter. I leave all of the young trees and anything that’s alive intact as much as possible. Even the ground vegetation is left intact except for the narrow path I create for myself. (All the wood is carried down by hand to minimize damage.) Using management techniques like these ensures that the woods will continue to look beautiful and produce wood well into the future.

Have you taken a stroll through a woods lately? Let me know your thoughts about careful management techniques at [email protected].


Hidden Eggs

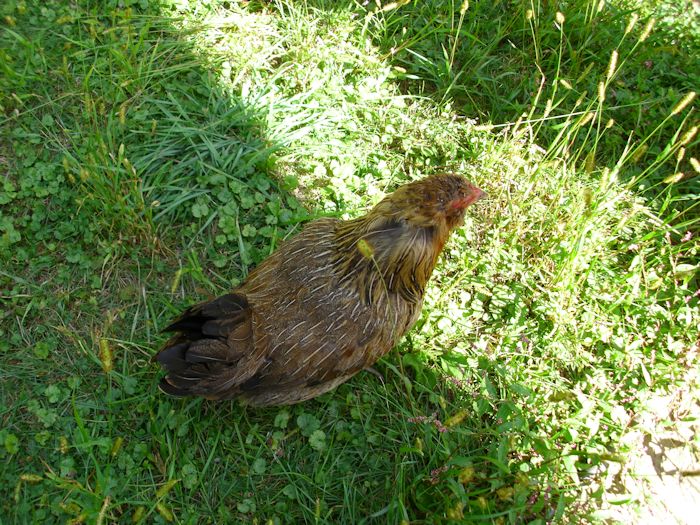
Some time ago I wrote a post entitled, “Dealing with Broody Chickens.” The chicken in question had decided to take to her nest box and stopped laying eggs. That’s only one sort of problem that can occur with hens. In some cases, a hen doesn’t become broody, she takes another course to perceived motherhood. In this case, Daisy decided to hide her eggs from view.

MysteryEggs01

Of course, we didn’t know that she had decided to hide her eggs until later. Because Daisy lays a particular egg color, a beautiful light blue, we had noticed we weren’t getting any eggs from her. However, we also hadn’t noticed any broody behavior. She was still out with the other chickens and didn’t have any of the other tendencies either.

I had also noticed an odor around some of the plants at our house. Given that we live just a few feet from the woods and that we have livestock, the odor didn’t attract too much attention, but I should have paid more attention to this particular odor.

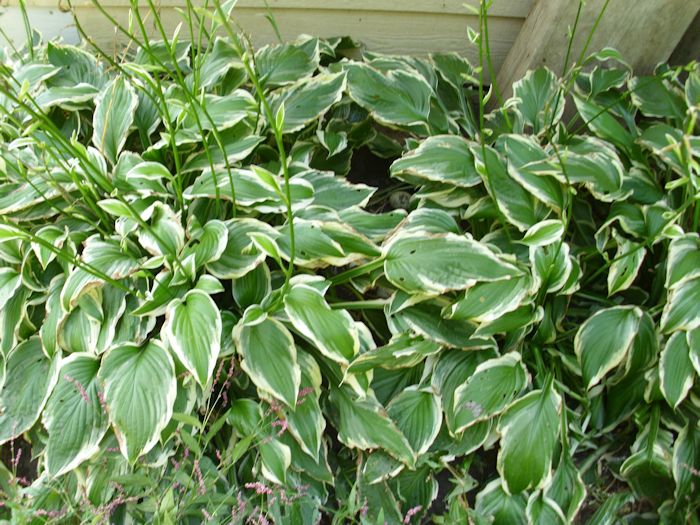
Things got interesting one evening when we put the chickens up. Daisy was nowhere to be found. We searched and called, but no Daisy. Finally, we closed the coop up thinking that some wild animal had gotten our poor hen. Imagine our surprise the next morning when she turned up outside. That’s when I decided to follow her around a bit. She kept going over to the hostas and I finally saw something interesting. See if you can see it in this picture as well.

MysteryEggs02

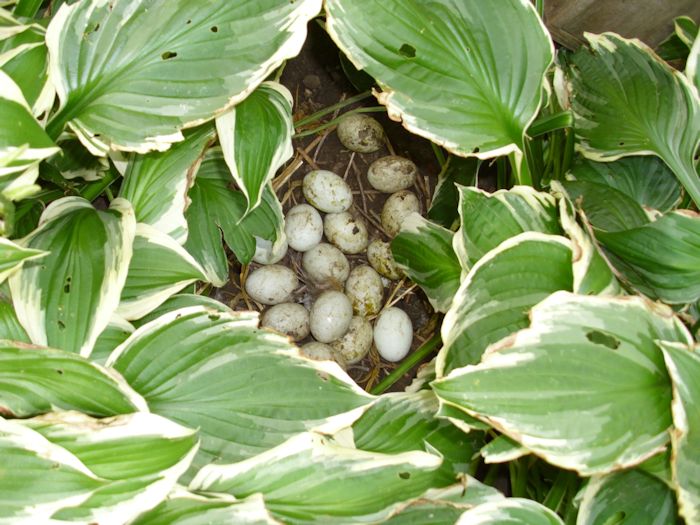
Up near the top of the frame in the center of the picture you see a hole in the hosta covering. Normally the hostas won’t have a hole like that. When you look very closely at the hole in the hostas, you see something. Taking a closer look, you can see what that something was.

MysteryEggs03

Daisy had built herself a nest in the hostas and laid 18 eggs there. She was busy setting on eggs that would never hatch because we have no roosters. Unfortunately, a good many of them were rotten by this time and cleaning them up was an unpleasant experience. This would lead many people to ask why we risk letting our chickens run free. There are many benefits in having chickens that can run around as they like.


  • Happier chickens
  • Fewer health problems
  • More eggs for the most part
  • Better egg quality
  • Lower feed costs
  • Reduced insect and other pest problems


Chickens like to get out and hunt for bugs. They eat more bugs and grass than they eat anything else. The more bugs chickens eat, the less mash you feed them and the lower your feed costs. The resulting eggs have more nutrients. Chickens will also clean up food dropped by other animals, which reduces the food left for pest animals. This means that all of your animals live in a better environment and you have fewer worries about having to deal with pests later.

In short, losing the 18 eggs was bothersome (not to mention expensive), but the benefits of letting Daisy run around are far greater. Let me know your thoughts about chickens running free at [email protected].


Harvest Festival 2013

Normally Harvest Festival is a well-organized event for us. I plan the time carefully and include a week out of the office to ensure I have time to harvest the last of the garden and all the fruit without problem. However, all the planning in the world won’t account for the vagaries of nature every time. Even though the Harvest Festivals in 2011 and 2012 went off precisely as planned, the Harvest Festival this year ended up being one emergency after another. It started when our fruit ripened three weeks sooner than expected—make that half the fruit. The other half of the fruit is ripening this week on schedule. The odd ripening schedule points out another potential issue with global warming, but more importantly, it demonstrates the requirement for flexibility when you’re self-sufficient. Yes, it’s possible to plan for a particular outcome, but what you get could be an entirely different story.

This year’s Harvest Festival was stretched out over three weeks while I continued to write and do all of the other things I normally do. (Fortunately, Rebecca was able to put many of the tasks she needs to perform on hold.) Of course, the dual work requirements made for some really long hours. Creating an enjoyable work environment is one of things that Rebecca and I work really hard to obtain. It’s part of our effort to make our close relationship work. So, this Harvest Festival included all of the usual music and other special environmental features we normally have. Lacking this year was much in the way of game playing, but it was a sacrifice we needed to make.

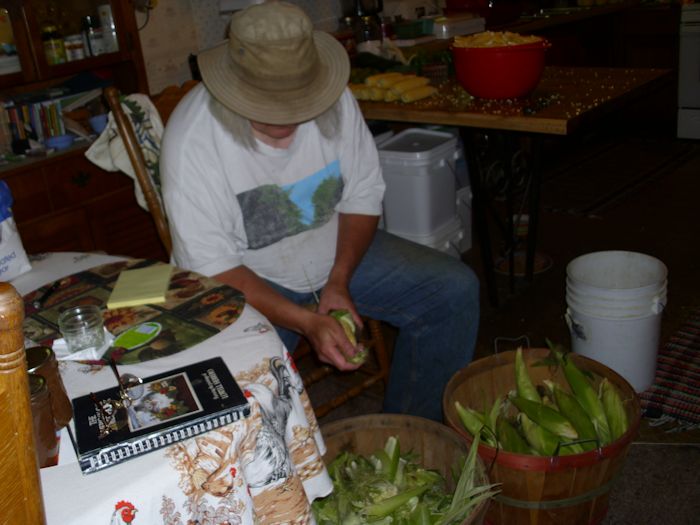
One of the bigger tasks we took on this year was processing four bushels of corn that someone gave us (all in a single day). Actually, the corn came from a few different sources, but the majority came from a single contributor. Of course, we started by husking the corn and getting all of the silk off.

HarvestFestival011

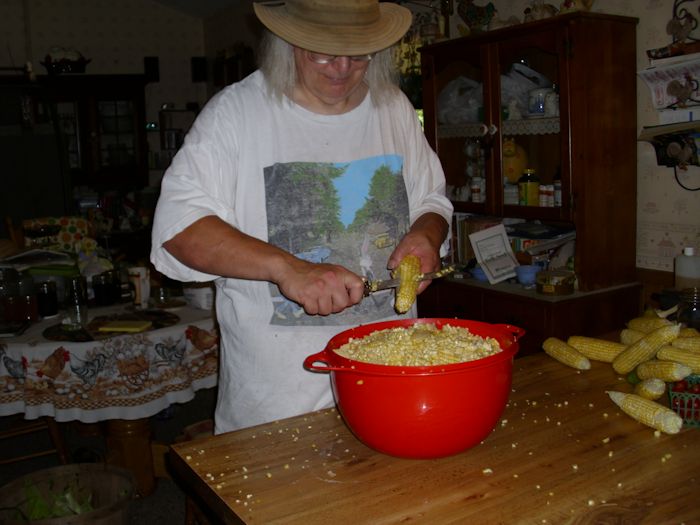
The next step is to cut all of the corn off the cob. This step can be a little tricky. You need a moderately sharp knife around 8″ long. If the knife is too sharp, you’ll take off some of the cob with the kernels. A knife that is too dull will damage the corn and make a huge mess. The knife needs to be long enough so that you can remove the kernels safely—a pairing knife would be an unsafe option.

HarvestFestival021

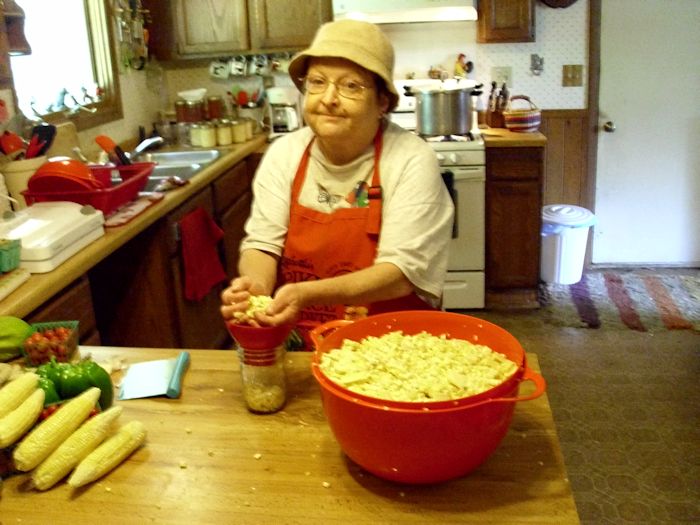
We use a raw pack approach when working with the corn. You want to be sure to pack the corn firmly, but not crush it. Rebecca always takes care of this part of the process because she has just the right touch.

HarvestFestival031

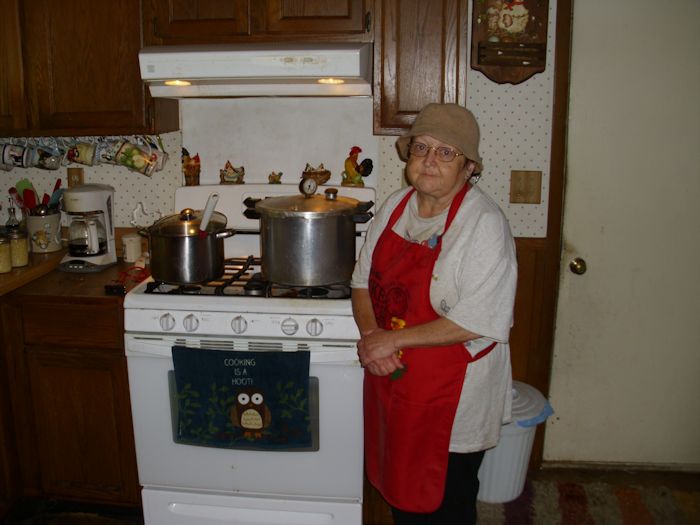
Each pint or quart is topped off with boiling water at this point. We don’t add anything else to our corn. The corn needs to be processed in a pressure canner because it’s a low acid food (the processing time varies, so be sure to check your canning book for details, we rely on the Ball Blue Book and have never had a bad result).

HarvestFestival041

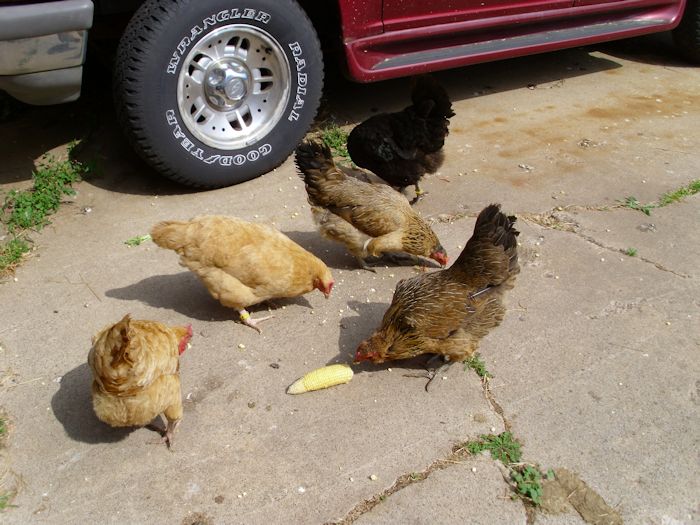
We had four fresh meals from the four bushels of corn. There is nothing quite so nice as corn roasted on the barbecue. We also gave the chickens an ear (plus all of the cobs). They seem to have quite a good time pecking out all the kernels.

HarvestFestival051

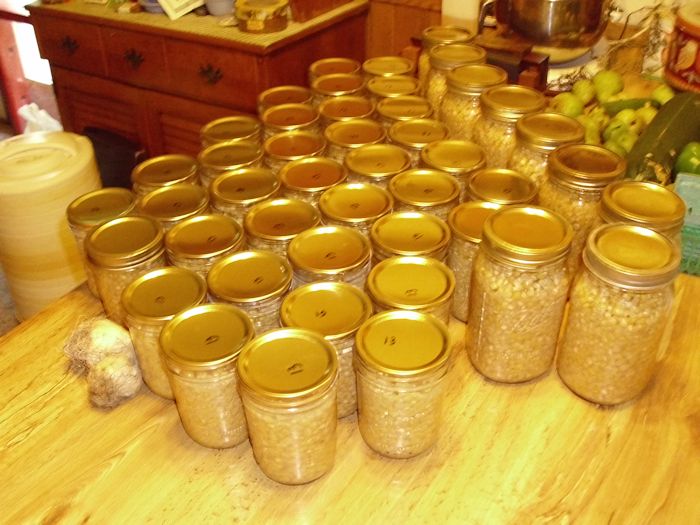
Even with these few subtractions, we ended up with 42 pints (each pint will last two meals using the recommended serving size of ½ cup) and fourteen quarts (used for soup and for company) out of the four bushels of corn. As a result, we have enough corn in the larder now for about 1½ years (a total of 140 servings).

HarvestFestival061

Our Harvest Festival this year included processing pears, grapes, apples, a wide variety of vegetables, and even some of the meat chickens (125 ¾ pounds worth on a single day). The point is that we did get the work completed and we did it while still having as much fun as is possible. We’re both admittedly tired and still resting up. Still to come is the garden cleanup and the wood cutting, and then we’ll have an entire winter to rest up for next spring. Let me know about your latest self-sufficiency emergency at [email protected].


Hornets in the Pear Tree

It always pays to look at your trees carefully before you do anything with them. That’s why it’s never a bad shout to consult a Tree Care Specialist in Jacksonville, Fl before making any drastic removals on your own. You never know what will be living there, especially if you’re like me and don’t use noxious sprays. There are many times where birds are nesting in the trees and I try my best not to disturb them. Trees also harbor a number of insects and other animals. Whatever is hiding in that tree, it won’t be apparent when you first approach.

Hornets01

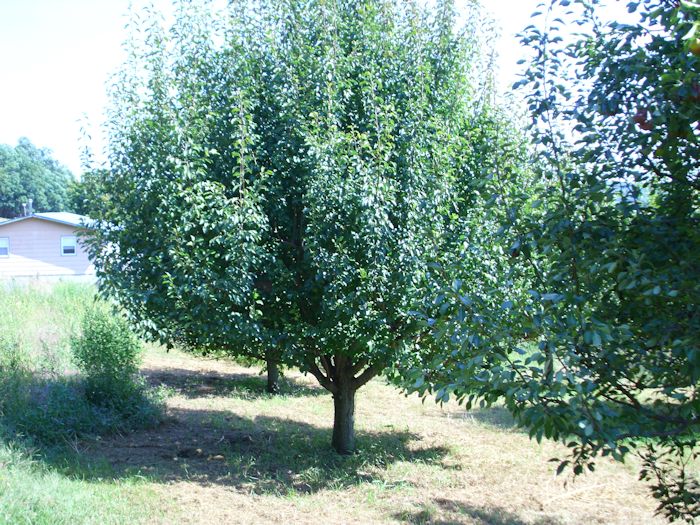
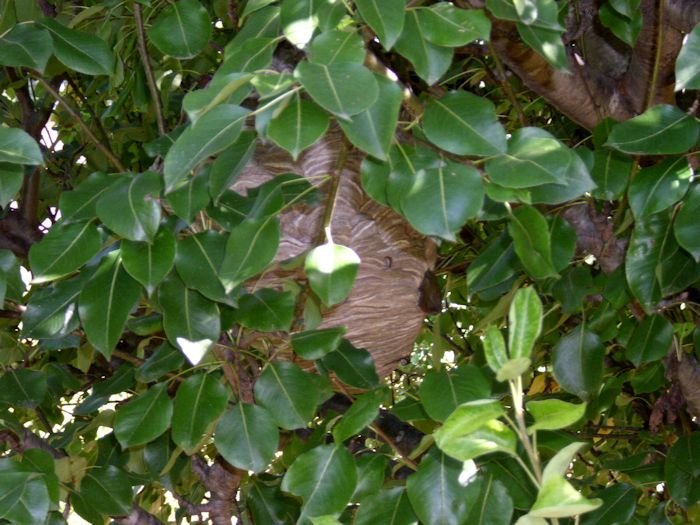
For example, this pear tree looks perfectly normal. I was approaching it one morning to pick the ripe pears and it looked just like this when I first saw it. However, I always exercise caution when I want to do something with the tree and in this case, caution was very much warranted. Hiding in the tree was a hornet’s nest (about 24″ tall and about 12″ in diameter). You’d have to be brave to get rid of this on your own, which is why some people may opt to check out sites like https://www.pestcontrolberkshire.com/pests/wasps-hornets in the hopes of getting in touch with a pest control company who would be able to get rid of the nest in the safest way possible.

Hornets02

Even when you get up close (and this was as close as I dared to get), the hornet’s nest isn’t immediately obvious. You really need to look before you do anything or suffer the consequences. Unfortunately, this tree has around 60 pounds of fruit on it. The fruit will likely go to waste because it isn’t worth getting stung to retrieve it. The deer will likely enjoy some good meals off us this fall as the pears drop and ferment.

Of course, the first thought would be to get someone to remove the nest, but the cost of doing so would far outweigh any benefit obtained from retrieving the fruit. In addition, hornets are one of those odd insects that are neither completely useful nor a complete nuisance. In the spring and early summer, hornets are helpful predators that actually kill off extremely harmful pests. The particular kind of hornet that we have, the bald faced hornet, also helps pollinate our trees. It’s one of eleven pollinators that I’ve identified that visit all of our trees during the spring. In other words, killing the hornets is a bad idea.

During the fall months, the tastes of the hornet change and they begin craving sugar. That means eating into some of the fruit we grow. However, they’re only attracted to fully ripe fruit that is almost to the point of being a little overripe. We avoid damage from the hornets by picking our fruit when it’s just a little underripe. When a hornet has made a small hole, we can brush it away. The bald faced hornet isn’t aggressive except when it comes to its nest (or outright abuse by humans). Respectful treatment doesn’t result in a sting (at least, Rebecca and I haven’t been stung by them them entire time we’ve had fruit trees, which is over 17 years now). The only thing that will really get you into trouble is disturbing the nest, which is why that tree will remain unpicked this year.

Once winter arrives, the majority of the hornets will die. The new queens will live on in the center of the nest, ready to emerge in the spring. What I’ll do is cut the nest out of the tree during a day when the temperatures are below freezing, move the nest to a sheltered tree in the woods, and tie it into place. When spring comes, the new queens will emerge in the near woods, produce a brood, and those new worker hornets will help pollinate our trees.

Discovering how to work with insects is an essential part of being self-sufficient. If I were to take the same approach that most people take, it would cost me money to remove the nest and then it would cost me more money when my trees aren’t pollinated properly in the spring. Taking the approach I am now is counterintuitive, but it’s also the best approach to use. Let me know your thoughts about hornets at [email protected].