Fun is Where You Find It! (Part 3)

Anyone can create work, but it takes some effort to create fun at times. It wasn’t very long after we started becoming self-sufficient that I discovered there would be a time each year where I’d need to work full time at helping Rebecca preserve the food from our orchard and garden. Of course, most people turn such events into work. After all, you’re working relatively long hours lifting heavy things in high temperatures and humidity. This is coupled with the repetitive motions needed to peel fruit and mixed with a bit of boredom waiting for things to happen—at least, that’s what happens if you’re most people. We’ve turned the event into Harvest Festivala party of sorts that we have every year. It has turned into my second favorite week of the year, right behind Christmas week, which will always remain my favorite.

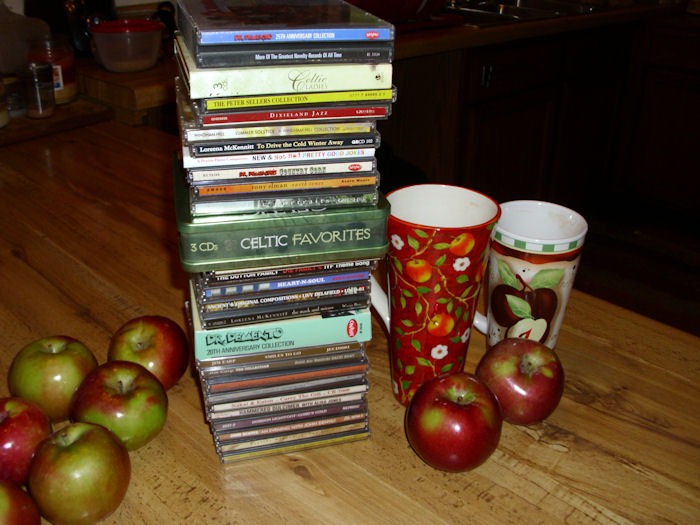
So, what makes this week so special? Well, it starts out with some special mugs and music. We use festive mugs during Harvest Festival that we don’t really use any other time of the year, except when we’re performing other food preservation tasks. In short, these mugs are special. The music is similarly special. Yes, we do listen to some of it at other times, but the collection as a whole is reserved for Harvest Festival. Rebecca also sets the mood with scented candles that give the house a warm feeling.

HarvestFestival01

There are also times where we’re waiting for something to happen. We could probably get other work done, but we’re already working pretty hard, so some fun is in order. Rebecca and I play an interesting sort of Backgammon called Acey-Ducey that I learned while in the Navy. It’s easy to learn and a lot of fun to play. The games are short, so you can play a number of them quickly. Because the game is a mix of skill and chance, no one has the corner on winning. Of course, we have to drink some apple cider while we’re playing.

HarvestFestival02

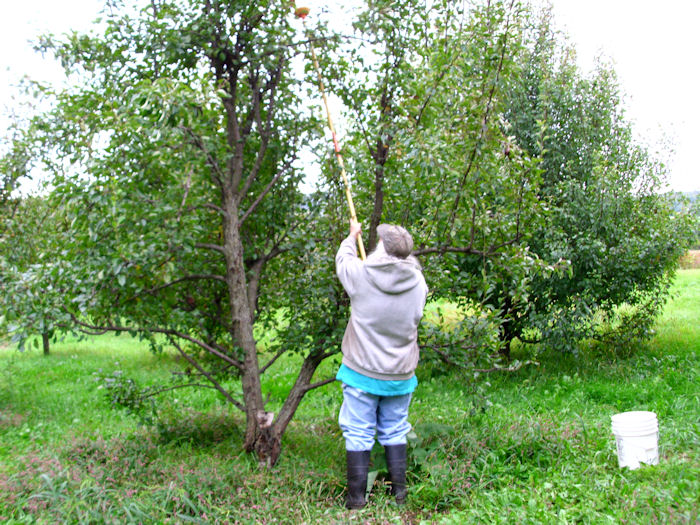
The festival begins by picking the fruit from our trees. In fact, the entire first day is spent outside at the fruit trees. Some of the fruit is quite high, so I have to use a fruit picker to get it.

HarvestFestival03

After the fruits and vegetables are in the house (or at least enough to get started), we’ll start processing it. Just how we accomplish that task depends on what we’re making at the time. Rebecca started this year with pear-sauce (think applesauce made with pears). We also made pear chunks, applesauce, apple chips, apple rings, apple jam, and a host of other fruit-related confections for the larder.

HarvestFestival04

Our “kids” get involved with Harvest Festival too. The dogs are especially fond of apple spaghetti, which is the long streamer of peel that comes off of the apple. Here’s Shelby enjoying some apple spaghetti.

HarvestFestival05

The kids are known to do all sorts of cute things during Harvest Festival. Sometimes they’ll sit with us; other times they’ll make strange noises or grab attention in some other way. Smucker decided that he was going to be extra cute to get snack from us.

HarvestFestival06

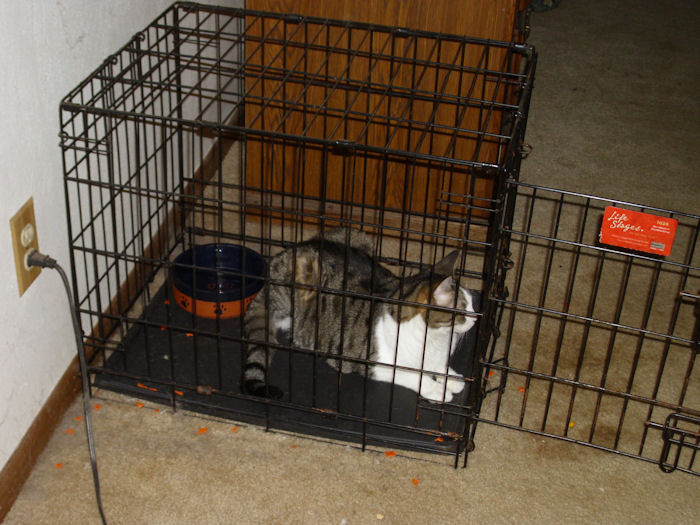
Bubba has decided that he really likes Reese’s kennel, which has Reese confused, but us laughing. We found Bubba in the kennel quite a few times during Harvest Festival.

HarvestFestival07

Because the stove is being used to process food, we don’t have any place to cook—at least, not in the house. I try to barbecue each day during Harvest Festival so we have special food as well. Normally, we don’t get any beef, but I decided to make some really thick and juicy burgers for us one day. There is also plenty of nibbling going on with all of the available fruit. Although we keep some fruit for fresh eating, I think we eat the most fresh fruit during Harvest Festival, which makes the week quite special for that reason alone.

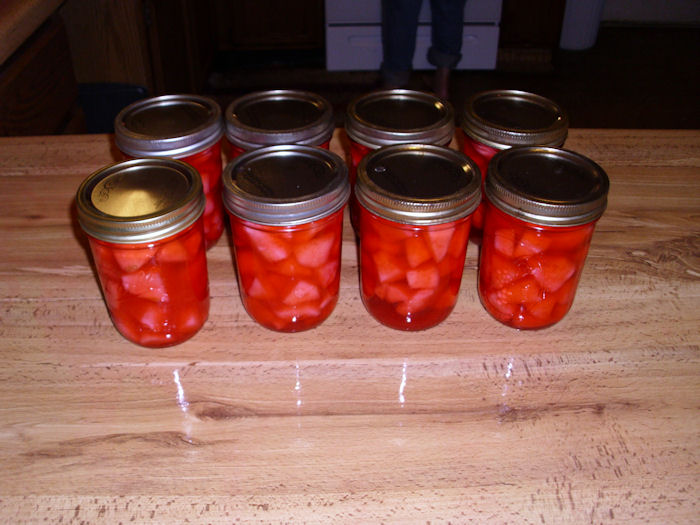
The result of all our work is jar upon jar of food for the larder. One of my favorites this year is the pear chunks. Rebecca makes regular, minted, and spiced. They’re all different colors to make them easy to find on the shelves.

HarvestFestival08

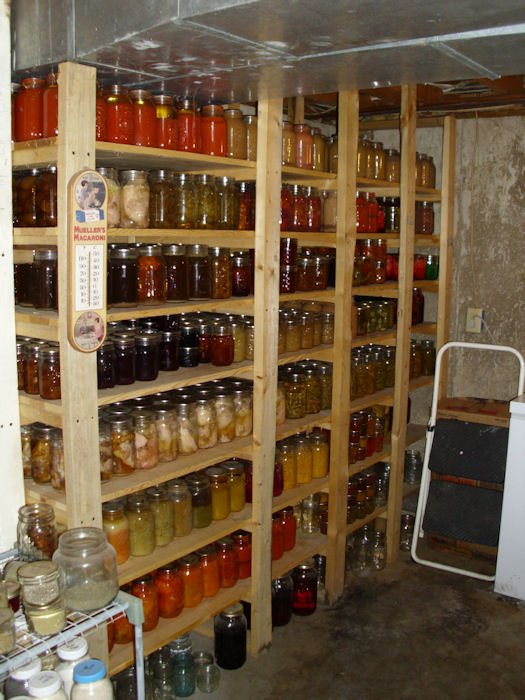
This year we processed 500 pounds of fruit, 480 pounds of tomatoes, 72 pounds of chicken, too many zucchinis to count, and a variety of other items all in one week. The result is that our larder is looking pretty nice (this is just half of the shelveswe also have two freezers and dry storage areas).

HarvestFestival09

There is still more to process in the garden. The beans are drying at this point. We’ll also be digging potatoes soon. I’m sure the zucchinis will produce a little more and the winter squash needs to be picked. However, Harvest Festival is our big push for the season and we have a lot of fun getting the food from our gardens and orchards to the larder. If you’re planning on a self-sufficient lifestyle, you’ll probably find a similar need for a “big push” week at some point during the season, depending on what you grow. Let me know if you have any question at [email protected].


Okra Pollination Problems

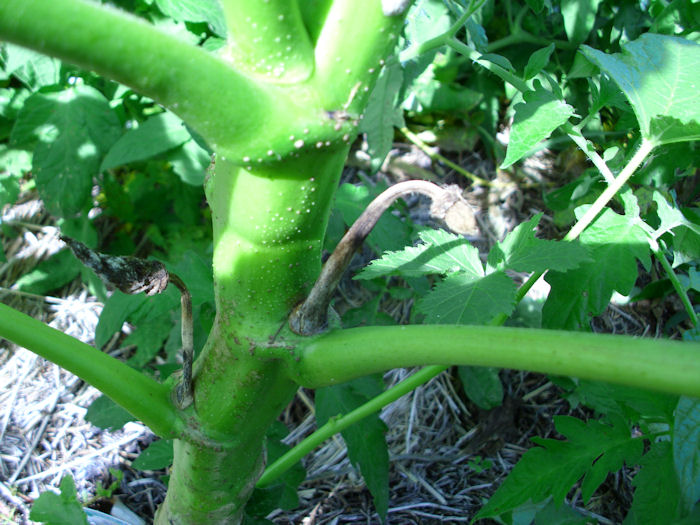
Every gardener faces the eventual problem that can’t be easily solved by talking with friends or looking online. This year presented one of those problems for us. We have big okra plants that aren’t producing any pods. Yes, there are a lot of flowers, but they aren’t producing anything. Instead, the flowers are opening, shriveling back up, and then dying as shown here.

Okra

You can see two flowers in this picture—both of which have dried up without producing fruit. All five of our okra plants are precisely in the same condition. They’re all nice big plants, but nothing to show for an entire summer’s worth of growth except some exceptionally beautiful leaves and dried flowers.

According to any number of sites, okra is self-pollinating in many cases. However, many of these sites also indicate that there hasn’t been any study done of the pollinators for okra and their effect on the plant. When I first noticed this problem, I spent time on a sunny day observing the plants carefully. A number of pollinators visited the plants, so it seemed at first that the issue isn’t one of pollinators.

However, I also noticed something else. On every other year, the okras in our garden are infested with ants. This year, there is not an ant to be found anywhere near our okra. A number of sites seem to indicate that the ants have no purpose for okra, but everyone complains about them. Now I’m starting to wonder whether the ants are pollinators or somehow help the plant in other ways. The okra certainly seems to put out a nectar that attracts ants like crazy.

The only other change in that particular part of the garden this year is that the patch has tomatoes in it. The okra is growing in row 4 of that patch and the tomatoes are growing in rows 1, 2, and part of 3. Last year, the okra was in row 1 of the same patch. Checking for relations between okra, tomatoes, and ants online proved fruitless. In short, there is no quick or easy answer for this particular problem except to say that it exists.

Our summer has been hot enough for the okra to grow quite large, so I’m sure it’s not a problem with heat. The okra has also been mulched and watered, so moisture isn’t a problem. Because the okra has been moved to a new row and that patch also received a nice layer of new mulch this past spring, it can’t be nutrients. I’ve checked the flowers and each one is producing the same amount of nectar as normal. I keep coming back to the lack of ants or some deleterious effect of putting tomatoes and okra in close proximity. If anyone else has a thought on this issue, please contact me at [email protected].
 

Making Tomato Juice

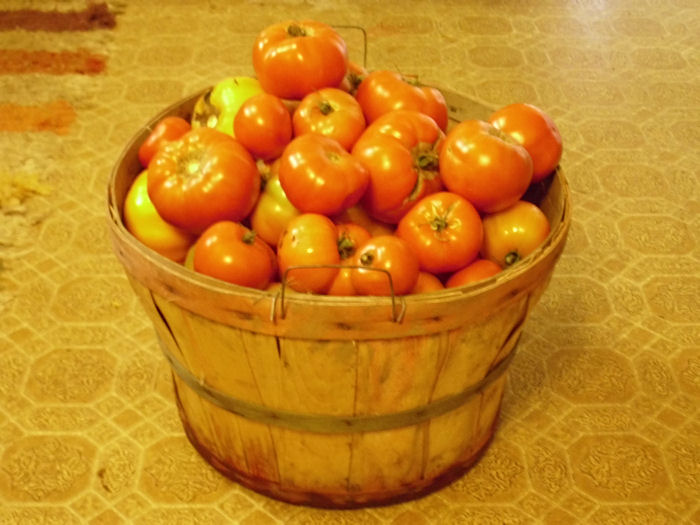
One of the ways in which we store food is as juice. Rebecca makes juice out of a number of items including tomatoes, apples, pears, and grapes. Of all of the juice sources, however, tomatoes are probably the easiest to work with. We’re having a stellar tomato year, so Rebecca decided to make tomato juice today. Of course, the tomato juice starts out with tomatoes. We used an entire bushel as shown here.

TomatoJuice01

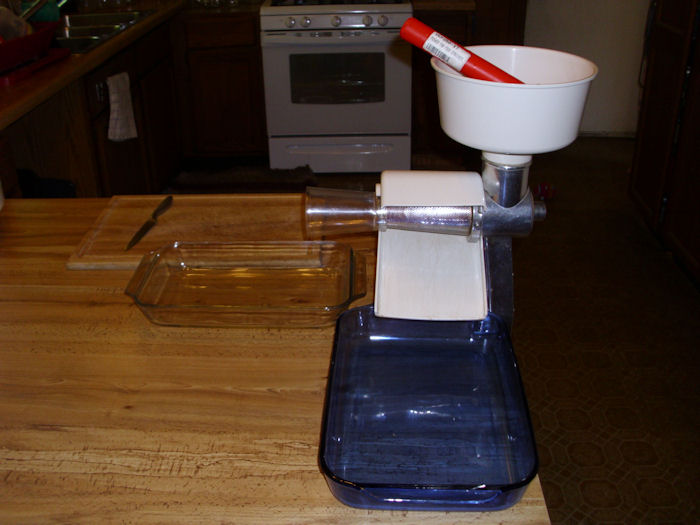
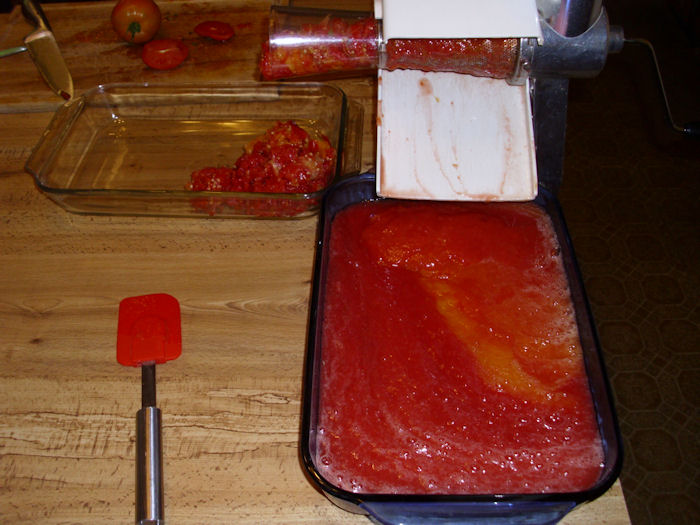
If you know how big a bushel basket is, you can see that our tomatoes are quite large this year. Fortunately, they’re also quite meaty. If you’re going to work with this many tomatoes (and believe me, this is only the beginning), you need some way to convert them to juice quickly. There are a number of tools available to perform the task, but our tool of choice is a Victorio Strainer:

TomatoJuice02

In order to use the Victorio Strainer properly, you need to provide two containers. The first holds the juice and it sits right below the output tray (the blue dish in the picture). The second holds the seeds and skin and it sits right below the strainer horn (the clear dish in the picture). Using glass works best for high acid foods such as tomatoes; otherwise, you can get a metallic aftertaste in the juice. Below the strainer (out of view of the picture) is a 5 gallon bucket to hold any liquid that comes out of the strainer (some leakage will occur) and to provide a place to put tomato that is cut out because it’s damaged in some way.

We use a two-person setup. One person (usually me) cranks the Victorio Strainer, while the other uses a knife and cutting board to cut up the tomatoes and place them in the hopper. A two-person team can whip through a bushel of tomatoes quite quickly. We did it in just over an hour this morning (and that included some cleanup and other chores, such as moving the juice to the stove).


I usually run the skins and seeds through the Victorio Strainer a second time to get all of the juice out of the tomatoes. Using this approach today netted an extra quart of juice. The downside to running the skins and seeds through a second time is that you could end up with extra seeds in the juice, along with bits of skin that many people dislike. The leftovers didn’t go to waste. After running the skins and seeds through a second time, I took the remains out to the chickens who were only too happy to eat every last bit.


The tomatoes today included a mix of red and orange tomatoes. Our garden has several varieties that compliment each other. As with a fine wine, a good tomato juice is the result of mixing several kinds of tomato together. Generally, if you have good tomatoes, you’ll get mostly juice and pulp, with very little in the way of waste as shown here.

TomatoJuice03

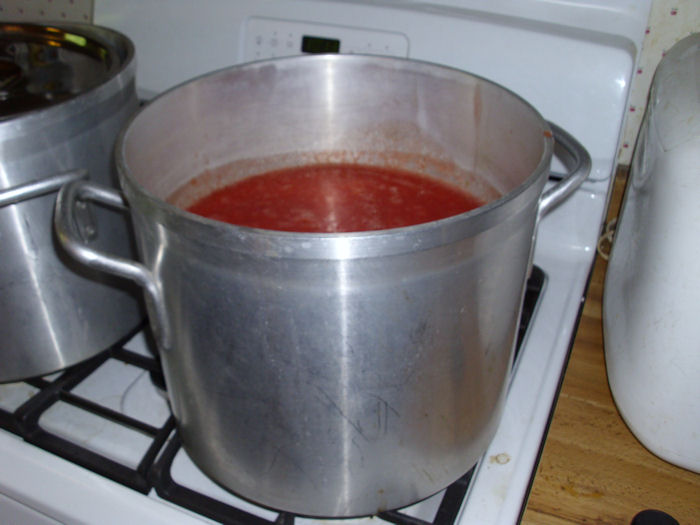
You’ll need a spatula to get the juice and pulp off the output tray. It also pays to clean off the outside of the strainer (the part with all of the holes in it) from time-to-time. A full bushel of tomatoes will easily fill a large pot like this one with space left over. (We asked a friend in the restaurant trade to purchase this professional quality pot for us, but the selection from Winware is quite nice.)

TomatoJuice04

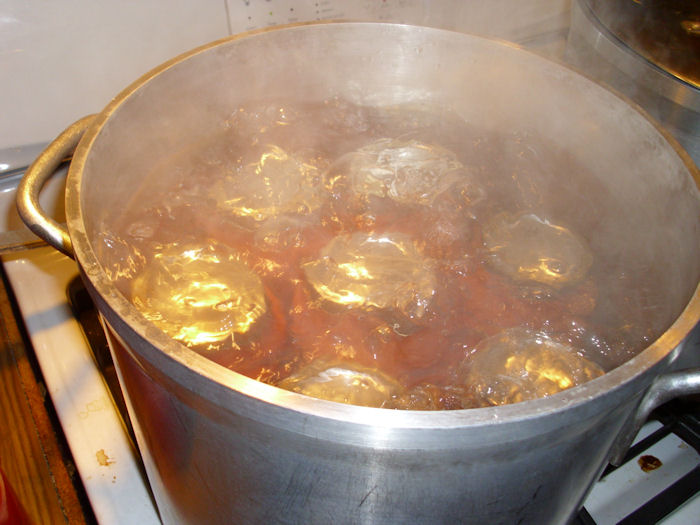
Rebecca uses the instructions found in the Ball Blue Book to can the juice. That means raising the temperature of the tomato juice to 190 degrees. While the juice is cooking, Rebecca adds a little salt (not much is needed) and spices. Before she pours the juice into the jars, she adds two tablespoons of lemon juice to each quart jar to raise the acidity level. The juice doesn’t require pressure canning. Because this is an acid food, you can use a boiling water bath like the one shown here.

TomatoJuice05

In order to ensure the juice won’t spoil, you process it for 40 minutes after the water comes to a boil. Normally you can fit seven jars into a large pot like this one at a time. You could also use a canner, but we found that we kept burning the bottoms out of the pot and it was costing more than buying a good pot to begin with.

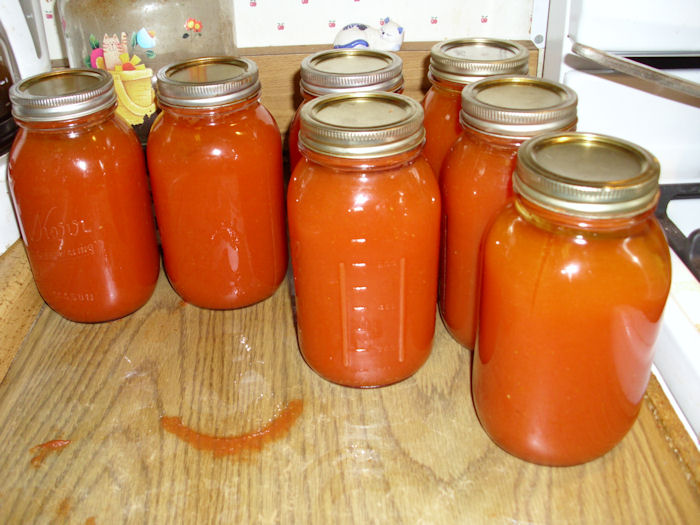
The result is these lovely quart jars of juice. One bushel of tomatoes produced 17 quarts of juice.

TomatoJuice06

After the jars have set for a while, you’ll notice some separation. It will look as if the water in the juice has separated from the pulp. This is perfectly normal. Just shake the quart before you open it to recombine the water and the pulp. Making tomato juice is an exceptionally healthy way to enjoy tomatoes anytime. You don’t have to use any particular kind of tomato to make juice. In fact, the juice usually tastes better (fuller) if you mix several kinds of tomatoes together, so you can make juice out of odds and ends used for other purposes. Let me know if you have any questions at [email protected].
 

Considering Chicken Size

If you’re raising chickens for meat purposes, you’ll eventually need to start processing them. A number of schools of thought exist about this process. For example, after eight or nine weeks, some people will gather family and friends together and process all of their chickens in one fell swoop. This is the approach used by the factory farms. The chickens are raised for a specific amount of time and processed at the same time to reduce costs and to obtain a profit on the entire group immediately. That’s why you commonly see chickens in a specific size range at the store. Gone are the days when you could ask for a chicken of a particular size to meet a specific need.


It’s important to note that chickens are usually processed at six or seven weeks in a factory setting. The chickens are force fed as much as they can possibly eat and restricted from moving about too much, which results in a fatty chicken with a poor density. The watery, flabby chicken you get in the store isn’t how chicken is actually supposed to look, but it’s what we’ve gotten used to seeing.

Rebecca and I take an entirely different approach-one that gives us a variety of sizes and reduces the workload on any given day. The two of us can comfortably process eight to ten chickens in a single day. (The largest number we ever processed was 23 chickens at a definitely uncomfortable pace.) We normally start processing chickens at week nine for the purpose of canning them (canned chicken is absolutely amazing stuff and it lasts up to five years without any electricity required). The following table shows the live weight, processed weight, and amount of time required to obtain various sorts of chickens. There is also a description of each kind of chicken.

Type

Time

Live Weight

Processed Weight

Description

Cornish Game Hen

3 to 5 weeks

1.2 to 3.25 pounds

0.72 to 2.0 pounds

A small chicken that’s used for individual servings. This size is usually available in stores.

Fryer

8 to 9 weeks

4.0 to 5.75 pounds

2.5 to 4.0 pounds

The store-sized chicken that’s good for canning and outstanding for low-fat soups when raised correctly.

Broiler

9 to 11 weeks

5.75 to 7.5 pounds

4.0 to 5.5 pounds

A little larger than a store-sized chicken that’s excellent for barbecuing in pieces or fried chicken. This size is also good for a robust soup. Some larger stores and most butcher shops sell this size.

Roaster

11 to 14 weeks

7.5 to 11 pounds

5.5 to 8.5 pounds

Usually unavailable in stores (you can get them at a butcher shop in some cases), but excellent for roasting in an oven or on a barbecue rotisserie.

Small Turkey

14 weeks+

11 to 18 pounds

8.5 to 12 pounds

A great replacement for a small turkey. Generally, you can’t grow any chicken larger than 12 pounds (and we’ve never achieved more than 11.5 pounds). You can sometimes get these birds in a rural butcher shop for a premium price.

Stewing

3 to 5 years

Varies

Varies

A stewing chicken is generally a laying hen that’s past her prime and is only useful for soup or broth. This option is unavailable anywhere today.


This table is based on our own experiences and those of people we’ve talked with. It reflects what you should expect for home grown chickens, not for chickens raised in a factory setting, which can produce chickens at a faster pace. We’ve kept records for five years worth of chicken processing. Your results may vary according to a wide range of factors, such as what you feed your chickens and how often. (We feed our chickens a combination of broiler mix chicken feed, grass, kitchen scraps, and insects.) When you raise animals outside, they’re subject to variations in the weather that will affect their weight. Even the place you buy your chicks from can make a difference. I’m also assuming that you plan to raise Cornish Rock chickens as described in the Getting Started with Chickens post.

Remember that if you plan to process a large number of chickens it can be worth investing in some machines to help you with the process. You can find second hand or discounted former factory models usually for cheap, and by contacting someone who makes replacement parts (National Band Saw makes berkel slicers parts and sells online is one example) you can make your life a lot easier in the long run.

It’s also important to remember that chickens today are typically sold without the organ meats and sometimes without the neck. The neck, heart, gizzard, and liver normally weigh in at a combined 4.0 to 6.0 ounces. We keep all of these parts because the small amount in each chicken really adds up. Some people also keep the feet, which could add another couple of ounces to the total. The feet are great for broth, but you need to ensure that they’re completely cleaned before you use them and you also remove the yellow outer skin before boiling them. We don’t keep the feet because we feel that the amount of work required to clean them properly isn’t worth the resulting broth.

Although the table seems to indicate that you can multiply the live weight by 0.67 in most cases to obtain the processed weight, we generally multiply by 0.5 to ensure we actually get chickens of the size we want. There is some weight variation between birds and you don’t want to have to weigh each one individually, so the lower multiplier adds a little insurance. Please let me know if you have any questions at [email protected].
 

CFLs for Free

If you haven’t heard about the Compact Fluorescent Light (CFL) by now, then you haven’t been paying much attention. They’re talked about on billboards, the television, radio, magazines, and in stores. In fact, it seems as if you can’t escape the CFL. Yet, many people are still buying the old incandescent bulbs created many years ago by Edison. Yes, incandescent bulbs were a marvel at the time, but today they’re costing you money.

A CFL is basically a fluorescent tube light put into a compact form. They consume considerably less energy than incandescent bulbs and last longer too. When I talk to people about CFLs, the biggest complaint I hear is that they cost so much money to buy. (The second biggest is that CFLs output harsh light or that the bulbs have a short life expectancy, neither of which is true any longer.) Of course, the expense is a legitimate complaint—one that I plan to address in this post.

Rebecca and I have switched our entire house to CFLs. When we first moved into our home, our average monthly bill was over $120.00 a month. Today, due to a number of energy saving techniques, we often get by for $50.00 a month despite a lot of price increases over the years. CFLs are a big part of that savings.

There are some tricks you can use to make the changeover a lot more palatable. Start by investing in high quality CFLs. Avoid the cheap Chinese knockoffsget a good bulb from GE or Sylvania, even though the initial cost is higher. Track the amount the bulb saves you each month. You can do that quite simply by checking your bill for a reduction or you can do things more scientifically. Keep a log of how long you use the bulb each day for a monththis represents the hours you use the bulb, then use this equation:

Savings = ((Bulb Watts / 1000) * Hours) * KWH Rate


Let’s say that you replace a 100 watt bulb with a CFL equivalent and you use the bulb for 4 hours each evening for a 30 day month. Your KWH rate (available from your electric bill) is $0.12. The new bulb takes only 26 watts. The original cost of using that bulb is:

((100 / 1000) * 120) * 0.12 or $1.44 per month


The cost of the new bulb is:

((26 / 1000) * 120) * 0.12 or $0.37 per month


Your savings are $1.07 per month from just that one bulb. OK, you can pocket that $1.07 and buy half a cup of coffee with it, or you can put it aside. In one year you’ll save enough money to buy a 12 pack of 100 watt CFL replacements for free (at least, you will if you shop smart). Now you can replace 12 incandescent bulbs and it won’t cost anything.

Here’s the payoff. Each of those replacements will also save on your electric bill. If you use each of those bulbs for the same amount of time each day, your savings increase to $13.91 each month, which means that you can buy the next package of CFLs in a month and end up with around $1.47 in change.

As you get new bulbs that haven’t cost you a penny because you would have spent that money on incandescent bulbs anyway, you can quickly replace all of those incandescent bulbs with CFLs that last longer, produce the same quality of light, and reduce your electric bill.

If you are interested in reducing your electric bill further, then you might want to consider using someone like the best electric companies in Texas, as sometimes changing providers can help reduce your electricity bill as well (although, the best thing that you can do is get things like new bulbs, to help you when it comes to energy savings).

Now you can move onto other things. Start with a programmable thermostat. You’ll find that it saves you money each month as well. If you use your CFL savings to buy the thermostat, it won’t cost you anything. You can extend this to weather stripping and all kinds of other energy saving additionseach of which provides a payoff—an incentive for using it.

It took us about 5 years to replace everything we could in our house that would readily provide a payoff and achieve that energy savings that I talked about earlier. Now, we’re pocketing that extra money. The cost savings will help keep our costs low (and in this economy, who can afford to turn away extra cash).

Eventually, we’ll look at other technologies to reduce our carbon footprint. There are many technologies now that we’ve looked at carefully that don’t actually put any money in your pocket. For example, we looked at windmill technology. By the time you pay for your own personal windmill, not to mention batteries, inverter, and other requirements, you’ll have to wait way too long for payback. Hopefully, this technology will improve with time. The same problem occurs with solar power and some other promising technologiesthey have no payoff right now (they don’t put money in your pocket).

The next technology that does look promising is solar heated hot water. Right now you still have to replace the system before you get a payoff (the longest lasting setup I could find is about five yearsnot long enough for payoff), but I think this is going to change in the near future. As the reliability of these systems improve and more people use them, but the cost will come down and there will be a payoff for those of us who have to be concerned about payoff.

There are also some changes we’ll make simply because we have to, even if there isn’t a payoff. For example, we’re going to have to replace our windows at some point. The old wooden windows are literally rotting in place. When we do make a replacement, we’ll look into buying a higher quality window that will at least partially pay back its installation cost in reduced energy costs. What I’ll try to do is balance the expected energy savings against the additional cost to find that magic point where I get a payback of a sort (the windows won’t ever pay for themselves, but the energy savings will ultimately make the windows less expensive than if I had bought cheaper windows).

Do you often find that the people selling energy saving devices miss the point? I find that the brochures stop short of telling people what the payoff is and how to obtain the devices without spending anything. There is usually some message about doing the planet some good and saving it for our children. These are certainly laudable goals, but the question that concerns me most is, “What’s in it for me?” In our case, it has turned out to be about $70.00 per monthwell worth the effort involved. Let me know your thoughts on using energy saving devices at [email protected].
Making Use of Those Oversized Zucchinis

You find it stashed beneath some leaves and it’s gargantuan—a zucchini that somehow missed your attention earlier. What do you do with this massive thing? Well, for one thing, you could eat it as normal. When you look at the nutritional benefits of the baby zucchini that most people eat, you might as well drink a glass of water for all the good it does you. The plant puts all its effort into the seeds, which aren’t developed at the time most people pick their zucchini. In fact, the seeds are simply packed with all kinds of good nutrition, including the highly sought Omega-3 and Omega-6 fatty acids. So, eating a larger zucchini has significant health benefits.

The secret is to learn when to pick your zucchini. We wait until they’re about 2 or 3 inches in diameter and the seeds are well developed, but you can still push a thumbnail through the skin. If you wait too long, the skin gets pretty tough. Yes, you can peel the skin off, but then you lose all of the wonderful fiber that zucchini can provide.

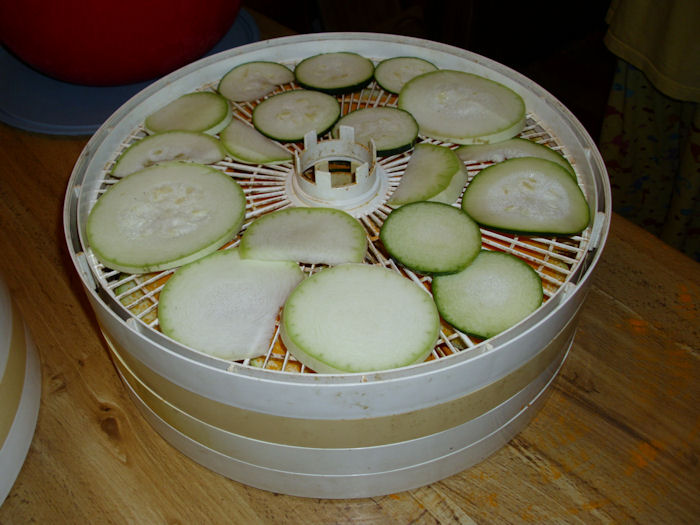
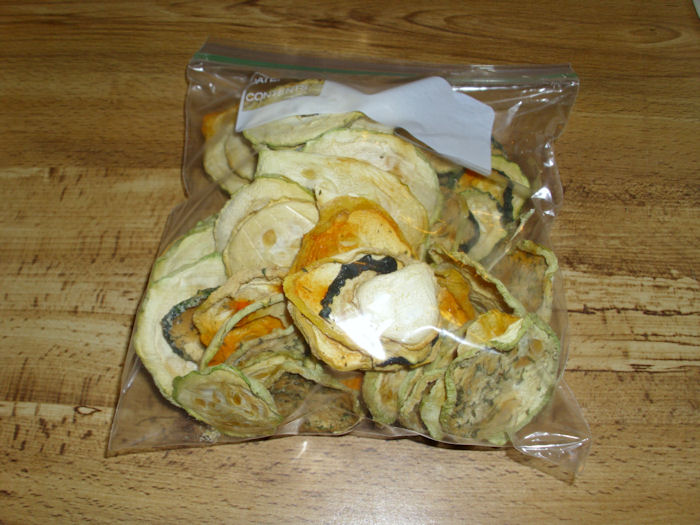
However, the subject of this post is to tell you about something interesting you can use those oversized zucchinis for. We use them to make a substitute for potato chips that provides some significant health benefits, yet taste absolutely amazing. Our technique isn’t completely healthy, but I’ll take them anytime over the store purchased chips. You begin by thinly slicing your Zucchini as shown here and placing them in a dehydrator.

Zucchini01

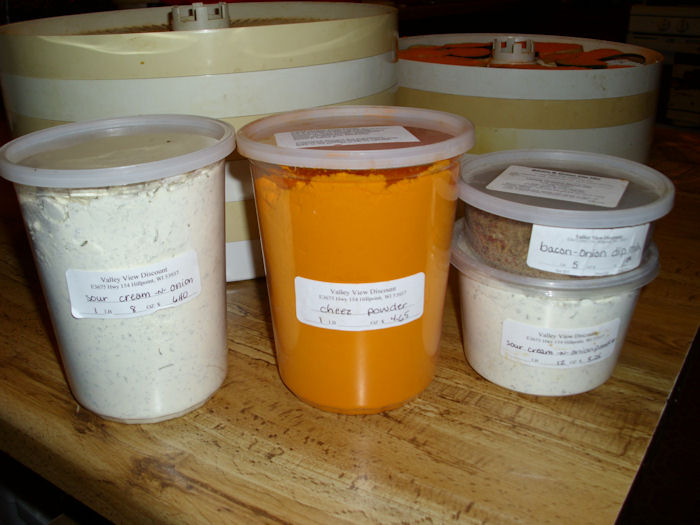
We sprinkle the tops of the zucchini with popcorn seasoning that we buy in bulk from a local store. The popcorn seasoning comes in four flavors: cheese, sour cream/onion, ranch, and bacon/onion. The cost for the product is extremely low when you buy in bulk quantities like this:

Zucchini02

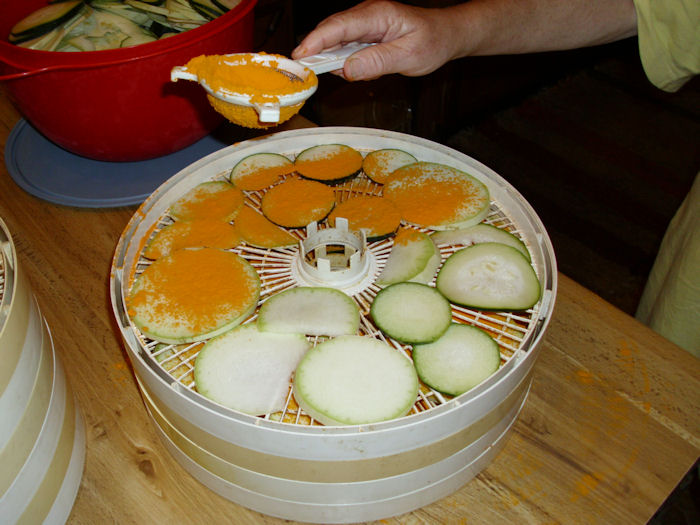
A one pound container of the topping cost us $4.65 at the local bulk goods store. You don’t need to use a lot of the topping. Just a dusting will add a bit of wonderful flavor to the resulting chips as shown here:

Zucchini03

You can use any sort of zucchini to produce the chips. As you see, we have a variety in the dehydrator right now. However, our friends introduced us to the Clarinette Lebanese Squash, which has a light green exterior, and produces a superior chip. The chip retains its crispiness far longer and the zucchini itself is a better shape for chips in that it tends to grow bigger around in a shorter period without getting a hard skin.

To perform the drying, you set the dehydrator to 155º. Check the dehydrator every few hours. When the chips are crispy (in about six hours), the drying process is done. Rebecca packages the initial chips in resealable bags until she has enough, then she uses the Food Saver to store the chips in sealed bags that contain a little air to prevent chip breakage. Normally, she makes me two five-gallon containers of chips for the winter (along with two more five-gallon containers of apple chips that I’ll describe later). Here’s the preliminary result:

Zucchini04

We’ve never had any of our chips go bad. They should last at least a year if you seal them properly. So, what is your favorite alternative way to use zucchini? Let me know at [email protected].
 

Every Year is a Good and a Bad Year

It’s easy to become discouraged in the garden sometimes. During the early spring you plant everything that you’ll hope will grow and produce plentifully. By August, you know which plants will fair the best and which didn’t survive at all. This year has been especially tough because I ended up getting gallbladder surgery first, and then, because we do everything together, Rebecca ended up getting gallbladder surgery as well. So, with both of us on our backs, our garden had a true test of being weed-bound. Unfortunately, that means that some plants didn’t live at all and some won’t produce well. Our corn was nice and tall, right before the wind blew it over. Many of our peas succumbed to the weeds.

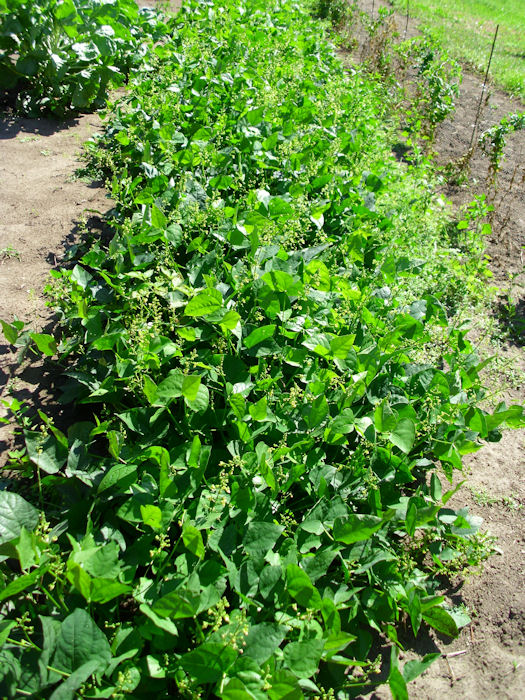
Still, it’s a good year in many respects and that’s the aspect I choose to focus on. Good years fill larders with interesting vegetables and fruits. Apparently, this is a bean year. We planted the normal amount of green beans and Lima beans. However, the plants decided to grow twice as tall and twice as wide as normal. We’re now inundated with green beans and will soon have a bumper crop of Lima beans as well.

GardenEnough01

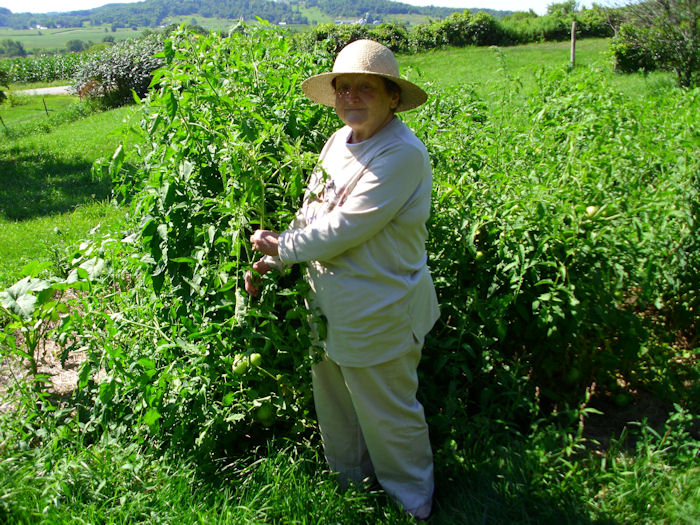
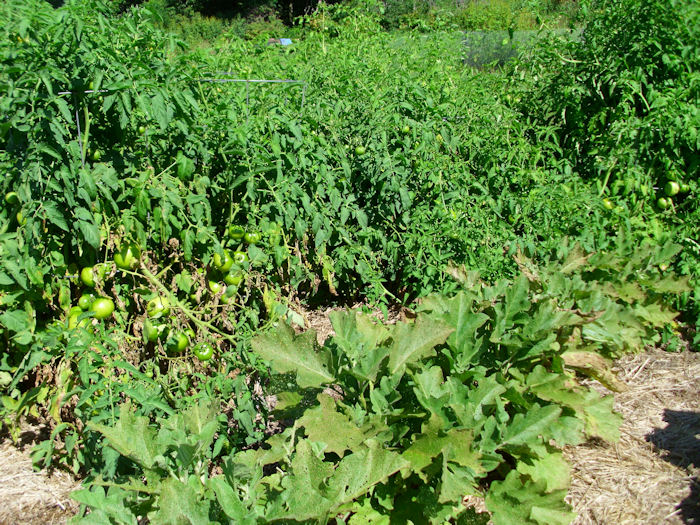
Not every year is a good year for every vegetable. In my Dealing with Overabundance post, I discussed how some years produce so much that you can hardly fathom what to do with it all. Last year and the year before were horrible blight-filled years for tomatoes. This year isn’t just good, it’s amazing. Our tomatoes have never looked quite this good.

GardenEnough02

Those are the same diminutive plants I wrote about in Mulching Your Garden. They’re over five feet tall now and loaded with so many tomatoes that we’re going to try pickling some green tomatoes this year. (Remember to try different preservation techniques whenever you can to discover new ways of dealing with overabundance.) The plants have obviously overgrown the tomato cages and are threatening the other plants in that plot. Unlike previous years, there is absolutely no sign of blight, even at the bottom of the plants (which are usually brown by now). Sometimes in this case it is better to buy things like new mulching heads for skid steers so we can effectively clean up the area for a more serious overgrowing problem.

Many of our plants are late, but will most definitely produce. The egg plants and okra are of sufficient size that we’ll get the normal amount from them, or perhaps just a bit more than usual. As in most years, the egg plants are constantly under attack from flea beetles, but the lacing of their leaves hasn’t reduce their vigor much and we expect the normal crop from them.

GardenEnough03

The beets and kohlrabi look good this year as well. We fully expect to harvest enough to replenish our larder and even provide a little extra for next year. So, many plants are producing enough that we’ll most definitely not starve. It’s best to avoid focusing on the lack of corn this winter in the larder or the fact that there won’t be much in the way of broccoli (we will have an abundance of Brussels sprouts though).

It’s important to remember diversity in gardening. Don’t plant just one or two items-plant a variety of items so that at least a few of them produce well. This is our year for tomatoes and beans. Next year might be a corn year or the year of the mutant squash (we’ve had one of those lately and are still eating squash from that year). Each year is a good year for something, and an equally bad year for something else.

There is actually a health benefit to all of this. If every year produced copious quantities of whatever you planted, there would be no incentive to try something new. Gardens force people to moderate what they eat and to try new things. As someone once said, “Variety is the spice of life!” So, what has grown well for you this year? Let me know at [email protected]

The Wonders of Queen Anne’s Lace

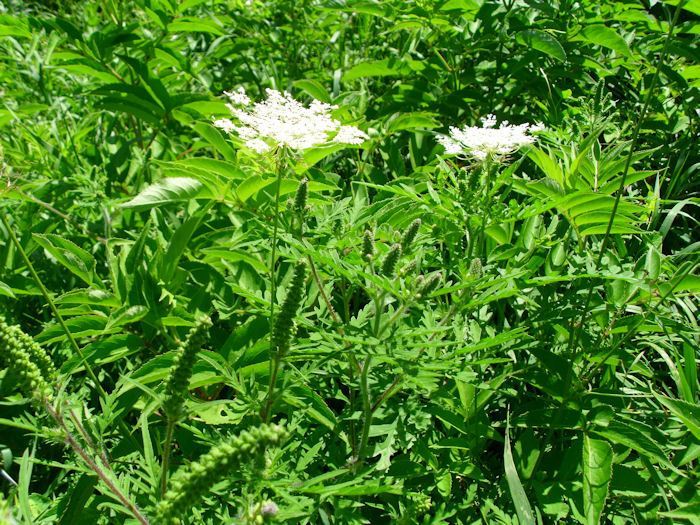
Sometimes, the best herb or edible plant is the one you didn’t plant. Nature provides a number of edible plants that grow naturally where you live. I’ve shared about the berries that grow in our woods before. There are blackcaps, blackberries, gooseberries, wild grapes, wild plums, and choke cherries available to anyone who wants to pick them in the woods. You can also find any number of usable mushrooms and other useful plants out there. However, the wild grass area also has abundance to offer. One of the most useful plants is Queen Anne’s Lace, also known as wild carrot.

QueenAnnesLace01

It’s quite possible that you’ve passed this plant by in the past because it normally grows in with the rest of the weeds. The large taproot is edible. However, you don’t want to dig it up mid-summer. It’s better to dig up a second year plant early in the spring or a first year plant late in the fall. Wait until the plant is dormant or you’ll end up with something that’s akin to shoe leather without much value. Older plants develop a woody interior (xylem) that’s most definitely unpalatable.

Some people actually use a tea made from the root for a number of medicinal purposes. When the root is used for medicinal reasons, the common wisdom is to dig it up in July, which is the same time the plant flowers in profusion.

Wild carrot is an ancestor of the modern cultivated carrot, but they’re different plants. In other words, it would require a lot of work to change Queen Anne’s Lace into anything resembling a domesticated plant and you should focus on the usefulness of the wild plant instead.

One of the most delightful uses of Queen Anne’s Lace is to make jelly from the flowers. You must pick a lot of fresh flowersthe more the better. I normally provide Rebecca with at least two shopping bags full of flowers to make jelly and it takes quite a while to obtain that many flowers, but the effort is most definitely worth it. The Queen Anne’s Lace flower looks like this.

QueenAnnesLace02

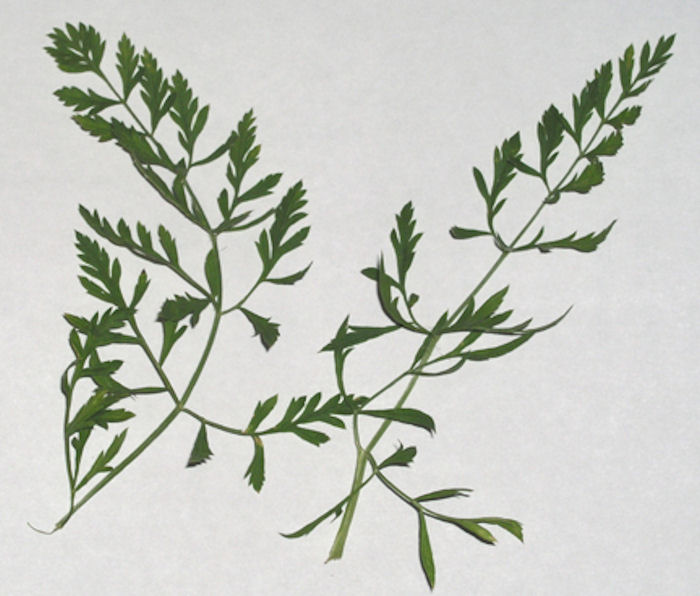
In some cases, the center of the flower will contain a purple floret, but I’ve found that the purple floret is somewhat rare. Before you go out and pick a bunch of flowers that look just like this one though, be aware that many flowers have precisely the same coloration and similar appearance. For example, the hemlock flower and fool’s parsley are easy to confuse with this flower. Fortunately, it’s easy to avoid the mistake. Hemlock and fool’s parsley both tend to grow in wetter areas, while Queen Anne’s Lace prefers a drier spot to grow. In addition, Queen Anne’s Lace has a distinctive carrot leaf like the one shown here (the photograph is courtesy of my friend William Bridges):

OLYMPUS DIGITAL CAMERA

When picking Queen Anne’s Lace, look for the flower in July, check the flowers carefully, and verify that the leaves are correct. If necessarily dig a plant up to ensure you’re getting the right one. The root will have a distinctive carrot aroma. If you take these four precautions, you won’t ever have any trouble.

There is conflicting information about the use of the leaves. I’ve never personally eaten the leaves and based on the conflicting information, I’d recommend not eating them. Here’s the Queen Anne’s Lace jelly recipe (courtesy of Rebecca).

Queen Anne’s Lace Jelly

2 qts Flower Heads, Rinsed
  Boiling Water to Cover
2 Lemons, Juiced
2 packets Certo
6 cups Sugar
Dash Cinnamon or Nutmeg

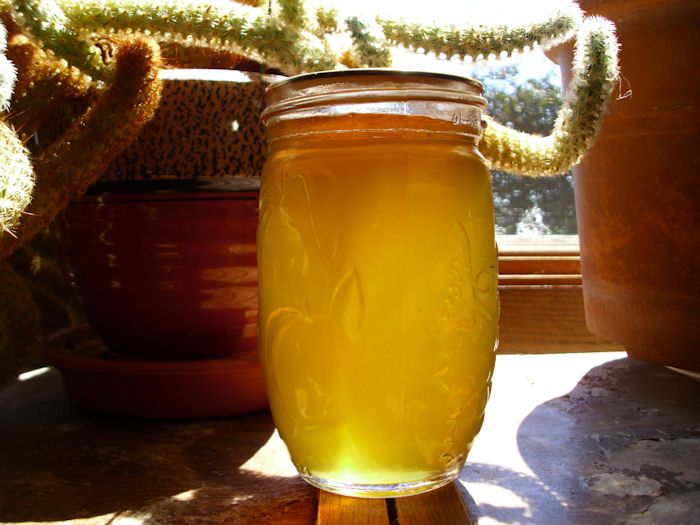
Infuse flowers in boiling water for 4 to 5 hours. Strain the result to obtain 5 cups of liquid. Add lemon juice, sugar, and spices. Bring the mixture to a boil. Add Certo. Bring to a full boil for 1 minute. Prepare the jelly according to the instructions on the Certo package. Can using a boiling water bath for 10 minutes.

The jelly has a subtle taste. It really is hard to describe, but think of something with an almost honey-like taste, but a bit of spiciness too. Add some tea and an English muffin, and you have a wonderful breakfast. The jelly ends up with a wonderful amber appearance.

QueenAnnesLace04

So, what are your favorite wild plants? Do you use them regularly? Let me know at [email protected].
Protecting Your Investment

Many people disregard the benefit of having good working animals. We currently have two dogs and three cats. Every one of them has work to do. Over the years I’ve found that working animals actually live longer and lead happier lives. It seems that everyone benefits from having work to keep them happy.

The two dogs work during the evening hours. We’re out and about enough during the daylight hours that we’ve never had a problem with the wildlife during the day. It’s at night that the wildlife comes out and causes us woe. So the dogs work all night and sleep all day. One of us takes them to work each evening and brings them into the house early each morning.

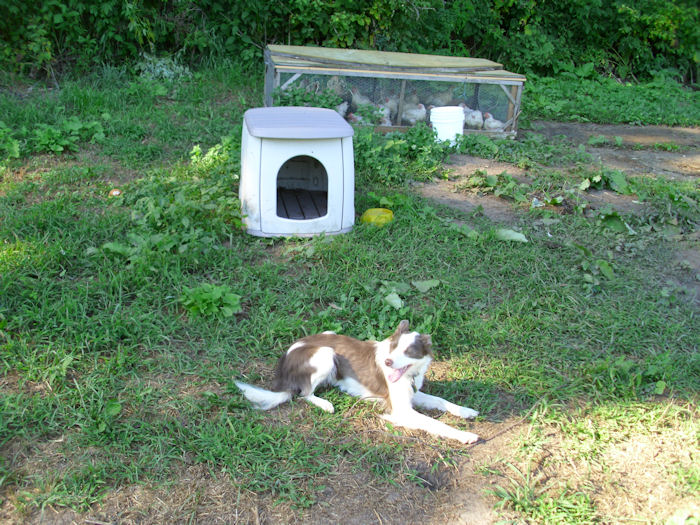
Shelby earns her keep by guarding the chickens. Everyone likes a chicken dinner. The way we have the chicken tractors constructed keeps hawks at bay. However, weasels and racoons will dig under the chicken tractors to get inside if they can’t get in any other way. The hardware cloth will delay them, but not permanently bar them. Weasels are the worst of the lot. They’ll make a small incision in the chicken’s neck, drain it of blood, and then move onto the next chicken without touching the meat of the one it has just killed. What a waste! We’ve had problems with other wildlife getting into the chicken tractors as wellI’m pretty sure a fox got into the chicken tractors at least once.

Shelby

Shelby also helps catch any chickens that get out of the chicken tractors. She’ll carefully move them toward me. I can usually catch the chicken without any problem and put it back inside. We chose a border collie because of the herding instinct.

Reese guards the apple orchard. We have two orchardsone for apples and another for everything else (pears, plums, and cherries). For some reason, none of the wildlife bothers the other orchard, but they absolutely love our apples. One season I had a wonderful harvest when I went to bedthe next morning I got up to find stems, which was all that the deer left behind after eating every apple. Rebecca says that there is still a dark cloud hanging over the orchard from the unfortunate language I used to express my discomfort with the deer’s choice of delicacy. Since we’ve had a dog out there, no one has touched the apples (or at least, not enough to matter). We chose a beagle/rat terrier mix for the no nonsense attitude toward guarding territory. Besides, she doesn’t dig (at least, not often) and she cuddles nicely in the winter.

Reese

During the late fall and most of the winter months, we store goods in the basement. It acts as our root cellar. There are usually some apples, potatoes, and squash down there. Given that the basement keeps at a nice 40 degrees, things last quite a while. We eat the last squash sometime in March in most years, along with the last of the potatoes (the apples never last past the holidays). Mice just love root cellars. Given a chance, they’ll bore through squash just enough to ruin it. Apples and potatoes make wonderful treats as well.

Two of our cats, Bubba and Smucker, patrol the root cellar. We don’t stick them down there at any given time. They ask to go down for a while, then they ask to come back up. It’s a nice arrangement for everyone. Since we’ve had Bubba and Smucker patrolling the root cellar, there hasn’t been any damage to our goods from mice. Sure, we could have used traps, but cats work significantly better.

SmuckerandBubba

Sugar Plum is Rebecca’s cuddle cat. Her main job is to keep Rebecca happy. During the daytime, that means staying with Rebecca in the kitchen or wherever else Rebecca might be at the time. It’s an important job.

All of our “kids” know how to do some simple tricks. The dogs each have their own way of asking for their breakfast and they play a mean game of fetch. They’re also trained to perform the usual commandssit, lay down, kennel, and quiet. The cats can also perform tricks. In this case, Sugar Plum is sitting up to ask for a treat.

SugarPlum

Having animals is an important part of self-sufficiency. Without these work animals, we’d never be able to hold onto the investment we’ve made. How do you work with your animals? Let me know at [email protected].
 

Decorating with Doilies

Many people view “old world” housing in museums and wonder why people took so much time to colorfully decorate their houses. I’m pretty sure it wasn’t because they had time to kill and needed something to do with their hands. The answer is simplepeople spent a considerable amount of time at their home. Trips into town were rare and there were no vacations in some other city. A home with aesthetic appeal is a necessity in such a situation. It’s important to have some color present and more than a little comfort. Otherwise, you’ll quickly find yourself getting depressed and not very happy about your self-sufficient lifestyle.

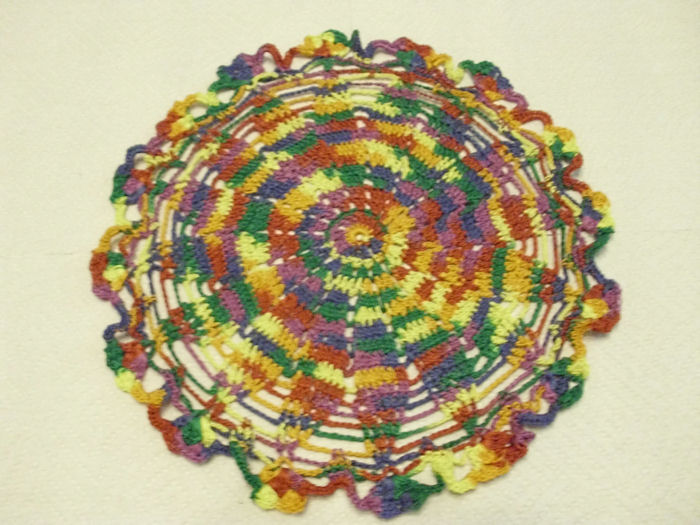
We haven’t taken to stenciling our ceilings or using exotic colors in our home, just the occasional wall decals spotted around. However, there is a certain amount of decorative clutter that exists to provide comfort and color. You’ve seen some of my offerings in previous posts such as Knitting for the Gentleman Farmer. Colorful hats and blankets are nice, but I lack the dexterity required to do much more. That’s where Rebecca comes into play. She creates items of significant artistic appeal such as the doily shown here:

Doily

Rebecca actually made this particular doily for a dear friend of ours, but we have others that she’s made throughout the house. It amazes me that she’s able to work on such fine crochet and that it comes out so nice. The important thing to consider is that we’re both working to make our home livable and enjoyable. When you’re self-sufficient, you need to consider the amount of time you’ll be spending at your home and make it as comfortable as possible. What sorts of decorations do you find inviting. Let me know at [email protected].