Summer Flowers

Every summer I plant flowers to make the area around the house cheery. There are flowers in the front, in the back, and in a tire next to my clothes line. Most of the flowers are arranged and I know the names of the vast majority of them. Some of the patio favorites are princess feathers, nasturtiums, snap dragons, alyssum, and morning glories. The flowers appear at different levels and mixed with herbs (peppermint in this case) to provide interest:
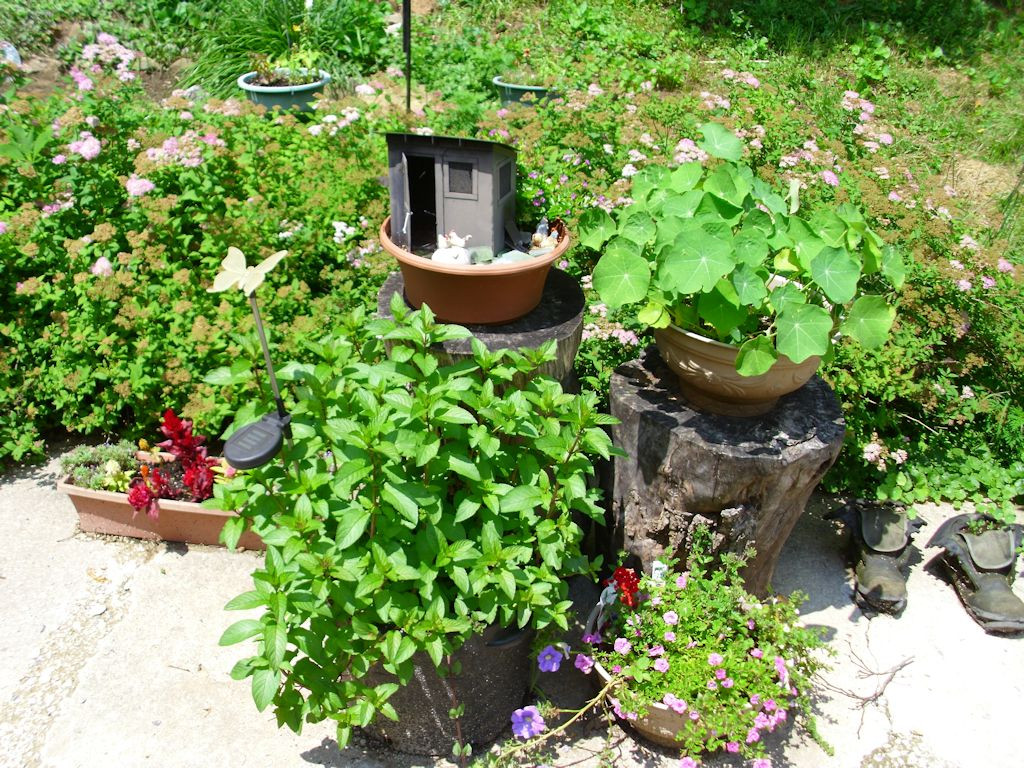
The flowers are mixed in with herbs and presented at different levels.

The fairy garden, old shoes, tree trunk, and other elements all help create an interesting mix that provides a feast for the eye. The fairy garden is a gift from a friend. I add new plants to it each year. This year’s flowers are quite nice:
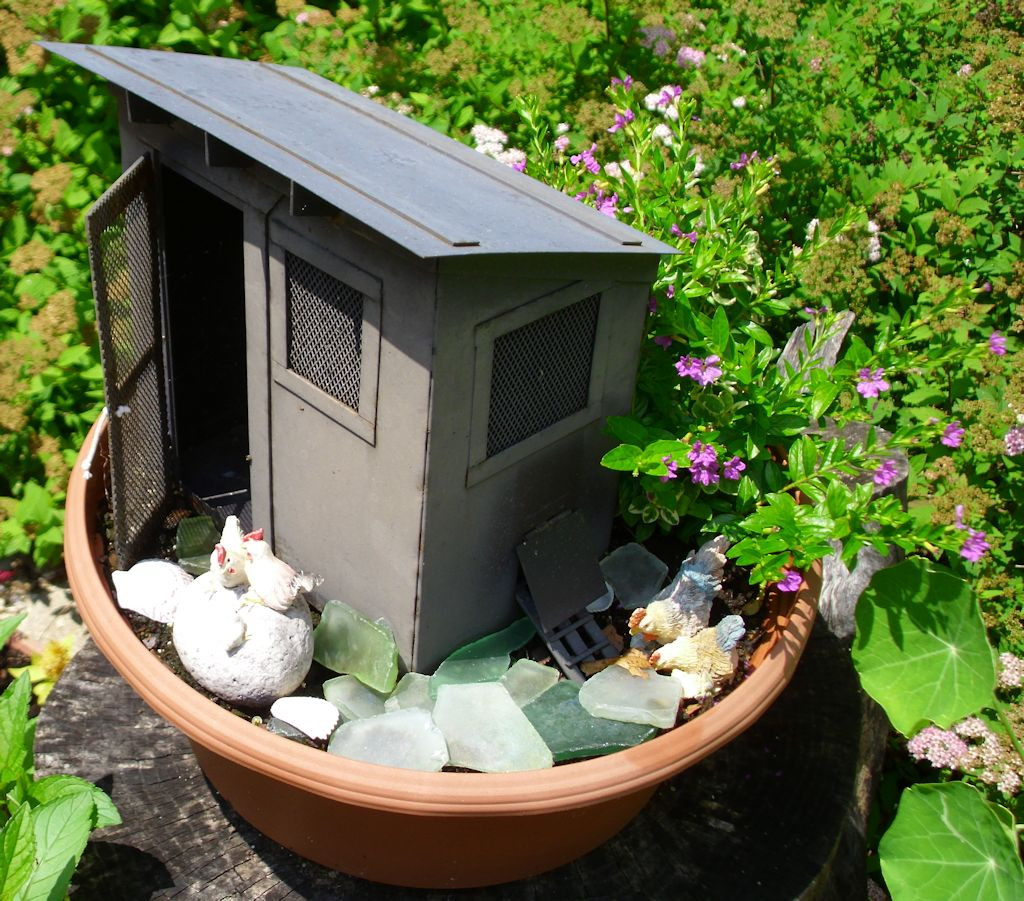
The tiny pink flowers of the fairy garden work well with the figurines.

One of my favorite flowers in the hanging pots in the back of the house is the morning glories (mixed with nasturtiums in this case):

Mixing the morning glories and nasturtiums provides all day color.

The front porch usually has wave petunias mixed with an assortment of other flowers in two pots (one on each side of the porch). I try to get them to match the furniture and fixtures on my front porch, including the doormat and the goose neck lights, as I like everything to tie together. The color combinations are interesting this year because one of the mixed in elements are nasturtiums (of three different colors no less):
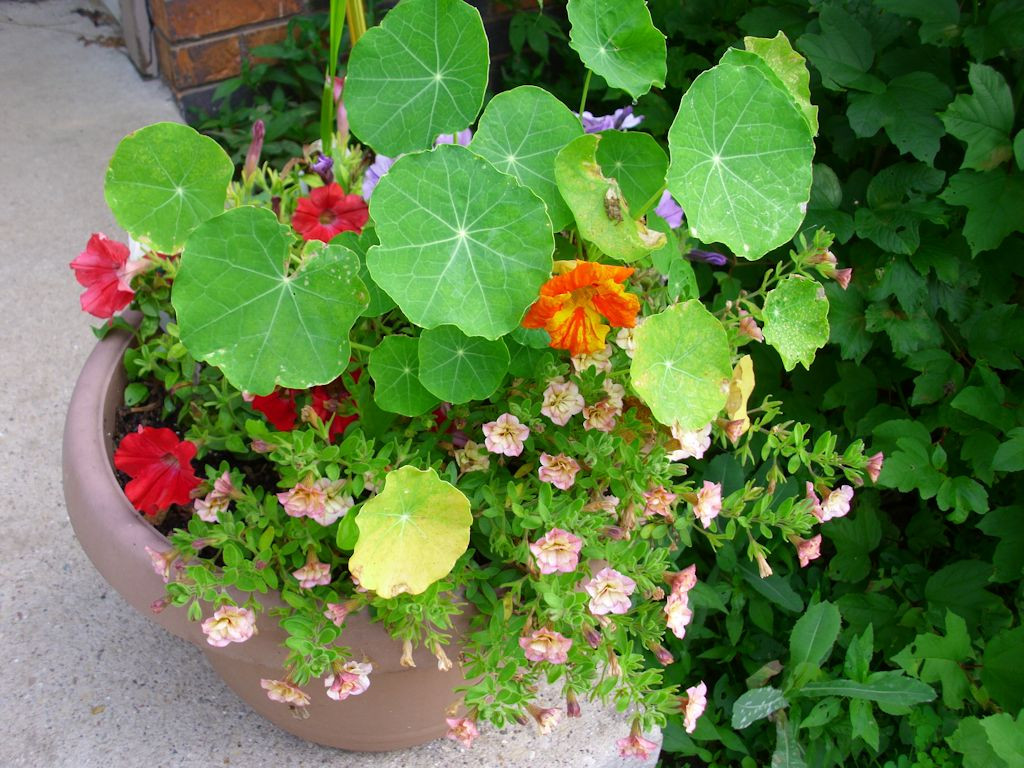
Wave petunias mixed with other flowers can provide an interesting arrangement.

The other pot uses the same concepts, but with different colored flowers. So you see the same idea on both sides, but the contrasting flowers prove to be quite nice. Both sides actually do have all three colors of nasturtium, but it’s apparently against the rules for all three to bloom at the same time:
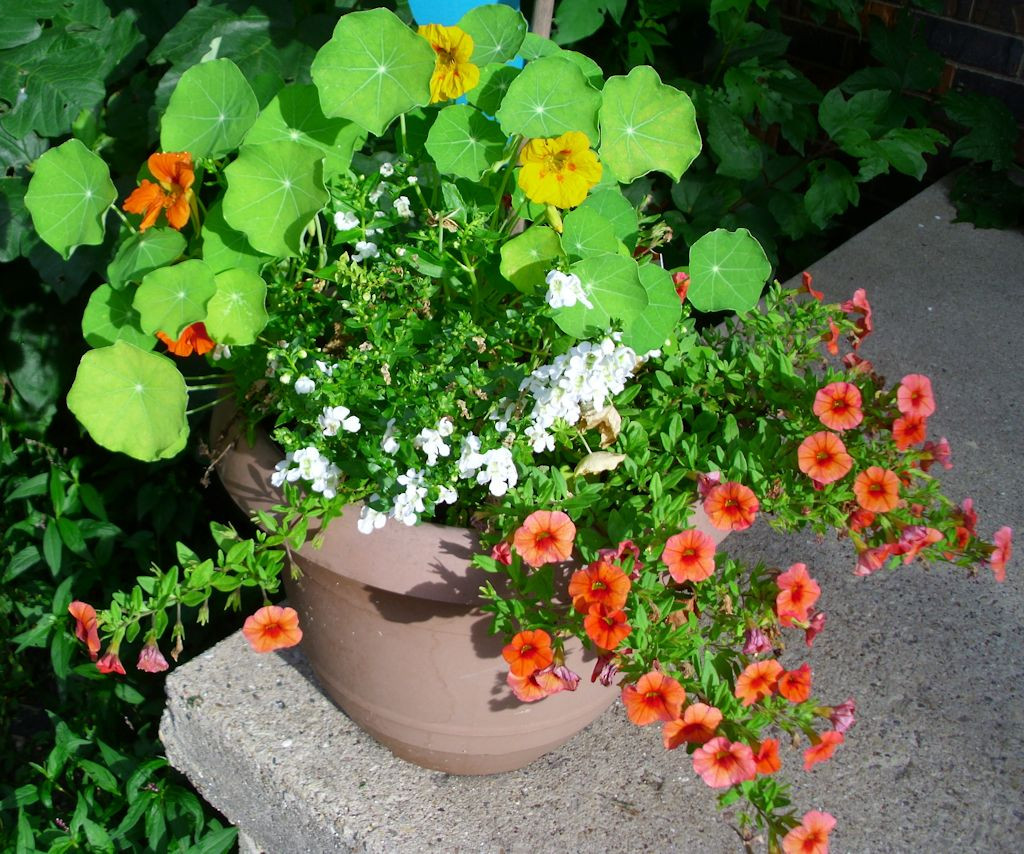
Color variations and textures differentiate the two front porch pots.

Organization is nice, but sometimes you need a little creative chaos, which is where my tire flowers come into play. I simply sew seeds from a mixed flower packet and enjoy whatever comes up. Sometimes I’m not sure about the names of the flowers. This year I did end up with a sunflower and something interesting called love lies bleeding (the prominent strings of flowers are the love lies bleeding).
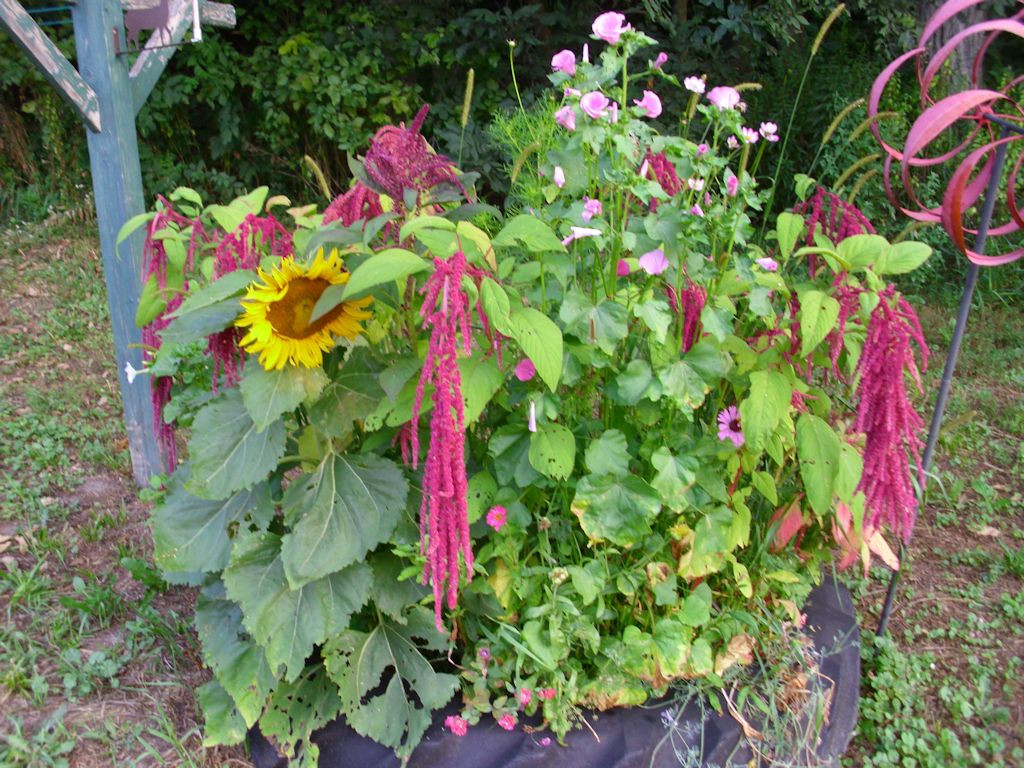
Interesting mixes of flowers can be quite pretty.

That really long strand in the front is a single flower. Even though some flowers, like the sunflower, attempt to steal the show, it’s important to look everywhere. Some flowers shyly peek out from near the bottom of the tire:
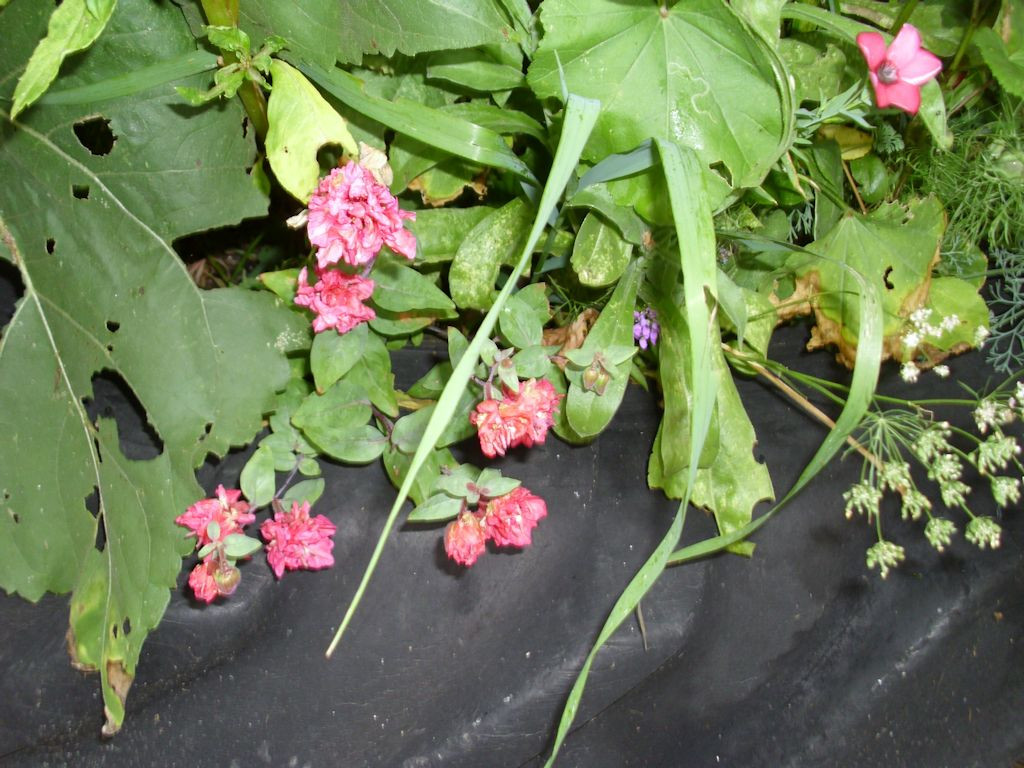
Sometimes the smallest flowers are the prettiest.

Of course, there is a lot more to see, but these are some of the highlights of the flowers for this year. The point is that summer lends itself to some beautiful arrays of flowers to please the eye (and sometimes the palette, nasturtiums, among other flowers, are edible). Make sure you plant plenty of posies to keep your heart happy.

 

Freezing Cabbage

Cabbage is one of those items that’s hard to store for the winter months. I know of some people who wrap the cabbage up in newspaper and then store it in their root cellar. In order to make this approach work, you need a cool root cellar-around 40 degrees (or lower) is best. The cabbage can last up to five months when stored this way if the storage meets all the required conditions.

Another way to store cabbage is to pressure can it. I’ve saved the secondary cabbages that come up after you cut off the primary cabbage this way. You can prepare and store the cabbage whole in most cases and it comes out reasonably well. The minute you have to cut the cabbage up, pressure canning starts to lose its appeal because the cabbage gets quite soft (sometimes downright mushy).

It’s also possible to preserve cabbage as sauerkraut-an approach that I highly recommend. Nothing quite matches the taste of homemade sauerkraut. Certainly, nothing you buy in the store will match the fermentation approach that most homemade sauerkraut relies on. Unfortunately, you can only eat so much sauerkraut in a year, even if you love the stuff.


Freezing cabbage is another alternative, but one that is also fraught with problems. Freezing any food can be problematic if it hasn’t been prepared correctly. In order to combat this, people could always consider visiting PreparedCooks.com to learn about freezing foods. They have blog posts on a number of different foods that can be frozen, so people could learn from that. Personally, I’ve eaten more than my fair share of truly horrid cabbage that has been frozen. If you don’t prepare it right, the mush that you get out of the freezer will not only look unappealing, it’ll taste quite bitter. In fact, about the only thing you can do with it is put it in the compost-it really is quite bad. After years of experimentation, I have come up with a way to freeze cabbage that does produce a palatable result. You can defrost the cabbage made this way and use it for anything that required cooked cabbage-the cabbage will still lack the crispness of fresh, so coleslaw is out of the question. Here are the steps I follow.

  1. Clean the cabbage carefully, removing any damaged leaves.
  2. Cut the cabbage in four to six parts of about a pound each. Don’t cut the cabbage too small. Cut the cabbage in such a way that each piece is still attached to the core. Don’t remove the core.
  3. Heat a pot of water to boiling. Add 2 tablespoons of salt and 1/4 cup of vinegar to the solution. The salt and vinegar improve the taste of the final product by keeping minerals from adhering to the cabbage.
  4. Blanch the cabbage for 2 minutes (timing is critical).
  5. Immediately cool the cabbage with copious amounts of cold water and ice.
  6. Place the cabbage on clean, white towels to dry. Pat or otherwise handle the cabbage as little as possible, but try to get as much of the water off of the cabbage as is possible.
  7. Freeze the cabbage overnight. Don’t wrap it. Separate pieces from each other using waxed paper or aluminum foil (the foil works better, but is a lot more expensive).
  8. The next morning, place the cabbage in the smallest possible freezer bag or, better still, use a vacuum packer such as the Food Saver to store it. Less air is better. When using a vacuum packer, use the lowest possible setting to avoid damaging the cabbage. Using the 8″ rolls works best because you can make the bags as large as needed.

If you’re able to vacuum pack the cabbage, it can last a minimum of a year in the freezer. In fact, you can often keep it in the freezer longer without any sign of frost damage, but longer storage may reduce the quality of the cabbage and affect the nutrients you get from it. Let me know if you have any questions about this technique at [email protected].


Chicken Fledging

The chicks are fast becoming pullets. No, they won’t become hens for quite a while yet. People get the idea that chicks become hens immediately, but they go through a pullet stage first. A pullet is a chick that lays smallish eggs and hasn’t moulted for the first time yet. A chick becomes a pullet at between 16 and 24 weeks of age. My chicks are currently 17 weeks old, but they’re of a “heavy” variety, which means that they get larger than most hens do and require more time to grow to size. It will likely be closer to the 24 week end of things before I see the first pullet eggs from them.

However, the first signs that they will soon become pullets are all there. For example, their feathers and wings are now strong enough so they can fly to the top of the run fence and walk along it with relative ease. I saw a couple of them outside the run the other day—calling to their buddies who are still on the inside. Most important of all, they can get back into the run when trouble arrives. It won’t be long and they’ll be walking around outside the run on a regular basis, becoming free range birds. These fledged birds now have the ability to defend themselves a little, run from trouble to some extent, and get into all sorts of trouble.

Another sign that they’re becoming pullets is that their combs and wattles are becoming fuller. They’re also making hen-like sounds now. They still don’t quite talk the talk, but they soon will. The beeping phase that happens between being a chick and being a pullet is coming to an end.

The most important sign is that the pelvis bones are starting to separate. You can check the pelvis bones by holding the chick in your arms with it’s back facing toward you. Calm the bird and give it a good place for its feet so it doesn’t kick. Place your hand on its rear and you’ll feel three prominent bones. These bones will separate when the bird is ready to starting laying eggs.

Pullets like to lay their first eggs in privacy, so expect to see the first eggs late in the day or even when you open the coop first thing in the morning. It’s important to check for eggs more often when your pullets start laying to keep egg eating at bay. Once the pullets begin to lay, I’ll go out every two hours during the day to check the nest box. A pullet can also be quite fussy about her surroundings, so make sure you change the hay in the nest box relatively often. Let me know your thoughts about pullets at [email protected].


Considering the Dangers of Outdated Canning Information

I am now the proud owner of not one, not two, but three copies of the Ball Blue Book. Of course, the first question anyone should ask is why I own so many copies, given that all three copies are in great shape. The problem is one of outdated information. Science is constantly finding out more about bacteria and the methods used to battle it, so working with old information is dangerous from a number of perspectives.

All of these issues affect how you can food. Consequently, it’s a good idea to keep your canning resources updated to ensure you stay safe. The point was driven home to me again last week when I went to check on the process for canning zucchini. My oldest Ball Blue Book had a perfectly usable recipe for the process. I also found recipes on several sites online, some of which included pictures that looked precisely like the process I had followed in the past. At least one resource talked about another book on my shelf, Putting Food By. However, I became suspicious when a third resource mentioned a potential issue with canning zucchini. Locating the USDA resource online provided the full story. It turns out that the USDA can’t determine a good processing time for zucchini because of the way the squash cooks. So, I froze my zucchini using the process found in all three copies of my Ball Blue Book (a process that hasn’t changed).

After spending some time researching this issue, I’ve come to the conclusion that I really need to recheck those old family recipes of mine to ensure they’re still safe. I also need to spend more time ensuring my resources, such as the Ball Blue Book, are updated regularly. Saving money by canning your own food loses its luster when a family member gets sick or possibly dies due to food contamination. Play it safe—throw that outdated book out and get the latest copy of any resources you use to ensure that you’re using the latest techniques. If in doubt, check additional resources such as the National Center for Home Food Preservation site for additional information or choose not to preserve the food in question. Let me know your thoughts on safe canning techniques at [email protected].


An Update on the Kits

The kits continue to grow. They’re starting to become more cautious. However, most important of all, they can get in and out of the nest box whenever they like. Instead of seeing out of the nest box (unless I sneak up on them), I normally see them peering out at me from the next box.


Four of the kits look out from the nest box.
The kits peer out from the nest box at me most of the time now.

This is a natural behavior. The kits will run for safety most of the time until they get a bit older. Of course, there always has to be an exception to the rule. One of the kits just ignores me and continues to do whatever he feels like doing at the moment.


One kit stays outside the nest box with its mother.
One kit always seems to have a mind of its own.

The kits are now starting to eat solid food. I see Moonbeam go into the nest box at times, so I think she still feeds them a little, but the kits are starting to consume more food on their own. This means that I need to keep a watch on both food and water in the cage to ensure that the doe and her kits have enough to eat. The doe won’t hog the food, but she doesn’t encourage the kits to eat either. Everyone seems to fend for themselves when it comes to rabbits.

Play is becoming a lot more important for the kits as well. There is a shelf in the cage and the kits will often jump on top of it. They seem to like looking down on the others in the cage. Only one kit can fit on the self at a time, so I was a bit surprised to find three of them up there the other day piled on top of each other. The bottom kit must have felt quite a burden. All these views of playtime come surreptitiously—I must peer at them from a distance and without them seeing me. Otherwise, into the nest box they go (well, except for the brave kit who really doesn’t care about hiding from anyone).

Overheating is a real issue at times. The kits could remain cool by staying outside of the nest box. However, during the heat of the day I often find them piled on top of each other in the next box. Because the kits are almost weaned and able to eat solid food, I now move them around and get them out of the nest box on warmer days. On some days I put an insert into the nest box so they can’t get inside and instead stay outside where it’s cooler. In times past, I’ve actually lost kits to heat simply because they insist on piling on top of each other.

In a few more weeks I’ll sex the kits and move the boys to one cage and the girls to another so they have a place to continue growing without the potential for inbreeding. Males can start breeding in as little as 14 weeks—females become fertile in about 16 to 18 weeks. It’s essential that you separate the rabbits before this time or you can end up with some unfortunate results (mothers made pregnant by their sons). Inbreeding can produce all sorts of terrible behaviors. In the meantime, the kits can look forward to spending a bit more time with mom. Let me know your thoughts about the growing stages of kits at [email protected].


Cooling Your Animals in Summer

Now that the summer weather is truly come to stay, I’ve turned my attention more fully to keeping my animals cool. I’ve talked about this issue before as part of my Keeping Your Animals Healthy in Hot Weather post. However, over the years I’ve learned a few more tricks of the trade. The first is to keep the house at the same temperature as the outside as long as practical and rely on ceiling fans as much as possible. The approach saves money, of course, and makes my house more environmentally friendly as well, but it also seems to spare my animals some level of shock. This is especially the case with my dogs, who must go outside at various times during the day. For the comfortableness of my dogs, I thought it might be best to start checking the temperature outside before I let them out, so I found a weather sensor that I could use to monitor whether it’s suitable weather for me to let them out. I decided to purchase an outdoor sensor because I was actually finding that my dogs weren’t doing as well as they could when they got back in from outside, and I think it was due to the shock of temperature change they felt. Giving them somewhere to rest when they’re experiencing uncomfortable changes in temperature could be helpful in settling their mood. Beds like the ones reviewed by Pupster Passion could be the perfect place for your dogs to stay cool in the shade on a hot day.

Of course, I also run my business out of the house, which means computers generating lots of heat and not liking to be overly hot. All of my computers have temperature sensors that monitor motherboard and chip temperatures as needed. I actually found that most systems today can run in higher temperatures as long as you keep the air circulated in the room. So, I now keep my house between 75 and 80 on hot days and rely on ceiling fans to keep the air circulating in my office. Because the office is where I’m generating the most heat, I monitor the temperature there, rather than the dining room (which contains the air conditioner thermostat). An office temperature of 80 can actually equate to a house temperature of about 75, which is quite comfortable. I adjust the thermostat as needed to keep the office at 80, rather than trying to keep the rest of the house at a specific temperature. Sometimes I’ll use my HVAC to maintain temperatures in the house; using services form the likes of One Hour Magic – https://onehourmagic.com/ – can help to keep my air conditioning system in working order for when it’s needed the most.

It is very important that, if you have animals who live outside, at the very least you provide them with shade and plenty of clean water. If you have livestock with no access to proper shade, then you are risking all sorts of complications. Perhaps the best course of action would be to look for steel buildings for sale. These buildings are durable, easy to construct and would provide ample shade for any animals who are outside. Everyone at my place gets shade during the summer months. However, I’ve been smart in the way I’ve provided shade. The shade is at the back of the cages and coop. The shade elements (mostly trees), hang slightly over the cages, coop, and run area. The front of the cages and coop are left as open as is possible so any breeze whatsoever can help keep the animals cool. Even so, I must still bring some of the rabbits in during really hot days and the chickens get their bucket of cooling water (they wade in it). It’s absolutely essential that the animals all have clean, cool water to drink, which means going out to change the water several times each day. I usually go out three times daily to check on everyone and make sure they’re doing well.

The cats are always the easiest to please. Smucker still loves to sleep in the bathtub on hot summer days. Sugar Plum likes the floor in the other bathroom. I tend to leave them alone except for the checks I make on them.

Animals still need hugs during the summer months and they still need play time. I’ve been getting out at 5:00 to ensure that I take care of these needs when it’s still cool. During the day I leave the animals completely alone and do everything I can to help them rest comfortably. Making sure you keep track of your animals and address their needs is one certain way to keep them around longer and to enjoy your time with them more. Let me know your thoughts about keeping animals cool at [email protected].

Mock Chick Fights

The chicks continue to grow. Unlike meat chickens, however, they grow at a glacially slow pace at times. This growing period is important to the chicks because they’re building strength, stamina, and skills. Part of this process involves mock fights.

The fights really are mock. If you watch them long enough, you see that the birds barely touch each other and they don’t actually use their talons. (I tried getting a picture for you, but would those hens cooperate? I think not!) What it looks like is that the two chicks fly up and touch beaks—a sort of a kiss. They use their wings as well, but not with nearly the same ferocity as used in a real fight. Unfortunately, while this skill will help with some animals (see Possum’s Surprise for details), it doesn’t do anything to help the chicken when it comes to hawks, weasels, raccoons, and other odd assorted animals. When the fight is over, it’s not uncommon to see the birds pile on top of each other somewhere in the run to rest for a while.

The mock fights do build strength and stamina. However, they serve the important purpose of helping to establish the pecking order and to also create a bond between hens. The pecking order is essential because only one hen can lead. The lead hen right now is Violet, but she could lose her place at any time to a worth adversary. As the chicks grow older, the mock fights will become real fights that could become a problem, except for the order established by the lead hen. She settles the disputes in the coop.

Bonding between hens is essential. It’s important though not to confuse chicken bonding with human bonding. Yes, laying hens are smarter than meat chickens, but they aren’t all that smart. You can teach them certain behaviors, but they work mainly on instinct. The lead hen can only lead because the rest of the hens are bonded to her and are willing to be led by the strongest and most knowledgeable hen in the coop. When you see hens outside the coop, the lead hen is normally there to establish the route they take and the other hens cluster around her. The act of bonding makes it less likely that a predator will get all of the hens—just the unfortunate hen that is attacked first.

The chicks are using their new found camaraderie to make a place for themselves in the coop. I noticed the other day that the other hens don’t try to get at all the food dishes any longer. The chicks have taken the smallest dish for themselves. The older hens will try to come around at times, but the chicks have started to gang up on the hens and chase them away from their food. At some point, it’s inevitable that there will be more real fights in the coop as the chicks establish themselves more fully in the pecking order.

I doubt that the Buff Orpingtons will attempt to gain much status. They’re gregarious birds that don’t appear to care about much except getting their fair share of the food. The new Americaunas will probably fight for some level of status with the existing Americaunas and the one remaining Buff Orpington. However, the Barred Plymouth Rock seems to show the kind of aggression needed to eventually take on Violet. I don’t see it happening until sometime next year though.

Watching your chicks carefully is important. You need to know that they’re adjusting to their new lives in the coop and that they’re healthy. Mock fights are an important part of the growing process and you shouldn’t try to stop it. Actually, some of them are hysterical. Two of the chicks engaged in a mock fight this morning, lost their footing, and rolled down to the bottom of the run. Just a bit dazed, they got up, fell into a heap, and then promptly fell asleep with the rest of the chicks around them. Let me know your thoughts on mock fights at [email protected].


Poppers!

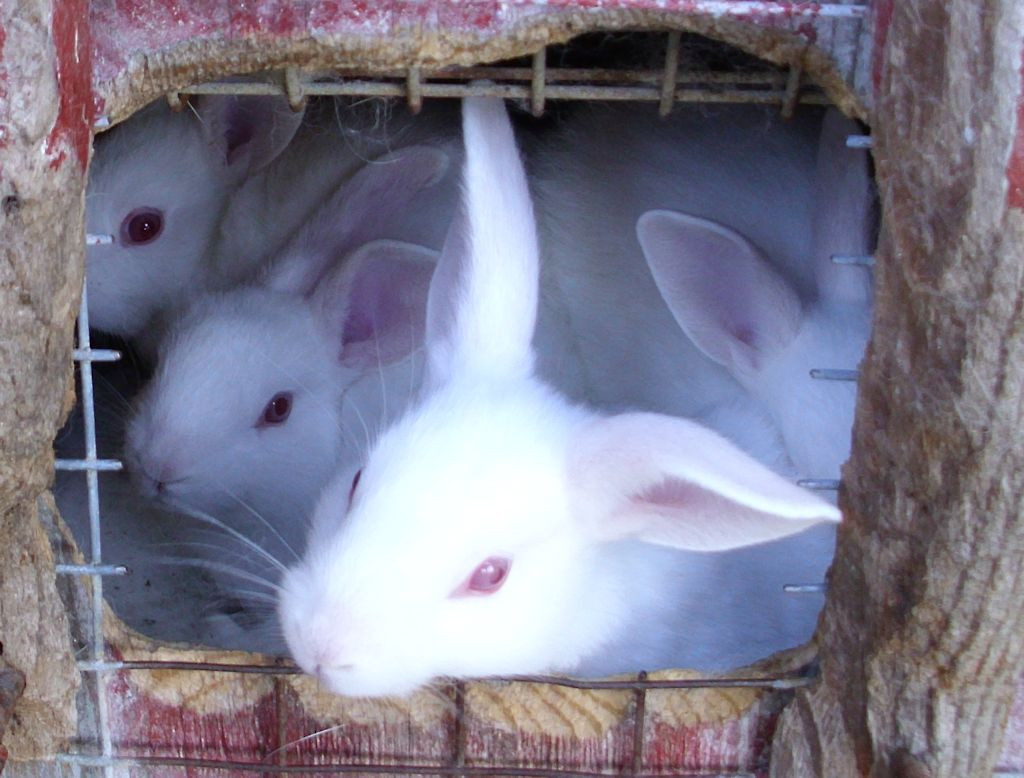
The first set of kits have been growing like crazy. In fact, they have begun popping out of the nest box, which is why they’re now called poppers. Several times a day now I need to check the cage and put the poppers back into the nest box. They’re getting old enough to get out, but they aren’t really old enough to be out. It’s still possible to lose the kits at this point if they get too cool, wet, or simply aren’t able to get milk from mom.

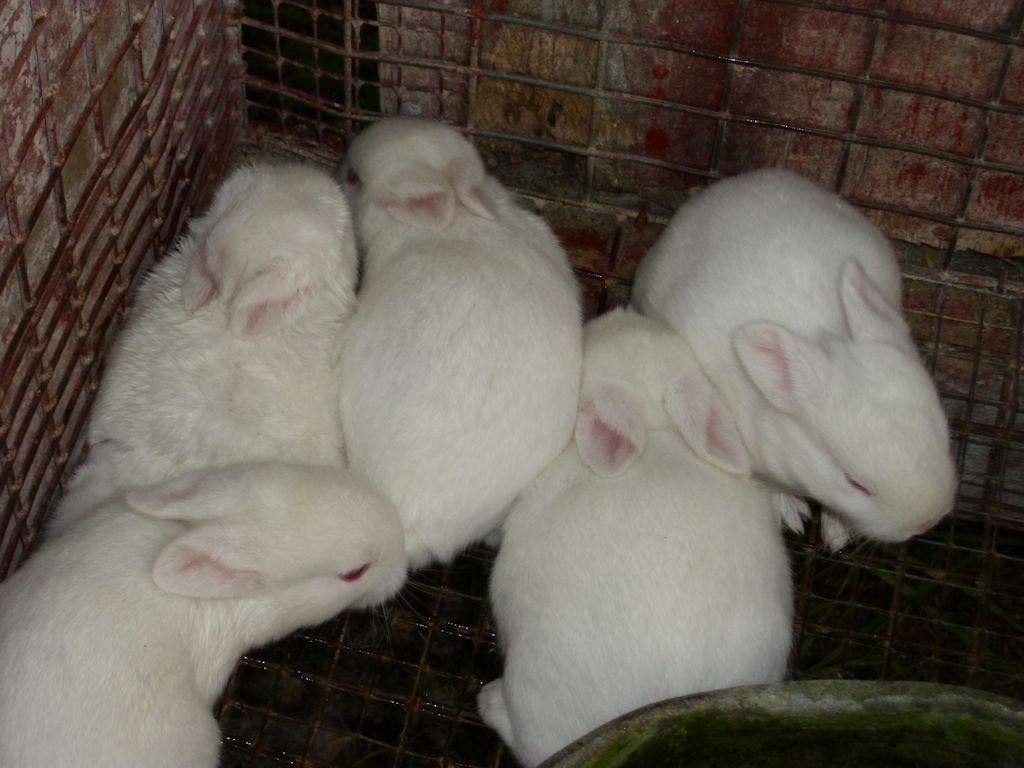
Five white kits have gotten out of the nest box and need to be put back in.
The kits are getting incredibly cute.

In this case, all five of the white kits have gotten out of the nest box. Immediately after I took this picture, I put them back in because they aren’t able to get into the nest box on their own. Notice that their eyes are open and they have a full covering of fur, but the fur is so downy and light that it really doesn’t help keep the kits warm. In most cases, the kits simply huddle in the corner of the cage for warmth when they get out like this.

Eventually, the kits will be able to get in and out of the nest box by themselves.  About the same time they’ll start to eat a little solid food. However, they won’t be weaned for at least a month and it’s absolutely essential to keep them where they can access mom quite easily.

Rabbits have a bicornuate duplex uterus, which consists of two completely separate uterine horns and no uterine body. Each horn has its own cervix and the two cervices combine into a single vagina. The reason that this deeply medical knowledge is required is that experience has shown that about half of the kits mature faster and are stronger than the other half. I’ve read everything I can find on the topic online and haven’t been able to figure out why except that one horn apparently provides a better environment than the other. The other half of the kits haven’t popped out of the nest box yet because they’re smaller and weaker than the kits you see in the picture.

For some odd reason, it’s also not unusual to find the kits separated into two piles at birth. Eventually they combine into a single group, but the two piles appear regularly when the kits are first born. An assumption on my part is that the kits in one horn are born first, followed by those in the second horn. Carefully watching the doe shows that the nest box typically contains some kits, she comes out to eat or simply to wait, and then she goes back into the nest box to have the remaining kits.

It would be nice to find out more about the birth process and why things happen as they do. If you have additional input about rabbit births, please feel free to contact me at [email protected].


Introducing the Baby Bunnies!

A number of people have asked me about how the rabbits are doing. It seems the chickens have been monopolizing the blog (and they have). About 30 days ago, Spartacus, my buck, made his rounds to the various cages with nest boxes. However, there wasn’t too much to report until Wednesday. Moonbeam, one of the does, had started pulling out her hair to make a nest. She had also gotten quite pudgy. On Wednesday she started having her babies. Now, she’s back to being a much thinner rabbit. (Because she’s feeding babies, I’ll give her nearly twice the normal amount of food and I’ll ensure her water dish is completely full.)

Moonbeam is a Rex and California Giant hybrid who just had a litter of eight kits.
Moonbeam and Her Special Treat

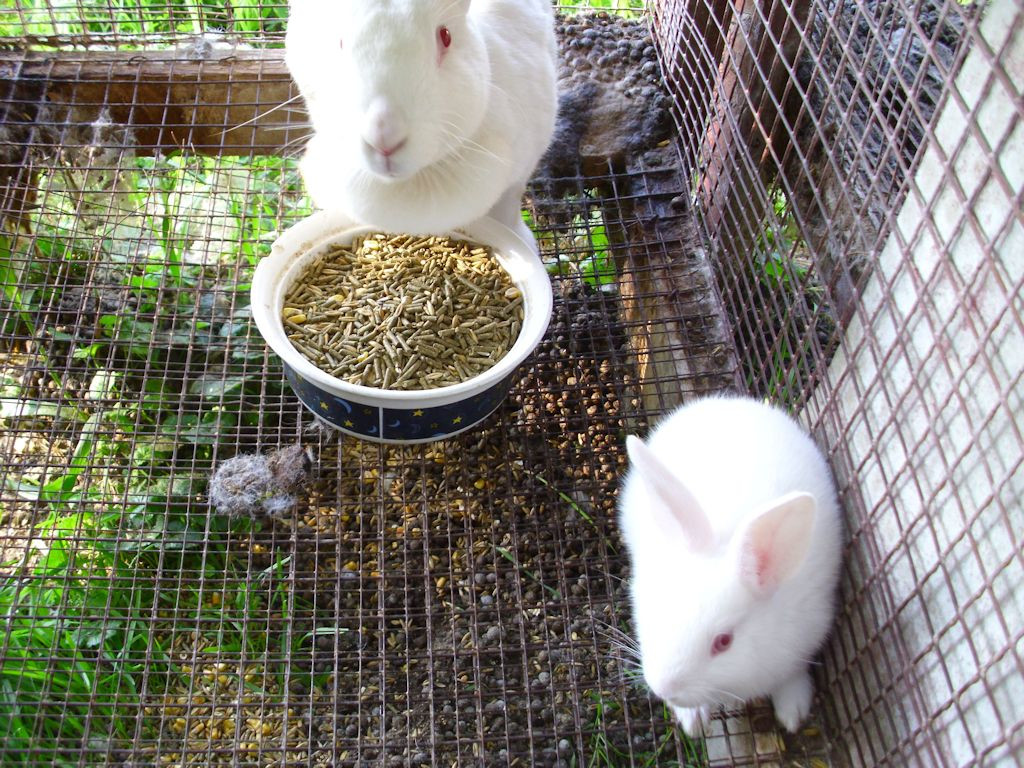
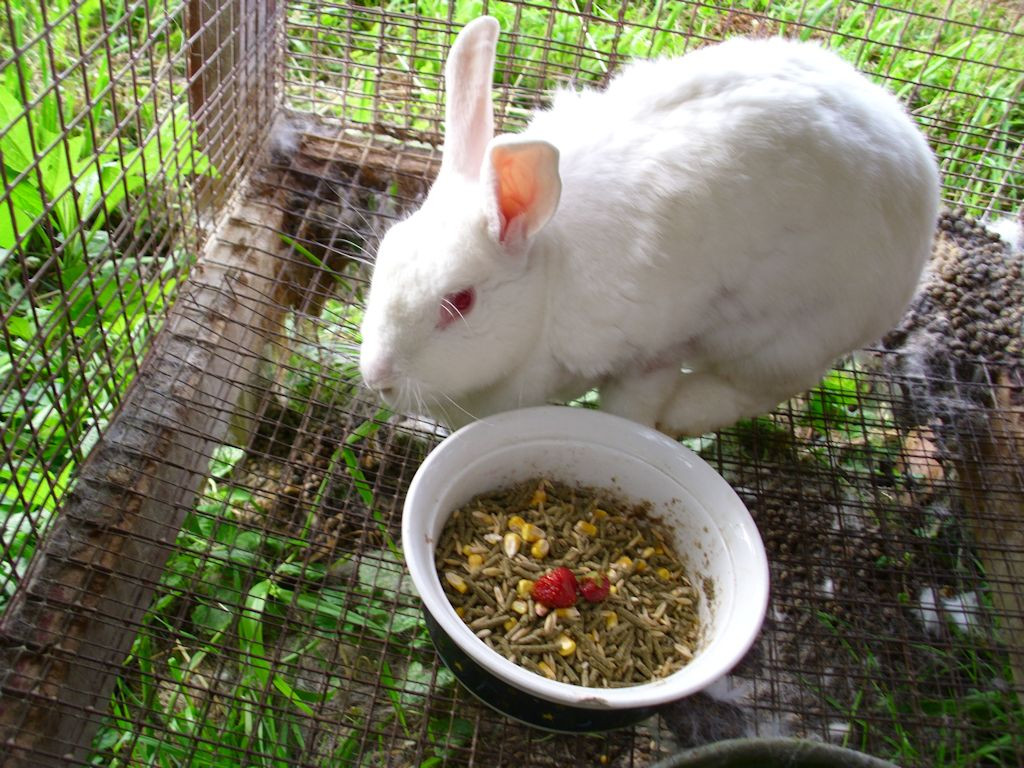
A friend had given me some strawberries and a few of them were getting a bit on the mushy side. So, all three of the new or expecting does received a special surprise with their food this morning. Moonbeam never eats her meal before I close the cage, so she’s just eying me right now.

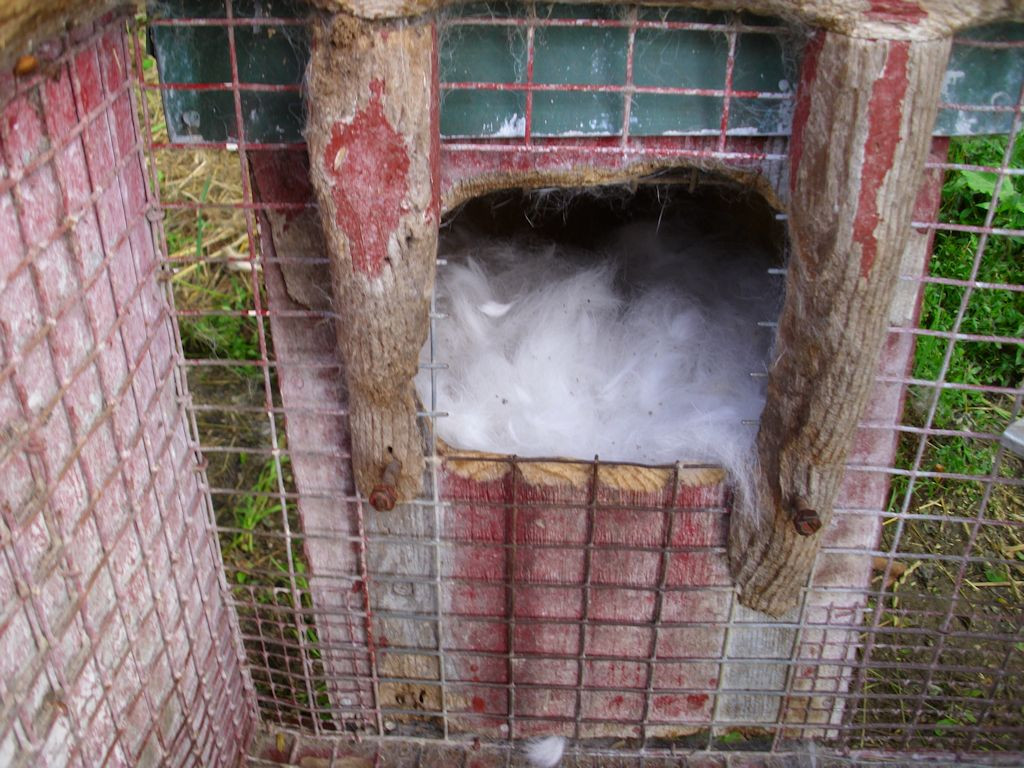
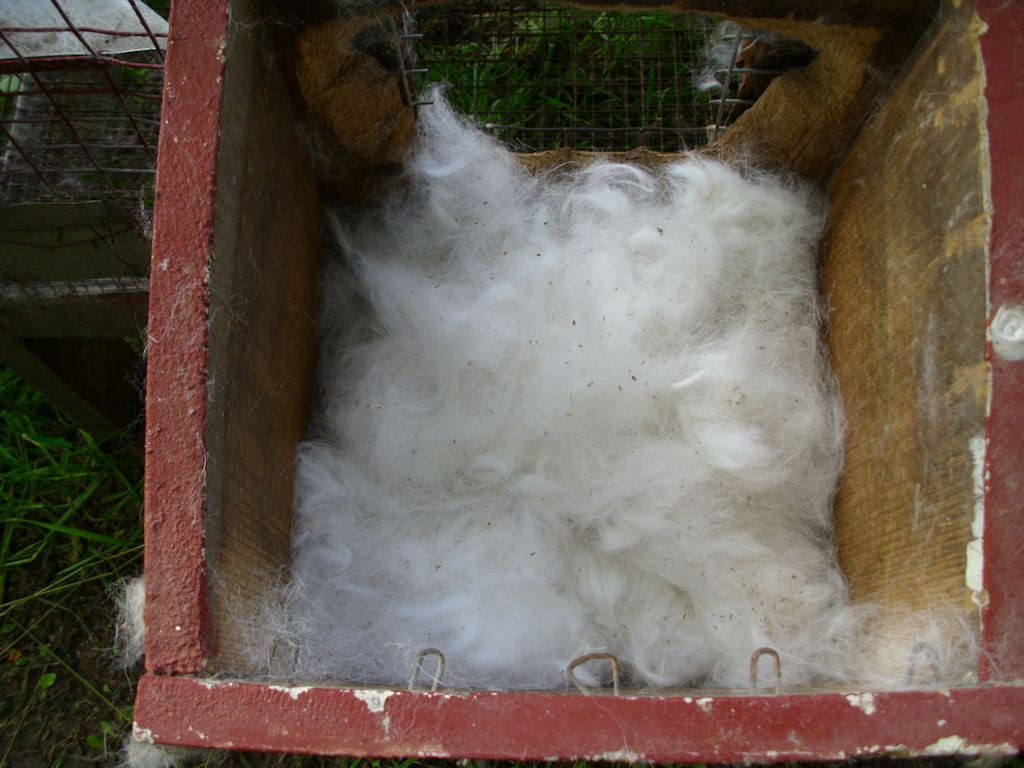
Moonbeam is the best mom out of all the rabbits. She goes out of her way to keep her babies (kits) happy. To start out, she completely fills the nest box with her hair. Imagine having to pull out the amount of hair shown here.

Moonbeam uses her own hair to keep her babies warm after they're born.
Moonbeam Completely Fills the Nest Box with Hair

I’m always careful opening the top of the nest box. It’s important not to upset the mom. She could possibly choose to abandon her babies, so I open the lid carefully and then wait to see if she pokes her head in to watch me. Moonbeam trusts me, so she calmly sat outside the nest box and ate breakfast. She still watched me, but she wasn’t anxious about it. This view of the hair gives you an idea of just how much she pulled out (I shot her good side for the photograph).

Moonbeam made herself nearly bald in an attempt to provide enough hair for her kits.
Moonbeam Provides a Lot of Hair to Keep the Kits Warm

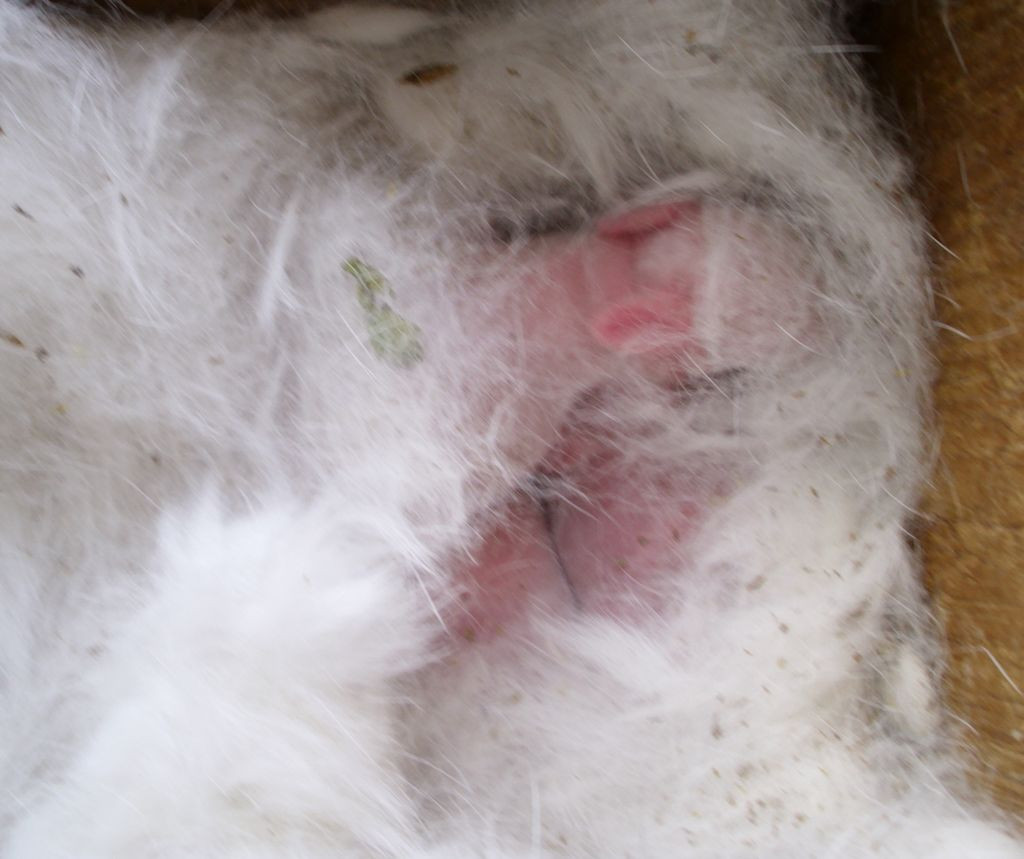
I never touch the hair or the kits. A number of texts that I’ve read say it’s permissible, but I’ve had does reject their babies because of the human scent on them, so I choose not to take the risk. I carefully moved the hair aside to count eight pudgy babies. The babies are born blind and hairless. They’re actually quite small at this point. It’s important to remove the hair just long enough to count (and take a picture in this case). Otherwise, the babies could get a chill.

This picture shows three of the kits, complete with the head of one of them.
Three of the Kits

You can only see three of the kits in this picture. There is so much hair that I can only move a small part of it at a time. I definitely don’t want to force poor Moonbeam to pull out any more. Notice that you can clearly see the head (with ears) of one of the kits. This one will likely be completely white. The other two kits have blotches that indicate they have black spots like their dad.

Moonbeam actually required 32 days to have her babies. The average time is about 30 days. That’s part of the reason that these kits are a bit bigger than normal. The kits will probably stay in the nest box for the first 30 days or so of their lives. It just depends on how fast they grow. During that time, Moonbeam will feed them each day. Let me know your thoughts about raising rabbits at [email protected].


A Chick Update (Part 10)

Sometimes chick behaviors can be a little more than interesting. Of course, you saw a few of those behaviors in the previous post, A Chick Update (Part 9).

This week was special in many ways. One of the Buff Orpington chicks has taken it into her head that she needs to sit on eggs. However, the egg she wants to sit on is the super jumbo sized eggs laid by the Buff Orpington hen. The super jumbo eggs are so large they actually peg my egg scale. My customers love them, but I have yet to figure out what this chick is thinking about because she’s truly not large enough to sit on anything quite that large—at least not comfortably. I had a good chuckle the first time I saw her doing it and must admit that the laughs haven’t ended. Well, if it helps her become a better hen, then more power to her. None of the other chicks has shown the slightest inclination to lay on any of the eggs laid by the hens.

The chicks can be even messier than the hens and the hens won’t lay eggs in a nest box fouled beyond a certain level. With that in mind, I’ve been replacing the hay in the nest boxes every week or week and a half.  I’ve also been scraping accumulate fecal matter off the horizontal surfaces each day. This past week  I decided that the coop needed a lot more than a touch-up. Unfortunately, that meant locking the hens out in the run while I did the cleaning. Chaos ensued while the hens staked out various territories and decided it might be fun to chase the chicks around for a while.

Even the best fun wears out after a while though and the hens soon decided that they absolutely must get into the coop at this particular moment. At first the pecking at the run door was light and somewhat sporadic. It soon grew much louder and more spirited. Eventually, the hens decided that the hen pecking at the door at that particular moment (only one can fit in front of the door) wasn’t doing a very good job. So they took turns knocking each other off the ramp, with a new hen pecking frantically at the door. All this happened in about 45 minutes mind you, so I really wasn’t taking very long to clean the coop, but you could never have convinced the hens of it.

When the coop was finally cleaned, the hens came strutting in—fuming. They gave me a piece of their mind. A few jumped in the nest boxes and began to pick at the new hay. Violet chose to provide me with the full onslaught of her upset by screaming at me (in chicken no less). Rose decided to peck my boots. Let’s say that the hens were definitely not impressed with my cleaning job—it fell well below par.

At this point, the chicks began to look inside the run door, but they seemed most determined not to come in. They seemed confused, “Is this the right place?” After a few seconds one of the chicks screamed and ran back down the ramp, followed by the others. They refused to go into the coop until it was time to put them up for the night.

Chickens are suspicious of everything. It’s a natural behavior that keeps them alive in the wild because everyone loves a good chicken dinner. However, in the coop, the behavior often leaves me belly laughing. If you get chickens for no other purpose than to get a good laugh, you really could do worse. Let me know your thoughts about all things chicken at [email protected].