Working with Chicken Tractors

In the previous post, Working with Young Chickens, the chickens were just starting to get big enough to put outside. We were hardening them off so that they’d survive the elements. The chickens are most definitely large enough now to go outside (and have been for about two weeks). Each chicken has about 2 square feet of space in a chicken tractor. However, the chicken only lives in that space for a few days. During the time the chickens are living in the chicken tractors, they’ll actually use a 24-foot × 80-foot area (or about 25.6-feet per chicken).

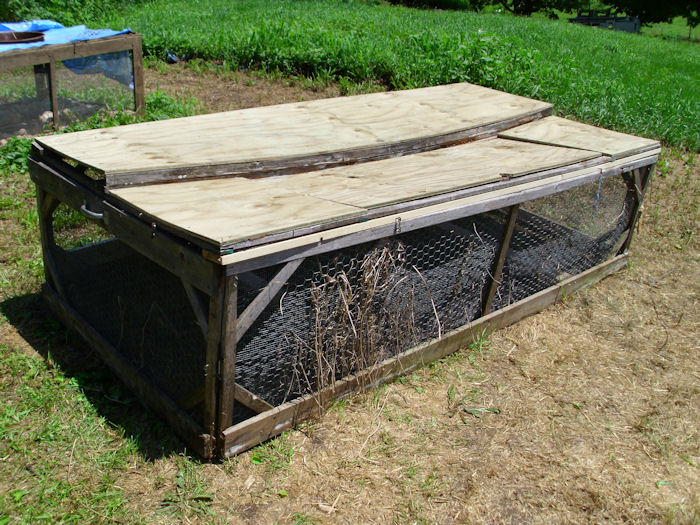
Of course, the question is, “What is a chicken tractor?” Our version of the chicken tractor is a square bottomless cage with a roof that allows the chickens to access bugs, grass, dirt, and other items that a chicken would normally want to access, but in a safe environment. Here’s one of our older chicken tractors.

ChickenTractor01

This particular chicken tractor is 4-feet wide and 8-feet long. It has handles at either end for moving it from place-to-place. Chicken tractors come a wide variety of forms, but the idea in all cases is to provide a movable cage that lacks a bottom. When the birds are young, we move our chicken tractors once a week. As they get older, we move them progressively more often until we’re moving them every three days before we process the last of them.

We build our chicken tractors from standard pine or fir boards and 24-inch high ¼-inch hardware cloth. Each chicken tractor requires about 40-feet of hardware cloth (24-feet for the sides and 16-feet across the top), so a single roll will build two chicken tractors that can house a total of 32 full grown birds comfortably. (Initially, you can put up to 64 birds in the two chicken tractors if you plan to cull the smaller ones for use in canned chicken, which requires three to four pound chickens, but larger birds require a minimum of 2 square feet each to be comfortable and to grow well.)

You shouldn’t use pressure treated lumber for your chicken tractor because the chickens peck at the wood. Anything the chickens eat, you also eat. That’s the same reason you don’t want to paint the lumber unless you want to invest in non-toxic paint. The only exception that you can reasonably make is to use ½-inch CDX plywood for the roofs because the chickens don’t get anywhere near them. Unfortunately, the use of non-treated wood means that we have to perform repairs on the chicken tractors each spring, but so far, the repairs have been minimal.

It looks like each chicken tractor will last six to eight years (perhaps longer as I gain experience). At that point, you need to build an entirely new wooden frame because the old one will rot enough to require replacement, but the hardware cloth, handles, and hinges are still perfectly good, so you can recycle them. In fact, it’s possible that you can even reuse some of the staples used to hold the hardware cloth in place. The cost to build a chicken tractor is about $240.00 with the hardware cloth, so you need to factor $30.00 to $40.00 into your costs each year to account for wear and tear on them.

As with any building enterprise, I made mistakes with the first few chicken tractors. For one thing, I tried using chicken wire the first time. The racoons demonstrated that they can easily overcome chicken wire and had a good chicken dinner as a result. Another thought I had was to build the chicken tractors with hinged joints so I could take them down each winter for storage. The solution proved problematic and the rotting was actually worse than if I had left the cages up all winter. I also made the door on the top of the cage too large the first time and the chickens demonstrated an unswerving ability to get out of the chicken tractor while I was trying to feed themleading to Keystone Cop episodes of chicken catching. I’m sure I’ll continue to learn new tricks as I build new chicken tractors.

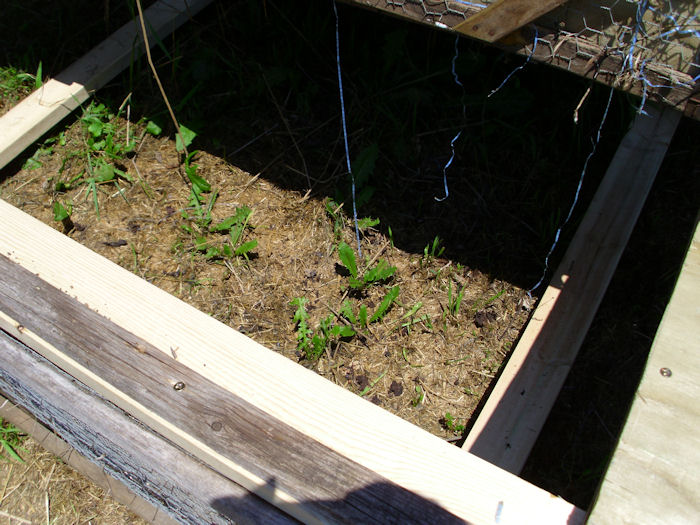
The chickens require boards to roost on inside the chicken tractor. Otherwise, they’ll get diseased easily and their breast feathers will become almost useless to them. Chickens also need exercise and a place to get their feet off the ground from time-to-time. Our chicken tractors have 2×4 roost like the ones shown here:

ChickenTractor02

We supply two roosts to divide the cage into thirds. The left side contains their water dish and the right contains the food dish. The center is completely free of any encumbrance so the chickens have a free space in which to roam. The roosts are 2-inches above the ground so that they aren’t too high to reach, yet provide complete protection from the ground, even when it rains.

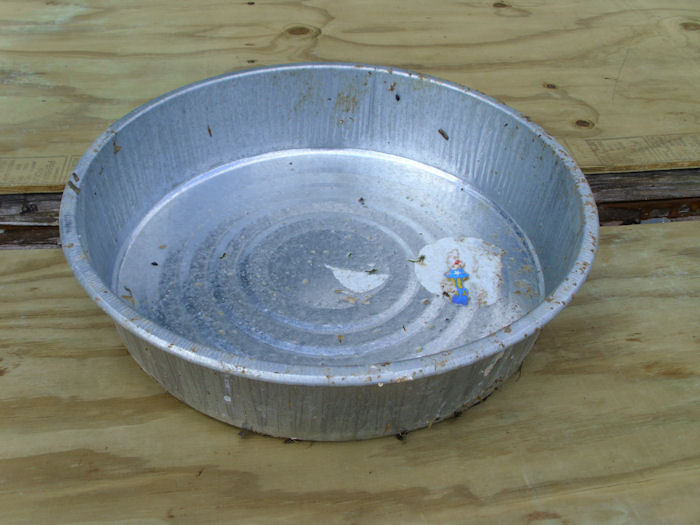
A lot of people use specialized feeders for their chickens. It’s actually better to use a short pan so that the chickens have good access to food and water. The water pan also serves as a bath, so we change the water at least twice a day (more often after a storm because the birds want to get any mud off). Here are the pans that we use:

ChickenTractor03

As you can see, it’s nothing fancy. A pan like this will last around five years. It holds 3 gallons of water, which is more than enough for the chickens in the chicken tractor. If you have any questions about these chicken tractors, let me know at [email protected].


Squash and Pesticides

Rebecca and I avoid pesticide/insecticide use whenever we can. However, I regret my laissez-faire attitude towards pesticides when we allowed a large family of termites to move into our home. If you find yourself in a similar position, you should be aware that a service provider like this termite control can help you deal with your pests in a sustainable way. Pesticides cost money, are costly to apply, and tend to ruin our health. They also kill pollinators, which are already in short supply. In fact, we’re able to use other solutions for every pest in the garden other than the squash bug. There is a host of bugs that will attack your squash, but the squash bugs seem to be the worst in this area.

Most other bugs are easily picked off (such as the tent caterpillars we squash by hand in the spring), drown in standard dish washing soap, killed using an environmentally safe method, like searching “terminix iowa” on Google and finding the best and closest pest control to you! Mulching (see my Mulching Your Garden post) can also help control bugs, as will keeping your garden weeded. One of the few good reasons to mow your lawn is to keep all sorts of pests under control by reducing the places they can hide. If you read this guide on mole control, you’ll see that mowing the lawn is one of the ways to rid your garden of moles, so it’s worth making the effort to maintain your lawn. (That being said, I’m a strong advocate of mowing the lawn less often to reduce mower emissions and to make the grass a length usable for purposes other than filling the landfill.)

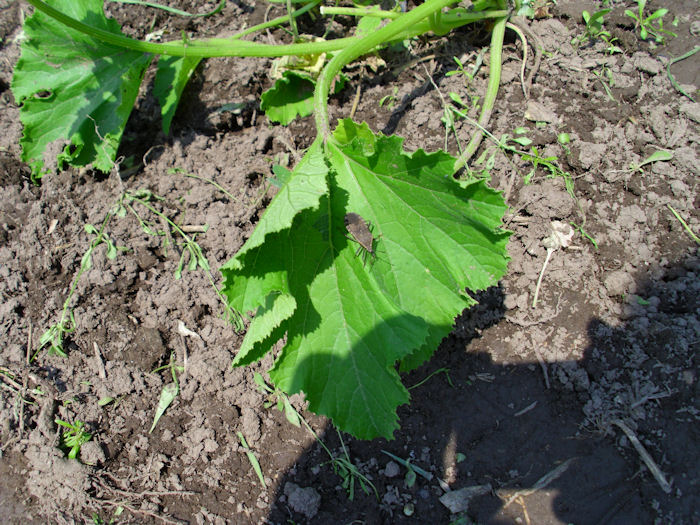
The squash bug will infest a squash or cucumber patch quickly in spring and will continue infesting it until every plant is completely destroyed. Adult squash bugs are incredibly difficult to kill. The pictures I’ve seen online don’t quite depict the monsters that we have in our area:

SquashBug01

I happen to catch this picture of one of our squash bugs. A single counting on one plant turned up 42 of themall breeding. As you can see, the picture here shows a bug considerably bigger than the bugs you’ll find on most sites online. I’m not sure why ours grow so large, but they are quite vigorous.

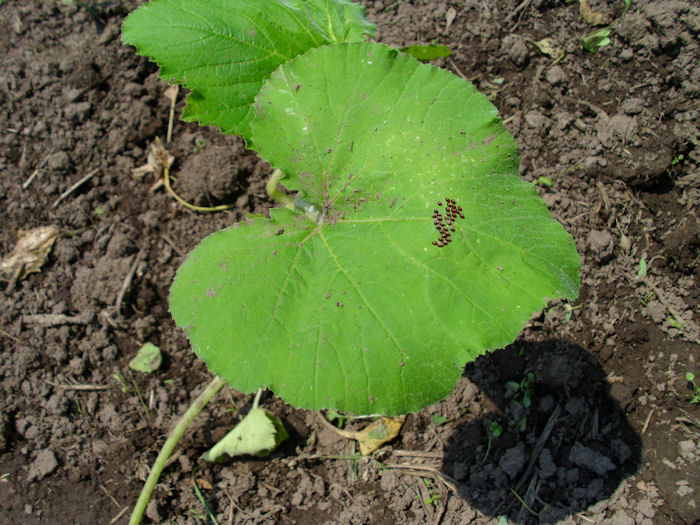
The eggs also aren’t limited to the underside of the leaf. The bugs seem quite happy to put them on both sides of the leaf and in large clusters. Here is just one cluster:

SquashBug02

As you can see, this cluster is on the top of the leaf and it isn’t in the V pattern discussed in online sources. The point is to examine the plant thoroughly for squash bugs because they’re determined to destroy your plants.

To keep pesticide use at a minimum, check the leaves regularly for these clusters. Trying to pick the eggs off won’t workyou’ll end up damaging the leaf and it’ll die. The eggs hatch in one to two weeks and get darker as they get nearer to hatching. These eggs are just about ready to hatch, so yesterday I applied Seven (Carbaryl) to the affected plants. I’ve been looking into some of the more environmentally friendly solutions, but so far Seven is the solution that works best. If you have a bug infestation, try some of these other solutions first, before you use Seven.

You can’t apply Seven three days before harvest (more if you want to be careful). In fact, once the plants start blossoming robustly, you don’t really want to use any sort of pesticide (it’s essential to look after pollinator health). The best idea is to look for the squash bugs early in the season and attack them vigorously so that you start with a strong vine. If you see eggs after the blooms start, try drowning them using a limited application of neem oil. Insecticidal soap is completely ineffective on hard bodied squash bugs. Smash adult bugs using your fingers if there aren’t too many of them.

There is a point each season where we lose the bug battle. The squash bugs simply overwhelm every defense we can mount. However, by that time our squash have grown quite large and produced well for us. The vines die too early, but not before they produce usable output for us. To ensure we get enough squash, we simply plant more plants knowing that they will die too early from the invading plague. Yes, we could keep them completely under control using Seven, but only at the cost of our own health and the health of our pollinators, so this approach represents a good compromise that ensures an adequate harvest. Let me know if you have any questions at [email protected].

Working with Young Chickens

You’ll remember from the Getting Started with Chickens post that we’re raising chickens this year. The chickens when the first five days with the heat lamp, after which we turned it off. After the first seven days, we started giving them food only during the first 12 hours of the day. In a factory setting, the chickens continually receive food, but we prefer that the chickens grow more slowly so they can develop strong bones and have a better survival rate. Of course, they get water whenever they want it.

Each morning now at 5:30, the young chickens wake up and immediately start chirping. Along with the birds outside our windows, it sounds a bit like “The Birds” or perhaps “Wild Kingdom.” There is no sleeping in our house after 5:30. All during the day the young chickens peck away at their food. Between 7:00 and 8:30 at night, the birds all nestle down and go to sleep.

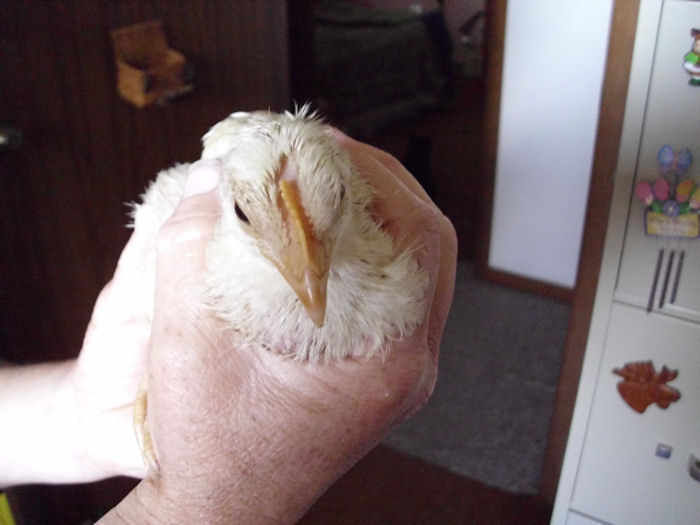
Our chickens are growing slowly, but steadily. You remember that they were mere puffs of yellow at one point. Here’s how they look today (about five times the size they started):

Chickens0201

Naturally, with all of this growth, the chickens need more space. They’re now in five boxes the same size of the original one. We can keep them in boxes for another week or two, but that’s about it. At that time, we’ll move them out to the chicken tractors, where each chicken will have two square feet of space in which to move about. That’s more space than you might imagine because they tend to clump together. You’ll hear more about the chicken tractors in my next post.

The young chickens are still eating chick starter, but they’ll move onto broiler mash soon. They’re also getting kitchen scraps and other more natural food (including bugs) now. We’re “hardening them off” at this point. What that means is that we dutifully take the boxes outside to a semi-shaded area each day. The chickens can hang out in the shade or move into the sun as desired. This stage helps the chickens adjust to the outdoors before we put them in the chicken tractors. If you suddenly move the chickens from an environment, such as your garage, to the outside, the shock could kill them.

Yes, you read correctly, we keep our chickens in the garage. One of our poultry farmer friends recommended the concept. It’s a wide-open space with an easy to clean floor. It could be the perfect place for you to raise your chickens too, with a bit of consideration. One of the biggest ones being the garage door, it can feel great to open that big door and watch the hens run out, it’s getting them back in that might be a problem. With the extra moisture and dirt generated from the chickens the door will also need more maintenance as well unless you’re keen on hiring your local garage door repair in Etobicoke that is. There is nothing more frustrating than a garage door that does not work properly after all. That farmer friend of ours recently had his garage doors repaired by a company that specializes in fixing local garage doors in Crownsville Maryland. He maintains his coop quite well, but it happened anyway. It’s just one of those that can occur, with or without chickens.

Each evening (about 4:00 or 5:00) we take them back into the garage for safety. At this point, they’re interesting enough that weasels, racoons, and even other birds would just love to have them for dinner. In fact, this is probably the most dangerous point in their growth because we still need to have them in the garagejust in case it gets cold (unlikely, but it can happen). Plus they’re still just a bit too small for the chicken tractors.

Heat is also a problem at this point. Young chicks require quite a bit of heat, but even they have limits. We’ve had a couple of extremely hot days and lost a couple of our charges due to the heat. Fans, time outside, and extra water just weren’t enough. The young chickens don’t need the heat of chicks anymore, but they haven’t developed fully enough to tolerate the heat swings of summer. So, you have to watch them carefully to ensure they’re staying comfortable.

We also lost a few of the chicks to other causes. One day the chicks managed to peck a hole in the box. We came home from town with more boxes, opened the garage door, and all the chicks came charging out. They looked quite determined to go on an adventure. So, we had to rush about gathering them up into the new boxes. It looked like one of those scenes you see on America’s Funniest Home Video, but this was real life. Unfortunately, we didn’t find all of them and other animals ate them.

We can tell that the young chickens are starting to make the transition between chicks and chickens. Their cheeps are becoming lower and a bit more like a cackle. No, it’s not the cackle of a chicken yet, but it’s getting there. They’re also starting to develop feathers. They haven’t quite gotten a case of the raging uglies yet, but they soon will as the hairy feathers they have now are replaced by a full set of real feathers. Let me know if you have any questions at [email protected].

Making Self-Sufficiency Relationships Work

A comment I regularly receive is that people can’t understand how Rebecca and I can work so closely together and for so many years. (We recently celebrated 31 wonderful years together, 25 of which we’ve worked in business together and 13 of which we’ve been self-sufficient.) Of course, there isn’t any hard and fast answer to this question and what works for us is unlikely to work for anyone else.

However, I think you could boil some of the key elements down to a few words, such as mutual respect. We do odd things like say, “Please” and “Thank you.” I say these things are odd because I don’t know that many couples exercise the option to show each other courtesy. We also expect that we’ll fail and that the other person will also failthat forgiveness is both necessary and desired. If people simply respected each other and employed courtesy freely, I’m sure the divorce rate would decrease. Worrying more about the other person than yourself has gone out of style, unfortunately, so I’m sure the divorce lawyers such as Simon Law attorneys who are skiled in this area, have nothing to worry about.

Divorcing is obviously not what the future couples had in mind when they married each other, but let’s face it, it happens, and the only way to get through it is to make sure both sides are treated fairly – that is the primary purpose of marital dissolution and the lawyers who can help with this approach the matter with both firmness and compassion because they recognize the vast amount of stress that one might feel going through a divorce and having their dreams for a happy home life sent into disarray. Moreover, with more and more couples choosing to get prenuptial agreements than ever before, getting an amicable divorce has never been easier. Provided that the prenuptial agreement has been checked over and validated by a team of prenup lawyers, then any property and assets owned by a couple should be able to be divided up in a mutually convenient manner.

That is not all though. Personally, I think that kinder divorces are going to become more commonplace. This is why divorce lawyers such as Peters And May are appointed to help those out who need a case settling. Divorce doesn’t have to mean hatred of the other, fairness should always play a part no matter the circumstances.

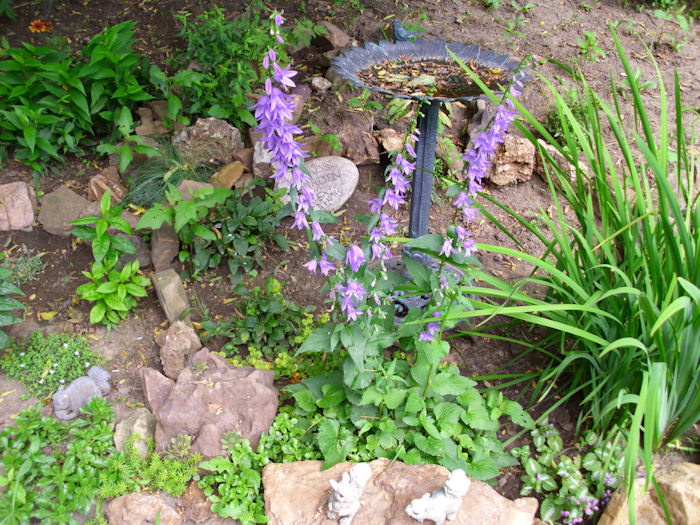
Rebecca has a special talent though that’s the topic of today’s post. She makes the mundane seem quite spectacular. Every year she creates a rock garden for me. It’s the first thing I see from the window when I get up in the morning and the last thing I see each night. I won’t share the window view, howeverthat’s exclusively for me. Here is a ground level view of some of the highlights of the garden. One of my current favorites is the Scottish bluebells:

ScottishBluebells

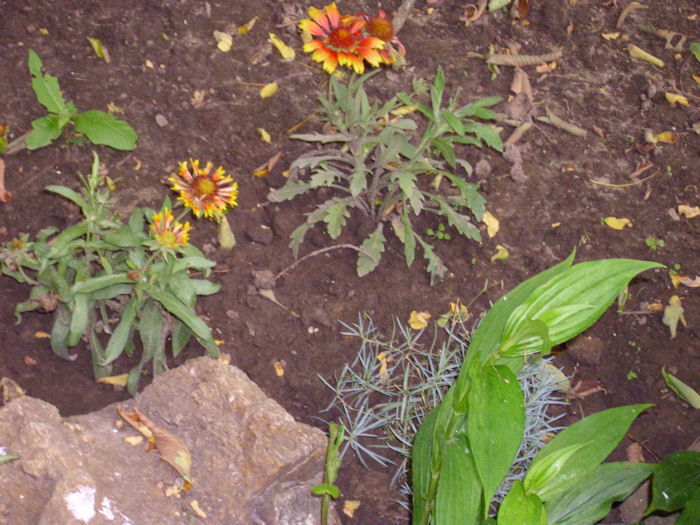
The purple flowers really show up nicely. They’re getting tall and spiky now. Another colorful member of the rock garden is the blanket flower shown here:

BlanketFlowers

From a color perspective, they remind me of a larger version of the Indian paintbrush that grows natively around here. We need to plant the blanket flower each year (the Scottish bluebells come back on their own each year).

The rock garden has a lot of shade, so Rebecca plants sedums freely in it. The blue spruce sedum is flowering right now. The yellowish flowers are a contrast to the rest of the plant and make it look quite fancy as shown here:

BlueSpruceSeedum

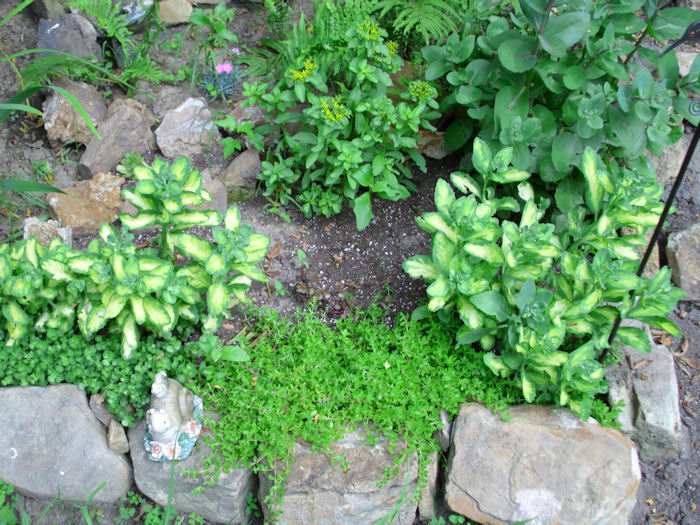
The autumn joy sedums are also quite pretty. The variegated version adds some lovely color to the rock garden as shown here:

AutumnJoySeedum

At the front of this part of the rock garden is a John Creech sedum. All of these sedums will last through the winter. Rebecca normally covers them with leaves. However, if I ever found them in precisely the same spot for more than two years in a row, I’d be amazed. Rebecca loves to move things around.

A final offering is the Japanese painted fern. it looks a bit metallic in some respects as shown here:

JapaneesePaintedFern

These are young ferns. As they mature, the center will take on a more reddish hue. I’m looking forward to seeing what they look like later.

The care that Rebecca takes in maintaining this rock garden (and all of our other gardens) tells me a great deal about her love for me. That, in turn, makes it easier to overlook the rocks in the road we take together. I can’t imagine working anywhere without my wife. Together, the two of us make an amazing team.

If you’re going to enjoy your self-sufficiency, you need to come up with a plan to maintain your relationships. Being courteous helps, but taking time to care is better. Can you imagine working with your significant other for 25 years? I certainly hope that you’ve found the same joy that I have. Write me about your best experiences at [email protected].

Easter Bunnies (Part 2)

You may remember my previous post about Easter Bunnies. At that point, they were hairless and barely recognizable as rabbits. Since that time, our Easter bunnies have continued to grow. After about three weeks the little rabbits will begin jumping out of the nest box. We call them “poppers” at that point. From that point on, the babies begin eating food on their own. It takes between 1 and 1½ months for the doe to ween the babies. At that point, the babies are more or less independent, but still spend plenty of time with mom (who continues to groom them).

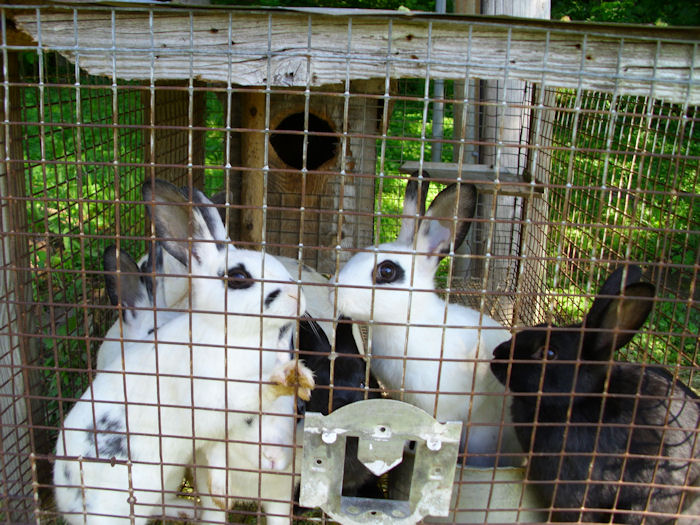
The babies are a little over 2 months old now. Mom will remain with the babies for another week or so, and then we’ll remove her. We’ll keep the babies together because they’re used to being together. Keeping the babies together for now will reduce stress. Here’s how the babies look now:

Rabbits01

Yes, it’s pretty amazing to see how fast they grow. There are six babies in here. We’ll separate them according to sex once they get a little bigger and put them in separate cages.

Some people wonder why we use such heavy cages. The rabbits are kept outside so they get fresh air and sunshine. (The nest box in the back of the cage is big enough to accommodate all of them in bad weather.) Because the rabbits are outside to be in a healthy environment, they’re at risk from predators. The other day we came home to find two dogs after the rabbits. So, the heavy cages aren’t there to keep the rabbits in, but to keep the predators out. You don’t want you bunnies eaten by any of the huge number of predators that feast on them, so it’s important to build sturdy cages well off the ground.

I’ve had a few people ask what we feed our rabbits. They do get rabbit pellets as one of their main dietary items. However, in addition to the rabbit pellets, we feed them garden scraps, grass hay (grass that we’ve let grow a little long and then raked up), corn (to help them keep their teeth ground down and to provide needed fat), oats (to provide needed fiber), and sticks from our apple and pear trees (a treat that also helps keep their teeth ground down). Each of the cages also has a salt block with minerals (the red blocksnot the solid white ones). We make sure that the rabbits also have clean water (they tend to dirty it by sitting in it at times).

The picture doesn’t show it, but bottom of the cage uses a much smaller mesh (½” × ½”). Otherwise, the rabbits would quickly become footsore and could get infections from cuts. The mesh allows fecal matter to pass through. We wash the cages regularly to keep them clean.


Planting Asparagus – Part 2

Earlier this spring, the Planting Asparagus – Part 1 post discussed some basics of getting the asparagus in the ground. Unlike many other garden plants, asparagus requires quite a bit of effort to get going. However, once planted, an asparagus bed will flourish for many years without much in the way of maintenance, so the up front effort is worth it.

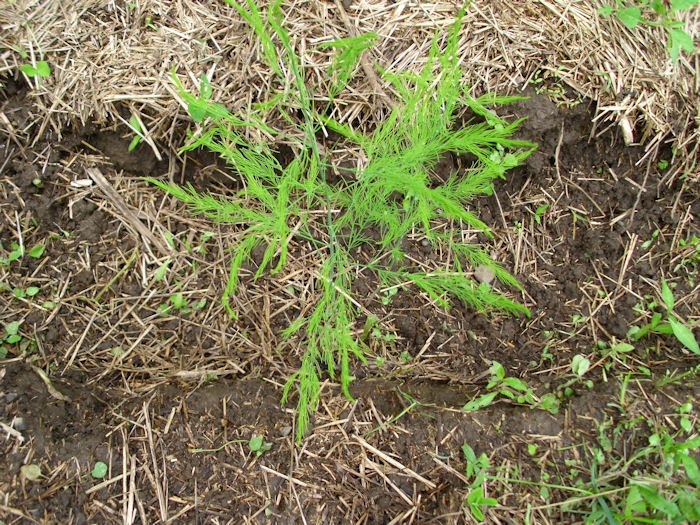
By this time, your asparagus has sprouted and you’ve probably weeded it more than once. It seems as if asparagus attracts weeds for whatever reason. Perhaps it’s the trencheswho knows for certain? If you’ve only seen asparagus in the store, you might have even pulled a few of the young plants accidentally. Here’s what your baby asparagus will look like:

Asparagus011

That’s right, it looks sort of like a fern on a stem. By now you should have a number of these fern-like growths in the trench. When they get this tall, you need to start adding dirt to the trench. Don’t bury any of the branches coming off the main stem. Add just enough loose dirt (don’t pack it down) to bring the trench up to the next level. Burying part of the stem will encourage the asparagus to grow taller.

Now you’ve got some asparagus to tend, but it’s still not done yet for this summer. We’ll visit this topic again. In the meantime, let me know if you have any questions at [email protected].


Getting Started with Chickens

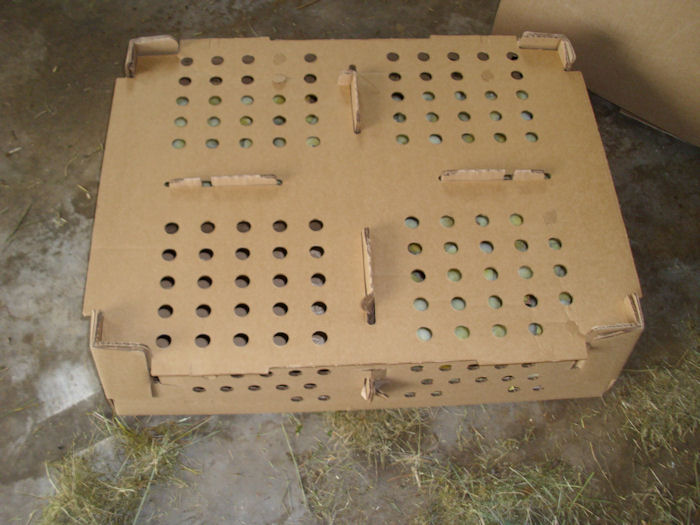
Rebecca and I don’t raise chickens every year. We raise chickens for two years, then give the land a rest on the third year. This cycle ensures we meet a number of goals, including the reduction of disease risks that could occur if we raised chickens every year. We normally start with 75 Cornish Rock chicks because that provides us with about 1½ year’s worth of meat. The chicks arrive in a box like this one:

Chickens0101

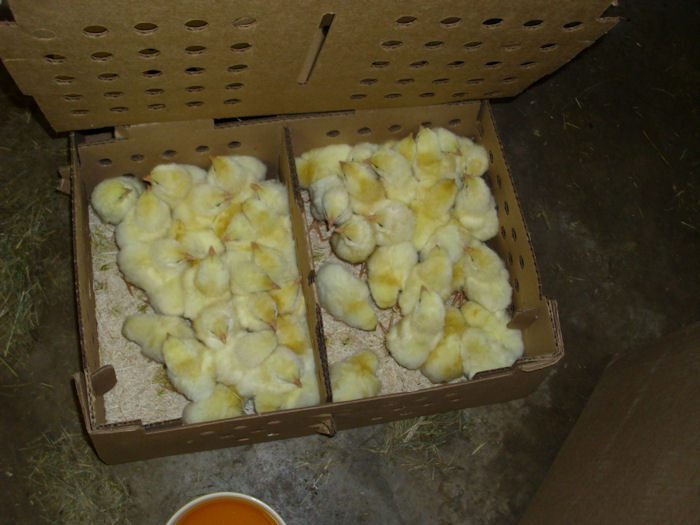
The baby chicks are packed pretty closely together so they stay warm. Chicks require a considerable amount of warmth or they’ll die. If you get chicks at some point, don’t be surprised at just how tightly they’re packed:

Chickens0102

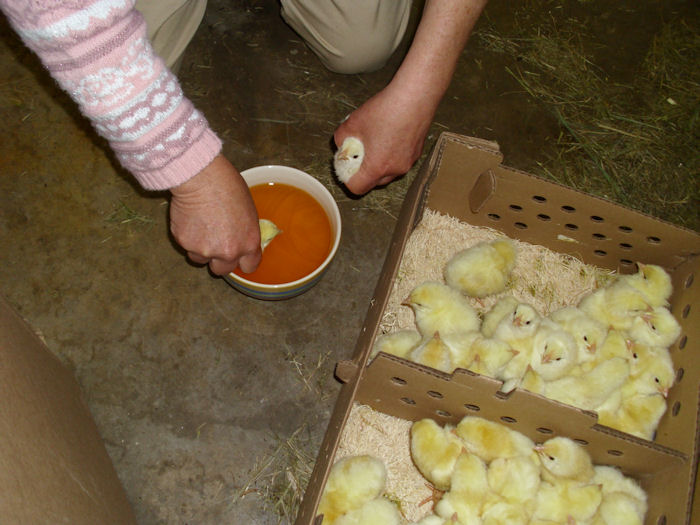
Of course, you’ll want to get them out of there as quickly as possible (the chicks will tend to want to run all over the place if you let them). However, the chicks don’t know how to drink when you first get them. The safest way to teach them to drink is to dip their beaks in a water solution as shown here.

Chickens0103

The solution shown here is actually Gatorade. It contains a number of things the chicks need to get started. We provide them with watered down Gatorade for the first few days and find that it reduces the number of chick deaths (in most cases, we lose 2 or 3 chicks during this first stage, but we’ve had years where we didn’t lose any).

At this point, you put the chick into some type of container (we use a large cardboard box) with a pan of chick starter. We don’t believe in using many chemicals with our chickens, but we do use a chick starter that has medications in it to prevent diseases such as coccidia.

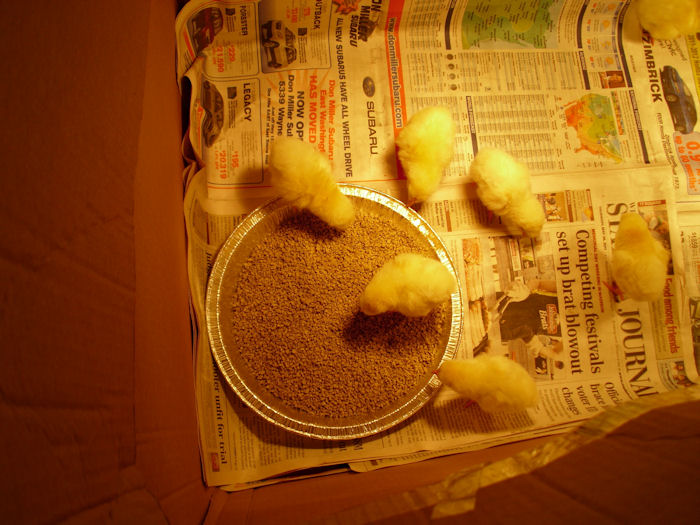
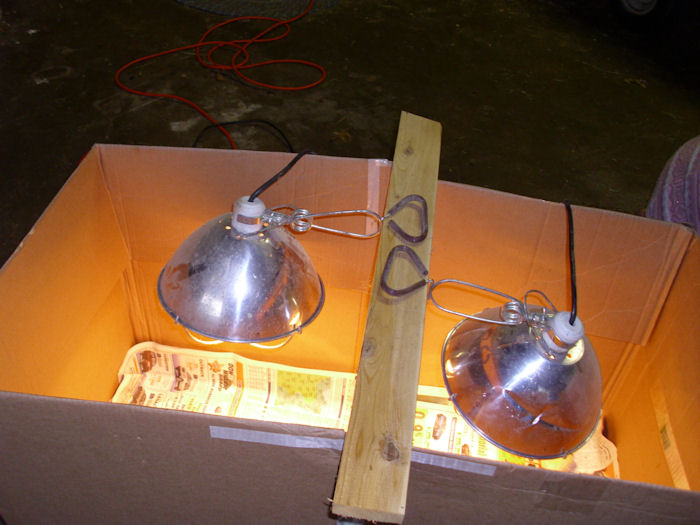
The chicks are kept under heat lamps until their full feathers grow in. We use disposable tin plates and replace their paper daily to ensure the chicks remain in the healthiest possible environment as shown here:

Chickens0104

As the chicks grow, we’ll move them to non-medicated food. In fact, they’ll often eat garden scraps, plenty of grass, and have access to various other items that chickens would normally eat (such as worms) because we raise them in chicken tractors. We also move our chicks outdoors to chicken tractors so they can get plenty of fresh air and sunshine. I’ll talk about this next stage in a later post. For now, the chicks are snug under the heat lamps.

Chickens0105

It’s important to provide the chicks with enough space, but not too much space. If you provide too much space, the more aggressive chicks will trample and kill the less aggressive chicks. At this point we supply 9 square inches of space for each chick. As the chicks grow, we increase the allotted area to 1 square foot per chicken.  The full grown chickens will have 2 square feet or more of space. (Full grown chickens normally receive 1/2 square foot of space in factory conditions.)

We’ll start out by making food available to them 24 hours a day.  After the first five days, we’ll withdraw food at night to prevent health problems. The chicks will have clean water available 24 hours a day. Overfeeding chicks (as is done in factory conditions) can result in a condition known as flip (the chick dies of a heart attack). We prefer to let our chickens grow slowly.


Berries in the Woods

Many people see a woods and think about the trees. In fact, that’s all they think about. However, a healthy woods is more than just the trees. A healthy woods has a significant biodiversity of all sorts of plants and shrubs that rely on the woods for cover and environment. Along the ground you’ll see interesting plants such as the bloodroot shown here:

BloodRoot

There are a number of sources that tell you what a useful plant bloodroot is. Of course, the woods are also the source of foods such as the morel mushroomnot that I was particularly successful in finding any this year. When I do find them, they cook up nicely in a stew or simply sauteed in a bit of butter. The woods provides this amazing bounty without any effort on my part, except in preservation efforts I take on the wood’s behalf.

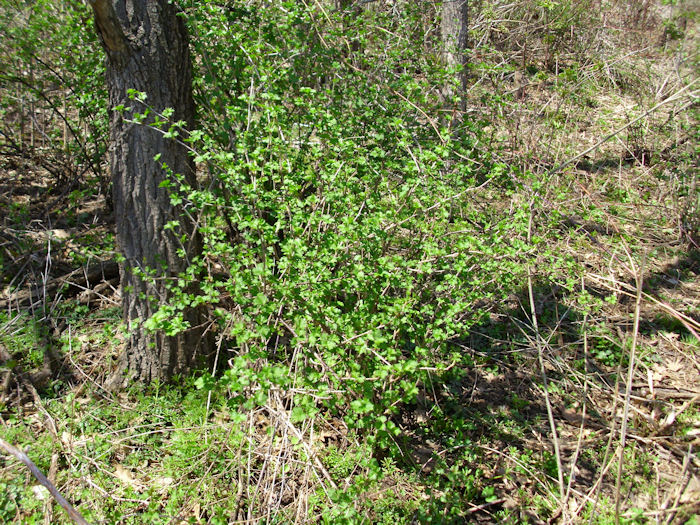
Keeping the woods happy is incredibly important. One food source (and the reason for today’s post) is the humble berry. My woods is simply packed with berry brambles so I have looked on campingfunzone.com to see which ones are ok to eat. A personal favorite is the gooseberry shown here:

Gooseberry

The gooseberries have already blossomed and set fruit. I won’t pick them though until mid-summer. I prefer a mix of dark black and green gooseberries for use in preserves (jam) or pie. We have both European and American gooseberries. Even though the European gooseberry is larger, the American gooseberry doesn’t suffer from mildew problems and produces more fruit per bush. I’ve found that the American gooseberries are a bit more tart than the European variety and that they’re better a bit on the green side. Mixed, the two kinds of gooseberry produce a delectable treat you won’t find in your local store (at least, not without a lot of looking). Gooseberries are terribly hard to pickthe long thorns will rip up your arms, even with long sleeves. Gingerly picking up the individual canes and picking the berries underneath works best.

A berry that ripens earlier is the blackcap (also known as a black raspberry). They also flowered and set fruit quite some time ago. I keep a watch on them because they tend to ripen quickly and don’t last particularly long on the bushes. Blackcaps are the easiest berries to pick and have an amazing flavor that differs from their red raspberry counterpart. They’re a bit smaller than red raspberries. We have a few red raspberry canes in the woods, but not enough to do much, so we mix them with the blackcaps. Because we don’t have a lot of blackcaps, we tend to use them for preserves.

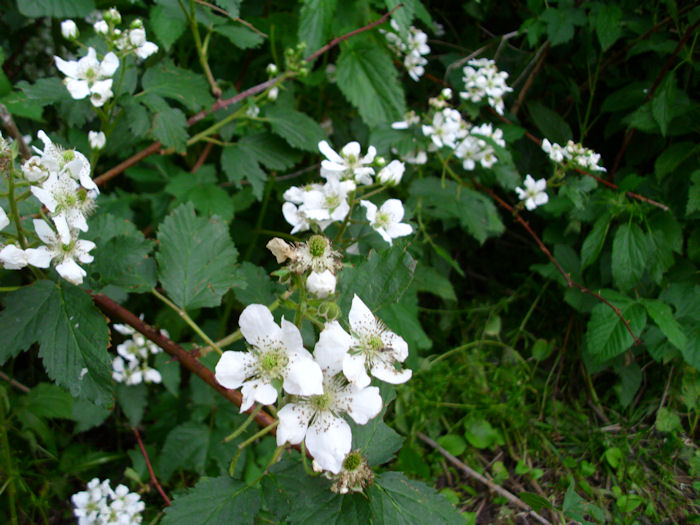
The last berry of the season is the blackberry. It’s larger than the other berries. In fact, in a good year, a blackberry will be about the diameter of my thumb and about half as long. The blackberries are still in bloom and won’t set fruit for another week or two as shown here:

Blackberries

In a good year it’s nothing for me to fill two or three gallon buckets with blackberries in an early morning picking session. We’ll use them for pie, preserves, wine, and just eating. The thorns of the blackberry are a bit longer than those of the blackcap. The longer canes make it harder to maneuver amongst the plants. In addition, our blackberries tend to grow on the sides of the hills, making them a little inaccessible at times. Of course, the taste is worth all of the effort.

I’ve only touched on a few highlights of the woods in this post. The biggest reason to maintain a healthy woods is that the majority of our pollinators live them. Every spring I count the number of different pollinators that visit our fruit trees. This year I counted eleven. Some I knew, such as the bumblebee, mason bee, black bee, and sweat bee. There were also a number of wasps and a few other varieties of pollinator that I haven’t researched as of yet. The point is, the majority of these pollinators come from our woods, so a healthy woods is essential to our health. Interestingly enough, the berry brambles in the woods are an important food source for pollinators in the early spring, so my delicacy is their delicacy too. What sorts of berries do you like? Let me know at [email protected].
 

Making Wine – Day 31

Welcome to Day 31the best day of the process . The previous post, Making Wine – Day 28, described how you can clear your wine. At this point, your wine should be clear. It may not be pristine, but you shouldn’t see more than a few particles here or there. If you see a bit of pectin haze, you probably won’t be able to clear it easily at this point and will need to amend your recipe to obtain better results in the future. However, if you’re seeing more than a few particles, wait a few additional days before bottling. If the particles don’t clear up in two or three more days, you might want to repeat the Day 28 processing. Professional wineries actually have a filtering system they use to improve the clarity of their winethe home wine maker has only time and technique to rely upon.

Assuming that your wine is clear, you’ll want to sterilize enough bottles to hold it. A single gallon container will normally provide four bottles of wine, plus a little leftover. These dregs are usually drinkable as long as you don’t pick up too much sediment, but you don’t want to bottle them. Choose good quality wine bottles. The type with the screw top don’t hold up well and you could even break the bottle during the corking process. Use the one-step sterilizer to wash the bottles and make sure you get any sediment out of the bottles. It helps to have a bottle brush designed specifically for wine bottles.

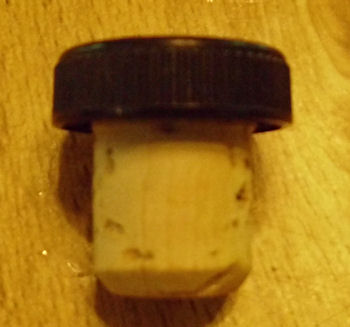
Before you can bottle your wine, you need to have a supply of corks and a corker. Many kits come with tasting corks that are absolutely worthless for storing your wine. These corks are probably good for three or four months worth of storage in optimal conditions and look like this:

WineDay31_1

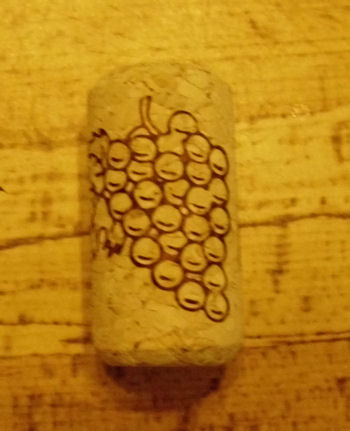
What you want instead is an actual wine cork that looks like this:

WineDay31_2

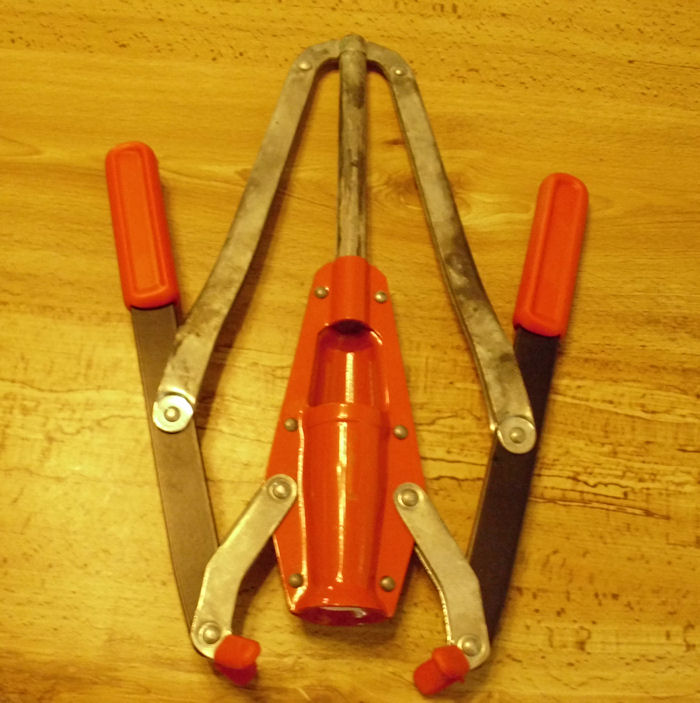
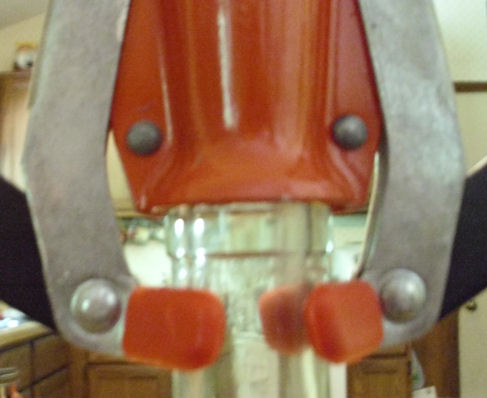
You can find them in several sizes and in a number of materials. My personal preference is actual cork, but I know of many people who are able to use the plastic corks with good results. It’s essential to choose a cork that fits the bottle you usea #8 cork fits the standard bottle used by wineries and normally found in kits. You may have to use a different size if you choose to store your wine in a 1.5 liter bottle. The choice of cork determines the corker you use. Even a cheap floor corker (required to use anything larger than a #8 cork) will cost you a small fortune. That’s why I chose standard sized bottles, the #8 corks, and a Portuguese twin lever corker that looks like this one:

WineDay31_3

The problem with this corker is that it does require a fair amount of arm strength to use. Some people much prefer the Gilda compression hand corker, which is moderately priced and requires about half the strength, or a bench model corker, which is whopping expensive and requires even less strength to use. The kind of corker you get is also dependent on how many bottles you plan to cork. Since I only make 2 gallons at a time, I get by corking 8 bottles and using the corker that I do works fine.

A problem that many new wine makers encounter is overfilling the bottle. If you overfill the bottle, you’ll find it nearly impossible to cork. In addition, the cork won’t seat fully (making spoilage more likely). It’s even possible that you could crack the bottle; although, I’ve never personally had this happen. Use the racking technique described on Day 10 to fill the bottles right to the point where the neck and shoulder meet like this:

WineDay31_4

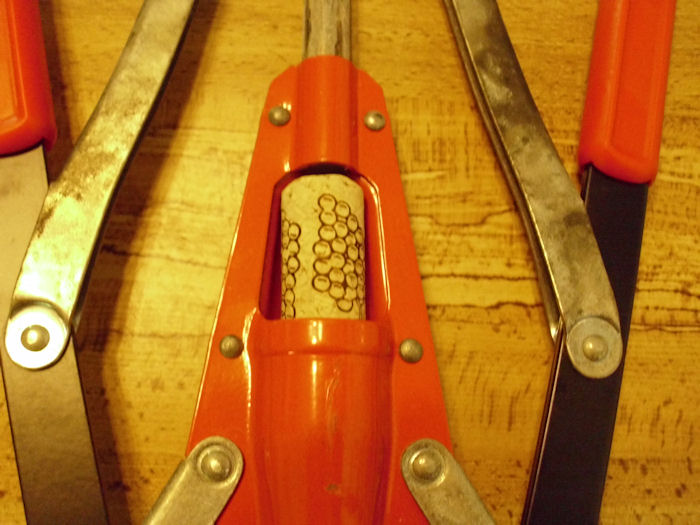
After you fill the bottle, insert the cork into the corker. Normally, the corker will have a slot you use to load it as shown here:

WineDay31_5

When you place the corker on the bottle, make sure it sits squarely and fully on the bottle top as shown here:

WineDay31_6

Push down on both handles (or on the single handle as determined by your corker) with an even, steady pressure. Eventually, the cork will seat properly and fully in the bottle. At this point, you can label your bottle and dress it up a bit (if desired). Even though your wine is drinkable at this point, you’ll normally wait three to six months for it to continue mellowing and settling. Store your wine in a wine holder designed to keep the cork wet in a cool, dry place. That’s ityou’ve completed the wine making process in a mere 31 days! So, are there any questions about day 31? Let me know at [email protected].
This post ends my basic series of posts about wine. Of course, there are all kinds of other topics I can cover. Let me know if you have a personal preference on what I discuss next in this blog.


Making Wine – Day 28

At this point, it doesn’t appear that there is any activity in your wine container, but activity still exits. Yes, the fermentation process is complete, but the wine is still in an early state. When you remove the air lock and take a whiff, you smell something with a distinct wine odor. It’s even possible to drink the wine now and you might possibly enjoy yourself, but you’d be cutting the process short.

The next step is a seemingly odd one because it requires a certain amount of wizardry on your part. You might have noticed that your wine is still a tiny bit cloudy and that it doesn’t quite have the taste you wanted. That’s what this post addresses. This is the fit and finish phase of your winethe phase that turns your homemade wine into something that could rival the best wine on the market.

Begin by racking the wine using the same procedure found on Day 10. Make sure you clean your container after you pour its contents into another container. Once you have the wine in a suitable container, put a small amount in a small glass. If you want to follow the fancy way of doing this, you’ll swirl the wine around a bit, inhale deeply, and then sip it gingerly. Personally, I find that taking a good deep smell and then tasting the wine using smallish sips is much better. If you used the Montrachet yeast, you’ll find that your wine has a nice odor, but that it’s probably too dry and that the flavor hasn’t quite come out. In short, the wine will be a little disappointing.

To overcome this problem, you add sugar to your wine. Now, remember that your wine is stabilized at this point, so you don’t want to make the wine horribly sweet (a problem I’ve noted in more than a few homemade wines) because there isn’t any yeast to clean up the excess. Add a little sugar at a time and then repeat the smelling and tasting process. Small sips are best. If you find that your nose is working less efficiently by the third or fourth try (I always do), give it a bit of a rest. Inhale some coffee grounds (if you have it around), then try again. The sugar you add at the end of the process is one the place where no one can offer you truly useful adviceeveryone has a different standard.

Now that your wine is properly sweetened, you need to perform one more step. This particular step caused me no end of consternation when I first tried it. It’s time to clarify your wine. Clarity problems come in three forms:

  • Pectin Haze: Pectin found in many fruits will cause a haze in your wine if not removed during the fermentation process. The haze is nearly impossible to remove at this point, but this step will help a little. However, most people won’t even notice it. The haze is slight in most cases. Amend your recipe to use more pectic enzyme (see the Day 1 post for details).
  • Free Floating Particles: Some wine ingredients, such as pumpkin (makes a wonderful warmed wine), will leave particles behind. The best way to avoid this problem is to filter your ingredients initially, before you add them to the wine. You can also use a two-step fermentation process that takes significantly longer than my wine making technique. This step will remove at least some of these free floating particles. Letting the wine rest for an extended period will also help.
  • Yeast Cells and Tanin Complex Materials: Your wine will almost certainly have yeast cells and other materials left over after the fermenting process. These particles are smaller than the larger particles left over from the main ingredient (such as pumpkin) This step always resolves this sort of clarity problems.


You need to obtain some Sparkolloid powder. Not every supply store stocks it, but the effort of getting this product is more than repaid by a superior wine. Add 1 tablespoon to 1¼ cup of vigorously boiling water and stir for five minutes (keep the pan on the stove while you stir). When I first started using this product, I tried all sorts of other time intervals, but you really do need to stir it for the full five minutes to obtain optimal results.

This action doesn’t apparently do muchat least, not much that you can see. What you’re actually doing is creating a static charge in the mixture (hence the need for vigorous stirring). This static charge will help clear your wine, much like an ion filter cleans the air in your house. The fine particles floating around in your wine are attracted to the charged particles in the Sparkolloid powder and drop to the bottom of the container. Interestingly enough, you’ll also find that this step improves both the taste and smell of your wine.

After you stir the Sparkolloid powder for five minutes, add 1/6 cup (8 teaspoons) of mixture to each gallon of wine. Mix it in thoroughly and pour the wine back into the container. Close the container using the airlock as usual. Put the wine containers in a cool location. That’s it! So, are there any questions about day 28? Let me know at [email protected].