Readers have written in to tell me that they’d really like to see more about Telnet after reading my Telnet Not Included post. Of course, there was the usual disagreement as to where I should begin the discussion, so I decided to start at the beginning. As previously mentioned, I do cover this command in my book “Administering Windows Server 2008 Server Core,” but don’t cover it in “Windows Command-Line Administration Instant Reference.”
Adding the Telnet Server feature to a server will likely require a restart. Consequently, you should only take this task on when you know that you can reboot the server afterward.
Neither books tells you how to configure Telnet, which is a necessary first step because Microsoft doesn’t install this application automatically any longer due to some serious security considerations. The purpose of this post then is to help you configure a Telnet setup that consists of a server (WinServer for the purpose of these posts) and a client (Main). You’ll need to substitute the names of your systems when working through the commands on your system.
It’s important to note that you can perform this task on a single machine by configuring both client and server.
WinServer is a Windows 2008 R2 Server. If you have some other version of Windows, the instructions I’m providing here might not work precisely.
- Choose Start > Control Panel. You’ll see the Control Panel window shown here.
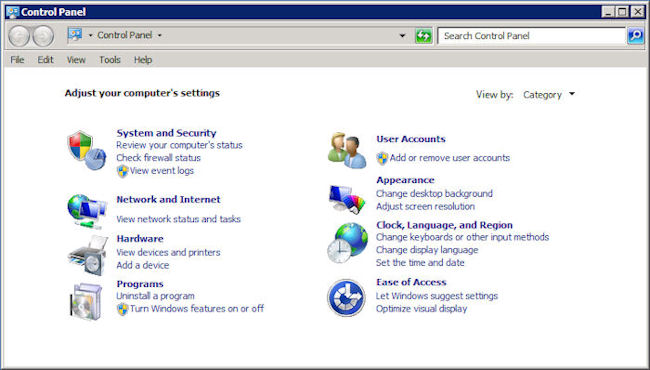
- Click Turn Windows Features On or Off. You’ll see the Server Manager window.
- Choose the Features folder in the left pane. You’ll see a list of installed features like the ones shown here.
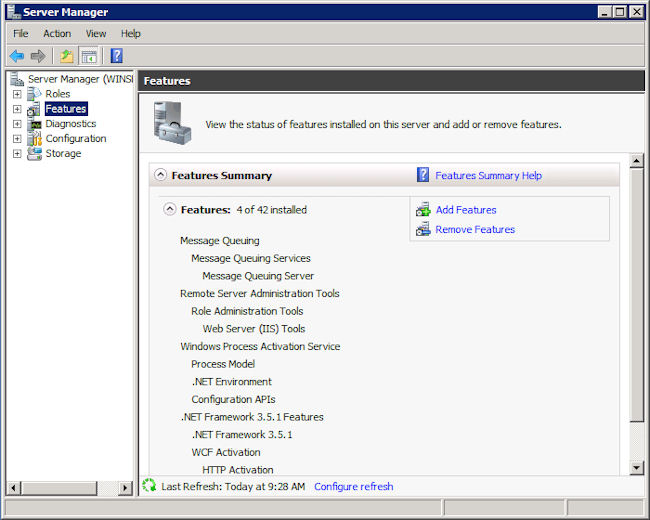
- Click Add Features. You’ll see the Add Features Wizard.
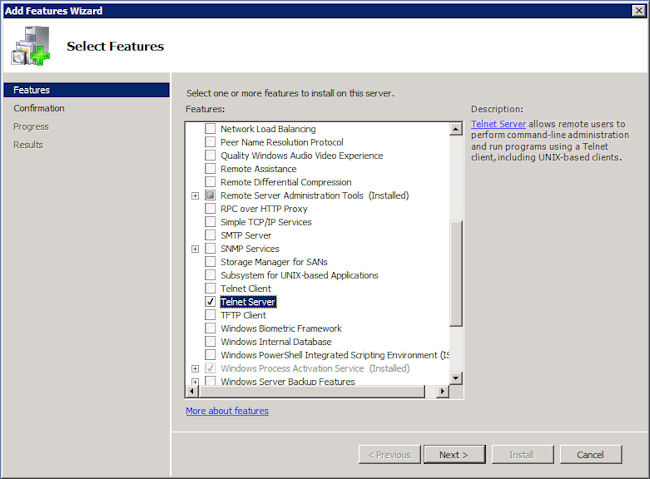
- Check the Telnet Server entry as shown here.
- Click Next. You’ll see a message about the server needing to be restarted after you complete the installation.
- Click Install. Windows installs the Telnet Server feature.
- At some point, you’ll see an Installation Succeeded message. Click Close to close the Add Features Wizard.
- If necessary, reboot your system (Windows will tell you when it’s necessary to reboot). Unfortunately, your Telnet installation isn’t active yet.
- Open the Services console found in the Administrative Tools folder of the Control Panel (depending on how your configure your server, you might actually find this folder right on the Start menu—my recommended placement for such an important feature).
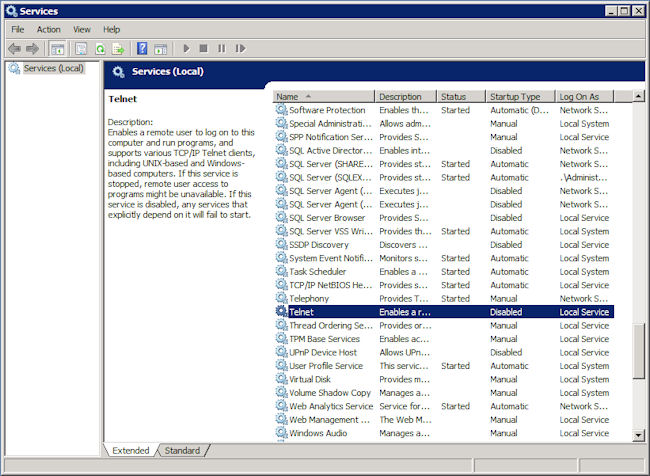
- Locate the Telnet entry. You’ll notice that the service is not only stopped, but it’s also disabled as shown here.
- Double click the Telnet entry. You see a Telnet Properties dialog box like the one shown here.
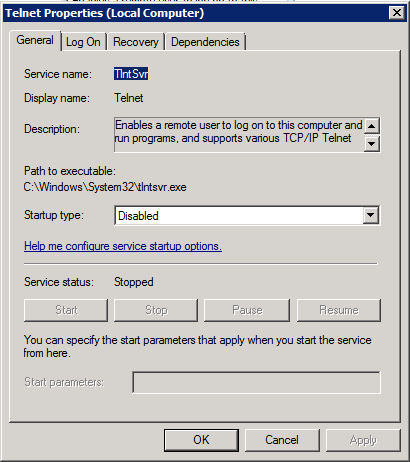
- Choose Automatic (Delayed Start) in the Startup Type field and click Apply. Using a delayed start seems to ensure fewer problems when working with Telnet.
- Click Start. Telnet should now be accessible on the system.
You can also configure the Telnet server from the command line. To set the server startup configuration type, SC Config TlntSvr Start= Delayed-Auto and press Enter. To start the server, type SC Start TlntSvr and press Enter.
Once you have Telnet installed on the server, you also need to install it on your workstation. The following steps get you started.
- Choose Start > Control Panel. You’ll see the Control Panel window.
- Click Programs. You’ll see the list of Programs options.
- Click Turn Windows Features On or Off. You’ll see the Windows Features dialog box.
- Check the Telnet Client option and click OK. Windows will install the Telnet Client.
Of course, you don’t know whether your setup will even work. So, it’s time to check your setup.
- Choose Start > All Programs > Accessories to display the Command Prompt link.
- Right click Command Prompt and choose Run As Administrator from the context menu. You’ll see a User Account Control dialog box where you click Yes. At this point, you’ll have an administrator level command prompt to use.
- Type Telnet WinServer (or whatever the name of your server is) and press Enter. You’ll see a message warning you about sending your password to the server. The password is sent in the clear and this is extremely dangerous from a security perspective.
- Type Y and press Enter. Telnet will create a command prompt session on the server for you.
- Type Echo %ComputerName% and press Enter. You’ll see that the name of the system matches your server, so you really do have a connection to it.
- Type Exit and press Enter. Telnet ends the session with the server.
- Type Echo %ComputerName% and press Enter. The output now corresponds to your local workstation.
At this point, you have a Telnet configuration to use for future posts. Of course, you can start experimenting with it now. Any command you can normally type at the command prompt, you can likely type at the Telnet prompt as well (as long as there are no graphics involved with executing the command). Now I need to know what sorts of topics you’d like me to cover. Send me e-mail at [email protected] with your requests.
