Making Tomato Juice

One of the ways in which we store food is as juice. Rebecca makes juice out of a number of items including tomatoes, apples, pears, and grapes. Of all of the juice sources, however, tomatoes are probably the easiest to work with. We’re having a stellar tomato year, so Rebecca decided to make tomato juice today. Of course, the tomato juice starts out with tomatoes. We used an entire bushel as shown here.

TomatoJuice01

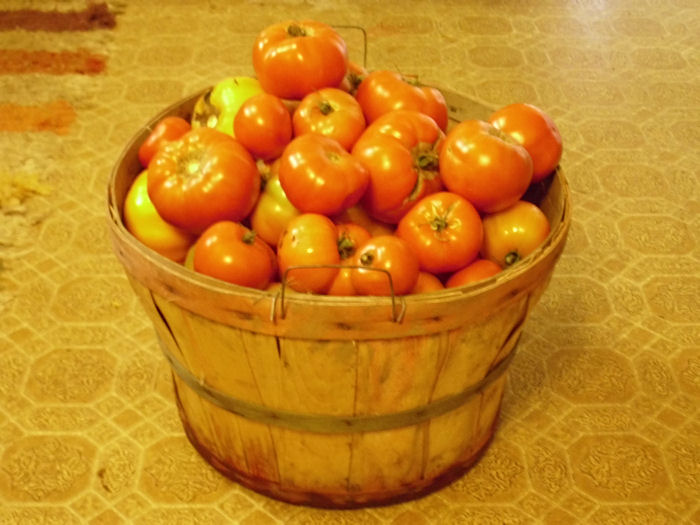
If you know how big a bushel basket is, you can see that our tomatoes are quite large this year. Fortunately, they’re also quite meaty. If you’re going to work with this many tomatoes (and believe me, this is only the beginning), you need some way to convert them to juice quickly. There are a number of tools available to perform the task, but our tool of choice is a Victorio Strainer:

TomatoJuice02

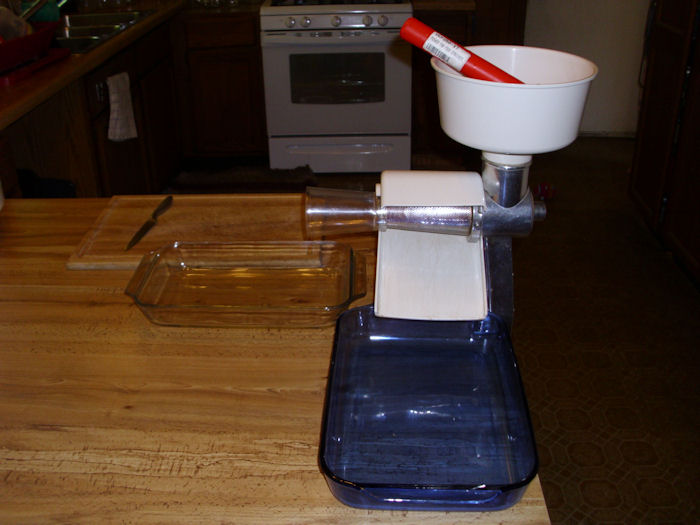
In order to use the Victorio Strainer properly, you need to provide two containers. The first holds the juice and it sits right below the output tray (the blue dish in the picture). The second holds the seeds and skin and it sits right below the strainer horn (the clear dish in the picture). Using glass works best for high acid foods such as tomatoes; otherwise, you can get a metallic aftertaste in the juice. Below the strainer (out of view of the picture) is a 5 gallon bucket to hold any liquid that comes out of the strainer (some leakage will occur) and to provide a place to put tomato that is cut out because it’s damaged in some way.

We use a two-person setup. One person (usually me) cranks the Victorio Strainer, while the other uses a knife and cutting board to cut up the tomatoes and place them in the hopper. A two-person team can whip through a bushel of tomatoes quite quickly. We did it in just over an hour this morning (and that included some cleanup and other chores, such as moving the juice to the stove).


I usually run the skins and seeds through the Victorio Strainer a second time to get all of the juice out of the tomatoes. Using this approach today netted an extra quart of juice. The downside to running the skins and seeds through a second time is that you could end up with extra seeds in the juice, along with bits of skin that many people dislike. The leftovers didn’t go to waste. After running the skins and seeds through a second time, I took the remains out to the chickens who were only too happy to eat every last bit.


The tomatoes today included a mix of red and orange tomatoes. Our garden has several varieties that compliment each other. As with a fine wine, a good tomato juice is the result of mixing several kinds of tomato together. Generally, if you have good tomatoes, you’ll get mostly juice and pulp, with very little in the way of waste as shown here.

TomatoJuice03

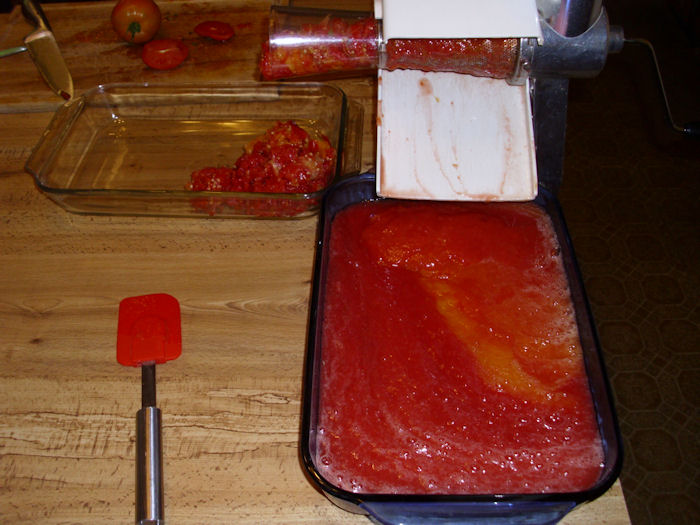
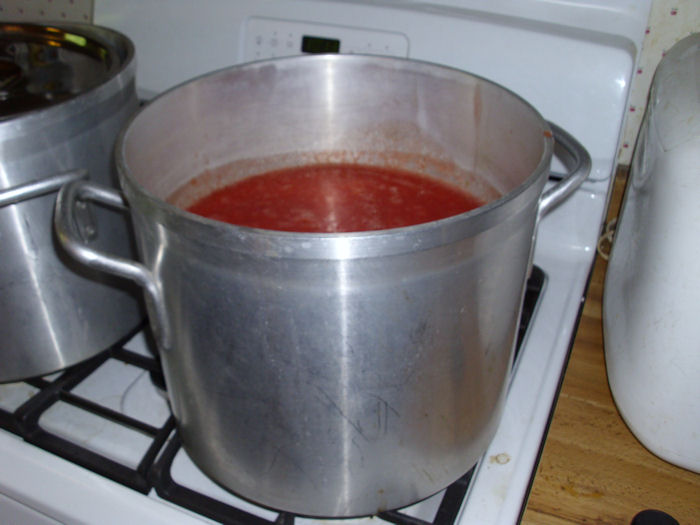
You’ll need a spatula to get the juice and pulp off the output tray. It also pays to clean off the outside of the strainer (the part with all of the holes in it) from time-to-time. A full bushel of tomatoes will easily fill a large pot like this one with space left over. (We asked a friend in the restaurant trade to purchase this professional quality pot for us, but the selection from Winware is quite nice.)

TomatoJuice04

Rebecca uses the instructions found in the Ball Blue Book to can the juice. That means raising the temperature of the tomato juice to 190 degrees. While the juice is cooking, Rebecca adds a little salt (not much is needed) and spices. Before she pours the juice into the jars, she adds two tablespoons of lemon juice to each quart jar to raise the acidity level. The juice doesn’t require pressure canning. Because this is an acid food, you can use a boiling water bath like the one shown here.

TomatoJuice05

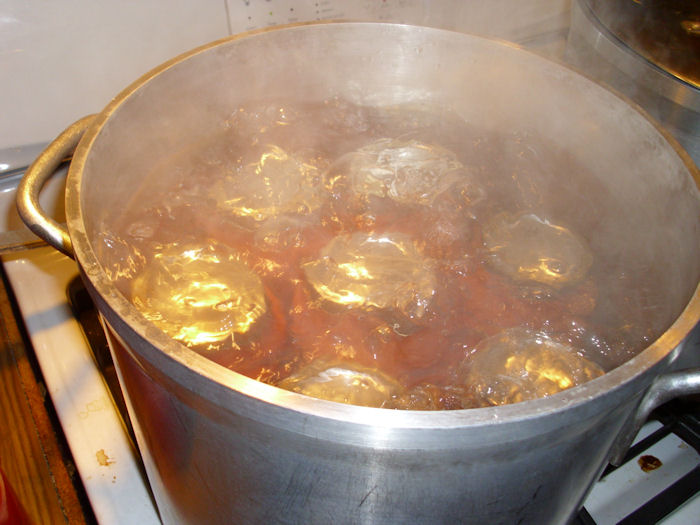
In order to ensure the juice won’t spoil, you process it for 40 minutes after the water comes to a boil. Normally you can fit seven jars into a large pot like this one at a time. You could also use a canner, but we found that we kept burning the bottoms out of the pot and it was costing more than buying a good pot to begin with.

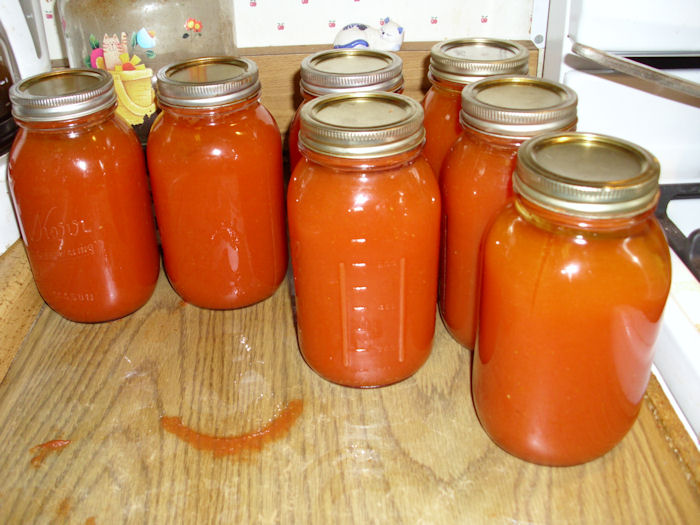
The result is these lovely quart jars of juice. One bushel of tomatoes produced 17 quarts of juice.

TomatoJuice06

After the jars have set for a while, you’ll notice some separation. It will look as if the water in the juice has separated from the pulp. This is perfectly normal. Just shake the quart before you open it to recombine the water and the pulp. Making tomato juice is an exceptionally healthy way to enjoy tomatoes anytime. You don’t have to use any particular kind of tomato to make juice. In fact, the juice usually tastes better (fuller) if you mix several kinds of tomatoes together, so you can make juice out of odds and ends used for other purposes. Let me know if you have any questions at [email protected].


Every Year is a Good and a Bad Year

It’s easy to become discouraged in the garden sometimes. During the early spring you plant everything that you’ll hope will grow and produce plentifully. By August, you know which plants will fair the best and which didn’t survive at all. This year has been especially tough because I ended up getting gallbladder surgery first, and then, because we do everything together, Rebecca ended up getting gallbladder surgery as well. So, with both of us on our backs, our garden had a true test of being weed-bound. Unfortunately, that means that some plants didn’t live at all and some won’t produce well. Our corn was nice and tall, right before the wind blew it over. Many of our peas succumbed to the weeds.

Still, it’s a good year in many respects and that’s the aspect I choose to focus on. Good years fill larders with interesting vegetables and fruits. Apparently, this is a bean year. We planted the normal amount of green beans and Lima beans. However, the plants decided to grow twice as tall and twice as wide as normal. We’re now inundated with green beans and will soon have a bumper crop of Lima beans as well.

GardenEnough01

Not every year is a good year for every vegetable. In my Dealing with Overabundance post, I discussed how some years produce so much that you can hardly fathom what to do with it all. Last year and the year before were horrible blight-filled years for tomatoes. This year isn’t just good, it’s amazing. Our tomatoes have never looked quite this good.

GardenEnough02

Those are the same diminutive plants I wrote about in Mulching Your Garden. They’re over five feet tall now and loaded with so many tomatoes that we’re going to try pickling some green tomatoes this year. (Remember to try different preservation techniques whenever you can to discover new ways of dealing with overabundance.) The plants have obviously overgrown the tomato cages and are threatening the other plants in that plot. Unlike previous years, there is absolutely no sign of blight, even at the bottom of the plants (which are usually brown by now). Sometimes in this case it is better to buy things like new mulching heads for skid steers so we can effectively clean up the area for a more serious overgrowing problem.

Many of our plants are late, but will most definitely produce. The egg plants and okra are of sufficient size that we’ll get the normal amount from them, or perhaps just a bit more than usual. As in most years, the egg plants are constantly under attack from flea beetles, but the lacing of their leaves hasn’t reduce their vigor much and we expect the normal crop from them.

GardenEnough03

The beets and kohlrabi look good this year as well. We fully expect to harvest enough to replenish our larder and even provide a little extra for next year. So, many plants are producing enough that we’ll most definitely not starve. It’s best to avoid focusing on the lack of corn this winter in the larder or the fact that there won’t be much in the way of broccoli (we will have an abundance of Brussels sprouts though).

It’s important to remember diversity in gardening. Don’t plant just one or two items-plant a variety of items so that at least a few of them produce well. This is our year for tomatoes and beans. Next year might be a corn year or the year of the mutant squash (we’ve had one of those lately and are still eating squash from that year). Each year is a good year for something, and an equally bad year for something else.

There is actually a health benefit to all of this. If every year produced copious quantities of whatever you planted, there would be no incentive to try something new. Gardens force people to moderate what they eat and to try new things. As someone once said, “Variety is the spice of life!” So, what has grown well for you this year? Let me know at [email protected]

Mulching Your Garden

Mulching is an extremely important part of maintaining your garden. Even if you don’t have time to mulch everything or have items that don’t mulch well (such as carrots and beets), anything you can mulch should be mulched. Using mulch has the following benefits:

  • Reduces the need to water
  • Keeps weed at bay
  • Reduces the pathogens that can splash up from the ground onto vegetables
  • Adds nutrients to the soil
  • Helps worms stay nearer to the surface where they benefit the garden
  • Lessens the chance of extreme temperatures damaging vegetables

There are many theories on the proper technique for mulching. This post doesn’t compare them because the bottom line is that any sort of mulching is better than none at all. If you find a technique that works for you, by all means, use it. My technique works well for me because I can get the materials at a very low cost.

Our mulching begins by laying down two sheets of non-advertisement newspaper. There are some things you should consider about the newspaper you use. First, make sure the newsprint is printed with soy or a similar non-toxic ink. Second, never use the glossy advertisements. Even if they aren’t printed with toxic chemicals (they often are), the glossy paper tends to repel water and takes a very long time to break down. Third, make sure the paper is large enough to overlap.

Make sure the newspaper does overlap by about an inch or so as you lay it down. Otherwise, the weeds will immediately spring up through any gaps. In the past, we’ve doused the newspaper in water before laying it down, but it works just as well dry as long as it isn’t windy.

Lay hay or dried grass on top of the newspaper. Make sure the grass is absolutely dry–brown is best. If you want to use this second technique, let your grass get a little long, let the newly mown grass dry a day or two, use a rake to move it about, and then let it dry for several more days before you rake it up to use it as mulch. We allow a full 2-inches of grass or hay on top of the newspaper. Here’s what our small garden looks like with mulch in place.

Mulch01

My uncle supplied us with some square bails of hay. They work quite nicely for mulch. The hay had been rained on, which ruined it for animal fodder. You may be able to find a farmer in your area who has some ruined or third cutting hay that you can buy for a pittance. Notice how the hay covers very square inch of the garden.

There is one addition trick you must employ. The mulch absolutely can’t touch the plants. For example, look at this tomato plant:

Mulch02

The newspaper and hay end in a small circle around the base of the plant. If the mulch touches the plant, it will cause the stem to rot and you’ll lose the plant. Rebecca and I didn’t know about this little problem during our first few years and we lost quite a few plants to mildew or rot.

The small spacing we allowed still provides all of the benefits of mulching. Tomatoes are especially prone to black spots. When it rains, the rain hits the soil, picks up pathogens, and splashes these pathogens onto the tomatoes. The mulch keeps the rain from splashing. The tomatoes can still get spotted from other sources, but it’s less likely.

As I mentioned previously, some vegetables don’t lend themselves to mulching very easily. For example, both carrots and beets are planted so closely as to make it impossible to mulch between the plants. You can mulch around the area in which the carrots and beets are growing though. Potatoes are planted further apart, so they mulch just fine. In fact, unless you plan to take time to hill your potatoes, mulching them is essential to prevent the potatoes from turning green (we don’t hill our potatoesit’s much easier to lift the mulch and the end of the season and almost pick them up off the surface).

Some mulching depends on the season. For example, bush green beans mulch fine during a hot and dry summer. They’re prone to mildew during a cool, wet summer. You need to allow a little more distance between the mulch and the bush green beans (or any other bush-style bean for that matter) to allow air flow. Pole green beans and peas don’t require this spacing because the majority of the plant is on a pole or a fence.

There are a lot of interesting ways to mulch a garden. For example, some people use cardboard for the task, while others use bark. The chocolate smell of cocoa hulls is quite enticing (assuming you can afford the high cost). Some materials provide properties that our hay mulching technique doesn’t provide. However, you have to be careful in choosing a material because some materials, such as bark, will actually leach important nutrients out of the soil (using bark can leach all of the nitrogen and also make the soil acidic). We actually do use bark for our blueberries and grapes because they require an acid soil, but we never use bark in the garden. Let me know your thoughts on mulching at [email protected].

Garden Structures

Rebecca and I have managed to get the garden planted for the year. The contents of the garden vary each year to accommodate our personal tastes and also to ensure the larder remains full of good things to eat. One of the big things we wanted to do this year was install a new fence potentially made from aluminum. We are yet to do this but we have learned all about this and more from Illinois Fence Company. So, this year, the small garden (20′ × 20′) contains tomatoes, okra, and eggplants. Our tomato crop is a bit smaller this year at only twelve plants in the main garden (we also have two plants in the salad garden).

Like many people, we use cages to hold our tomatoes. However, the somewhat strong winds in our area have a habit of knocking the tomato cages over and damaging the vines long before they’re through for the season. To prevent this from happening, I came up with a technique for enhancing the survivability of the cage setup using electric fence posts. Electric fence posts come in a number of formswe prefer the 48″ metal variety that comes with a triangle of metal at the bottom. You push them into the ground with your foot and they hold relatively well for smaller loads. Each tomato cage requires one fence post as shown here:

TomatoStakes01

Place the posts so that they’ll oppose movement by the wind, so that little triangle at the bottom has the best chance of holding when the wind is high. The next step is to get the tomato cages in place. Put the upper ring (or third ring on a four-ring tomato cage) on the outside of the post and the second ring on the inside of the post so that the post is threaded through the tomato cage. Use cable ties to secure both rings to the post as shown here:

TomatoStakes02

You can clip off the excess cable tie using a side cutter pliers. The combination of tomato cage and electric fence post normally keeps everything in place, even in high winds. The completed setup looks like this:

TomatoStakes03

The main garden (60′ × 80′) contains a wealth of vegetables and fruit this year. Of course, you saw some of the permanent bed items in the Early Spring – The Garden and Orchard post. In addition to those items, the main garden now contains potatoes, summer squash, winter squash, snap peas, standard peas, lima beans, green beans, broccoli, cauliflower, brussels sprouts, carrots, sweet peppers, sweetcorn, asparagus, and comphrey. Later in the season we’ll probably plant beets and perhaps a few other short growth time items.

We get bush varieties of vegetables when we can because they require significantly less setup than the vine varieties. However, peas are one of the vegetables for which there aren’t any suitable bush varieties, so we need to erect a fence for them to grow on. The one mistake I made in getting fencing material is that our fence is only 30″ highthe peas really need something taller (upwards of 5′). However, we just let the vines grow over the top and things work out acceptably.

The fence has to be movable from year-to-year to allow for rotation. In addition, we don’t grow peas every year, so sometimes the little fence is used for something else (such as cucumbers) and sometimes not at all. In order to grow the quantities we need, the fence is 50′ long.

The weight of the produce demands that we use something a little more sturdy that electric fence posts to hold the fence up at the ends, so this project requires T-posts, which are considerably heavier than electric fence posts (and more expensive too). In addition, you need a T-post driver/puller to work with this type of post. If you have good chest strength, you can get by with a much less expensive T-post driver and pull the posts out by wiggling and then pulling them out at the end of the year.

We used chicken wire as fencing material. It’s inexpensive, lasts an incredibly long time if you take it down each year (ours is 12 years old now and no sign of rust at all), and the small openings are perfect for peas and cucumbers to grow on. You begin by driving a T-post into the ground and then attaching one end of the fence to it using cable ties as shown here. There are other materials that also act as a maintenance free solution but we like to use the chicken wire as the veggies can climb it, giving it a dual purpose.

PeaPost01

Make sure you use enough cable ties and that the cable ties are of the heavier variety available in garden stores. Use the fencing to help define the location of the second T-post. Drive the T-post into the ground, pull the fencing as taut as possible (using one or two helpers), and temporarily attach it to the T-post.

At this point, you can add electric fence posts every four or five feet. Begin at one end and work toward the other end. Always pull the fence taut, using a helper to make it possible to attach the fence using cable ties. Use four cable ties minimum and make sure you use a double cable tie at the top (one cable tie slightly lower than the other) to keep the fence from sagging too much as the peas or cucumbers grow as shown here:

PeaPost02

Eventually, you’ll get to the other end of the row. At this point, you can reattach the fencing the T-post, if needed, to remove any slack. Your fencing won’t be completely straight, but it’ll look nice and provide good structure for the peas. Here’s my completed fence:

PeaPost03

Of course, the garden is far from complete. We’re weeding between the rows now and will then add mulch. More on these tasks in another blog post. In the meantime, let me know if you have any questions at [email protected].