Death of Windows XP? (Part 4)

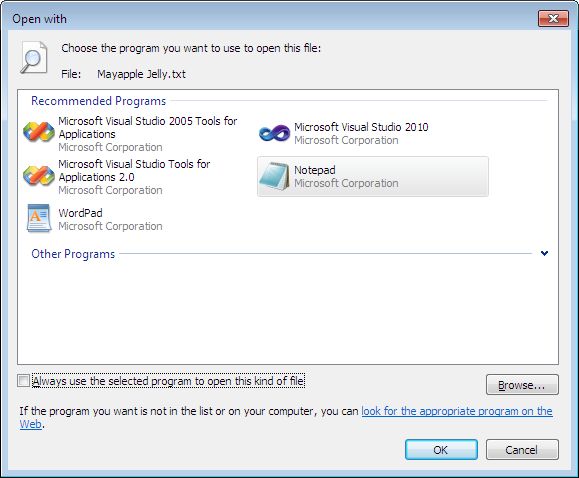
The last post, Death of Windows XP? (Part 3), was supposed to be the last word on this topic that won’t die, but as usual, it isn’t. The hackers of the world have figured out a new an interesting way of getting around Microsoft’s plan to kill Windows XP. It turns out that you can continue to get updates if you’re willing to use a registry hack to convince Windows Update that your system is a different version of Windows that is almost like Windows XP Service Pack 3, but not quite. You can read the article, How to get security updates for Windows XP until April 2019, to get the required details.

The hack involves making Windows Update believe that you actually own a Point of Sale (POS) system that’s based on Windows XP. The POS version of Windows XP will continue to have support until April of 2019, when it appears that Windows XP will finally have to die unless something else comes along. It’s important to note that you must have Windows XP Service Pack 3 installed. Older versions of Windows XP aren’t able to use the hack successfully.

After reading quite a few articles on the topic and thinking through the way Microsoft has conducted business in the past, I can’t really recommend the registry hack. There are a number of problems with using it that could cause issues with your setup.


  • You have no way of knowing whether the updates will provide complete security support for a consumer version of Windows XP.
  • The updates aren’t specifically tested for the version of Windows XP that you’re using, so you could see odd errors pop up.
  • Microsoft could add code that will trash your copy of Windows XP (once it figures out how to do so).


There are probably other reasons not to use the hack, but these are the reasons that come to mind that are most important for my readers. As with most hacks, this one is dangerous and I do have a strong feeling that Microsoft will eventually find a way to make anyone using it sorry they did. The support period for Windows XP has ended unless you have the money to pay for corporate level support-it’s time to move on.

I most definitely won’t provide support to readers who use the hack. There isn’t any way I can create a test system that will cover all of the contingencies so that I could even think about providing you with any support. If you come to me with a book-related issue and have the hack installed, I won’t be able to provide you with any support. This may seem like a hard nosed attitude to take, but there simply isn’t any way I can support you.


Creating Links Between File Extensions and Batch Files

A couple of weeks ago I wrote a post entitled, “Adding Batch Files to the Windows Explorer New Context Menu” that describes how to create an entry on the New context menu for batch files. It’s a helpful way to create new batch files when you work with them regularly, as I do. Readers of both Administering Windows Server 2008 Server Core and Windows Command-Line Administration Instant Reference need this sort of information to work with batch files effectively. It wasn’t long afterward that a reader asked me about creating links between file extensions and batch files. For example, it might be necessary to use a batch file to launch certain applications that require more information than double clicking can provide.

This example is going to be extremely simple, but the principle that it demonstrates will work for every sort of file extension that you can think about. Fortunately, you don’t even need to use the Registry Editor (RegEdit) to make this change as you did when modifying the New menu. The example uses this simple batch file named ViewIt.BAT.

@Echo Processing %1
@Type %1 | More
@Pause

Notice that the batch file contains a %1 entry that accepts the filename and path the Windows sends to it. You only receive this single piece of information from Windows, but that should be enough for many situations. All you need to do then is create a reasonably smart batch file to perform whatever processing is necessary before interacting with the file. This batch file will interact with text (.TXT extension) files. However, the same steps work with any other file extension. In addition, this isn’t a one-time assignment—you can assign as many batch files as desired to a single file extension. Use these steps to make the assignment (I’m assuming you have already created the batch file).

  1. Right-click any text file in Windows Explorer and choose Open With from the context menu.
  2. Click Choose Default Program from the list of options. You see the Open With dialog box shown here.
    Link01
  3. Clear the Always Use the Select Program to Open this Kind of File option.
  4. Click Browse. You see the Open With dialog box.
  5. Locate and highlight the batch file you want to use to interact with the text file (or any other file for that matter) and click Open. You see the batch file added to the Open With dialog box.
  6. Click OK. You see the batch file executed on the selected file as shown here.
    Link02

At this point, you can right-click any file that has the appropriate extension and choose the batch file from the Open With menu. The batch file will receive the full path to the file as shown in this example. It can use the information as needed to configure the environment and perform other tasks, including user interaction. Let me know your thoughts on linking file extensions to batch files at [email protected].


Using Assoc and FType to Create a New Type

On page 74 of Windows Command-Line Administration Instant Reference, I describe how to add an Open command to an existing file type, txtfile. The txtfile type already appears in the registry, so adding a new command to it is relatively straightforward. However, what happens if you want to create an entirely new type—one that doesn’t currently exist in the Registry?

Before you can do anything, you need to open an Administrator command prompt because Vista, Windows 7, and anything else newer won’t let you make the required registry changes with a standard account. Follow these steps in order to open an administrator command prompt.


  1. Choose Start > All Programs > Accessories.
  2. Right click the Command Prompt icon and choose Run As Administrator from the context menu. You’ll see a User Account Control dialog box.
  3. Click Yes. You’ll see a new command prompt open. However, instead of the usual title bar entry, you’ll see Administrator: Command Prompt. In addition, instead of opening to your personal user folder, the prompt will display C:\Windows\system32>. If you don’t see these differences, then you haven’t opened an administrator command prompt.


Let’s say you want to include a new file extension and it’s associated type. For example, you might want to create a .RIN file extension and associate it with a type of RINFile. Once you create this association, you may want to use Notepad to open the file. In order to perform this task, you need to use two different utilities as shown in the following steps.


  1. Type Assoc .RIN=RINFile and press Enter. You’ll see, “.RIN=RINFile” appear at the command line. This command creates a .RIN file extension entry in the Registry as shown here.
    AssocFType01
  2. Type FType RINFile=%SystemRoot%\Notepad.exe %1 and press Enter. Notice that you don’t enclose the command in double quotesit will fail if you do. You’ll see, “RINFile=C:\Windows\Notepad.exe %1” (or something similar) appear at the command line. This command creates the RINFile association in the Registry as shown here.
    AssocFType02
  3. Create a new .RIN file on your hard drive. You don’t have to do anything with it, just create the file.
  4. Double click the new .RIN file. Windows will open the file using Notepad.


This technique works with any file extension and association you want to create. In fact, you could easily create a batch file to patch user configurations where the file associations have become damaged in some way. The big thing to remember is that this is always a two-step process when the file extension doesn’t already exist or the association is new. Use the Assoc utility to create a link between any file extension and it’s association and the FType utility to create the association itself. Let me know if you have any questions about this technique at [email protected].


A Visual Studio Quick Guide to Accessibility (Part 1)

One of the most important accessibility aids that also applies to common users is the keyboard accelerator (or keyboard shortcut). In fact, this issue figures prominently in both C# Design and Development and Accessibility for Everybody: Understanding the Section 508 Accessibility Requirements. Just why Microsoft decided to turn this feature off in Windows 7 is a complete mystery to me. All of the pertinent examples in Professional Windows 7 Development Guide include keyboard accelerators, but you can’t see them. I’ve received a number of queries about this problem and decided that this two-part post on accessibility for Visual Studio developers is really necessary.

First, let’s discuss the keyboard accelerator from a programming perspective. A keyboard accelerator is the underline you see on a button, label, menu, or other control. You press Alt+Letter to perform the equivalent of a click or selection with the associated control. For example, most people know that you press Alt+F to access the File menu in an application that has keyboard accelerators properly implemented.

To create a keyboard accelerator, the developer precedes the letter or number with an ampersand (the & character). For example, to make the File menu respond to Alt+F, the developer would type &File in the development environment. I’ve always strongly encouraged the use of keyboard accelerators as a must have for any application because many keyboardists are seriously hindered by an application that lacks them. In fact, you’ll find the keyboard accelerators used in the vast majority of my books, even for examples that aren’t related to programming in any way.

Second, some developers who feel as I do about keyboard accelerators are upset that adding them to applications no longer works (apparently). Windows 7 hides the keyboard accelerators for some odd reason known only to Microsoft. The Ribbon interface provides an equivalent when the developer provides it, but we’re talking about all of the applications (the vast majority) that don’t use the Ribbon interface. It turns out that you must manually turn the keyboard accelerator support back on. Follow this steps to accomplish the task manually:


  1. Open the Control Panel, followed by the Ease of Access applet. Click the Ease of Access Enter link. You’ll see the list of options shown here:Accessibility0101
  2. Click Make the Keyboard Easier to Use. You’ll see a list of options for making the keyboard easier to use. Near the bottom of the list you’ll see the Underline Keyboard Shortcuts and Access Keys option shown here.
    Accessibility0102
  3. Check this option and then click OK. The system will now display the underlines as before.

One of the biggest questions I had while working through this is whether there is a method for turning this feature on or off at the command line. There isn’t any WMIC command that I’ve found to make the change (nor any other command for that matter), so I’m currently trying to discover the associated registry keys. I’ve found one so far. The On value in the HKEY_CURRENT_USER\Control Panel\Accessibility\Keyboard Preference key must be changed to 1. However, that value alone doesn’t make the change work, so there are more keys and values to find. If anyone has some clues to provide me about this particular need, please let me know at [email protected]. In the meantime, I’ll continue looking for the elusive registry updates required to automate this change.