Making Soup

One of the things I do during the winter months is make soup. However, I don’t make just a small amount of soup in a small pot, in a small way. Years ago I bought a large restaurant-quality aluminum soup pot that weighs a ton and holds at least four gallons of soup. Making soup in large batches seems to produce a much better result and the large, thick, heavy soup pot works so well that nothing seems to burn in it. Well, I guess if I tried really hard it would burn, but I don’t try really hard.

Most of my soups start out with meat of some sort (beef, pork, chicken, venison, or lamb), but I normally use soup bones, lots of them. Sometimes I use a whole chicken, a large one. No matter what kind of meat I use, I start out with at least five pounds of it, sometimes more. I start the cooking early in the morning and cook the meat very slowly (never ever boiling it), scooping off the blood that rises to the surface and adding spices and salt afterward. I favor using more spices than salt. In fact, I just barely add salt to taste. I use spices that you normally wouldn’t think of in my soups such as, cinnamon, nutmeg, and cloves, which helps me keep salt to a minimum. You don’t add a lot of these spices, the effect is meant to be subtle. In some cases, such as with beef, I use pickling spice (but make sure to remove the tea ball containing the pickling spice after no more than 20 minutes or it gets bitter). Favorites with chicken include sage, rosemary, and thyme. Sometimes I add orange or lemon peel. A common addition are onions and I sometimes add a bit of fresh garlic (minced fine) as well.

I like my soup to be really nutritious, so I add plenty of vegetables. Most of my soups contain corn, carrots, and potatoes. However, I don’t stop there. The soup I made the other day also contains turnips, Holiday Soup Mix, and celery. I’ve been known to add things like green beans, kohlrabi, rutabagas, turnips, and all sorts of other odd assorted vegetables. In fact, if something in the larder or freezer is getting a bit old, it goes into the soup pot. The point is that the soup is far from plain. It contains good nutritional value from a wide variety of wholesome vegetables.

In addition to all of the vegetables, I sometimes add mushrooms. As with the vegetables, I normally get a better quality mushroom, not those canned kind. My personal favorites are baby portabella, shiitake, and oyster mushrooms, but I’ve used others as well. Even a good quality button mushroom can be a nice addition. I’ve never had much success using morels in soup. Besides, morels were meant for cooking in butter and garlic, with a bit of salt.

To top my soup off I usually add pearled barley. Using pearled barley gives the soup that finishing touch, a kind of nutty flavor that you find in only the best soups. As an alternative, I sometimes use half and half wild and brown rice. I generally don’t add noodles to my soup; they fall apart quickly, don’t have much nutritional value, and tend not to freeze or can well.

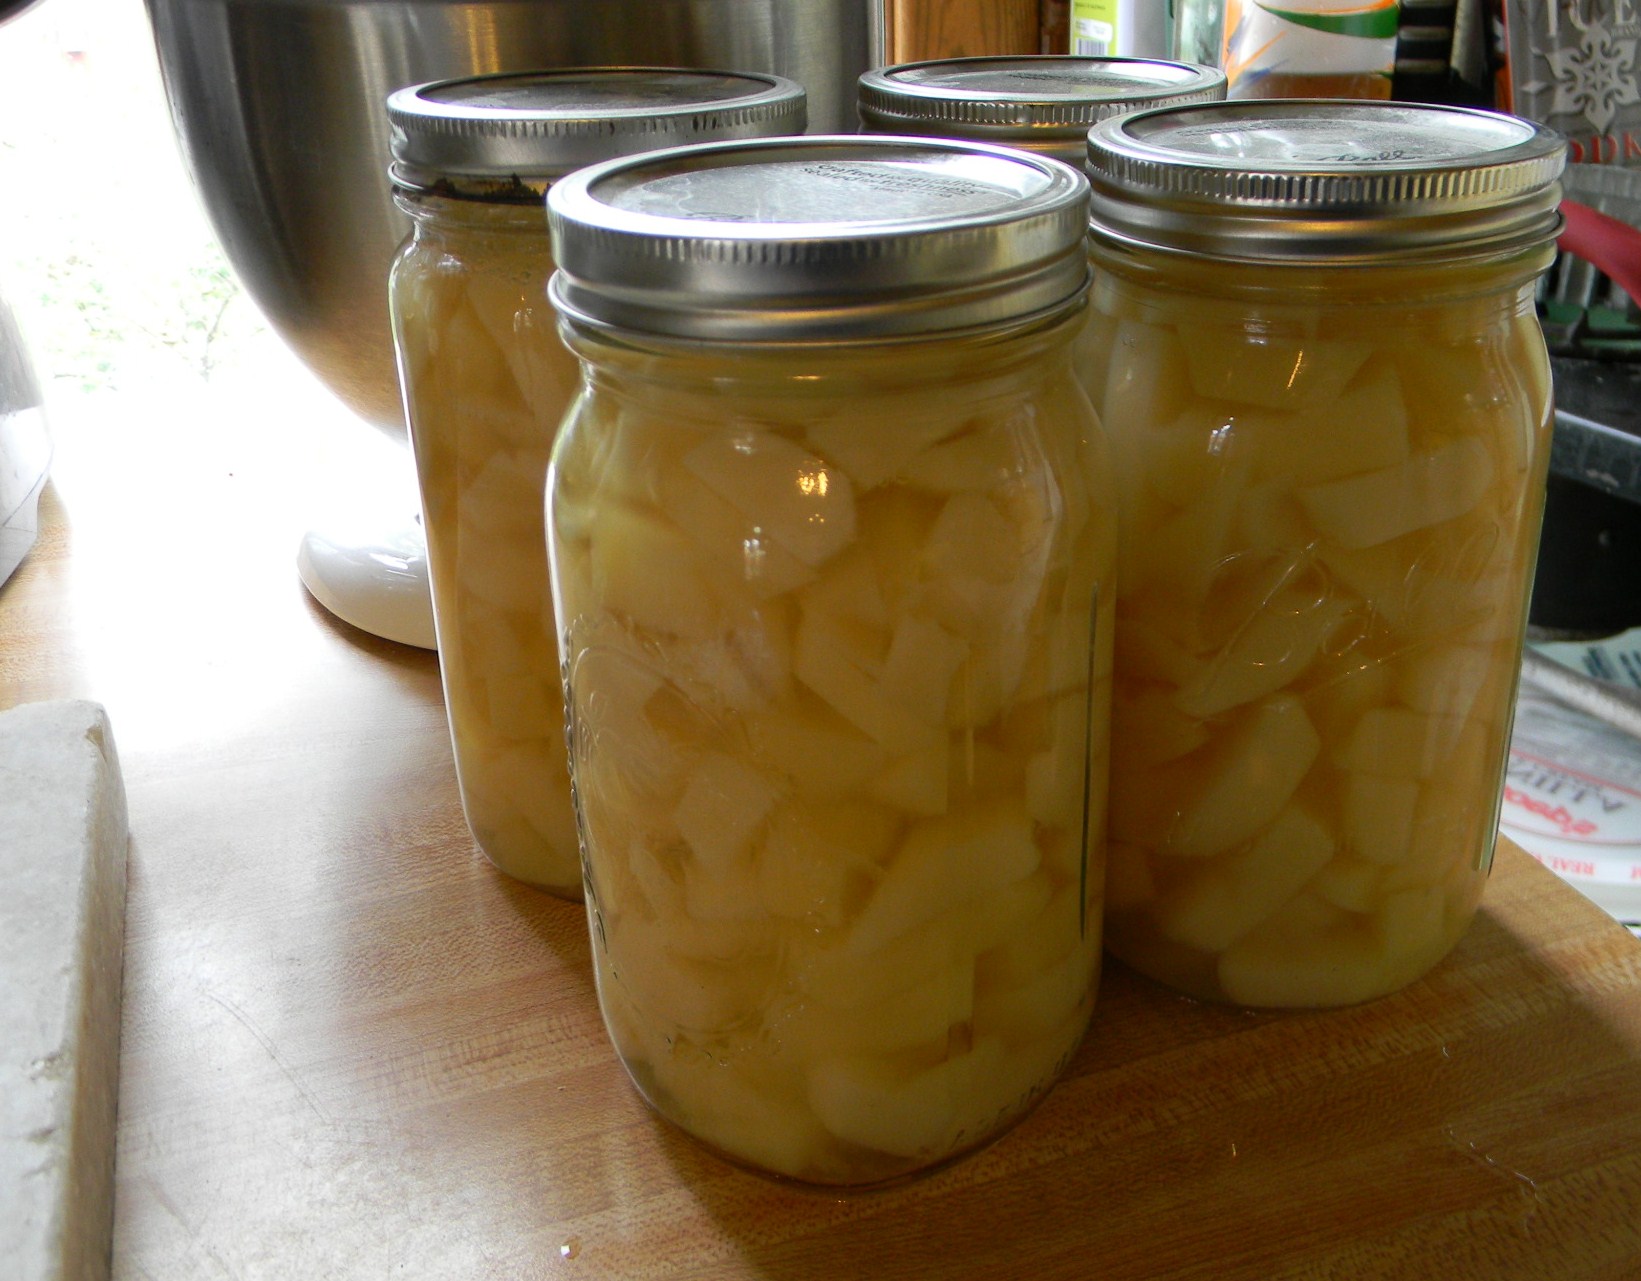
Speaking of freezing and canning, there is no way one person can eat four plus gallons of soup before it goes bad and that’s the point. I either can or freeze the excess soup for later. Soups that are a little more broth get canned in one quart containers, while robust soups get frozen in one gallon bags. A word of advice, don’t overfill your gallon bag. I put three quarts of soup at most in my gallon bag and sometimes less depending on the soup. Lay the bags flat in the freezer as they freeze and you’ll find that your bags of soup stack well. If I’m having a really busy time, I simply get out a quart or a bag of soup and I have a nutritious meal I don’t have to cook. Soup is comfort food. Let me know your thoughts about soup at [email protected].

Harvest Festival 2016

This has been an interesting year in the garden. In looking at the Harvest Festival 2015 post, I see a year that offered me what I would call the standard garden items. Not so this year. The problems began with a late frost that wiped out my grapes and pears. In fact, it nearly wiped out my apples as well, but I learned a curious lesson with the fruit this year because of the apples. All the outer apple trees had no fruit, but those in the center of the orchard did have some fruit. In other words, the trees on the outside protected those on the inside. I didn’t get a lot of fruit this year, but it isn’t a big deal because my larder is setup to provide multiple years’ worth of any particular item. The lesson I learned was not to prune too heavily when the weather is uncertain (as it was this year). In fact, the reason the apples survived as they did was because I didn’t have time to prune them much at all.

The garden also behaved quite oddly this year due to the weather. The Wisconsin winter was semi-mild this year without nearly as much snow as normal, so different bugs survived than normal. In addition, the weather was either hot or cold, without a lot of in between this summer. It has also been the fourth wettest summer on record. All these changes produced prodigious amounts of some insects that I don’t normally see and the vegetables didn’t produce as expected.

As an example of odd behavior, I normally have a hard time growing cauliflower. This year I grew huge cauliflower and one plant is attempting to grow a second head, which is something that never happens here. On the other hand, broccoli, a plant that always does well, didn’t even produce a head this year. All I got were some spikes that didn’t taste good (they were quite bitter). The rabbits didn’t even like them all that well. The cauliflower is usually plagued by all sorts of insects, but this year there was nary a bug to be seen. The point is that you need to grow a variety of vegetables because you can’t assume that old standbys will always produce as expected.

Two other examples of odd behavior are okra (which normally grows acceptably, but not great) and peppers (which often produce too well for their own good). This year I’m literally drowning in beautiful okra that gets pretty large without ever getting tough, but the peppers are literally rotting on the plant before they get large enough to pick. I’m not talking about a few peppers in just one location in the garden either—every pepper plant completely failed this year.

Location can be important and planting in multiple locations can help you get a crop even if other people are having problems (and I didn’t talk to a single gardener this year who didn’t have problems of one sort or another). One example in my case were potatoes. I planted six different varieties in six completely different locations in the garden. Five of those locations ended up not producing much of value. A combination of insects destroyed the plants and tubers. All I got for my efforts were rotting corpses where the potatoes should have been. The last area, with Pontiac Red potatoes, out produced any potato I’ve ever grown. The smallest potato I took out of this patch was a half pound and the largest was 1 ¼ pounds. I didn’t even find any of the usual smallish potatoes that I love to add to soup. The potatoes were incredibly crisp and flavorful. The odd thing is that this patch was in an area of the garden that doesn’t usually grow potatoes very well.

A few of my garden plantings didn’t seem to mind the weather or the bugs in the least. My peas did well, as did my carrots. I grew the carnival carrots again because the colors are so delightful and even canned, they come out multiple colors of orange, which dresses up the shelves. I also grew of mix of yellow wax and green beans this year. The two beans work well together canned. They have a nicer appearance than just yellow or just green beans in a can. However, because the two beans have slightly different tastes, you also get more flavorful meals out of the combination.

I still stand by the statement I made long ago when starting this blog, every year is both a good and a bad year. Because I planted a wide range of vegetables and ensured I didn’t plant all the vegetables in a single location in the garden, I ended up with more than enough vegetables to can or freeze. No, I didn’t get all of the vegetables that I had hoped to get, but I definitely won’t starve either. My larder is quite full at this point. Let me know your thoughts on ensuring a garden has a significant variety of items in it to ensure success at [email protected].


In Praise of the Humble Potato

You say Po-TAE-to and I say Po-TA-to.

Kennebec. Pontiac. Norland Red.

Burbank. Russet. Yukon Gold.

Even the names are beautiful, humble and poetic.

So useful. So nutritious. So versatile.  So comfortable and comforting.

Just in case you’re wondering, all Russet potatoes are Burbanks, but not all Burbank potatoes are russet. The Russet Burbank is described as a natural genetic variant of the Burbank potato. It has a russet-colored skin that visually identifies this potato type. The Russet is the world’s predominant potato used in food processing, so you have probably seen a lot of them and eaten even more.

I grew up in a meat and potatoes household. Although my mom grew a garden full of a wide variety of vegetables, my dad really only believed that there were 4 kinds of vegetables worth eating. Those were corn, peas, beans and potatoes.   As a result, most of our meals were created with those basics but there was always plenty! If we didn’t have enough production of potatoes from the garden, my dad would stop by a roadside stand in the fall and buy a bag of 100 pounds for about $4. That would last us through the winter and into the early spring.   In the fall, potatoes are at their least expensive and best quality compared to any other time of year. Buying them in bulk and storing them is as good an investment now as it was when my dad was doing it in the 60’s.

Storing potatoes is one of the earliest self-sufficiency skills I learned. We always lived in an old house with an unfinished cellar. We would put the potatoes down in the basement in a barrel and just go to collect what we needed when it was time to make supper. Once in awhile we would come in contact with a slimy potato that had to be tossed out. We were warned that we should always bring up anything that had been in contact with the bad potato so they could be used right away. As kids, the science wasn’t explained to us. It was just the rule. Now that I understand the science, it’s still a rule that I live by.

Here are some rules for successful potato storage:

  • Choose a potato variety that is appropriate for storage.  My favorite is Kennebec.  Some like Russet.  There are others.  The grocer or garden center should be able to tell you which potatoes are going to be good for storing.  You can also go online to find the attributes for most vegetables.
  • Raw potatoes should not be washed before storing. Remove the big chunks if you have been digging during a wet season.  However, a powdery coating of dry soil toughens the skin and helps them stay dry longer in storage.
  • Check all potatoes over for spade cuts or bad spots. If there are soft spots, cut away the bad section and use only the good one or discard the whole potato.
  • Do NOT store anything with a bad spot or spading fork cut.
  • After sorting, store the unwashed raw potatoes in any place that is dry, cool (but not cold) and dark. Exposure to sunlight will cause the skin to go green, get bitter and can cause illness if you eat a large quantity.
  • Frequently check your stored potatoes for any that have developed soft spots and discard them immediately when you find them.
  • Wash and dry any potatoes that are in contact with a bad one during storage.  Keep it apart so it can be used soon.

With smaller houses and less storage space, it is still possible to find good storage for potatoes. One way is to store them in milk crates in a pantry, cool closet or heated garage alongside an outer wall. If the area has a window, drape a heavy cloth over the whole stack. With the coolness  of the wall, the airflow created by the construction of the milk crates and the dark provided by the cloth, it works beautifully. As the potatoes at the top are used, take the crates out to store and start on the crate below it.

Also, if you have a rarely used, cool bedroom; a layer of crunched up paper under potatoes in an under-the-bed container is the perfect place for storing them. Winter squash and pumpkins can be stored there also!  The main idea is to keep them dry, dark and cool but not frozen.

Another favorite way to store potatoes is simply to put your pressure canner into play.  

As with other vegetables, canning potatoes is a great way to control the salt level and quality of the food as well as customizing the cut of the finished product.

Quart Jars of White Potatoes cut into cubes
Fast Food at its Finest!

  • For best results, the potatoes should be washed and peeled before cutting into your favorite shapes – slices, cubes, shreds or small whole potatoes.
  • A mandolin is a useful tool when cutting potatoes into thin, even slices. Be very careful when using a mandolin because it has an extremely sharp edge. 
  • A French fry cutter is great for making cubes. Simply put the potato through the cutter and then cut the ‘fries’ into chunks. This cuts the potatoes into really nice sized cubes. 
  • Always follow the instructions for canning that came along with your pressure canner. 
  • Do NOT try to pressure can anything completely absent of salt.  A little salt is absolutely necessary for successful canning.

Once the potatoes are processed and cooled they are ready to eat! You can rinse them, cold and use them in potato salads. You can microwave them to have them warm. You can mash them with garlic and butter. You can drain them, dry them and fry them with your favorite seasonings for fantastic hash browns. In a pinch, you could eat them straight from the jar! 

The potato is the workhorse of the pantry. It is low in saturated fat and sugar.  It has no cholesterol or sodium unless you add it. It is also high in potassium and vitamin C as well as very high in vitamin B6, the vitamin that helps to improve moods. 

If you have stories or recipes using potatoes, I would love to hear from you. Please share them by adding your comment to this post or contacting John at [email protected].


Making Dehydrated Chips

Rebecca dehydrates several kinds of chips for us to eat during the winter months. I talked about the technique used to create zucchini chips in the Making Use of Those Oversized Zucchinis post. The techniques in that post also work well for vegetables such as eggplant, which has a slight peppery taste when dehydrated. We have found that the American (globe) and Italian eggplants work best for the purpose—the thinner varieties, such as the Japanese eggplant, tend to get tough. There are a lot of different kinds of eggplants, so make sure you choose a variety that will dehydrate well.

Along with eggplant, Rebecca has made dehydrated potato chips for us and I’m sure will try other vegetables as time permits. The same technique used for zucchinis works just find for any globular vegetable that has a moderate level of moisture. You want to be sure that the chips are crispy dry when finished to ensure they have the maximum storage time and have a satisfying crisp feel when chewed. Try to get the chips as evenly sliced as possible. Rebecca used a mandoline for the purpose. I particularly like the Kitchenaid model that she has because it includes a guard to keep her fingers safe and some attachments for additional cutting methods, such as julienne.

It’s also possible to make fruit chips. For example, if you use an apple peeler, you can create spiral cut apples. Cut through the spiral (top to bottom) and you end up with individual apple slices that you can dry as chips. The basic technique for drying apples is the same as zucchini, but there are a few things to consider.

Rebecca dehydrates apples using two flavorings. Of course, the sugar cinnamon combination is a must have selection. Last year she tried using cheese powder on some apples and we liked it so much that it has become the second favorite. The cheese powder makes the apple chips taste like an apple pie with a slice of cheddar on it. In both cases, you must alter the zucchini technique a little to obtain usable results.

The first difference is that you absolutely can’t use a dehydrator with the motor on the bottom. The fruit chips will produce copious amounts of liquid that will get into the motor and cause the premature death of your dehydrator. When drying apples and other fruit, use only a dehydrator with a top mounted motor so that the liquid won’t cause problems. In fact, we highly recommend placing the entire dehydrator on a tray, just to make sure that any liquid that leaks out doesn’t make a mess.

The second difference is that you don’t dip the chips as you might do with vegetable chips. Dust the top of the fruit with the flavoring of your choice. Using this approach makes the resulting product more enjoyable because it isn’t overly sweet (or sometimes bitter). It also reduces the amount of liquid the chips produce as they dry. You get just as much flavor by lightly dusting the top as you would by dipping the fruit, but at a significantly reduced cost. When the fruit produces copious liquid, the extra flavoring you used ends up in the tray anyway, so there is no point in overindulging.

The third difference is that fruit chips tend to a be little flexible when completely dry. They won’t dry crispy like vegetable chips will. Think more along the lines of dried fruit or a fruit leather. So far we haven’t noticed any difference in longevity. The fruit chips will most definitely last a year when kept in an appropriate container.

A number of people have asked how we store our chips to keep them fresh. We use five-gallon-food-grade-buckets with tear tab lids. Make absolutely certain you use food grade buckets because buckets made with other sorts of plastic could contaminate your food. These are the same buckets used by your local restaurant for everything from pickles to potato salad. In order to get the lids off, you must have a bucket lid wrench. Trying to get the lid off otherwise will be difficult to say the least. Even with the wrench, you must work carefully around the lid top to get it off. These buckets seal extremely tight and they provide great storage even in a basement or other less than ideal setting.

Dehydrated food in the form of chips makes for ready, delicious, and nutritious snacks. None of our chips has the slightest amount of oil or preservatives in them. We’ve tested this technique for up to two years with great results. The two biggest considerations are that you must make absolutely certain that the chips are completely dry and that you seal them in an airtight container, such as the five-gallon-buckets we use. Using this approach is also good for the planet because you don’t use any electricity to keep the food usable. Once the food is dehydrated, you simply open the bucket, grab what you want, and eat.

What sorts of vegetables and fruits do you think you might try to store using this approach? Is this an approach that you find appealing? Let me know your thoughts at [email protected].


Potatoes, Buried Treasure

Arr matey! ‘Tis potato season and time to seek buried treasure! Potatoes really are a kind of buried treasure. For one thing, the dried stalk you see above ground only gives you a clue as to the location of the potatoes underneath-not a precise location. The potatoes might be all to one side or another of that stalk, or they might be centered beneath it. I use a garden fork to dig potatoes to reduce the risk of making one unusable. I usually start digging about a foot or a foot and a half from the stalk and move inward.

Unlike many people, we mulch our potatoes instead of creating hills for them. I’ve discussed the benefits of mulching in the Mulching Your Garden post. Using a little heavier mulch makes it possible to plant the potatoes and then basically forget them for the entire growing season. To harvest the potatoes, you simply move the mulch away in the fall and dig the thin layer of dirt from around each of the potatoes. Using the mulching technique seems to produce larger potatoes (or at least, larger quantities of potatoes) with less work and no watering. However, potatoes don’t create set amounts of output. There is an uncertainty factor that gives the potato the feel of buried treasure. One plant may produce a few large potatoes and another copious amounts of smaller (salad) potatoes.

Potatoes and tomatoes are both part of the nightshade family. This family contains a number of highly toxic plants. In fact, some varieties of potato are so odd that you’d hardly recognize them and a few varieties are eaten with clay because they’re not digestible otherwise. The varieties sold in the US are rather bland when compared with the unique diversity found in the Andes (amongst other places). The largest potato we’ve ever had weighed an impressive 1½ pounds, which is far below the 25 pound monster dug in Lebanon in 2008.

You can see the resemblance of potatoes and tomatoes in the leaves. In addition, potatoes will produce a tomato-like fruit. It really does look like a green cherry tomato, but the fruit is quite toxic and you should never eat it. The flowering spud looks pretty though and you should carefully look for the blossoms. They last, at most, two or three days. In other words, blink and you’ll miss the flowering completely.

Domestic potatoes are attacked in a number of ways. This year we lost a few to burrowing insects. The most devastating pests were millipedes who ate directly through the potato and left a rotting mess behind. Because of the drought this year, mice were a particular problem. They normally don’t bother the potatoes much, but this year they were looking for food and water-the potatoes provided both. In addition to these pests, there were also other ones too. Pests can be irritating to have around the house, especially when you’re trying to grow vegetables. One of my friends did suggest that I should contact an exterminator in Charlotte NC to see if they could do anything to help me remove these pests from my garden. By the time my friend has told me about this company, the pests had already ruined the majority of the vegetables. In addition to pests, quackgrass was also a bit of a problem. We lost some potatoes when the quackgrass roots grew right through the tubers. Finally, some of the potatoes had scabs. The scab ruins the skin and makes it impossible to store the potato for any length of time (otherwise, the potato is perfectly edible as long as you cook it).

Our 20′ × 20′ patch produced two bushels of potatoes this year (about 120 pounds). That’s down from the 3½ bushels we received four years ago in the same patch (we rotate our potatoes between three areas). Between the effects of the drought, the extreme heat this summer, and abundance of pathogens, I think we still did quite well. We managed to get a few really nice sized potatoes with a maximum size of 1 pound this year. Buried treasure indeed!

Do you grow potatoes? If so, how did your potatoes do this year? Do you ever encounter any special problems with them? Let me know at [email protected].


Mulching Your Garden

Mulching is an extremely important part of maintaining your garden. Even if you don’t have time to mulch everything or have items that don’t mulch well (such as carrots and beets), anything you can mulch should be mulched. Using mulch has the following benefits:

  • Reduces the need to water
  • Keeps weed at bay
  • Reduces the pathogens that can splash up from the ground onto vegetables
  • Adds nutrients to the soil
  • Helps worms stay nearer to the surface where they benefit the garden
  • Lessens the chance of extreme temperatures damaging vegetables

There are many theories on the proper technique for mulching. This post doesn’t compare them because the bottom line is that any sort of mulching is better than none at all. If you find a technique that works for you, by all means, use it. My technique works well for me because I can get the materials at a very low cost.

Our mulching begins by laying down two sheets of non-advertisement newspaper. There are some things you should consider about the newspaper you use. First, make sure the newsprint is printed with soy or a similar non-toxic ink. Second, never use the glossy advertisements. Even if they aren’t printed with toxic chemicals (they often are), the glossy paper tends to repel water and takes a very long time to break down. Third, make sure the paper is large enough to overlap.

Make sure the newspaper does overlap by about an inch or so as you lay it down. Otherwise, the weeds will immediately spring up through any gaps. In the past, we’ve doused the newspaper in water before laying it down, but it works just as well dry as long as it isn’t windy.

Lay hay or dried grass on top of the newspaper. Make sure the grass is absolutely dry–brown is best. If you want to use this second technique, let your grass get a little long, let the newly mown grass dry a day or two, use a rake to move it about, and then let it dry for several more days before you rake it up to use it as mulch. We allow a full 2-inches of grass or hay on top of the newspaper. Here’s what our small garden looks like with mulch in place.

Mulch01

My uncle supplied us with some square bails of hay. They work quite nicely for mulch. The hay had been rained on, which ruined it for animal fodder. You may be able to find a farmer in your area who has some ruined or third cutting hay that you can buy for a pittance. Notice how the hay covers very square inch of the garden.

There is one addition trick you must employ. The mulch absolutely can’t touch the plants. For example, look at this tomato plant:

Mulch02

The newspaper and hay end in a small circle around the base of the plant. If the mulch touches the plant, it will cause the stem to rot and you’ll lose the plant. Rebecca and I didn’t know about this little problem during our first few years and we lost quite a few plants to mildew or rot.

The small spacing we allowed still provides all of the benefits of mulching. Tomatoes are especially prone to black spots. When it rains, the rain hits the soil, picks up pathogens, and splashes these pathogens onto the tomatoes. The mulch keeps the rain from splashing. The tomatoes can still get spotted from other sources, but it’s less likely.

As I mentioned previously, some vegetables don’t lend themselves to mulching very easily. For example, both carrots and beets are planted so closely as to make it impossible to mulch between the plants. You can mulch around the area in which the carrots and beets are growing though. Potatoes are planted further apart, so they mulch just fine. In fact, unless you plan to take time to hill your potatoes, mulching them is essential to prevent the potatoes from turning green (we don’t hill our potatoesit’s much easier to lift the mulch and the end of the season and almost pick them up off the surface).

Some mulching depends on the season. For example, bush green beans mulch fine during a hot and dry summer. They’re prone to mildew during a cool, wet summer. You need to allow a little more distance between the mulch and the bush green beans (or any other bush-style bean for that matter) to allow air flow. Pole green beans and peas don’t require this spacing because the majority of the plant is on a pole or a fence.

There are a lot of interesting ways to mulch a garden. For example, some people use cardboard for the task, while others use bark. The chocolate smell of cocoa hulls is quite enticing (assuming you can afford the high cost). Some materials provide properties that our hay mulching technique doesn’t provide. However, you have to be careful in choosing a material because some materials, such as bark, will actually leach important nutrients out of the soil (using bark can leach all of the nitrogen and also make the soil acidic). We actually do use bark for our blueberries and grapes because they require an acid soil, but we never use bark in the garden. Let me know your thoughts on mulching at [email protected].