Making Soup

One of the things I do during the winter months is make soup. However, I don’t make just a small amount of soup in a small pot, in a small way. Years ago I bought a large restaurant-quality aluminum soup pot that weighs a ton and holds at least four gallons of soup. Making soup in large batches seems to produce a much better result and the large, thick, heavy soup pot works so well that nothing seems to burn in it. Well, I guess if I tried really hard it would burn, but I don’t try really hard.

Most of my soups start out with meat of some sort (beef, pork, chicken, venison, or lamb), but I normally use soup bones, lots of them. Sometimes I use a whole chicken, a large one. No matter what kind of meat I use, I start out with at least five pounds of it, sometimes more. I start the cooking early in the morning and cook the meat very slowly (never ever boiling it), scooping off the blood that rises to the surface and adding spices and salt afterward. I favor using more spices than salt. In fact, I just barely add salt to taste. I use spices that you normally wouldn’t think of in my soups such as, cinnamon, nutmeg, and cloves, which helps me keep salt to a minimum. You don’t add a lot of these spices, the effect is meant to be subtle. In some cases, such as with beef, I use pickling spice (but make sure to remove the tea ball containing the pickling spice after no more than 20 minutes or it gets bitter). Favorites with chicken include sage, rosemary, and thyme. Sometimes I add orange or lemon peel. A common addition are onions and I sometimes add a bit of fresh garlic (minced fine) as well.

I like my soup to be really nutritious, so I add plenty of vegetables. Most of my soups contain corn, carrots, and potatoes. However, I don’t stop there. The soup I made the other day also contains turnips, Holiday Soup Mix, and celery. I’ve been known to add things like green beans, kohlrabi, rutabagas, turnips, and all sorts of other odd assorted vegetables. In fact, if something in the larder or freezer is getting a bit old, it goes into the soup pot. The point is that the soup is far from plain. It contains good nutritional value from a wide variety of wholesome vegetables.

In addition to all of the vegetables, I sometimes add mushrooms. As with the vegetables, I normally get a better quality mushroom, not those canned kind. My personal favorites are baby portabella, shiitake, and oyster mushrooms, but I’ve used others as well. Even a good quality button mushroom can be a nice addition. I’ve never had much success using morels in soup. Besides, morels were meant for cooking in butter and garlic, with a bit of salt.

To top my soup off I usually add pearled barley. Using pearled barley gives the soup that finishing touch, a kind of nutty flavor that you find in only the best soups. As an alternative, I sometimes use half and half wild and brown rice. I generally don’t add noodles to my soup; they fall apart quickly, don’t have much nutritional value, and tend not to freeze or can well.

Speaking of freezing and canning, there is no way one person can eat four plus gallons of soup before it goes bad and that’s the point. I either can or freeze the excess soup for later. Soups that are a little more broth get canned in one quart containers, while robust soups get frozen in one gallon bags. A word of advice, don’t overfill your gallon bag. I put three quarts of soup at most in my gallon bag and sometimes less depending on the soup. Lay the bags flat in the freezer as they freeze and you’ll find that your bags of soup stack well. If I’m having a really busy time, I simply get out a quart or a bag of soup and I have a nutritious meal I don’t have to cook. Soup is comfort food. Let me know your thoughts about soup at [email protected].

Harvest Festival 2016

This has been an interesting year in the garden. In looking at the Harvest Festival 2015 post, I see a year that offered me what I would call the standard garden items. Not so this year. The problems began with a late frost that wiped out my grapes and pears. In fact, it nearly wiped out my apples as well, but I learned a curious lesson with the fruit this year because of the apples. All the outer apple trees had no fruit, but those in the center of the orchard did have some fruit. In other words, the trees on the outside protected those on the inside. I didn’t get a lot of fruit this year, but it isn’t a big deal because my larder is setup to provide multiple years’ worth of any particular item. The lesson I learned was not to prune too heavily when the weather is uncertain (as it was this year). In fact, the reason the apples survived as they did was because I didn’t have time to prune them much at all.

The garden also behaved quite oddly this year due to the weather. The Wisconsin winter was semi-mild this year without nearly as much snow as normal, so different bugs survived than normal. In addition, the weather was either hot or cold, without a lot of in between this summer. It has also been the fourth wettest summer on record. All these changes produced prodigious amounts of some insects that I don’t normally see and the vegetables didn’t produce as expected.

As an example of odd behavior, I normally have a hard time growing cauliflower. This year I grew huge cauliflower and one plant is attempting to grow a second head, which is something that never happens here. On the other hand, broccoli, a plant that always does well, didn’t even produce a head this year. All I got were some spikes that didn’t taste good (they were quite bitter). The rabbits didn’t even like them all that well. The cauliflower is usually plagued by all sorts of insects, but this year there was nary a bug to be seen. The point is that you need to grow a variety of vegetables because you can’t assume that old standbys will always produce as expected.

Two other examples of odd behavior are okra (which normally grows acceptably, but not great) and peppers (which often produce too well for their own good). This year I’m literally drowning in beautiful okra that gets pretty large without ever getting tough, but the peppers are literally rotting on the plant before they get large enough to pick. I’m not talking about a few peppers in just one location in the garden either—every pepper plant completely failed this year.

Location can be important and planting in multiple locations can help you get a crop even if other people are having problems (and I didn’t talk to a single gardener this year who didn’t have problems of one sort or another). One example in my case were potatoes. I planted six different varieties in six completely different locations in the garden. Five of those locations ended up not producing much of value. A combination of insects destroyed the plants and tubers. All I got for my efforts were rotting corpses where the potatoes should have been. The last area, with Pontiac Red potatoes, out produced any potato I’ve ever grown. The smallest potato I took out of this patch was a half pound and the largest was 1 ¼ pounds. I didn’t even find any of the usual smallish potatoes that I love to add to soup. The potatoes were incredibly crisp and flavorful. The odd thing is that this patch was in an area of the garden that doesn’t usually grow potatoes very well.

A few of my garden plantings didn’t seem to mind the weather or the bugs in the least. My peas did well, as did my carrots. I grew the carnival carrots again because the colors are so delightful and even canned, they come out multiple colors of orange, which dresses up the shelves. I also grew of mix of yellow wax and green beans this year. The two beans work well together canned. They have a nicer appearance than just yellow or just green beans in a can. However, because the two beans have slightly different tastes, you also get more flavorful meals out of the combination.

I still stand by the statement I made long ago when starting this blog, every year is both a good and a bad year. Because I planted a wide range of vegetables and ensured I didn’t plant all the vegetables in a single location in the garden, I ended up with more than enough vegetables to can or freeze. No, I didn’t get all of the vegetables that I had hoped to get, but I definitely won’t starve either. My larder is quite full at this point. Let me know your thoughts on ensuring a garden has a significant variety of items in it to ensure success at [email protected].


In Praise of Dried Beans

One of the more amazing vegetables in the garden is the green bean. Green beans typically take little work to grow, produce well, and don’t appear to have many problems (with the exception of mold in wet years). We grow the bush variety because they don’t require a trellis. You can eat green beans in all sorts of ways—raw by themselves, cooked, in salads, and even fried. What most people don’t realize is that the uses of green beans don’t end there. You can also use green beans dried. Simply let the green bean stay on the plant until the shell is completely dry (usually after a few frosts).

Dried beans have a significant advantage over other items you grow. Unlike most items, they require no preparation. You can simply pick them, put them in a bucket, put a lid on the bucket, and then stuff it in a cool, dry place. That’s it! The beans will stay good almost indefinitely. I just finished shelling the last of our dried beans from last year. There was no deterioration of the bean whatsoever. Rebecca will use them in baked beans, soups, and in salads. Dried beans are also quite high in nutrients, making them a great food value. For example, if you make them into baked beans, a single serving supplies 28 percent of your daily requirement of iron.

Before I get e-mail about the relative merits of other vegetables, yes, you can store root vegetables such as potatoes in your basement without doing anything special to them. In addition, winter squash also lasts quite well in the basement without any special preparation. However, in both cases you face the problem of having to use the items by February or (in a good year) March. The winter squash tends to start rotting by that time and the potatoes start to get soft in preparation for sprouting. Dried beans appear to have no such limitation.

Of course, the big thing is to ensure that the bean really is dried. We keep the beans on the plants until late fall after a few frosts have killed the plant completely. The beans should rattle within the shells when shaken. The outside should be a nice tan color in most cases and should feel quite dry. The shells will also be a bit on the hard side, rather than soft as a green shell will be.

Don’t worry if you see a bit of discoloration on the shell. That’s normal. If you see a little discoloration, shell a bean or two to see for yourself that the beans inside are shiny and that the skin is intact. Even if the bean is a little dirty, it’s acceptable to use as long as the skin is intact.

The one thing you must do before using beans you dry yourself is to wash them. The beans do pick up a few contaminants during the drying process. You don’t use soap and water. Just place the beans in a colander and rinse thoroughly. Make sure you move the bean around and get all of the dirt off. When you see that the water is coming out of the colander without any dirt, the beans are probably clean.

The bean is one of those items with a nearly unlimited shelf life that’s both nutritious and delicious. The fact that you can use them green or dry, raw or cooked, makes them exceptionally versatile. Even a small garden has space for some of these marvelous plants. Let me know your thoughts about beans (both green and dried) at [email protected].


Working the Fall Schedule

There is a misconception that anyone who works in a farm-like environment simply takes a vacation once the crops are in (no matter what those crops might be). It’s true that I’m slightly less frantic now than during the summer months when I need to be doing three things (or more) at once. However, the work continues throughout the fall and winter. The fall period begins after the garden is cleaned up, tilled, and planted with winter rye. Our winter rye is just showing above the ground at this point. It’ll stay that way until spring, when it’ll take a growth spurt. The winter rye roots will keep our precious soil in place and also provide “green manure” in the spring when we till it under.

A lot of people are surprised to see the two buckets of what appear to be shriveled bean pods in our basement, alongside the potatoes and squash. They actually are dried green beans, which might seem like a less than helpful use for them. However, the beans you buy for soup in the store come from this source. When we’re done canning green beans for winter, we let the remaining beans dry on the vines. We then pick them off, shell them, and use them in soups or for baked beans. In fact, anywhere you’d normally use dried beans you can use the dried green beans from your garden. Our dried beans are a beautiful shade of brown this year. We’ve had speckled beans, solid black beans, and a number of other colors, all of which contribute to a colorful soup, even if they taste mostly the same. You simply remove the pod by shelling the dried green bean and you end up with handfuls of beans you can store without much fuss at all. In short, green beans are an extremely efficient way to produce food—you can eat them green or dried and they require no special storage when dried (an airtight container is helpful).

Of course, this is also the time of year that I start getting into the woods to cut wood for winter. I’m actually bringing down wood that I cut and stacked last year (or two years ago in some cases). It won’t be quite enough for the entire winter, but it’s a good start. I’ll look for dead, dry trees to cut up to complete our wood supply for the winter, and then begin on next year’s wood. Rebecca helps by carrying wood from the cart, wood pile, or from the edge of the woods and throwing it into the basementsaving me a ton of time. Some of the wood has to be split, a good job for my maul on days when it’s too windy to cut wood.

Self-sufficiency relies on a lot of equipment as well. During the summer months there is little time to maintain it. Yes, if something breaks, you have to take time out to fix it, but that’s not the same as maintaining it. During the fall and winter months, I’ll sharpen shovels and spades, repair equipment, change the oil, and tune everything up. These maintenance actions are essential if you want to have a good summer. Nothing is worse than trying to dig with a dull spade. Anything I can do to make our hand, electric-powered, and gas-powered equipment work better is money in my pocket and time to do something else. So these winter months are an essential time for me.

This is also the time I’ll be working on new projects. For one thing, Rebecca needs a bit more storage and better lighting in the larder. I’ve been wanting some shelving for my equipment for quite some time now and I may get to it this winter. The chicks need something better than a refrigerator boxI’m planning to build a box that we can use as a combination of brooder (to keep young chicks warm) and rabbit house (during the summer months after the chicks are put outside).

Still, nothing beats sitting by the wood stove after a day of cutting wood and feeling it’s warmth hit tired muscles. I’ll break out my Knifty Knitter to make some hats, scarves, blankets, and socks (you can see some of the things I’ve made in my Knitting for the Gentleman Farmer post). I may even engage in some latch hook this winter to make a rug or wall hanging. Winter is a time of crafting too! So, how do you enjoy the fall and winter? Let me know at [email protected].


Every Year is a Good and a Bad Year

It’s easy to become discouraged in the garden sometimes. During the early spring you plant everything that you’ll hope will grow and produce plentifully. By August, you know which plants will fair the best and which didn’t survive at all. This year has been especially tough because I ended up getting gallbladder surgery first, and then, because we do everything together, Rebecca ended up getting gallbladder surgery as well. So, with both of us on our backs, our garden had a true test of being weed-bound. Unfortunately, that means that some plants didn’t live at all and some won’t produce well. Our corn was nice and tall, right before the wind blew it over. Many of our peas succumbed to the weeds.

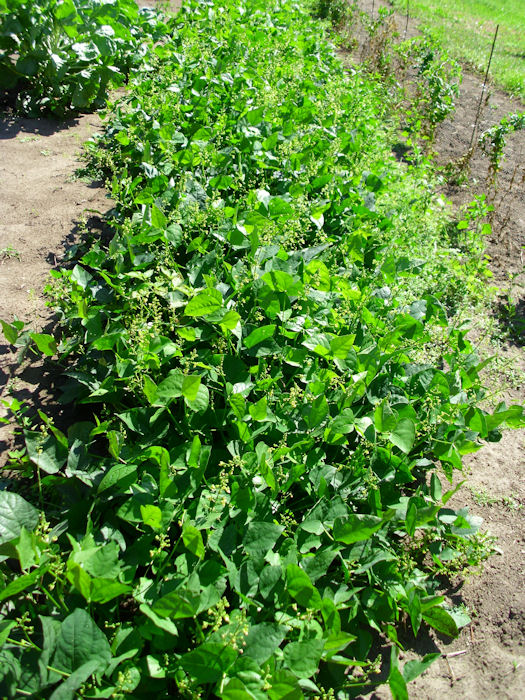
Still, it’s a good year in many respects and that’s the aspect I choose to focus on. Good years fill larders with interesting vegetables and fruits. Apparently, this is a bean year. We planted the normal amount of green beans and Lima beans. However, the plants decided to grow twice as tall and twice as wide as normal. We’re now inundated with green beans and will soon have a bumper crop of Lima beans as well.

GardenEnough01

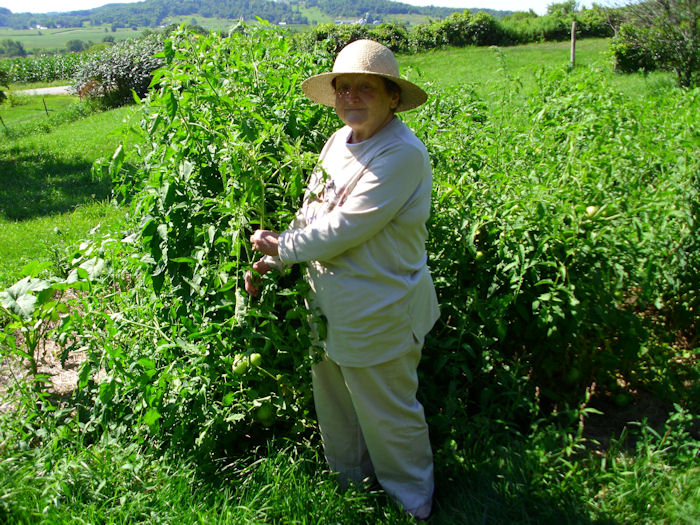
Not every year is a good year for every vegetable. In my Dealing with Overabundance post, I discussed how some years produce so much that you can hardly fathom what to do with it all. Last year and the year before were horrible blight-filled years for tomatoes. This year isn’t just good, it’s amazing. Our tomatoes have never looked quite this good.

GardenEnough02

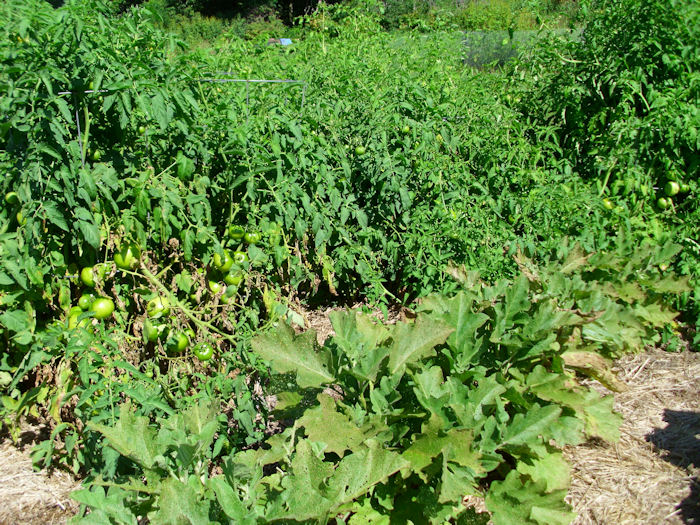
Those are the same diminutive plants I wrote about in Mulching Your Garden. They’re over five feet tall now and loaded with so many tomatoes that we’re going to try pickling some green tomatoes this year. (Remember to try different preservation techniques whenever you can to discover new ways of dealing with overabundance.) The plants have obviously overgrown the tomato cages and are threatening the other plants in that plot. Unlike previous years, there is absolutely no sign of blight, even at the bottom of the plants (which are usually brown by now). Sometimes in this case it is better to buy things like new mulching heads for skid steers so we can effectively clean up the area for a more serious overgrowing problem.

Many of our plants are late, but will most definitely produce. The egg plants and okra are of sufficient size that we’ll get the normal amount from them, or perhaps just a bit more than usual. As in most years, the egg plants are constantly under attack from flea beetles, but the lacing of their leaves hasn’t reduce their vigor much and we expect the normal crop from them.

GardenEnough03

The beets and kohlrabi look good this year as well. We fully expect to harvest enough to replenish our larder and even provide a little extra for next year. So, many plants are producing enough that we’ll most definitely not starve. It’s best to avoid focusing on the lack of corn this winter in the larder or the fact that there won’t be much in the way of broccoli (we will have an abundance of Brussels sprouts though).

It’s important to remember diversity in gardening. Don’t plant just one or two items-plant a variety of items so that at least a few of them produce well. This is our year for tomatoes and beans. Next year might be a corn year or the year of the mutant squash (we’ve had one of those lately and are still eating squash from that year). Each year is a good year for something, and an equally bad year for something else.

There is actually a health benefit to all of this. If every year produced copious quantities of whatever you planted, there would be no incentive to try something new. Gardens force people to moderate what they eat and to try new things. As someone once said, “Variety is the spice of life!” So, what has grown well for you this year? Let me know at [email protected]

Mulching Your Garden

Mulching is an extremely important part of maintaining your garden. Even if you don’t have time to mulch everything or have items that don’t mulch well (such as carrots and beets), anything you can mulch should be mulched. Using mulch has the following benefits:

  • Reduces the need to water
  • Keeps weed at bay
  • Reduces the pathogens that can splash up from the ground onto vegetables
  • Adds nutrients to the soil
  • Helps worms stay nearer to the surface where they benefit the garden
  • Lessens the chance of extreme temperatures damaging vegetables

There are many theories on the proper technique for mulching. This post doesn’t compare them because the bottom line is that any sort of mulching is better than none at all. If you find a technique that works for you, by all means, use it. My technique works well for me because I can get the materials at a very low cost.

Our mulching begins by laying down two sheets of non-advertisement newspaper. There are some things you should consider about the newspaper you use. First, make sure the newsprint is printed with soy or a similar non-toxic ink. Second, never use the glossy advertisements. Even if they aren’t printed with toxic chemicals (they often are), the glossy paper tends to repel water and takes a very long time to break down. Third, make sure the paper is large enough to overlap.

Make sure the newspaper does overlap by about an inch or so as you lay it down. Otherwise, the weeds will immediately spring up through any gaps. In the past, we’ve doused the newspaper in water before laying it down, but it works just as well dry as long as it isn’t windy.

Lay hay or dried grass on top of the newspaper. Make sure the grass is absolutely dry–brown is best. If you want to use this second technique, let your grass get a little long, let the newly mown grass dry a day or two, use a rake to move it about, and then let it dry for several more days before you rake it up to use it as mulch. We allow a full 2-inches of grass or hay on top of the newspaper. Here’s what our small garden looks like with mulch in place.

Mulch01

My uncle supplied us with some square bails of hay. They work quite nicely for mulch. The hay had been rained on, which ruined it for animal fodder. You may be able to find a farmer in your area who has some ruined or third cutting hay that you can buy for a pittance. Notice how the hay covers very square inch of the garden.

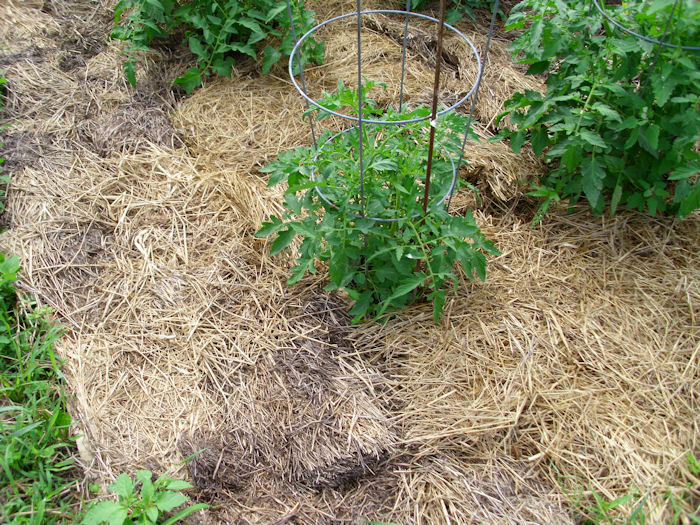
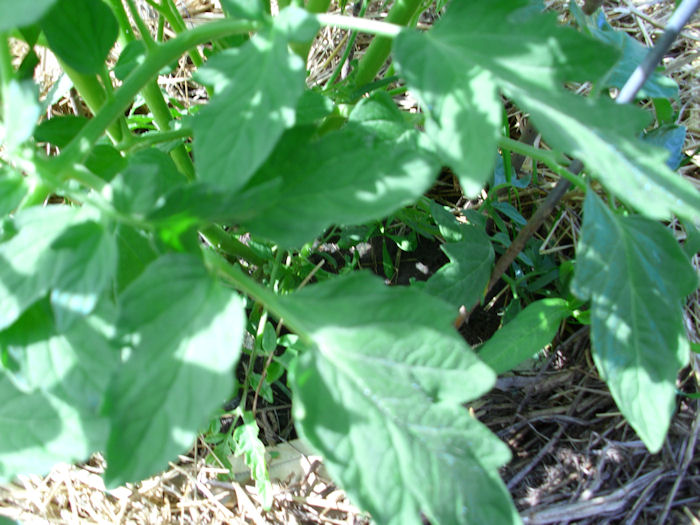
There is one addition trick you must employ. The mulch absolutely can’t touch the plants. For example, look at this tomato plant:

Mulch02

The newspaper and hay end in a small circle around the base of the plant. If the mulch touches the plant, it will cause the stem to rot and you’ll lose the plant. Rebecca and I didn’t know about this little problem during our first few years and we lost quite a few plants to mildew or rot.

The small spacing we allowed still provides all of the benefits of mulching. Tomatoes are especially prone to black spots. When it rains, the rain hits the soil, picks up pathogens, and splashes these pathogens onto the tomatoes. The mulch keeps the rain from splashing. The tomatoes can still get spotted from other sources, but it’s less likely.

As I mentioned previously, some vegetables don’t lend themselves to mulching very easily. For example, both carrots and beets are planted so closely as to make it impossible to mulch between the plants. You can mulch around the area in which the carrots and beets are growing though. Potatoes are planted further apart, so they mulch just fine. In fact, unless you plan to take time to hill your potatoes, mulching them is essential to prevent the potatoes from turning green (we don’t hill our potatoesit’s much easier to lift the mulch and the end of the season and almost pick them up off the surface).

Some mulching depends on the season. For example, bush green beans mulch fine during a hot and dry summer. They’re prone to mildew during a cool, wet summer. You need to allow a little more distance between the mulch and the bush green beans (or any other bush-style bean for that matter) to allow air flow. Pole green beans and peas don’t require this spacing because the majority of the plant is on a pole or a fence.

There are a lot of interesting ways to mulch a garden. For example, some people use cardboard for the task, while others use bark. The chocolate smell of cocoa hulls is quite enticing (assuming you can afford the high cost). Some materials provide properties that our hay mulching technique doesn’t provide. However, you have to be careful in choosing a material because some materials, such as bark, will actually leach important nutrients out of the soil (using bark can leach all of the nitrogen and also make the soil acidic). We actually do use bark for our blueberries and grapes because they require an acid soil, but we never use bark in the garden. Let me know your thoughts on mulching at [email protected].