How Cold is Too Cold for Animals?

In many ways, we follow some relatively old fashioned methods of animal husbandry. For example, a lot of people now use heated barns or other enclosures to protect their animals from winter. Of course, there are a lot of benefits to this approach, such as maintaining productivity during winter and reducing animal stress. One way to help reduce animal stress is to get some cbd for pets, this can help calm them and keep them mellow for a period if they are in distress.

However, there are also disadvantages that you must consider from a self-sufficiency perspective. For example, heating an environment for the animals incurs an additional cost that is unlikely to be repaid with additional productivity. In addition, such an approach is harder on the environment because the heat is normally provided by some sort of fossil fuel. Unfortunately, the biggest problem is the effect on the animal. If there is a power outage or similar issue that causes a loss of heat, the animal is going to be adversely affected in a serious manner because it isn’t used to the cold and hasn’t had any time to develop a fat layer. We can put on additional layers of clothing when the heat fails-animals typically don’t have this advantage. Animals also tend to have natural cycles, just as we do. The change in seasons helps keep an animal’s internal clock in sync.

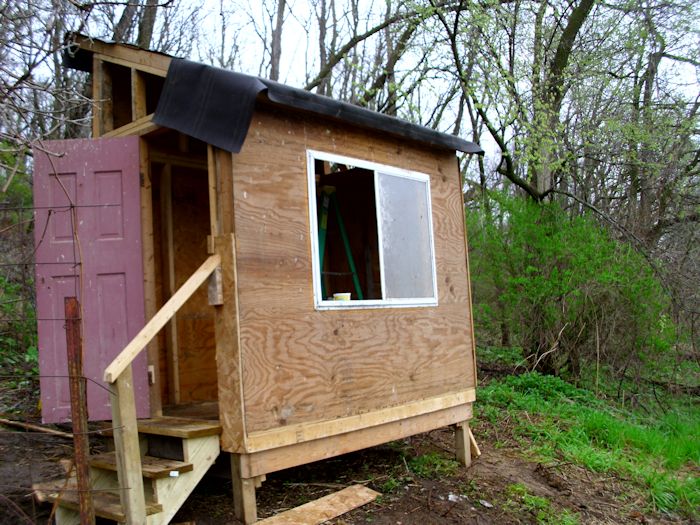
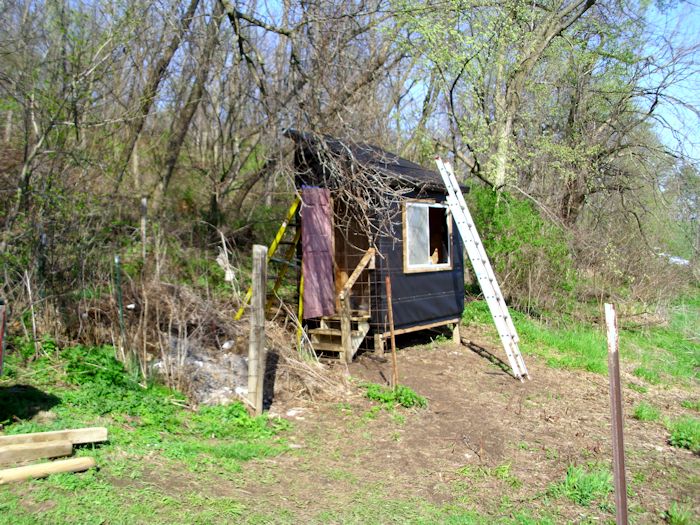
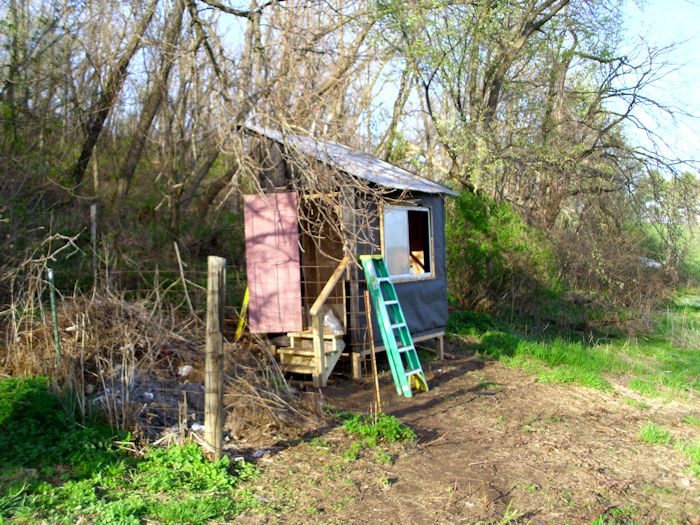
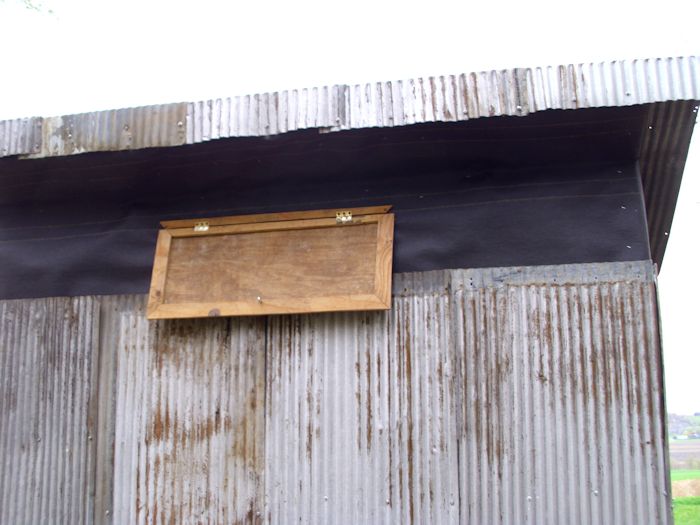
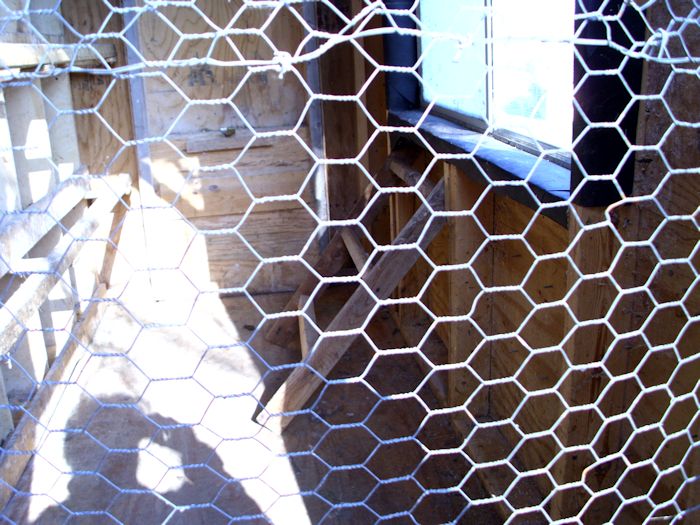
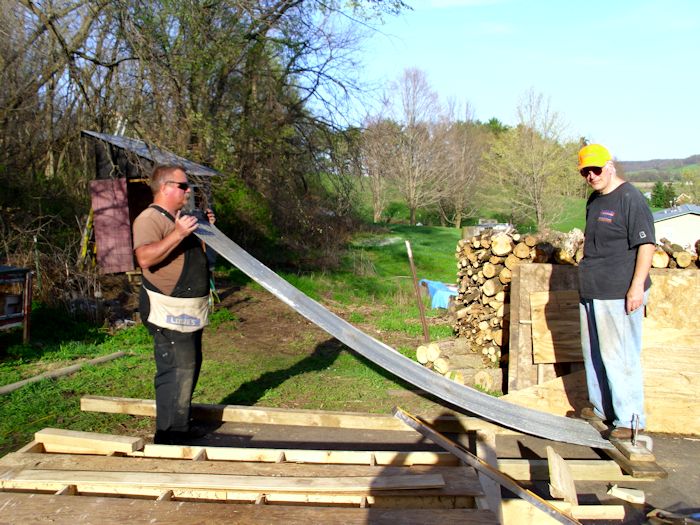
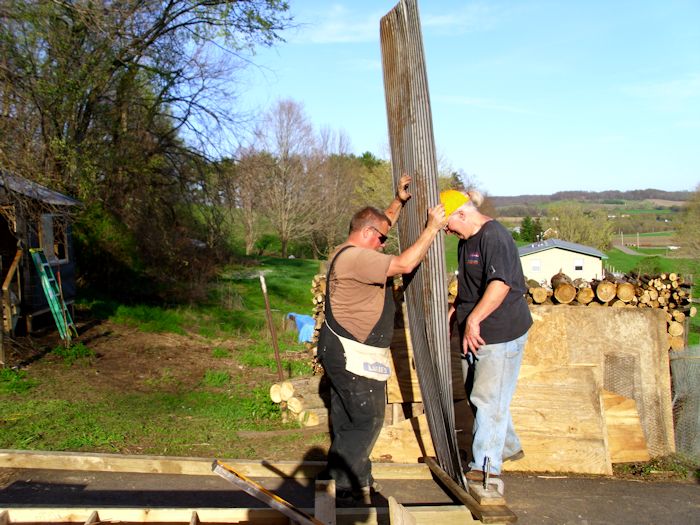
Of course, it gets pretty cool here in Wisconsin. We do winterize the animal cages in various ways. For example, the rabbit cages receive a covering of plastic sheeting over the front to keep the wind at bay and also reduce some heat loss. Likewise, the chicken coop window receives a plastic sheet and the back window is both closed and secured. You can’t make the cages airtight, however, because doing so would trap harmful gasses from animal feces that would eventually prove detrimental to animal health. Even during the winter months, animal cages must have at least a little air movement to promote good health.

During the winter months, we also feed the animals food with a higher fat content that provides additional calories to help keep them warm. In most cases, this means adding more corn and oats to the rabbit food and providing them with additional high energy food treats (such as carrot scraps). The chickens receive various types of seeds with their feed, along with high protein sources such as meal worms. This approach follows what happens in nature. The seed heads of plants are exposed above the snow, so animals eat these high energy sources of nutrients during the winter months.

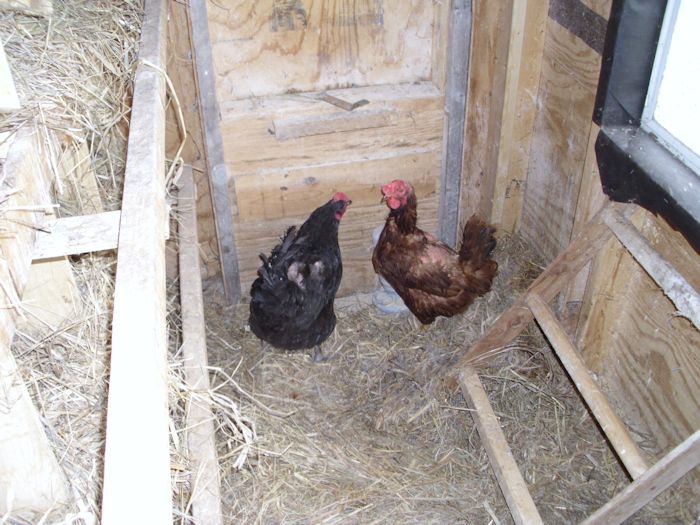
Our chickens love the forage all throughout the year. During the summer months they go out every day unless the weather is absurdly harsh (the weather service is predicting tornadoes). In the winter the chickens only go out on warmer, sunnier days. During the cooler days we keep them inside where they can huddle together to preserve warmth.

Part of our strategy is also to use the natural environment to our advantage. For example, all of the cages and the coop are south facing so that any sunlight tends to warm the interior of the cage or coop. There are times when we open the coop door and feel a surge of warmth come out simply because of the effect of the sun on the interior. So, it’s possible to rely on some level of passive heating to help keep animals warm.

Beside the other measures we take, we ensure we check the animal’s water more regularly during the winter to ensure the animals all have liquid water (not iced over in any way) to drink during much of the day. A good source of high energy/high calorie food and water are both essential to animal health during the winter months. All of our animals drink less during the winter, so giving the animal less water, but filling the water trays more often, is the best strategy to follow.

If the weather were to get terribly cold, we also make provision to keep the animals short term in the garage or basement of our home. Neither area is warm enough to stress the animals, but is warm enough to keep them from getting frostbite (a real problem for chicken combs). What sorts of things do you do to make your animals more comfortable and maintain their health in winter? Let me know at [email protected].


Engaging in the Fall Cleanup

For many people, fall is a time when they cut the grass the last time, take their car to the mechanic for winterization, check for air leaks in the windows, and ensure the furnace will run. These common chores affect anyone involved in self-sufficiency as well. For example, you still need to get your car ready—assuming you have one.

However, fall cleanup requires a lot more from anyone engaged in self-sufficiency because there are more facets to their environment. For example, fall is the time when you need to ensure your animal cages are completely cleaned. (Yes, you also clean them at other times, but fall is when you take everything apart and really clean it up.) If some of your animals are outdoors, you need to ensure they’ll have sufficient cover for the winter months. For us, that means scrubbing down every one of the rabbit hutches and letting them dry before we put a rabbit back inside. In addition, we add any manure under the cages to the compost heap. The chicken coop needs to be cleaned completely, the old hay replaced, and the windows closed. I also make sure I wash the window so the chickens can see out. It turns out that chickens like a nice view too.

Of course, you take the garden down after picking any remaining goodies and plant your winter rye to prevent erosion. The fall is a good time to look for potential soil issues and possibly get a soil test so that you know how to deal with problems the following spring. Likewise, your herb and flower gardens require attention so that any perennial plants will make it through the winter. However, don’t put mulch on immediately. Wait until the garden is frozen and then put the mulch on. Doing so will ensure that the plants are properly prepared for the winter.

You may not have thought of it, but all of your equipment has taken a beating during the summer months, including all of the equipment used for canning. This is a good time to scrub your pots and pans up and ensure they’re in good shape before you put them up. Make sure your pressure canner receives particular attention. Check to see if the gasket is in good shape, along with the rubber plug used for emergency pressure relief. Your stove will need a thorough cleaning and may require maintenance as well. Make sure everything is put away correctly so that you don’t have to waste a lot of time trying to find it in the late spring when you begin using it again.

Don’t think you’re finished yet. Now is the time to start walking the grounds looking for problems in your orchard. For example, it’s relatively easy to find pests that hide on trees during this time of the year. Make sure you check trees for problems associated with stress. For example, pear trees are prone to crack at the joints. You might need to mark some areas for special pruning in the spring. If a problem seems especially serious, you may want to address it now, rather than later.

Being self-sufficient means ending as well as you began. During the spring there is an excitement that builds that makes it easy to prepare for the new gardening season, but by the end of the season, all you really want to do is flop down in front of the wood stove. The time you take to prepare now will pay significant dividends in the spring. Let me know about your fall preparations at [email protected].


Emergency Repairs

A less thrilling part of being self-sufficient is dealing with emergency repairs. They seem to happen far too often, and it depends on what is in need of maintenance. There are some things you can repair yourself, but for others, you may need the help of an expert. For instance, if you want to repair your furnace and you’ve never repaired one before, you may want to search for a service that was ranked for top furnace repair in your local area since there is so much that can go wrong if you don’t repair it properly. However, for this emergency repair story, I’m not talking about a big repair issue, I’m talking about a small one. We use our snow blower to remove snow from our long driveway, as well as create paths to the various animal enclosures. It’s in this second capacity that I encountered problems the other day. The snow blower moved in an unexpected manner while working around the chicken coop and the side of the wheel hit the coop stairs. A small pop sounded, but I didn’t really notice. I did notice a few minutes later when the tire deflated and the snow blower was no longer usable 
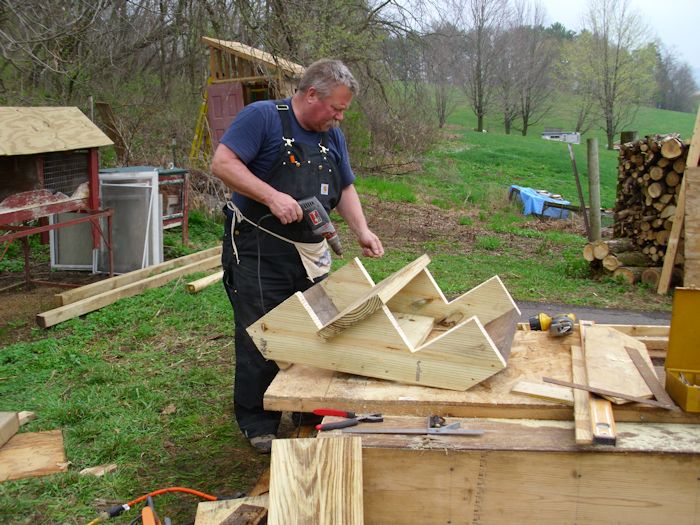
. Emergency repairs are just an unfortunate part of adult life that can affect us in the most random ways. It may be something like your garage door that suddenly becomes faulty, which is not ideal but must be dealt with quickly and efficiently. If this sort of thing happens you’ll want to consult with local garage door technicians in Whitestone, New York. so that your garage can return to full working order as quickly as possible. Nobody wants to keep needing emergency repairs, but you’ll be grateful when you receive them.

Trying to blow the tire up with a hand pump didn’t work because the bead had popped. So, that meant putting the snow blower away and continuing snow removal by hand. Four hours later, I finally completed the task with Rebecca’s help. Nothing provides quite as much exercise as four hours worth of snow shoveling in freezing winds, but we also needed to get to town to fix the flat (as well as perform other tasks).

The snow blower is too large and heavy to get into the Explorer. So the obvious course of action was to get the wheel off and take it to our local repair shop. The only problem was getting the wheel off. The bolt holding the wheel in place is designed to provide a tight fit and proved quite resistant to any effort at removal. Blocking the tire would normally provide enough friction to allow removal of the bolt, but that technique didn’t work in this case because the wheel simply turned within the tire. I finally improvised by attaching a large deep reach c-clamp to the wheel, which blocked the wheel and made it possible to gain purchase on the bolt.

At this point, the bolt wouldn’t move at all and penetrating oil (WD-40) wasn’t helping much. I brought out my persuader-which is a length of pipe that I slip over the end of my socket wrench handle to increase the torque I can apply to the bolt. Actually, it isn’t a pipe in the conventional sense. I saved the torsion bar from our old garage door and have cut it into several pieces that I use for a number of tasks, including persuading bolts. Extending the handle of the socket wrench gives you a physical advantage and makes it easier to remove stubborn bolts, but you have to be careful not to break the sockets as a result of using the pipe. Moreover, fortunately, I have a few torque wrenches similar to these tekton torque wrenches in my automotive tool kit so I was able to carry out this task relatively easily.

Bolt removed, the wheel still wouldn’t come off. The snow blower shaft is keyed and the wheel fits quite tightly. Unfortunately, working with the front of the wheel wouldn’t accomplish anything because the wheel goes on in that direction. The back of the wheel isn’t easily accessed because the snow blower transmission is in the way. In order to gain access to the back of the wheel, I angled a 2 × 2 over the top of the engine and hit it with a mallet. After a few pounds with the mallet on the end of the 2 × 2, I turned the wheel 90 degrees. Each 360 degrees of movement saw me applying a little more WD-40 to the front and back of the wheel shaft. Eventually, the wheel came off.

Getting the wheel fixed was quick and easy. The local repair shop has a compressor and the tire blew back up without problem after applying a sealant to the bead. The tire is back on the snow blower now and the snow blower is ready for use after today’s snowstorm. The point is that you have to think ahead about the potential for emergency repairs and have a strategy in place for dealing with them. Yes, the approach we used was a bit inconvenient and time consuming, but it did work. But, of course, while things like repairing a snow blower can be done by us, other things that may need doing after a snowstorm, like slab foundation repair, should always be done by experts.

What sorts of emergency repairs do you think about when thinking about self-sufficiency? Do you have contingency plans in place to handle your emergencies? Let me know at [email protected].

An Update On Our Pullets

I recently wrote about our chickens first attempts at laying eggs in my Pullet Eggs post. Of course, nothing remains static. Our nine pullets are laying four eggs on average every day now. That number will increase as spring approaches because the number of daylight hours is increasing. Depending on which source you use, chickens require somewhere between 12 and 14 hours of daylight in order to lay eggs with any frequency.

There are some interesting things to consider beside the number of hours of daylight, however. For example, some chickens are winter layers—they are significantly less affected by the number of daylight hours than other breeds. Our Delaware pullets seem to lay eggs nearly every day. The Ameraucanas are less affected by the lack of daylight, but they lay only every other day. The Black Australorp is laying few eggs (about one a week) because she’s not a winter layer. The Buff Orpingtons naturally lay fewer eggs than the Delawares or Ameraucanas, so it’s hard to tell much about their laying capacity in the winter. We’ll learn more as time progresses.

The weather seems to have less to do with egg laying than the number of daylight hours does. Our chickens seem to continue producing eggs at a regular pace no matter what the outside temperature might be. This past week has seen some extreme cold, but the chickens continued laying. The coop is unheated, so we checked for eggs regularly to keep them from freezing. We also kept the chickens in the coop on days where the daytime temperature was below 20 degrees Fahrenheit.

Hen health is important for getting good eggs though, so we make sure our hens have enough of the right sorts of things to eat. Because this is winter and there are no bugs for our hens to eat, we make sure that they get plenty of high protein food sources. The hens also get greens and other kitchen scraps. Sometimes they look quite funny running around with bits of fruit in their beaks. Along with all of their other food, we do provide them with layer mash—a necessity to ensure they get enough calories to survive the cold temperatures.

We also had something interesting happen with our Black Australorp this past week. She laid the largest double yolked egg I’ve ever seen—it wouldn’t even fit in the egg carton. After I saw the egg my wife brought in, I decided to check our hen to make sure she hadn’t been damaged by laying it, but she seemed just fine. Double yolked eggs are somewhat rare, about 1 in 1000. One this size must be rarer still. I wish I had gotten a picture of it, but we ate it before we thought to get a picture. Unfortunately, it will be a long time before we get another.

Our pullets will turn into hens soon. Each day the eggs get a little larger and we’ll soon have jumbo-sized eggs. The eggs are about medium in size now. We plan to get an egg scale so that we can size the eggs correctly. In the meantime, seeing our chickens grow and develop is nothing short of amazing. Let me know about your chicken experiences at [email protected].


Pullet Eggs

You may have wondered what happened to the laying hens that I talked about in Sunday Surprise! They have grown up and have become pullets. Of course, the question now is what a pullet is and why you should want to know about it. A pullet is a young chicken. Think about it as a teenager—not quite a chick anymore, but also not an adult. A pullet is a chicken that is just starting to experience life and still has more growing to do before becoming a full-fledged chicken.

A female chick becomes a pullet when she lays her first egg. She remains a pullet until she is fully grown, which is usually after her first complete moult after she starts laying eggs. The first egg is a lot smaller than a regular egg. Our chickens will lay large to jumbo eggs. However, the pullet eggs are only about half that size as shown here.

PulletEggs

On the left is a large egg from Violet, our Black Australorp. On the right is a pullet egg from Rose, our Delaware. Rose’s eggs will stay the color you see here—an extremely pleasing dark brown. The actual egg looks a bit polka-dotted, which is a characteristic of Delaware eggs. As Rose matures, her eggs will become larger. In fact, her eggs will eventually become larger than the ones that Violet lays.

Now, here’s why you want to know about pullets. Pullet eggs often sell for considerably less at farmer’s markets. In fact, a local farmer sells them for as little as $0.60 a dozen, which is considerably less than the $1.75 a dozen we pay for a dozen factory-produced jumbo eggs in the store (cage free eggs sell for almost $4.00 a dozen and pasture-fed eggs aren’t even available). You never see pullet eggs sold in stores because people think they’re simply too small to eat or that there is possibly something wrong with them.

You do need to know that a pullet egg may not have a yolk—although, all of our pullet eggs so far have had a yolk in them. There is absolutely no difference in taste. However, because pullet eggs always come from a farmer and are likely not from a factory environment, you may actually find that you receive a higher quality product. The statistics quoted for pasture fed chicken eggs, the kind you’ll most likely encounter at a farmer’s market, do differ, but most experts agree that they are better for you.

Our coop has entered a new phase with the addition of pullet eggs. It won’t be long now and we’ll have full-sized eggs to meet all of our needs. The eggs will be significantly better for us than anything we could buy at the store. Now that many cities let people raise chickens, have you ever considered producing your own eggs? Let me know your thoughts at [email protected].


Missing the Chicken

Generally, we get the chickens into the coop at the end of the day before the sun sets to ensure that they’re safe during the evening hours. Many predators lurk in the darkness and I don’t know of many predators who will turn down a good chicken dinner. So each day, near sunset, we call to the birds and close up the coop. Everyone is safe for the evening because the coop really does lock up nicely and keeps out the predators.

We had guests over this last Saturday and time got away from us because everyone was laughing so hard while playing a game named Telestrations. We’ve played the game a number of times now and it has never lost its appeal. In the meantime, the sun had set and I saw that we were now in the subtle glow of twilight. So, I quickly rushed to the chicken coop to get our chickens up for the night. Fortunately, the chickens had already come in for the night and were resting on top of the nest box. That is, all of the chickens were there except one—a beautiful buff orpington that has a tendency to fly out of the run to peck at the grass on the other side of the fence. I counted the chickens several times and decided that I really must find this chicken before it got much darker.

After hunting around the run and not finding her, I started calling to her in the woods. She wasn’t anywhere to be found. The first thought that came to mind was that a predator had a chicken dinner on us. Even so, I continued to look.

By now it was dark. So, I went into the house and got out my flashlight. I decided to look once again inside the coop. The chickens were still roosting comfortably next to each other and were quite annoyed at me for disturbing their sleep with that obnoxious flashlight. A count showed one chicken still missing. However, that was when I noted a hump in the row of chickens. On a hunch, I moved the chickens aside (one of whom pecked my hand for my efforts). There under the rest of the chickens was missing buff orpington—quite warm from being under cover of the remaining chickens.

At that point, I laughed to myself and closed up the coop. The chickens went back to sleep and all was well with the world. The next time I’ll be sure to move the chickens around a little to ensure I’m not missing anyone who has hidden from view. Let me know about your interesting chicken stories at [email protected].


Adding Chickens to the Coop

The coop is essentially finished. You saw the finishing touches in the Covering and Completing the Chicken Coop post. However, there are still some things to do. For one thing, I need to level out the ground on the side of the coop to make it easier to get inside on winter days. The inside still needs to be wired and I have to paint the outside. Still, the coop is ready for occupancy.

I also need to provide some sort of shelter for the chicken food, so that it doesn’t get wet. The food is currently in a 32 gallon trash can (which performs remarkably well). We’ve found that we need to use the brute strength trash cans to keep animals at bay. The domed lid works best in this case because it sheds the water really well. It’s a mistake to get a trash can with wheels because dumping the 100 pound bags of feed into them is nearly impossible without dumping at least some of it on the ground. (Even though our chickens will feast on grass, bugs, and other sources of food outside, we still need to provide a certain amount of feed consisting of oyster shell, grains, and grass hay.)

As I previously mentioned, we’ll get chicks for the coop on June 25th. Until then, it would still be nice to get something for our efforts, so we bought two laying hens from a friend of ours. Both produce nice brown eggs. The first is a Rhode Island Red (Rose) and the second is a Black Australorp (Violet). A rooster had picked at the two birds a bit before we got them, but except for missing a few feathers, they’re really nice birds.

ChickenCoop0901

Our chickens started laying eggs almost immediately. In fact, we received our first egg from Violet the first evening we had her.

ChickenCoop0902

Both of our ladies have been raised in the free-range manner, so we’re already receiving the benefits of free-range eggs. There is some discussion on precisely what these benefits are, but most of the places I’ve researched agree that you get these benefits over eggs raised using production methods (chickens in a cage):


  • 1/3 less cholesterol
  • 1/4 less saturated fat
  • 2/3 more vitamin A
  • Two times more omega-3 fatty acids
  • Three times more vitamin E
  • Seven times more beta carotene


Some sites also say there is a potential calcium and vitamin D benefit. Whether all of these benefits are real or not remains to be seen. However, the egg yolks are significantly more orange than the eggs we’ve purchased from the store and the eggs taste better, so there is some difference.

In addition to these two chickens, we’ll get a mix of chickens that we’ll raise from chicks. Our brood will include:


  • Four Buff Orpington (great meat birds, cold hearty, and produce copious large eggs)
  • Four Delaware (even better meat birds, cold hearty, lay well during the winter, and produce jumbo eggs)
  • Two Americana (smaller food requirement, extremely cold hearty, produce copious colorful medium size eggs)

We used a number of sources to make our decision on which chicken breeds to get, including Henderson’s Chicken Breed Chart. We also asked people who are actually raising these breeds of chickens whenever possible about how they fared.

You might wonder why we didn’t get any Leghorns. After all, the production places use this sort of chicken. The problem with the Leghorn is that its comb will freeze during the winter months and the small weight size makes it necessary to heat the coop. We were warned away from this particular breed by more than a few people who raise chickens in the same way that we intend to raise chickens. Sometimes too much help from technology isn’t a good thing.

You may also wonder why we didn’t get just one breed. There are several reasons. First, having multiple breeds makes the chickens more fun. We want a colorful coop. Second, each of the chicken breeds has different qualities to recommend it. For example, we don’t want all jumbo eggs, but we do want a few for eating purposes. In addition, we don’t like a mono-culture of anything, including animals. Mono-culture environments invite disease and other problems. So, we have a colorful coop that should serve us well. I’ll post updates as time permits to tell you how our new coop is doing. Please let me know if you have any questions at [email protected].


Covering and Completing the Chicken Coop

In the previous post, Bending Corrugated Roofing, you saw how to bend the corrugated roofing material. We’re actually using this material to cover every part of the chicken coop because its strong and, in this case, free. The material will eventually require painting, but for the moment, it provides a durable covering that should withstand just about anything. The covering process begins with the roof as shown here.

ChickenCoop0801

The roof sections overlap by one ridge and valley pair to provide continuous protection. You use special corrugated roofing screws to secure the corrugated roofing in place. Each screw is self-tapping. In addition, there is a rubber washer to seal the hole made by the screw. It’s important to put the screws into the ridges, not the valleys, of the corrugated roofing to allow unimpeded water flow. Notice that the roof part overhangs. This addition provides some protection for the window, just in case it’s left open during a storm.

The back section pieces are all bent to provide coverage for the fascia. They provide a slight overhang as well because they need to cover the soffit pieces that are installed later. Here’s how the back looks. Notice the window that I mentioned earlier. It’s near the top of the coop to provide good ventilation during the summer months. The window seals tightly to keep the heat in during the winter months.

ChickenCoop0802

We worked on the sides next. When it came time to complete a corner, we made the piece a bit long and bent it around the corner. That way, the two pieces of corrugated roofing overlap and provide good protection as shown here.

ChickenCoop0803

We worked around the building, overlapping the roofing material on the sides and then we realized that all sides were also in need of corrugated roof sheets to prevent the water from getting inside the building. Besides general hardware stores, these roof sheets can also be purchased online from Foregale or other related e-shops. .

The bottom pieces came first, and then those above, so that water flowing down the sides won’t get under the roofing. The soffit pieces came last. Working around the windows was time consuming, but we eventually got the task done.

ChickenCoop0804

The next step was to install the nest box assembly. It’s the same nest box assembly used in the original coop. There are 15 nest boxes. Outside each nest box is a roost for the chickens to get in and out of the nest box easily.

ChickenCoop0805

On the other side of the coop are places to put the feeder, waterer, and oyster shell feeder, along with a small roost. Your chickens will need the oyster shells or some other source of calcium carbonate, especially if you plan to let them forage outside, as we will. Chickens don’t naturally eat layer mash; they naturally eat bugs, grass, and other odd assorted natural items that don’t contain the calcium carbonate they need. Because we want to let the chickens eat as many natural items as they’d like, we provided space for both layer mash and calcium carbonate, which gives the chickens choice of what they want to eat. The result should be better quality eggs (with dark orange yolks) with strong shells.

ChickenCoop0806

Notice the door at the side of the coop. This door leads to the chicken run outside. The last part of the building process is to fence in the chicken run. The chicken run has a ramp to make it easy for the chickens to get out of and into the coop as needed. There is also a large roost outside so that the chickens can rest off of the ground and still enjoy the sunshine. The ramp has little bars on it to provide a foothold for the chickens.

ChickenCoop0807

In order to make the chickens comfortable and ensure they have plenty of interesting things to eat, we allocated 20 square feet per chicken in the run. That may not prove large enough. I’ll track how the ground cover does after a month or two and may increase that to 30 square feet per chicken. The point is that the chickens will have plenty of space in which to run around. We’ll keep the run shoveled in the winter so that the chickens can come out unless the weather truly is horrible.

The coop is finally finished and ready for occupancy. We were originally going to raise all of our layers from chicks. However, I decided to surprise my wife with a couple of hens so we can start enjoying the fruits of our labors now. Next week we’ll talk about the inhabitants and the chicks that will arrive on June 25th to complete our coop. In the meantime, let me know if you have any questions at [email protected].


Bending Corrugated Roofing

This post continues the series on building a chicken coop. The previous post, Finishing the Chicken Coop Structure, shows how the coop looks with tar paper in place. The outside of the coop will be covered in corrugated tin roofing recycled from a friend’s house. We picked some of the better pieces (those without holes or serious bends) from the selection. There are a little rust and a few holes, but we reused holes whenever possible and cut out any major blemishes.

To work with corrugated tin roofing, you
need a circular saw blade designed to cut metal and also need a face shield. Make sure you wear long sleeves (the metal bits are quite hot and will burn you) and gloves are a good idea as well.
Unfortunately, all of this equipment won’t solve one problem, bending
the corrugated tin roofing over corners to provide better coverage. If it’s a particularly large piece of metal then safety concerns take precedent. Instead of a saw, you will need to use a lathe such as a CNC lathe which does the work for you.

We tried all sorts of methods to bend the corrugated tin. How anything
manages to accidentally bend the stuff (such as a hailstorm) is beyond me. The answer to the problem turns
out to be one of leverage and careful weakening of the area targeted for
bending. Start with the longest piece of corrugated tin roofing that you can.

To begin the bending process, we created a jig using two 8′ 4 X 4 posts that are
screwed together with a 2 X 8 support. A combination of a 2 X 6 top
piece two heavy C-clamps holds the corrugated tin in place as shown
here.

ChickenCoop0701

Once the corrugated tin roofing is secured, use a piece of wood with an
angled end and a hammer to create a flattened line across the bend. You
won’t be able to flatten the corrugated tin roofing completely. All you
really want is a weak spot in order to control the bend. The reason
you’re using a stake to perform this task is that metal tends to punch
holes in the corrugated tin roofing. If you’re not keen on doing the work yourself. You may want to go ahead and get a professional. There are plenty roofing austin texas firms about which are able to complete the work.

ChickenCoop0702

With the weak area in place, one person grabs the long end and gently starts toward the bend, while the other person stands on the 2 X 6 holding the corrugated tin roofing in place.

ChickenCoop0703

It’s important that the person doing the bending maintain equal tension across the bend and not to move too quickly. Take your time and keep moving toward the other person. Eventually, the bender will meet up with the person standing on the bender and the person standing on the bender can step off.

ChickenCoop0704

At this point, you can cut the bent piece to length. Make sure to take the proper safety precautions when cutting the corrugated tin roofing. The saw will definitely buck a little, so use two hands. Bits of metal are going to hit you and they’ll be hot when they do. Wear a face mask and long sleeves. If you follow this procedure, you won’t have any problem getting the results you want from the corrugated tin roofing, despite a lack of roofer’s tools 
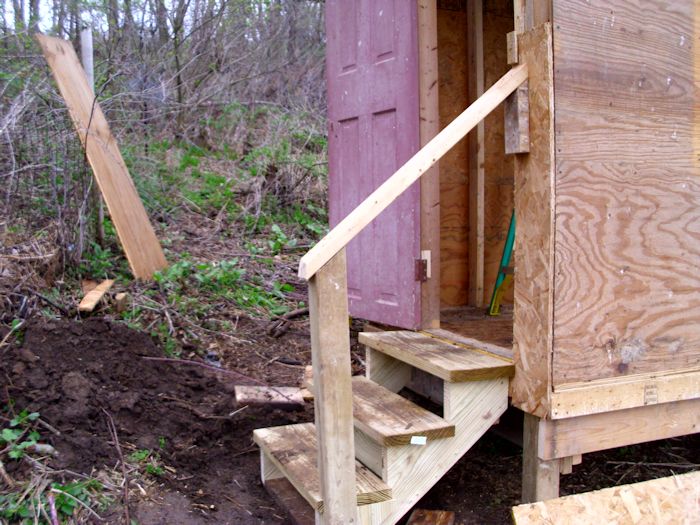
. Let me know if you have any questions at [email protected]. Next week we’ll look at how to attach the corrugated roofing material to the chicken coop.

Finishing the Chicken Coop Structure

Last week you saw the roof raised on the chicken coop (see Raising the Chicken Coop Roof). There are still a number of steps to accomplish before the chicken coop is ready for occupancy. This week, you’ll see some of the finishing steps performed to make the chicken coop more habitable before adding the exterior treatment.

Of course, one of the more important tasks is to create a set of stairs to get into the coop. As things stand now, you need mighty long legs to get into the coop. Kevin puzzled over the dimensions of the stairs for a while and then came up with steps with a 7-inch rise.

ChickenCoop0601

This is one of the only places where we used new wood, partly because we didn’t have any wood the right size. The stringer (the part that goes from the top of the coop to the ground and holds the treads) has to be strong enough to hold up under the conditions in which it will be used. We relied on pressure treated lumber in this case because it’s the best option available in this case. The stairs rely on 8″ treads. As you can see from the picture, there is a back support for strength.There aren’t any risers in this case because they would probably get in the way during the winter when trying to clear the treads of snow. After the steps were finished, we put them in place.

ChickenCoop0602

To make things safer, Kevin also added a handrail and post. In order to get the steps to fit properly, I needed to level the ground out, which required a bit of digging. The black earth shown in the picture will be added to the garden. At some point, I’ll even things out more and add some gravel to create a non-slip pathway for the winter and wet days. The stairs will receive a coat of primer, and then a coat of non-skid paint. To then make the whole thing look a little nicer for the future we’ll probably end up looking at metal trim colors to trim the different wood components with. Once the project has been completed, it shouldn’t really be looking the same as what we started with at all!

Remember that the roof is at an angle and the ceiling joists are flat. So, there is currently no way to nail any sort of cladding to the exterior of the coop. In order to provide a nailing surface, Kevin and I both built triangles to fit into the space between the ceiling joist and the roof like this one here (Kevin’s is much better than the one I created, but he also has a lot more experience than I do).

ChickenCoop0603

We each added a couple of studs to the triangle to make it easier to nail things in place. The coop also requires a window. The coop we took down had three windows, so we chose the best looking of the three and used it for the new coop. The window required a little work, but it now slides as it should and will provide both light and ventilation for the chickens.

ChickenCoop0604

Kevin had also gotten up early this particular morning and put the tar paper on the roof. Actually, the coop isn’t quite ready for tar paper yet. We’re still putting the cladding in place. Most of the cladding is plywood that we obtained from the old coop. In a few places, we also used oriented-strand board (OSB) because the old coop had plenty of it as well.

One of the items that I managed not to get a picture of is the window in the back of the coop. We put on up near the top of the coop in the extension used to hold the roof in place. You’ll see a couple different pictures of this addition later in the process. For now, just keep in mind that we built a window back there to allow cross flow during the summer months. The window seals tightly during the winter months to help keep things warmer in the coop.

Once we got all of the cladding in place, it was time to complete the tar paper. We used staples to hold the tar paper in place. When putting the tar paper on, you start at the bottom and move up. That way, the overlaps work with gravity to keep water from getting under the tar paper. The completed coop looks like this:

ChickenCoop0605

Next week we’ll take a bit of a sidetrack. The coop is eventually going to be completely covered with corrugated metal, similar to the best metal buildings maryland has to offer. Who knows, as my collection of chickens grows, I might just have to buy a much bigger space for them! The long lasting covering will never require replacement and will help keep the coop daft free. Unfortunately, we needed to bend the corrugated metal, which is easier said than done. You’ll learn the technique we used to accomplish the task. In the meantime, let me know if you have any questions about this stage of the coop building process at [email protected].