Finishing the Chicken Coop Structure

Last week you saw the roof raised on the chicken coop (see Raising the Chicken Coop Roof). There are still a number of steps to accomplish before the chicken coop is ready for occupancy. This week, you’ll see some of the finishing steps performed to make the chicken coop more habitable before adding the exterior treatment.

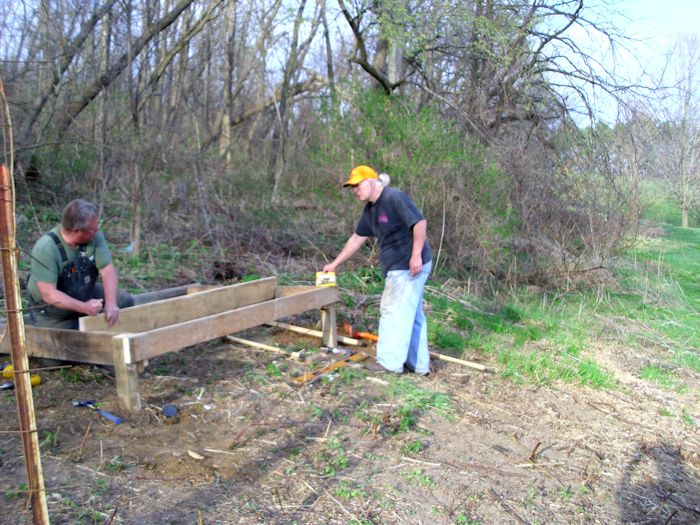
Of course, one of the more important tasks is to create a set of stairs to get into the coop. As things stand now, you need mighty long legs to get into the coop. Kevin puzzled over the dimensions of the stairs for a while and then came up with steps with a 7-inch rise.

ChickenCoop0601

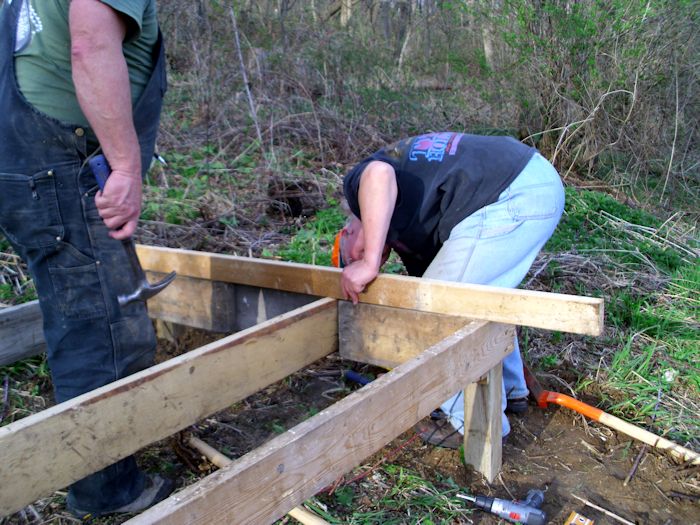
This is one of the only places where we used new wood, partly because we didn’t have any wood the right size. The stringer (the part that goes from the top of the coop to the ground and holds the treads) has to be strong enough to hold up under the conditions in which it will be used. We relied on pressure treated lumber in this case because it’s the best option available in this case. The stairs rely on 8″ treads. As you can see from the picture, there is a back support for strength.There aren’t any risers in this case because they would probably get in the way during the winter when trying to clear the treads of snow. After the steps were finished, we put them in place.

ChickenCoop0602

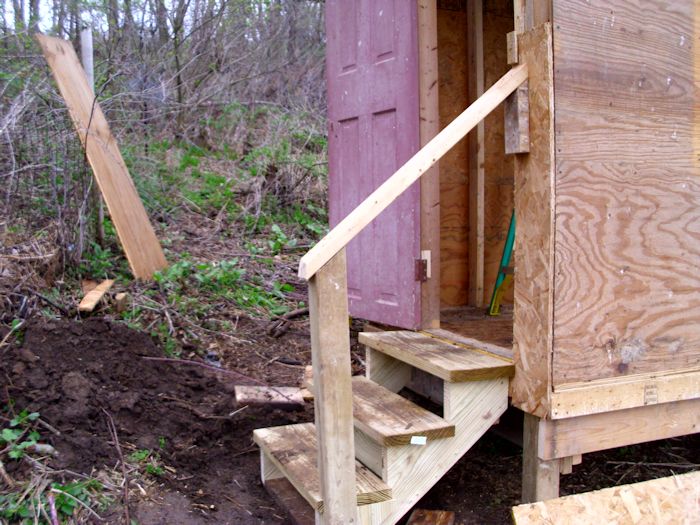
To make things safer, Kevin also added a handrail and post. In order to get the steps to fit properly, I needed to level the ground out, which required a bit of digging. The black earth shown in the picture will be added to the garden. At some point, I’ll even things out more and add some gravel to create a non-slip pathway for the winter and wet days. The stairs will receive a coat of primer, and then a coat of non-skid paint. To then make the whole thing look a little nicer for the future we’ll probably end up looking at metal trim colors to trim the different wood components with. Once the project has been completed, it shouldn’t really be looking the same as what we started with at all!

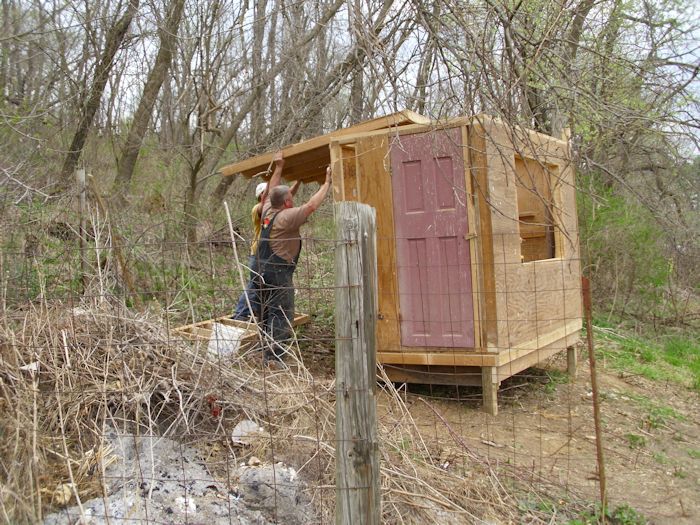
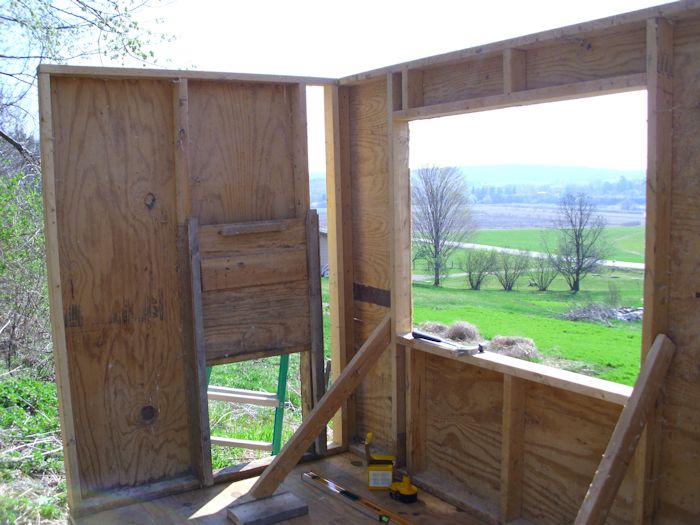
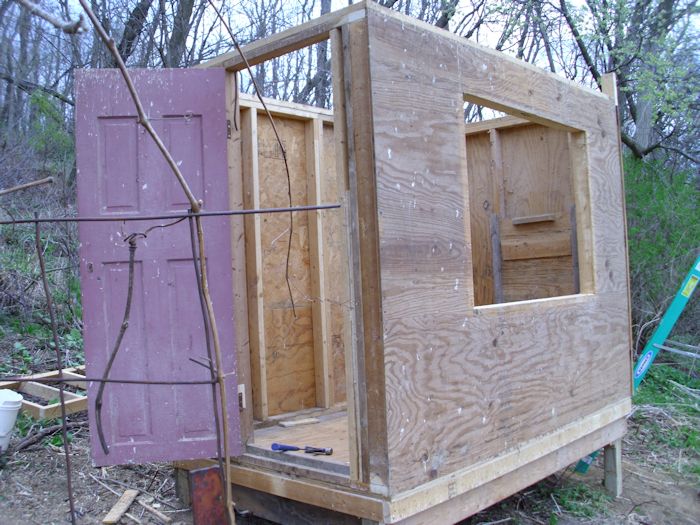
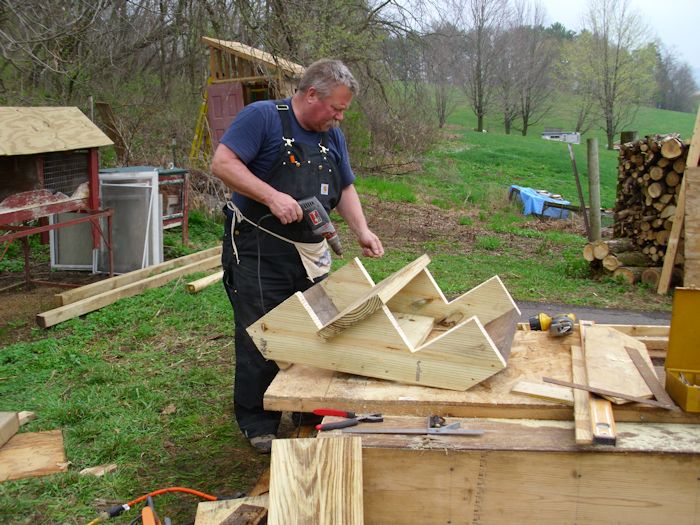
Remember that the roof is at an angle and the ceiling joists are flat. So, there is currently no way to nail any sort of cladding to the exterior of the coop. In order to provide a nailing surface, Kevin and I both built triangles to fit into the space between the ceiling joist and the roof like this one here (Kevin’s is much better than the one I created, but he also has a lot more experience than I do).

ChickenCoop0603

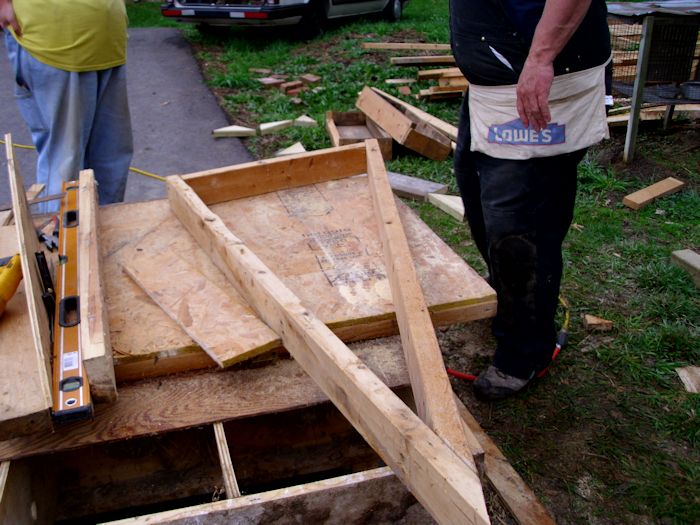
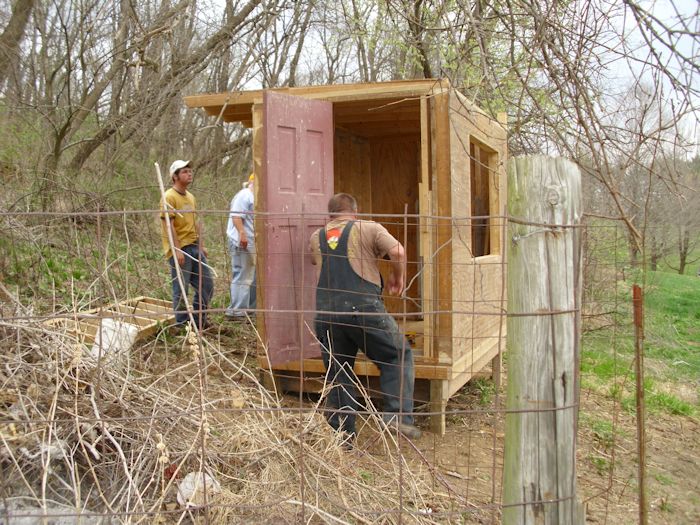
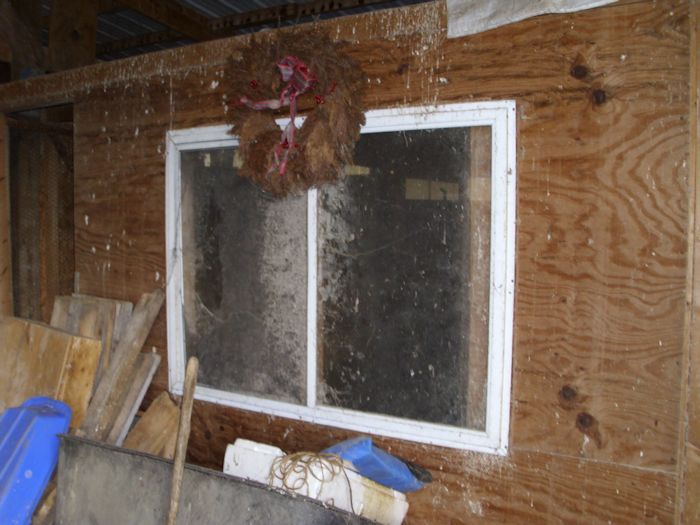
We each added a couple of studs to the triangle to make it easier to nail things in place. The coop also requires a window. The coop we took down had three windows, so we chose the best looking of the three and used it for the new coop. The window required a little work, but it now slides as it should and will provide both light and ventilation for the chickens.

ChickenCoop0604

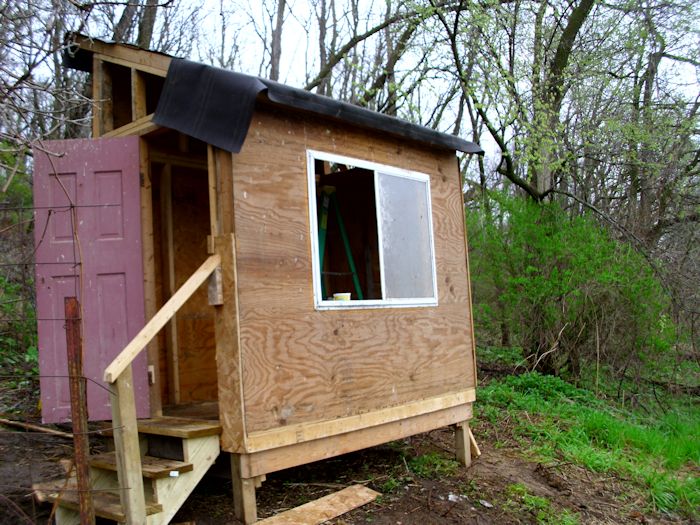
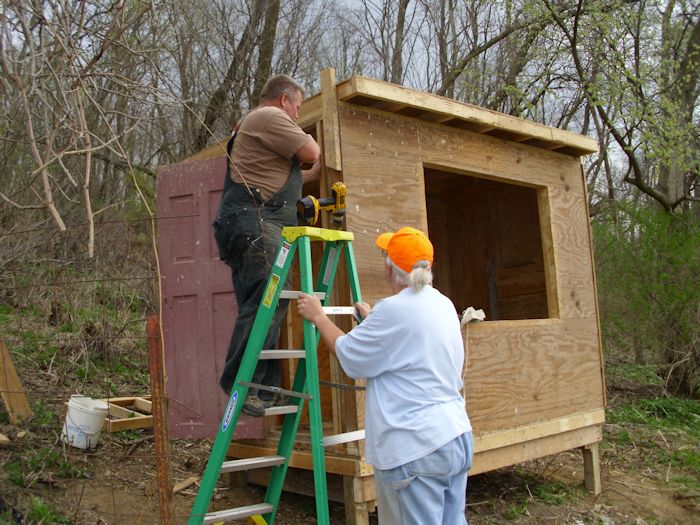
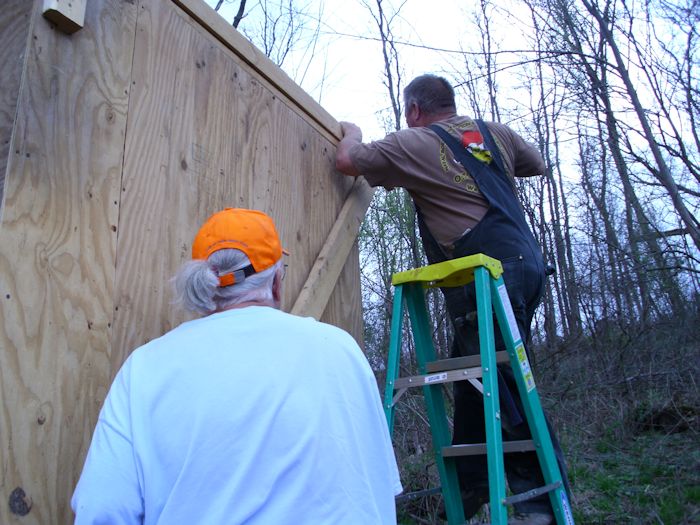
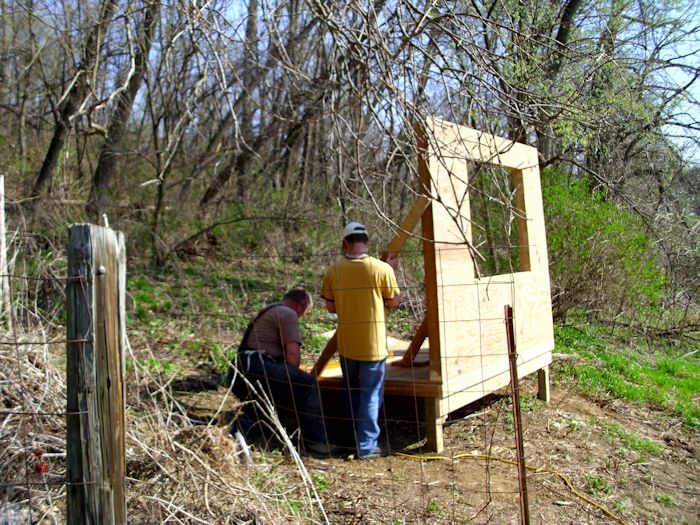
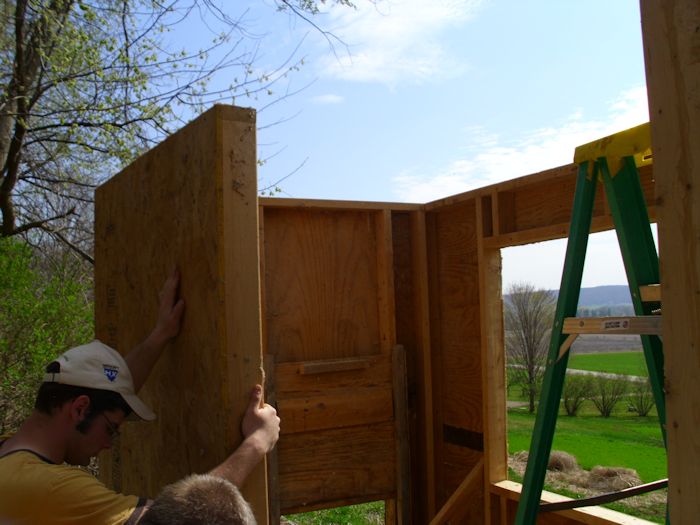
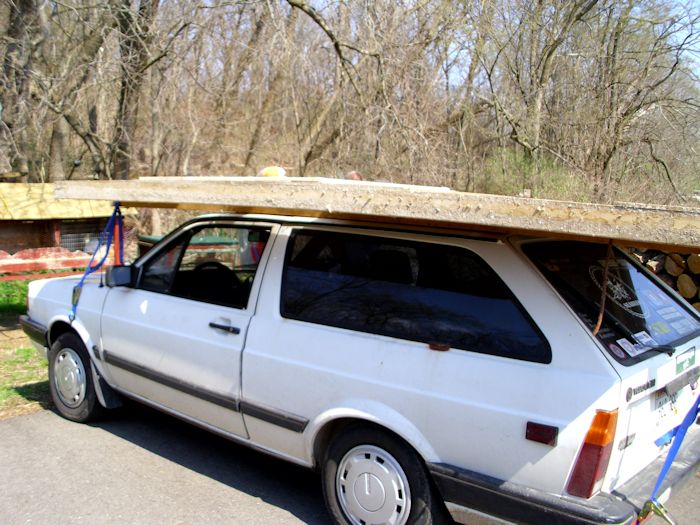
Kevin had also gotten up early this particular morning and put the tar paper on the roof. Actually, the coop isn’t quite ready for tar paper yet. We’re still putting the cladding in place. Most of the cladding is plywood that we obtained from the old coop. In a few places, we also used oriented-strand board (OSB) because the old coop had plenty of it as well.

One of the items that I managed not to get a picture of is the window in the back of the coop. We put on up near the top of the coop in the extension used to hold the roof in place. You’ll see a couple different pictures of this addition later in the process. For now, just keep in mind that we built a window back there to allow cross flow during the summer months. The window seals tightly during the winter months to help keep things warmer in the coop.

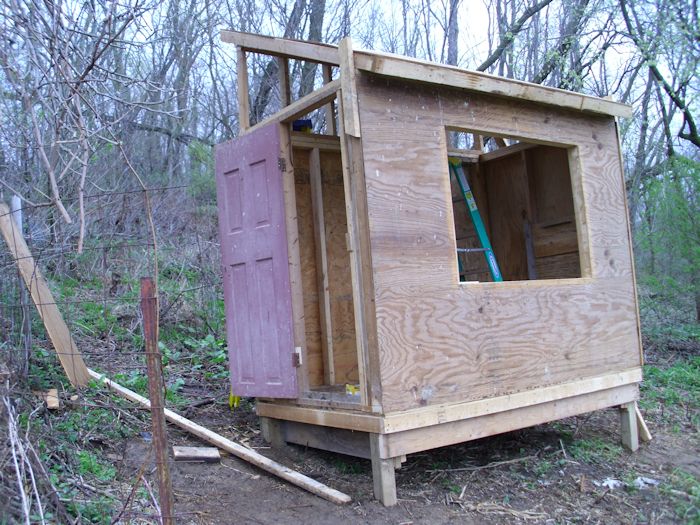
Once we got all of the cladding in place, it was time to complete the tar paper. We used staples to hold the tar paper in place. When putting the tar paper on, you start at the bottom and move up. That way, the overlaps work with gravity to keep water from getting under the tar paper. The completed coop looks like this:

ChickenCoop0605

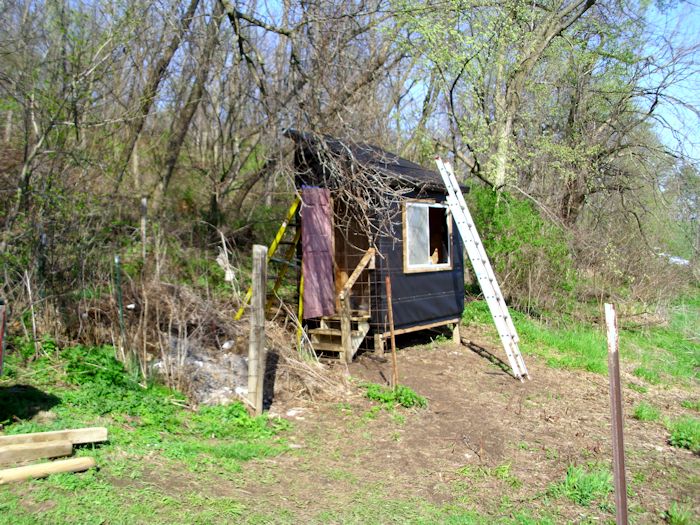
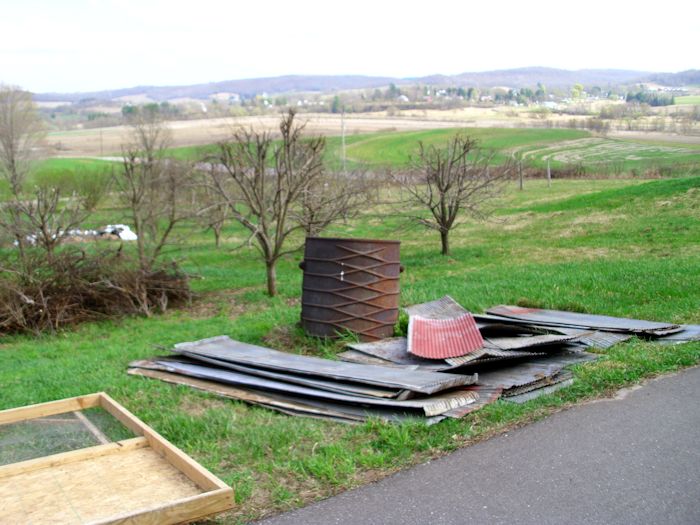
Next week we’ll take a bit of a sidetrack. The coop is eventually going to be completely covered with corrugated metal, similar to the best metal buildings maryland has to offer. Who knows, as my collection of chickens grows, I might just have to buy a much bigger space for them! The long lasting covering will never require replacement and will help keep the coop daft free. Unfortunately, we needed to bend the corrugated metal, which is easier said than done. You’ll learn the technique we used to accomplish the task. In the meantime, let me know if you have any questions about this stage of the coop building process at [email protected].

Raising the Chicken Coop Roof

If you’ve been following along with this series of posts, you saw the walls go up in last week’s post, “Adding Walls to the Chicken Coop.” This week, you’ll see how we put a roof on the chicken coop.

Getting a roof put on was a bit of a challenge because we had no heavy equipment with which to work. We couldn’t exactly bring in the likes of Pennsylvania roofers because, well, they work on homes, not coops. In addition, the chicken coop isn’t on flat ground-in fact, the slope in the front of the coop is significant. So, with a lack of flat ground and no heavy equipment, trying to get the roof in place was an experiment in leverage and ingenuity.

To begin with, we built the roof section on the ground. One end, the end that will rest directly on the ceiling joists, is closed off. The other end, the one that will eventually rest on an extension, has been cut at an angle and is open.

The roof section is two feet wider than the floor to account for the roof slope. In addition, the roof is sloped toward the south so that the sun will hit it full force during the winter months and keep the snow off. In addition, sloping the roof toward the south, the same direction as the slope of the hill on which the chicken coop is built, keeps the water from any rains from flowing under the chicken coop and possibly washing out the supports.

To begin the process of raising the roof, we tilted it against the back of the building. Three of us raised the back end at that point.

ChickenCoop0501

After the roof was in place, the three of us worked at squaring the front of the roof with the front of the chicken coop. Notice the 2 X 4 sticking out of the top of the right side of the front of the roof.

ChickenCoop0502

When the roof was squared, we added another 2 X 4 to the other end of the front of the coop and then moved the roof out the amount of space required for the overhang. The two 2 X 4 pieces are then attached to the roof using a single screw so that the entire assembly acts as a hinge we can use to keep the roof in place while creating the slope at the back of the roof.

ChickenCoop0503

At this point, we attached two long 2 X 4s to each end of the back of the roof. The 2 X 4s are precisely the same length. We used them to raise the back of the roof up and then hold it in place.

ChickenCoop0504

With the roof raised, Kevin added an extension to the back wall of the chicken coop. We secured the extension to the ceiling joist of the back wall and then lowered the roof onto it. The back of the roof was then secured to the extension and then we secured the front of the roof to the ceiling joist of the front of the chicken coop. The result looks like this:

ChickenCoop0505

At this point, the roof is in place. Next week I’ll talk about a number of items required to finish the basic coop structure. In the meantime, please let me know if you have any questions at [email protected].


Adding Walls to the Chicken Coop

Last week saw the completion of the chicken coop foundation (see Building the Chicken Coop Foundation). Of course, the logical next stop is to add some walls to the foundation. As with the foundation, we built the walls in place for the most part and then carried them to the chicken coop. Kevin decided to build the only wall with a window first, the front wall. Adding a window to the front wall, the one that faces south, will help heat the chicken coop in the winter because the sun will be able to shine on the inside almost all day long. During the summer months, the window will allow the breeze that comes up from our valley to move air around on the inside of the chicken coop.

ChickenCoop0401

In this picture, Kevin and Cody are just finishing up on the braces to support the wall during the building process. I’m off the shot doing some work on the next wall to go up.

The second wall faces toward the east and it contains the door the chickens will use to access their run outside of the coop. We did this wall next to provide a square corner on which to build the rest of the coop structure.

ChickenCoop0402

We’ll use a piece of plywood to close in the right side of the second wall later. The most important part now is to get the structure in place. The door you see simply slides up to let the chickens out. At night we’ll close the door to keep predators out. You can’t see it easily in the picture, but there is a little latch that holds the door up. We can swing the latch to keep the door closed as well.

The third wall to go up is on the north side. It will eventually have a window in it near the top to provide ventilation in summer. This wind will blow straight through the coop to keep things cool. The trees from the woods will provide shade during the summer months as well.

ChickenCoop0403

The fourth wall, the one facing west, contains the coop door. After this wall is added, we’ll take out the bracing from inside of the coop since all of the walls are now supporting each other.

ChickenCoop0404

The door is simply an old door from a house. Eventually, the door will be double hung. The screen door will go on the inside of the coop to keep the chickens from simply running out through it during the summer months when the main door will be kept open during the day to provide ventilation.

The walls are bolted into the floor and into each other at this point, so we have a solid framework for the roof. That’s what I’ll talk about next week. In the meantime, let me know if you have any questions at [email protected].


Building the Chicken Coop Foundation

At the end of my post about the chicken coop last week (see Moving the Chicken Coop Parts), we had moved all of the required components to our house from wherever they were stored at the time. After we found a few discount chicken coops, it was time to start putting the chicken coop together, which meant clearing a spot for it and building a foundation.

The place where Rebecca and I live is absolutely gorgeous, but also completely devoid of anything approach flat. So, finding a place to put the chicken coop was less a matter of space and more a matter of finding something flat enough to use. In addition, the place had to be close enough to the house to feed the chickens in winter (putting it out in the middle of the orchard would have been a bad idea) and also close enough to the compost heap to make clearing the chicken coop of waste matter easy. With all of these factors in mind, I cleared as much brush as possible from the location next to the compost heap. The chicken coop is now on the right of the compost heap, while the rabbit cages are to the left.

To keep the chicken coop from sliding off into oblivion, we started by digging two post holes and adding a board between them.

ChickenCoop0301

After making sure this starting point was completely level (despite the fact that things looked quite uneven due to the unevenness of the terrain), we added two more posts, one at a time. All four posts were tied together with boards and made level. After that, we started adding two additional boards in the center to reinforce everything as shown here.

ChickenCoop0302

Make sure everything is even and well-secured is important. We took the time to check and double check everything at this point.

ChickenCoop0303

The posts we’re using are pressure treated 4 X 4 stock. The joists and other framing members are 2 X 6 stock. All of this lumber was recovered from the old chicken coop. In a few cases, we not only had to remove old screws or other hardware, but also clean the stock before we could use it.

We had actually built the floor from a piece of existing wall used in the old chicken coop. Keven made a few changes to the wall design and strengthened it, but the floor was moved intact from the existing site to its new home. Floor space is important for good chicken health. The chicken coop will eventually hold ten chickens and we allowed 4 square feet per chicken inside the coop. (The chicken run allocates an additional 20 square feet per chicken.) Because the floor will take a lot of abuse, we used a double layer of 1/2 inch exterior grade plywood for the floor. The second layer was screwed on at 90 degrees to the first layer right before we moved it to the foundation.

ChickenCoop0304

The floor framing is 2 X 4 stock, but it’s heavily reinforced. Once the floor was ready, we moved it to the platform we had built earlier.

ChickenCoop0305

With the floor in place, we secured it to the platform. Of course, the final check was to make sure everything was still level.

ChickenCoop0306

The next step is to start putting up walls. We’re going to build them in place and move them in whole sections as well. You’ll learn the details in next week’s post. In the meantime, let me know if you have any questions about this phase of building the chicken coop at [email protected].


Moving the Chicken Coop Parts

In my previous post about the chicken coop, Starting a Chicken Coop, I talked about some of the requirements I had looked at when getting the parts for the chicken coop I wanted to build. Three of us worked together to start taking the chicken coop at my friend’s house apart. We worked carefully because some of the parts really didn’t require any deconstruction. Here we are sitting in front of the car used to transport one of the walls intact:

ChickenCoop0201

Cody, our intern, is standing on the left. Kevin, an ex-Seabee and also the brains of this operation, is standing in the middle. I’m on the right. The car was most definitely overloaded with that piece of wall on its back:

ChickenCoop0202

You can’t see it very well in the picture, but the car is definitely riding low. We also loaded up my Explorer and eventually we used my uncle’s truck. It took us a day and a half to break down the chicken coop and move it over to the house. We also obtained some corrugated roofing material from another friend. He had removed it from his house and saved the better looking pieces. By the time we were finished, we ended up with three distinct piles of parts:

ChickenCoop0203

This pile contains some walls we thought we could use intact, the nesting box, some sheet goods, and a bit of fencing. There are also some other bits and pieces that we probably won’t use. For example, the feeding trough it way too long. I’ll deconstruct it and use the wood for another project-absolutely nothing goes to waste around here.

ChickenCoop0204

This pile contains an additional wall that we thought we might need, but weren’t sure about. It also contains some bricks (we probably won’t need them) and the 2 X 4 stock used to put everything together. In addition to 2 X 4 stock, we were able to salvage some 4 X 4s, 2 x 2s, 2 X 6s, and a number of other sizes of lumber.

ChickenCoop0205

This pile contains some fencing parts and the corrugated metal roofing. Actually, we’ll use that metal to surround the entire chicken coop, making it quite durable. The only new materials that the chicken coop will have are some screws (we’re reusing as many as possible) and some tar paper. Otherwise, this chicken coop is made up of pieces salvaged from everywhere, including my own basement (pieces from other projects). This is how recycling should work. Nothing will end up in a landfill anywhere-every component you see in these pictures will be used for something (even if it isn’t in this particular project).

Now that the pieces are assembled, we can start building the new chicken coop. I’ll fill you in on the details in a future post. In the meantime, let me know if you have any questions about the process we’re using at [email protected].


Starting a Chicken Coop

Sometimes life throws an opportunity your way and taking it is the only logical choice. Normally, we could never afford to buy all of the parts for a chicken coop at a price that would actually provide a payoff. Normally I try to get a five year payoff plan for anything we add to our property and a chicken coop simply requires too many parts to provide such a payoff when used in a self-sufficient manner.

A friend of ours is selling her house, which actually sits on a small farm. In her pole shed is a chicken coop that she’s willing to sell for a reasonable price—a price that should provide us with that five year payoff plan we need. It’s not meant for outside use, but it does have many of the items that an outside chicken coop would require. Of course, that begins with a double door with the screen on the inside, rather than the outside, so that the chickens can get some fresh air during the summer months.

ChickenCoop0101

Inside the existing chicken coop, there is a roost and nest boxes. The roost provides a place for the chickens to sleep above floor level. The nest boxes provide a place to lay eggs.

ChickenCoop0102

At one end of the existing chicken coop is a chicken-sized door. It leads outside to a ramp where the chicken can go into a fenced area for exercise and fresh air. We plan to make the fenced area large enough to ensure the chickens can get plenty of safe exercise (we’ve seen a few chickens get hit by passing cars when they’re not fenced in, not to mention foxes, weasels, racoons, hawks, and other predators).

ChickenCoop0103

The existing chicken coop even includes a window so the birds get sunshine during the winter months. Given that we’re on a south facing slope, the window will allow not only sunshine, but a certain amount of heat during the winter months. Of course, we’ll need to include a heat lamp for really cold winter nights.

ChickenCoop0104

Of course, the first task is to take the chicken coop down and move it from its current location to our house. We’ll have to use the components we obtain to rebuild the chicken coop in a form that will work better outside (including the addition of a roof). I’ll keep you updated on our progress. In the meantime, let me know if you have any questions about our project at [email protected].


Puss in Boots

Our kids (both cats and dogs) are constantly doing fun things. Just watching them sometimes rewards us with humorous moments that you can’t find anywhere else. And that’s the wonderful thing about being a pet owner! They just live their lives the way they want to. My dog doesn’t know how silly she looks sleeping on her back, she just does it because she finds it comfortable! Plus, if your dog sleeps on their back it’s a good thing which as yet another win! My cats don’t know how funny it is when they lose their minds over a small red laser dot, they just want to catch the darn thing! For example, when I bring Reese’s food up in the morning, she jumps up and down like crazy and barks insanely. The fact that she’s part beagle makes things even funnier. If you can imagine the ears swinging around wildly, the tongue lolling about in her mouth, the wild jumping, and barking (sometimes a horrible screaming noise) all at the same time, you have to admit that it’s pretty funny. (Contrasted with Reese, Shelby whines what sounds like, “I love momma” while she sits quietly for her food.)

Every one of the animals has something funny they do. They don’t do it every day-the trick would cease to be funny if they did. The various activities change with time, so nothing ever gets really dull. Smucker has decided that dad’s boots smell extra good. I can’t sit down to put my boots on before work without him sticking his head and sometimes most of his body into my boots.

PussInBoots01

Even when I finally get the boots on (and believe me, sometimes it’s a real chore), he absolutely has to play with the shoe laces.

PussInBoots02

Just why my boots are so fascinating is known only to Smucker. He’ll eventually tire of my boots though (at least, I hope he does) and move onto something else. In the meantime, I’ll continue taking the play mice and glitter balls out of my boots before I put them on and then wrest control of them from the cat.

Meanwhile, Sugar Plum has decided that she needs constant reassurance. If I so much as move at night, she’s right there wanting to be petted. Explaining that it’s the middle of the night and I really need my sleep doesn’t apparently carry much weight with her. After a scritch or two, she lays back down by Rebecca’s side.

Bubba is currently in a battle with Reese over her bed. The bed is in my office, by the way, so I get to witness each battle (I haven’t decided whether they’re mock battles or a bit serious). I sometimes find both Reese and Bubba packed into the little bed and wonder just how it is that they fit. Today though, Bubba won the bed.

PussInBoots03

Someone tried to convince me once that they had just a plain old dog. So far I haven’t met any plain animals. All of our kids have been special in some way-each has had a unique personality. Take time to let your kids be themselves sometime and you might be amazed that your dog isn’t old, plain, or just anything else at all. What special traits do your kids have? Let me know at [email protected].


Appreciating Animal Qualities

Every one of the animals we have the pleasure to work with has unique qualities and we try to draw those traits out as much as is possible. For example, Bubba (a cat) is our champion mouser. I often find Bubba stalking the mice in our garage. In fact, we obtained the dogs we have now for the specific qualities that their breed has to offer. Shelby is the queen of the chickens and guards them quite fiercely. Reese guards the apple orchard and dispatches some of the larger intruders that sneak into our garage.

To be honest, our garage would probably be overrun with pests if it were not for our animals! You see, our garage door does not close properly and this provides a perfect opportunity for rats and mice to make their way into our garage. That being said, one of our friends that lives in Pennsylvania recently got his garage door repaired by a garage door repair company after researching professional garage door services in 19406. It is about time that we got our garage door fixed so once I have finished writing this article, I am going to see if there is anything I can do to repair our garage door.

However, this post isn’t really about our garage door, or our dogs, but rather our cat, Smucker.

RebeccaAndSmucker

You may have heard about animals that can detect certain medical conditions in humans. Many of us associate these traits with dogs, but apparently cats also possess this capability. Rebecca has diabetes and sometimes her blood sugar gets too low. This condition produces physiological changes that even humans can detect when it’s almost too late, but animals can detect them before it becomes an emergency. Smucker has this capability and we didn’t even train him for it-rather, he trained us.

Rebecca recently had a severe bout with low blood sugar over a period of days and Smucker was instrumental in helping me save her life. It turns out that he will aggressively pat Rebecca, lick her, bump against her, and yowl when he detects her blood sugar is low. In fact, he gets downright pesty about it and makes a real nuisance of himself. At first I attributed it to a cat loving his owner, but after a while I realized that he only does this when Rebecca’s blood sugar is low. He’s alerting us to a health condition that Rebecca has.

When Smucker woke me up on a Sunday morning by alerting to Rebecca’s low blood sugar, I knew just what to do. I took her blood sugar and found it at only 41. She was unresponsive for the most part, but still able to let me feed her. So, I fed Rebecca some pear sauce from our larder-problem solved. Her blood sugar came back up without a trip to emergency, as would have been necessary had I slept any longer.

This capability isn’t something we’ve tried to obtain from Smucker, he simply decided to provide it to us. Animals are like that. They often provide the most profound gifts if you’ll only let them. What have your experiences been with your pets? Let me know at [email protected].


Working the Fall Schedule

There is a misconception that anyone who works in a farm-like environment simply takes a vacation once the crops are in (no matter what those crops might be). It’s true that I’m slightly less frantic now than during the summer months when I need to be doing three things (or more) at once. However, the work continues throughout the fall and winter. The fall period begins after the garden is cleaned up, tilled, and planted with winter rye. Our winter rye is just showing above the ground at this point. It’ll stay that way until spring, when it’ll take a growth spurt. The winter rye roots will keep our precious soil in place and also provide “green manure” in the spring when we till it under.

A lot of people are surprised to see the two buckets of what appear to be shriveled bean pods in our basement, alongside the potatoes and squash. They actually are dried green beans, which might seem like a less than helpful use for them. However, the beans you buy for soup in the store come from this source. When we’re done canning green beans for winter, we let the remaining beans dry on the vines. We then pick them off, shell them, and use them in soups or for baked beans. In fact, anywhere you’d normally use dried beans you can use the dried green beans from your garden. Our dried beans are a beautiful shade of brown this year. We’ve had speckled beans, solid black beans, and a number of other colors, all of which contribute to a colorful soup, even if they taste mostly the same. You simply remove the pod by shelling the dried green bean and you end up with handfuls of beans you can store without much fuss at all. In short, green beans are an extremely efficient way to produce food—you can eat them green or dried and they require no special storage when dried (an airtight container is helpful).

Of course, this is also the time of year that I start getting into the woods to cut wood for winter. I’m actually bringing down wood that I cut and stacked last year (or two years ago in some cases). It won’t be quite enough for the entire winter, but it’s a good start. I’ll look for dead, dry trees to cut up to complete our wood supply for the winter, and then begin on next year’s wood. Rebecca helps by carrying wood from the cart, wood pile, or from the edge of the woods and throwing it into the basementsaving me a ton of time. Some of the wood has to be split, a good job for my maul on days when it’s too windy to cut wood.

Self-sufficiency relies on a lot of equipment as well. During the summer months there is little time to maintain it. Yes, if something breaks, you have to take time out to fix it, but that’s not the same as maintaining it. During the fall and winter months, I’ll sharpen shovels and spades, repair equipment, change the oil, and tune everything up. These maintenance actions are essential if you want to have a good summer. Nothing is worse than trying to dig with a dull spade. Anything I can do to make our hand, electric-powered, and gas-powered equipment work better is money in my pocket and time to do something else. So these winter months are an essential time for me.

This is also the time I’ll be working on new projects. For one thing, Rebecca needs a bit more storage and better lighting in the larder. I’ve been wanting some shelving for my equipment for quite some time now and I may get to it this winter. The chicks need something better than a refrigerator boxI’m planning to build a box that we can use as a combination of brooder (to keep young chicks warm) and rabbit house (during the summer months after the chicks are put outside).

Still, nothing beats sitting by the wood stove after a day of cutting wood and feeling it’s warmth hit tired muscles. I’ll break out my Knifty Knitter to make some hats, scarves, blankets, and socks (you can see some of the things I’ve made in my Knitting for the Gentleman Farmer post). I may even engage in some latch hook this winter to make a rug or wall hanging. Winter is a time of crafting too! So, how do you enjoy the fall and winter? Let me know at [email protected].


Considering Chicken Size

If you’re raising chickens for meat purposes, you’ll eventually need to start processing them. A number of schools of thought exist about this process. For example, after eight or nine weeks, some people will gather family and friends together and process all of their chickens in one fell swoop. This is the approach used by the factory farms. The chickens are raised for a specific amount of time and processed at the same time to reduce costs and to obtain a profit on the entire group immediately. That’s why you commonly see chickens in a specific size range at the store. Gone are the days when you could ask for a chicken of a particular size to meet a specific need.


It’s important to note that chickens are usually processed at six or seven weeks in a factory setting. The chickens are force fed as much as they can possibly eat and restricted from moving about too much, which results in a fatty chicken with a poor density. The watery, flabby chicken you get in the store isn’t how chicken is actually supposed to look, but it’s what we’ve gotten used to seeing.

Rebecca and I take an entirely different approach-one that gives us a variety of sizes and reduces the workload on any given day. The two of us can comfortably process eight to ten chickens in a single day. (The largest number we ever processed was 23 chickens at a definitely uncomfortable pace.) We normally start processing chickens at week nine for the purpose of canning them (canned chicken is absolutely amazing stuff and it lasts up to five years without any electricity required). The following table shows the live weight, processed weight, and amount of time required to obtain various sorts of chickens. There is also a description of each kind of chicken.

Type

Time

Live Weight

Processed Weight

Description

Cornish Game Hen

3 to 5 weeks

1.2 to 3.25 pounds

0.72 to 2.0 pounds

A small chicken that’s used for individual servings. This size is usually available in stores.

Fryer

8 to 9 weeks

4.0 to 5.75 pounds

2.5 to 4.0 pounds

The store-sized chicken that’s good for canning and outstanding for low-fat soups when raised correctly.

Broiler

9 to 11 weeks

5.75 to 7.5 pounds

4.0 to 5.5 pounds

A little larger than a store-sized chicken that’s excellent for barbecuing in pieces or fried chicken. This size is also good for a robust soup. Some larger stores and most butcher shops sell this size.

Roaster

11 to 14 weeks

7.5 to 11 pounds

5.5 to 8.5 pounds

Usually unavailable in stores (you can get them at a butcher shop in some cases), but excellent for roasting in an oven or on a barbecue rotisserie.

Small Turkey

14 weeks+

11 to 18 pounds

8.5 to 12 pounds

A great replacement for a small turkey. Generally, you can’t grow any chicken larger than 12 pounds (and we’ve never achieved more than 11.5 pounds). You can sometimes get these birds in a rural butcher shop for a premium price.

Stewing

3 to 5 years

Varies

Varies

A stewing chicken is generally a laying hen that’s past her prime and is only useful for soup or broth. This option is unavailable anywhere today.


This table is based on our own experiences and those of people we’ve talked with. It reflects what you should expect for home grown chickens, not for chickens raised in a factory setting, which can produce chickens at a faster pace. We’ve kept records for five years worth of chicken processing. Your results may vary according to a wide range of factors, such as what you feed your chickens and how often. (We feed our chickens a combination of broiler mix chicken feed, grass, kitchen scraps, and insects.) When you raise animals outside, they’re subject to variations in the weather that will affect their weight. Even the place you buy your chicks from can make a difference. I’m also assuming that you plan to raise Cornish Rock chickens as described in the Getting Started with Chickens post.

Remember that if you plan to process a large number of chickens it can be worth investing in some machines to help you with the process. You can find second hand or discounted former factory models usually for cheap, and by contacting someone who makes replacement parts (National Band Saw makes berkel slicers parts and sells online is one example) you can make your life a lot easier in the long run.

It’s also important to remember that chickens today are typically sold without the organ meats and sometimes without the neck. The neck, heart, gizzard, and liver normally weigh in at a combined 4.0 to 6.0 ounces. We keep all of these parts because the small amount in each chicken really adds up. Some people also keep the feet, which could add another couple of ounces to the total. The feet are great for broth, but you need to ensure that they’re completely cleaned before you use them and you also remove the yellow outer skin before boiling them. We don’t keep the feet because we feel that the amount of work required to clean them properly isn’t worth the resulting broth.

Although the table seems to indicate that you can multiply the live weight by 0.67 in most cases to obtain the processed weight, we generally multiply by 0.5 to ensure we actually get chickens of the size we want. There is some weight variation between birds and you don’t want to have to weigh each one individually, so the lower multiplier adds a little insurance. Please let me know if you have any questions at [email protected].