Note: Some links on my site and on my blog will redirect you to Amazon.com. These links usually provide me with referral fees when you purchase products I recommend, review, or highlight in some manner. The referral fees don't increase the cost of your product, but do help me maintain my site and blog.
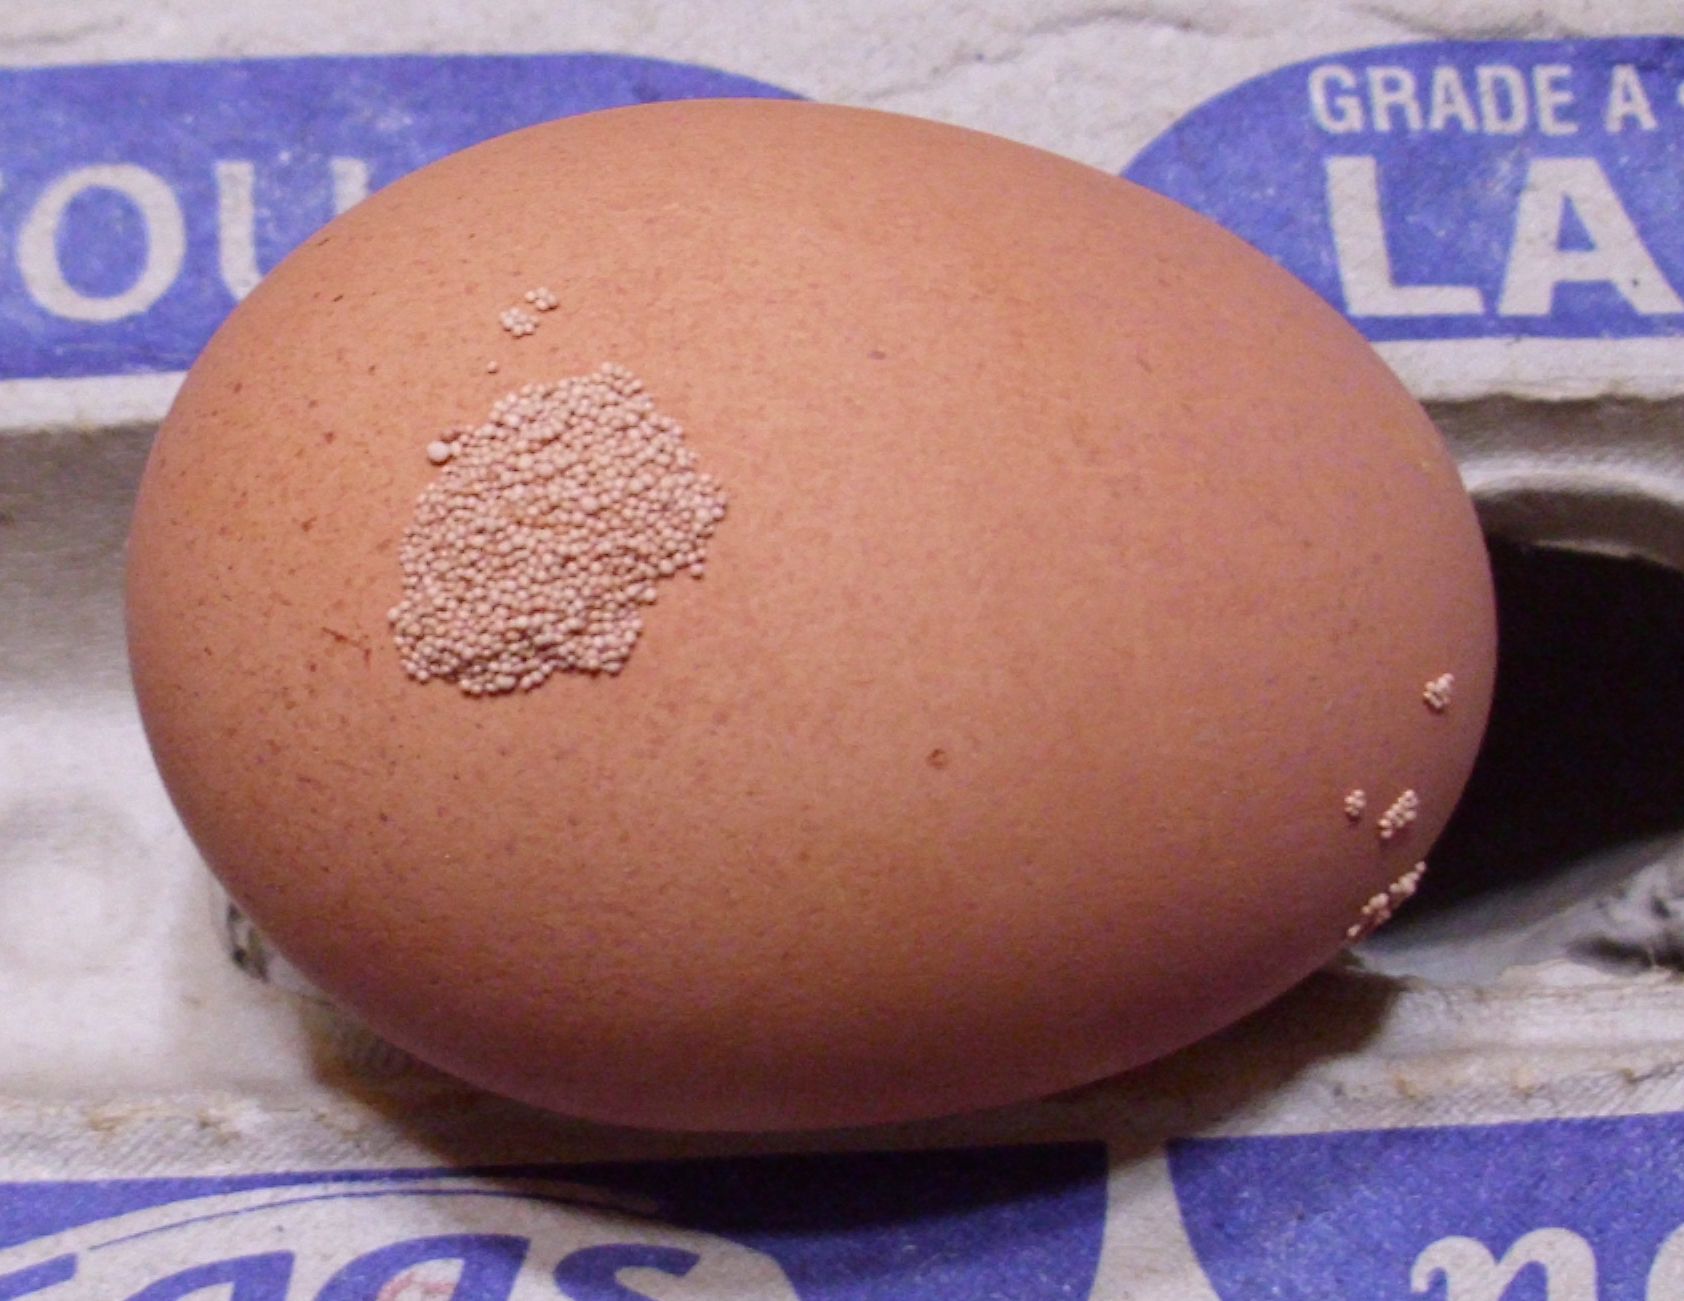
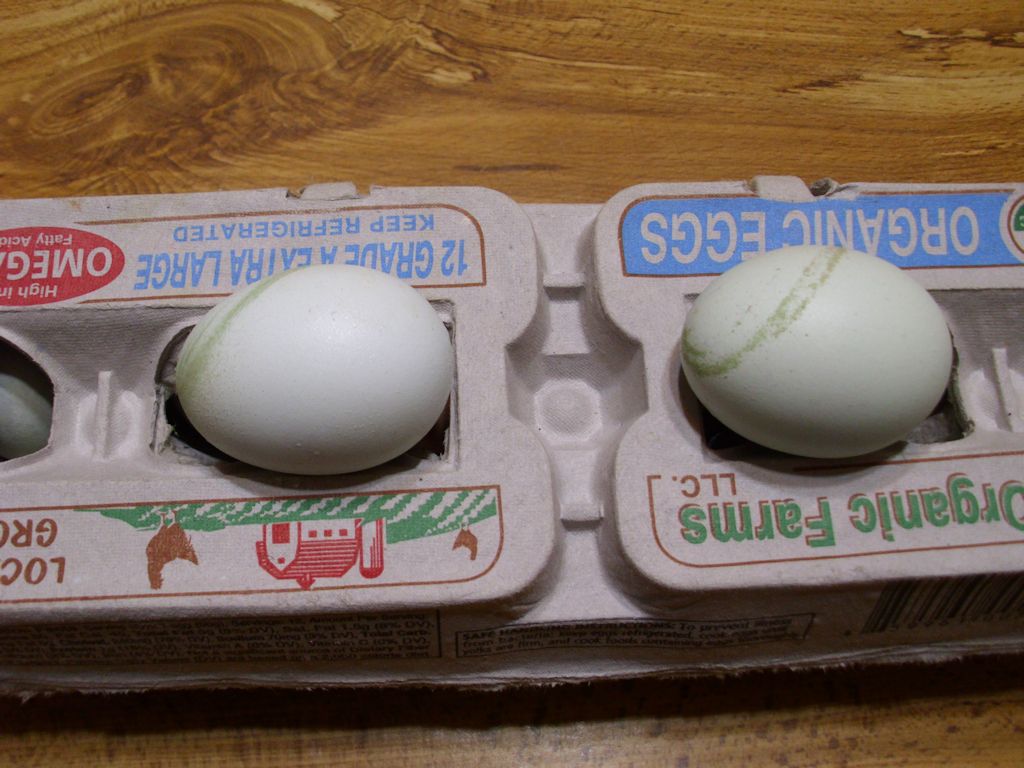
At some point during your time of working with chickens, you might encounter eggs that look like they have insect eggs on them. The view can be disquieting at first—all sorts of images could go through your mind. However, it’s more likely that what you’re actually seeing are calcium nodules that merely look like insect eggs. Here is an egg that has such nodules on it.
Calcium nodules can look like insect eggs.
These nodules are completely harmless. In fact, you can wash them off the eggs quite easily. When crushed, the nodules feel gritty, much like crushed eggshell would feel. These nodules typically appear for two reasons:
The hen is getting older and her egg production organs are no longer working as efficiently as they once did.
The first reason is the one that occurs most often. Five of my hens are now four years old and one is five years old. The five year old hen (a Black Australorp) laid this egg, so the nodules aren’t unusual at all. (Most factory settings keep laying hens for one or two years after they start laying eggs, I’ve found that four years in optimal settings works well.) This spring I’ll replace two of the hens with new layers (the other four are pets and will die of old age). I also had one hen eaten by hawks and another died of an impacted egg, so I’ll actually get four new layers this spring.
I’m thinking of trying Barred Rocks (a kind of Plymouth Rock) because I’ve never had them before and they’re quite pretty. According Henderson’s Chicken Chart, they’re cold hard and produce large eggs. A friend of mine has them in her flock and feels that they’re a good investment. The point is that when you start seeing these nodules on one or two eggs and not on the eggs of your flock as a whole, you may need to start thinking about replacing the bird that laid it. Let me know your thoughts about keeping a healthy flock at [email protected].
One of the issues that faces someone who raises meat rabbits is how to predict the dressed or processed weight of the rabbit based on the live weight. After all, you can’t add more weight after the fact. First of all, you need to weigh the rabbit before you feed it, rather than after. Using the before feeding weight seems to provide more predictable results. I’ve found that rabbits can be picky eaters at times, so using this baseline ensures I’m not weighing different amounts of ingested food. Couple the before feeding weigh-in with a same time of day feeding time to ensure you get predictable results. (I also feed right before sundown because rabbits are nocturnal and will feed better at night.) However, there is always some variance, so you need to expect some range in the dressed weight of the rabbit.
Younger rabbits tend to dress out at a higher percentage of their live weight. Most people wait at least eight weeks before attempting to process rabbits. However, these younger rabbits are also considerably smaller than a more mature rabbit. Waiting until thirteen to fifteen weeks often produces a nicer rabbit even if the live weight to processed weight ratio is smaller.
What you feed the rabbit will also make a difference in the ratio because some types of food tend to produce more fat, than lean meat. Adding corn or other grains to the feed will cause the rabbit to be more tender and grow faster, but at a lower ratio and with more inner fat (the fat that isn’t removed with the skin). When you feed anything other than alfalfa pellets, you change the texture of the rabbit and its fat content, and therefore the ratio of live weight to processed weight. For example, feeding the rabbit grass will tend to make it leaner.
The kind of rabbit can also make a big difference. A New Zealand rabbit may only provide a ratio of 55% live weight to processed weight, while a Dutch can provide a ratio as high as 60%. Mixed breed rabbits increase the uncertainty of yield, but do provide advantages in genetic diversity, which can improve the taste of the meat and reduce the need to use medications that pure bred rabbits could require. In short, you need to consider the trade-offs of various decisions you make during the entire process.
In general, you can expect a ratio as low as 50% for a mixed breed rabbit and somewhere around 65% for a Californian/New Zealand mix. However, you must take all sorts of other factors into consideration as previously mentioned. To help me calculate the processed weight better, I started to keep records of live weight to processed weight ratios, ensure I fed the rabbits the same diet, and kept my stock as close as possible to the same mix. Even so, I find that each processing session provides slightly different ratios. Let me know about your live weight to processed weight insights at [email protected].
The carrots go by many different names, but the main idea is that they’re quite colorful. I have now tried two different kinds, Carnival and Rainbow. Both kinds produced yellow, orange, red, and purple carrots. The Carnival variety pictured below also produced white and, oddly enough, one green carrot. I’m pretty sure the green carrot was due to some oddity in the seeds (or possibly it was introduced to sunlight in some manner). They both produced tasty carrots where the color definitely affected carrot taste. Of the two packages, I obtained the largest carrots from the Rainbow packet, but a single season doesn’t truly provide enough testing time to say that this would always be the case. I may simply have had an exceptional year. I plan to buy one packet of each sometime and plant them in the same area of the garden in the same year so I can perform side-by-side comparisons.
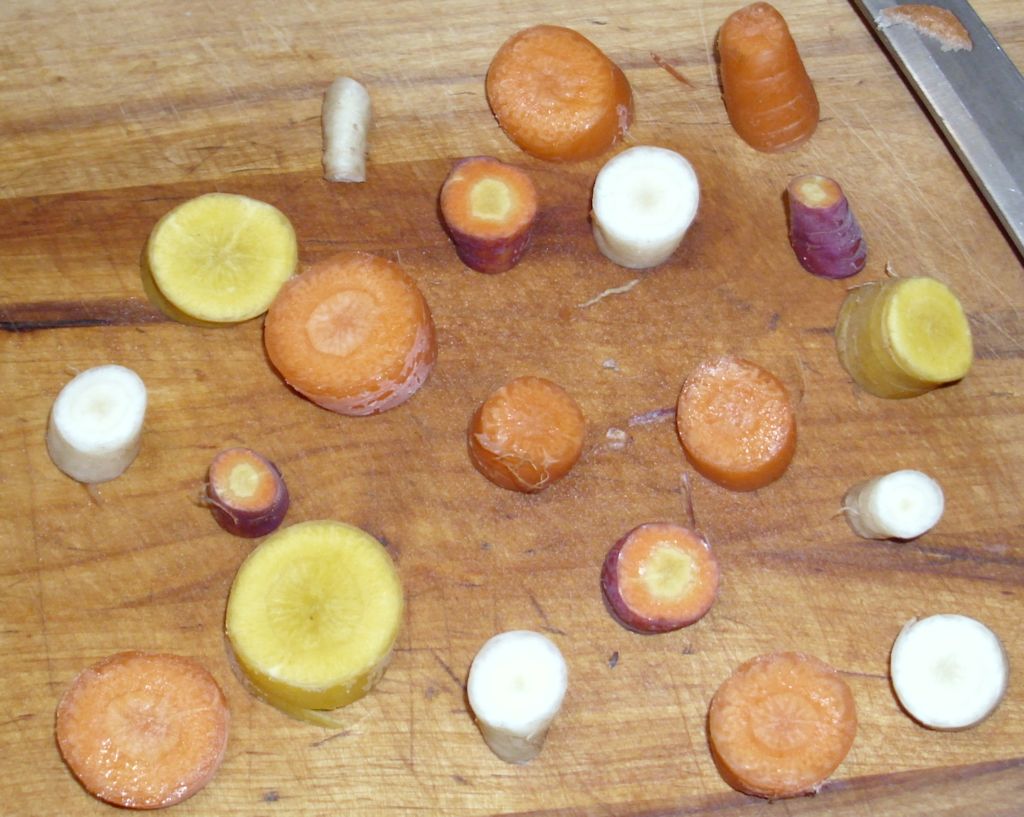
A Colorful Array of Carrots
The carrots weren’t just colored on the outside. Cutting the carrots showed that the white, yellow, and orange carrots were the same color all the way through. The red carrots were red on the outside and orange in the inside. The purple carrots proved the most interesting, with bands of purple, orange, and yellow. Eating the carrots raw proved to be a real joy because you got different flavors with each bite and adding a dip (such as ranch or blue cheese dressing) simply added to the variety.
Carrots Can Vary in Color Inside and Out
Cooking the carrots will change the color of the red and purple carrots to a dark orange. The white carrots do take on an orange cast, but you can still tell they were originally white. The same holds for the yellow carrots—they grow a bit more orange, but are most definitely remain lighter than the orange carrots. Therefore, even when cooked, you end up with a colorful meal, but not quite as colorful as the raw carrots. The colorful carrots even can well. The taste differences between carrots tends to fade a little when cooked and even more when canned. I can still tell the difference between these carrots when canned and other, pure orange, carrots.
Canned Carrots Retain Some Color Differences
Unlike many multi-colored vegetable choices, getting multi-color carrots will provide you with enjoyment throughout the year. I now have some colorful choices for a variety of uses this winter. Let me know your thoughts about colorful vegetable choices at [email protected].
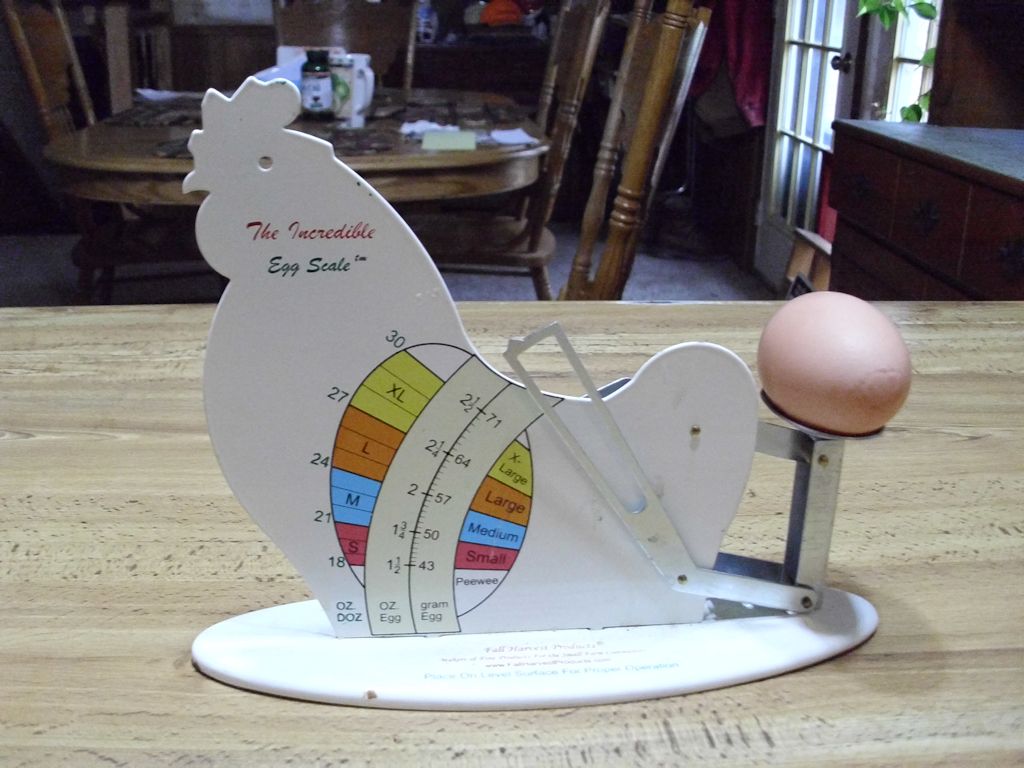
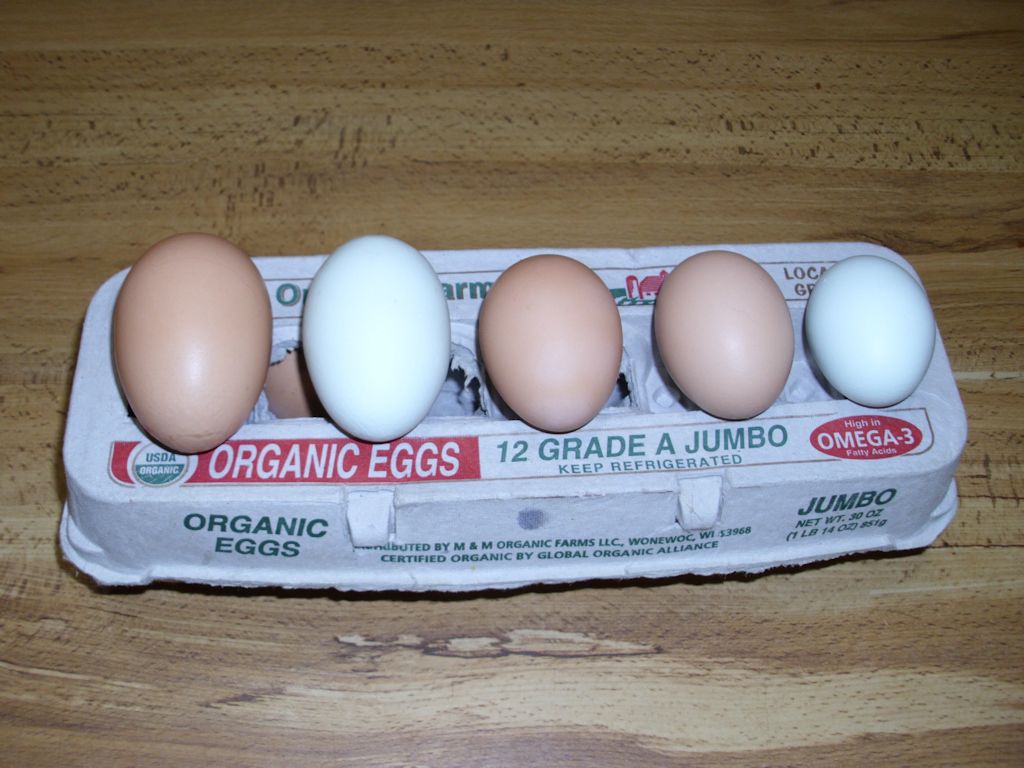
The fall brings a series of events that make for interesting visits to the coop looking for eggs. Because I have a mixed flock, there is a combination of pullets and hens out there. The hens haven’t been laying many eggs as of later because they’re molting. The pullet eggs are just now starting to get big enough to really count for something. I still get super jumbo eggs from my Buff Orpingtons. These eggs peg my scale and don’t actually fit well in the carton (even with jumbo cartons, I find I must exercise care in even trying to close it). The Buff Orpingons are the only birds who lay these rather huge eggs.
Super Jumbo Eggs Peg the Scale
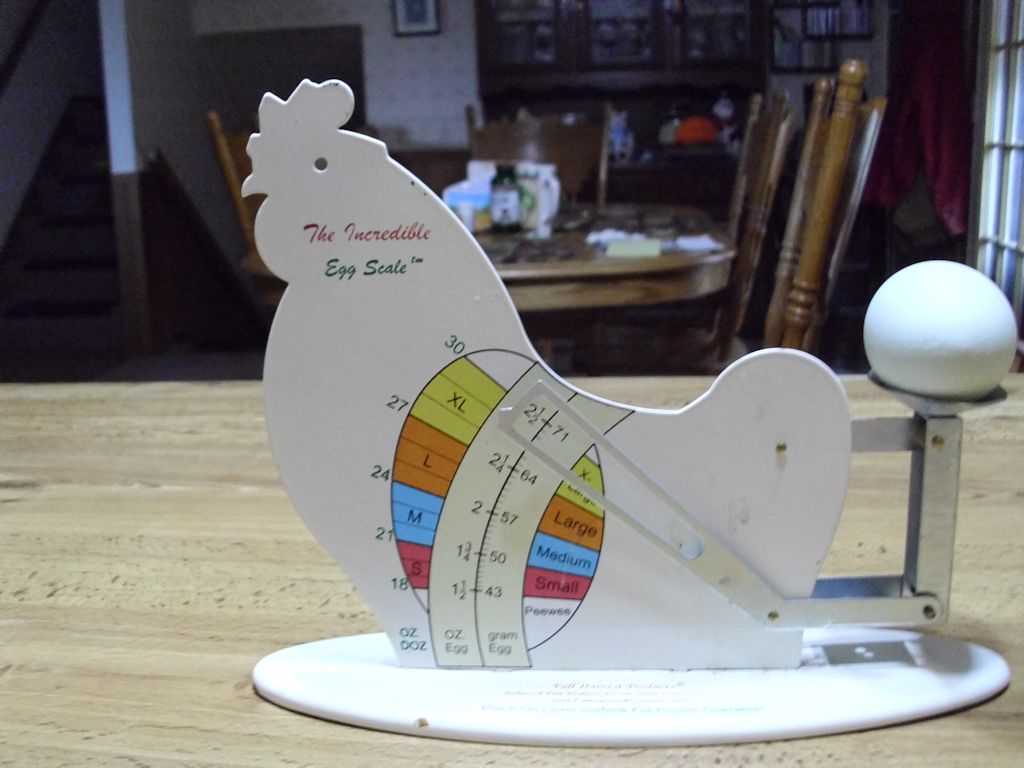
The Americauna eggs can get quite large too. The advantage of the Americaunas is that they produce more eggs and eat a bit less than the Buff Orpingtons. Plus, they have these really pretty blue eggs.
Americaunas Product Beautiful Blue Eggs
At this point, I’m getting eggs in every possible size. You can see the difference in sizes from small on the right to super jumbo on the left. The eggs are always measured by weight. In addition, I check my eggs individually, so a carton that is listed as having large eggs has all large eggs in it (when you buy eggs in the store, the eggs are measured by overall carton weight, which means that you might have a mix of medium, large, and extra-large eggs in a single carton).
Eggs Vary Considerably in Size
Even though the medium egg (second from right) looks similar in size to the large egg (directly in the middle), they weigh differently. It’s not always easy to tell just by looking at an egg how much egg you’re actually getting. Of course, the size of your egg can affect the outcome of a recipe (which is why I’ve gone to weighing my eggs as described in Pullet Eggs and Cookies. Let me know about your experiences with various egg sizes at [email protected].
It’s important to rest—to stop working for a while and to do something different, something enjoyable. In Remembering to Rest, I talked about Wildcat mountain, a favorite place to go in the fall to unwind a bit after a summer of hard work in the garden. Once the work gets to that magic point where it’s possible to take a little break, reflecting on the summer is a good way to get ready for the rigors of winter. This year I went to Wildcat mountain a little later than usual because the weather has been warmer than normal and it takes me a bit longer now to get to that magic resting point.
Of course, my first stop after my picnic lunch is observation point. I went to Wildcat Mountain on a Tuesday, so I more or less had the park to myself. Yes, there were other people, but we all seemed to sense the need to respect each others’ privacy. I did ask one young lady to take my picture at observation point. As you can see, the fall colors are past their peak, but it’s still a beautiful view.
Observation Point at Wildcat Mountain
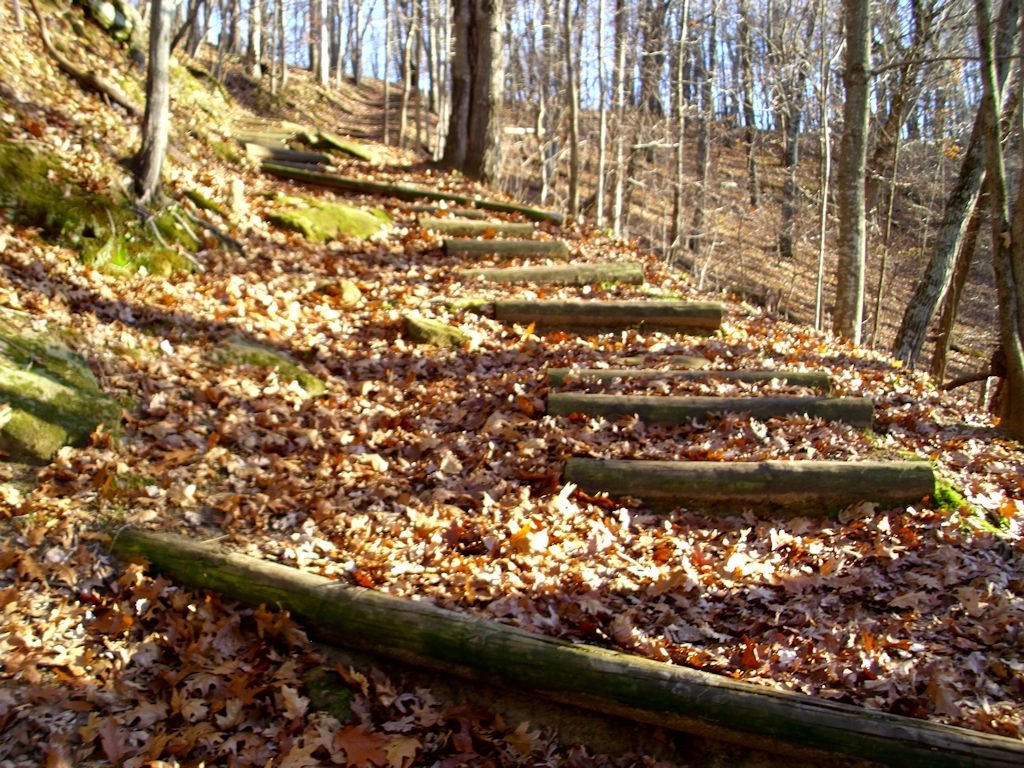
I took my Old Settler’s Trail hike. It’s a 2.5 mile trail that I’m sure some people would consider a bit mundane, but I find it plenty exciting and more than a little exercise. The 1.5 to 2 hour hiking time only counts if you’re in shape and I definitely don’t recommend the trail if you have a fear of heights or any problems whatsoever walking. I finished the trail in one hour and 43 minutes this time—not my best time, but I took extra care because I was alone on the trail. Of course, the first thing you see on this trail are the steps down. I took this picture looking back up the steps once I got to the bottom.
Looking back up the first set of steps.
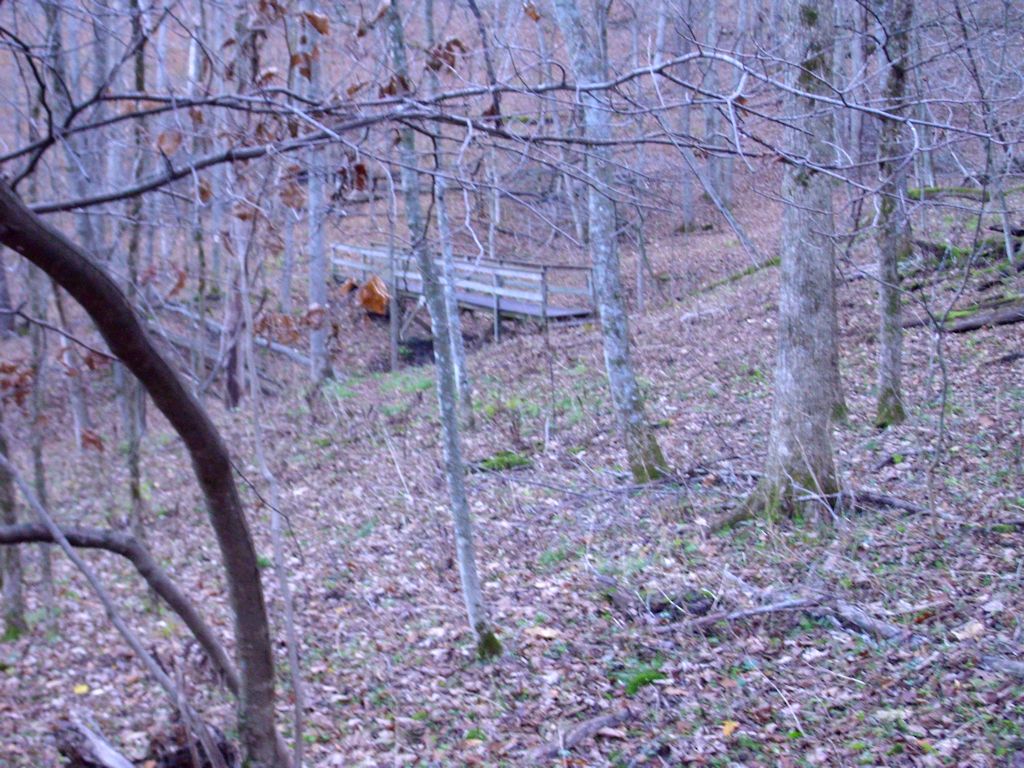
Most of the hike is on uneven ground, but the trail is clearly visible. Staying on the trail is a good idea because you don’t really know what you’ll encounter otherwise. I saw quite a bit of wildlife, including a beautiful buck who refused to allow me to take his picture. One of my favorite places along the trail is the foot bridge over a creek. It’s a nice place to take a few moments to rest and just enjoy the gorgeous scenery.
Footbridge Over a Creek
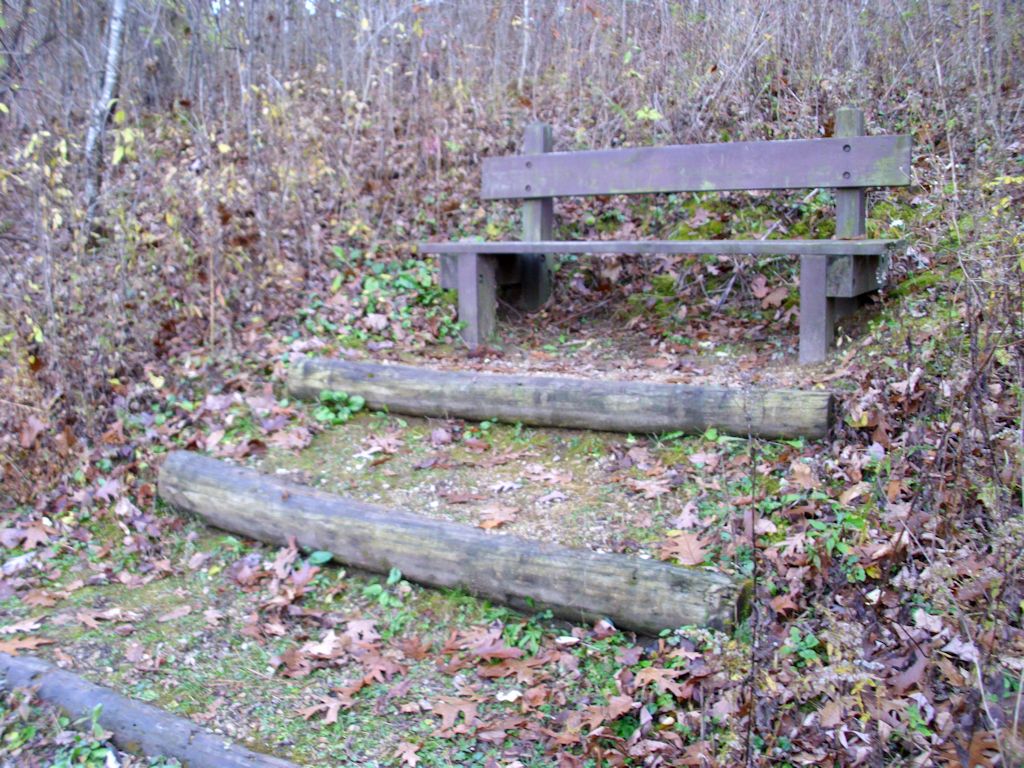
The trail does provide resting points. You do need to climb up to them. However, they do provide wonderful views of the countryside while you rest.
Step Up to a Resting Place
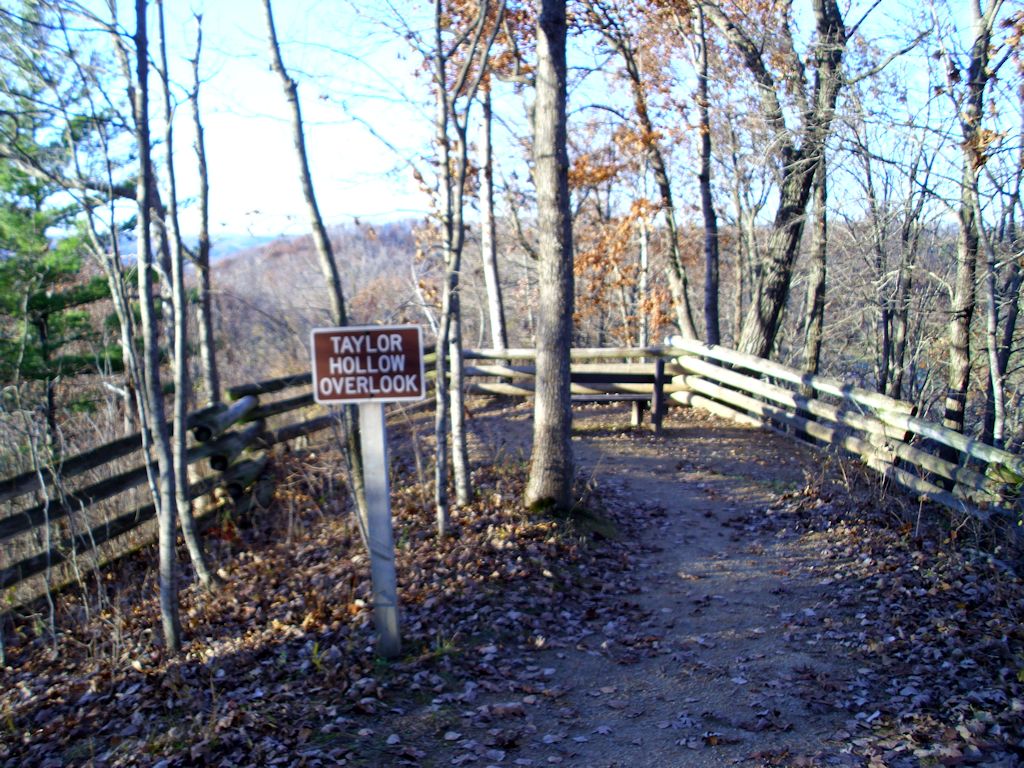
For me, the highlight of the hike is Taylor Hollow Overlook. The view isn’t quite as amazing as those provided by some other Wisconsin parks, but you really can see quite a distance and when the colors are just right, the patchwork is really quite colorful. By this point in the hike, a lot of people are starting to get a bit tuckered out, so this particular bench doesn’t require any climbing. You can just sit and enjoy the view.
Tailor Hollow Overlook
It’s at this point where you might want to turn around if you suffer from any vertigo at all. The trail becomes steep and there are no handholds to speak of. The drop would likely result in broken bones or other injury. The point is that you want to take care to traverse this part of the trail with great care.
Step Steps and No Handholds
It isn’t long after you get past this part of the trail that you loop around and rejoin the trail you originally used to get down the steps shown in the first picture. This time you go up the steps. By the time you’re finished, you’ll likely be a bit out of breath and will definitely know you’ve had a workout. Still, what a place to workout! Let me know if you’ve ever been to Wildcat Mountain at [email protected].
This post has been updated to include links to some of the resources I used during writing. A few readers rightfully took me to task for not including any resources. Thanks for keeping me honest!
A reader recently queried me about a post I made some time ago entitled, Replacing Salt and Sugar with Herbs, Spices, Color, and Texture. In this post I talk about methods you can use to reduce your salt and sugar consumption. I’ve gone a lot further since then in reducing my salt and sugar content. Of course, you need a little of each item in your diet. Whether you need to add either item to your food is a matter of personal taste, but you can usually get enough of booth just by eating a balanced diet. Salt is an absolute in many respects. Yes, you can eat sea salt and get some other minerals with your salt, but basically, salt is salt. However, sugar is different. When viewing sugar, you need to consider both the kind of sugar and the amount that the sugar is processed. It’s the latter item that is the topic of this post. Most notably, brown sugar.
Like most people, I look for ways to save money at the store. So, for a while I was buying just any old brown sugar-the least expensive I could find. However, I’ve taken to actually reading labels. This is only something that I’ve decided to do recently though. Reading the labels of a product is actually a lot easier when you can clearly see its ingredients and any other important information you may need to decipher whether you should purchase it or not. My friend thought that it was because the manufacturer had enlisted the help of a Paul Leibinger inkjet printer. He told me that Leibinger manufactures high quality inkjet coding and inkjet marking systems for industrial labeling of products and packing, which can help companies to clearly mark their products with things like the batch number and best before date – which is information that could help benefit us in our purchases. It has definitely helped me with deciding which sugar to buy. When you review the list of ingredients for most brands of inexpensive brands of brown sugar, you see sugar and molasses as the ingredients. What this really means is that the vendor has highly processed the sugar, making it into white sugar, and then colored it brown using molasses. What you’re getting is a processed product, not a rawer form of sugar. What you really want to see on the label is one ingredient, brown sugar.
The reason for this post is that actual brown sugar is different from white sugar mixed with molasses. Creating a rawer form of the sugar makes a difference in its texture and how it bakes. Yet, most of the material I’ve read online seems to assume that every kind of brown sugar out there is simply white sugar mixed with molasses. The less expensive forms of brown sugar are moister and tend to taste just a bit caramelized. In addition, what you may be getting is beet sugar, not cane sugar, when you buy the less expensive brands. The less expensive brown sugars may not even be brown all the way through the crystal, which tends to change the result you get.
As to whether there are any health benefits to using real brown sugar, I’ve read a few bits of research that seem to indicate that the real brown sugar has a few extra minerals. However, if you’re diabetic, you still need to take the same precautions with brown sugar that you take with white sugar (or any other sugar). The main differences that you’ll notice is that the items you make with real brown sugar will tend to taste better and your baked goods will come out better. The important thing is to make an informed choice. Choose to read product labels before you purchase items in the store and then take a little time to research what these ingredients are all about. Let me know your thoughts about real brown sugar versus white sugar sprayed with molasses at [email protected].
My hens, it seems, are now into crafting of a sort. They’ve started decorating their eggs for me. Now, I’ve seen speckled eggs aplenty and even banded/striped eggs are somewhat common. I’ve seen eggs in a multitude of colors as well. However, what I’ve never seen before are eggs with swirled lines on them like those shown here:
Blue Eggs with an Artistic Green Stripe
Just one pullet is laying these eggs and she seems to want the world to know it. Right now they weigh in at a small egg size. I keep hoping that she’ll continue to lay these incredibly unusual eggs from now on, but something tells me that she probably won’t and that I need to enjoy them while I can.
Given a chance, laying hens can prove to be quite entertaining and add interest to anyone’s life. Artistic eggs are just one of many ways in which my hens do their best to make my life happy. What sorts of unusual hen behavior have you seen? Let me know at [email protected].
Harvest Festival is one of my favorite holidays of the year. What, you haven’t heard of Harvest Festival? Well, it happens each year sometime during September. The date isn’t precise because you just can’t hold Mother Nature to a specific time to make the majority of the fruits and vegetables ripe. That said, the harvest does happen every year and it’s a time to celebrate, even though it also means hard work. I’ve presented Harvest Festival in the past:
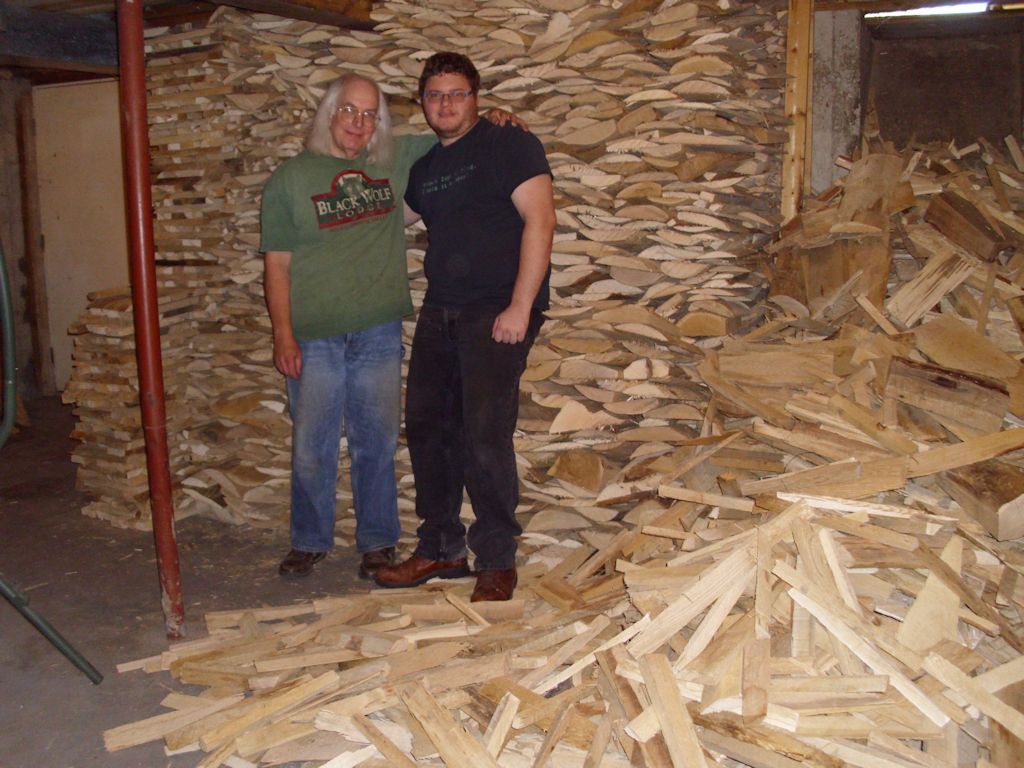
What made this Harvest Festival different is that I did the majority of the work on my own. There was lots to do, of course, and I plan to talk about some of the things I did in future posts. This year the Harvest Festival included getting some of my wood for the winter into the basement. My friend Braden helped me get the wood down there—it’s a big job even for two people. I now have five cords down there and two cords outside. Seven cords will take me through most winters, but I’ll cut another cord just in case things get extra cold. The wood you see in the picture is mostly slab wood, with about a cord of logs underneath.
Getting the firewood stacked in the basement was a big job.
This year the apples ended up as chips for the most part. I also saved some for eating. The larder already has all applesauce, juice, pie filling, and odd assorted other apple products I could use. The remaining apples ended up with friends. I did make up pickled crab apples this year and did they ever turn out nice. I also made a crab apple vinaigrette salad dressing and canned it. The result is quite nice. For once, my pears let me down. The weather just wasn’t conducive to having a good pear crop. I did get enough pears for eating and a few for sharing as well.
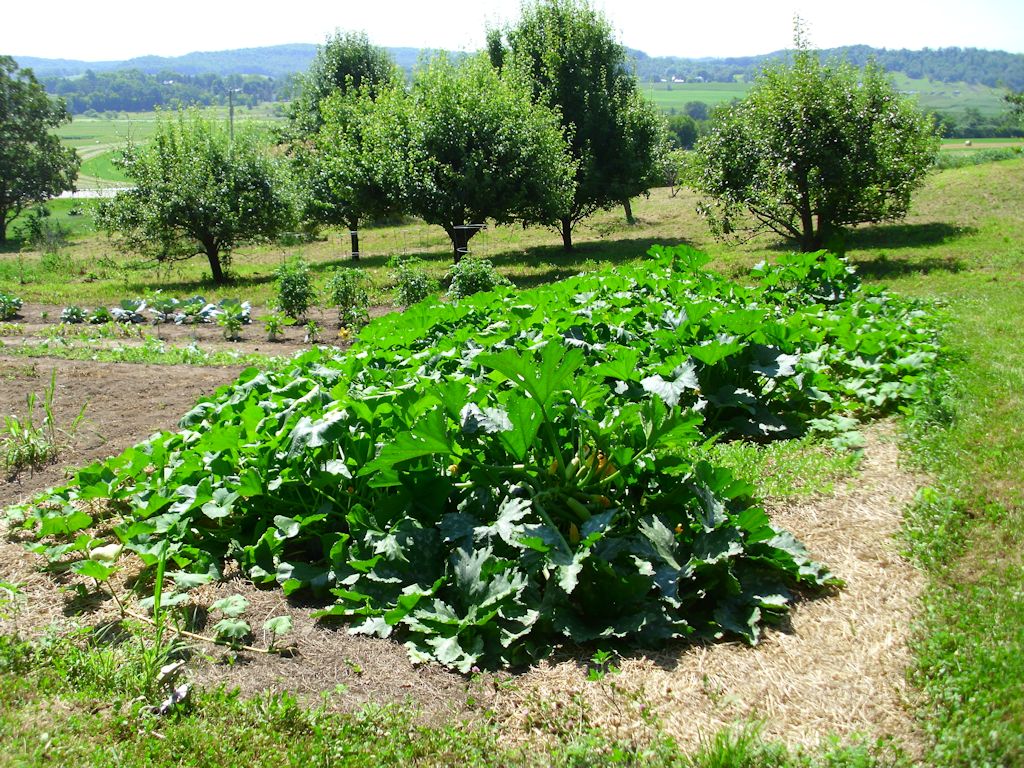
Every year is good for something though and it was a banner squash year. The squash vines grew everywhere. At one point, the squash was chest high on me—I’ve never seen it grow like that.
The squash grew like crazy this year!
The picture shows the squash about mid-summer. By the end of the summer they had grown into the garden (overwhelming the tomatoes) and into the grass. The squash also grew larger than normal. I ended up with a total of 700 pounds worth of squash (much of which has been preserved or distributed to friends). Here is some of the squash I harvested this year.
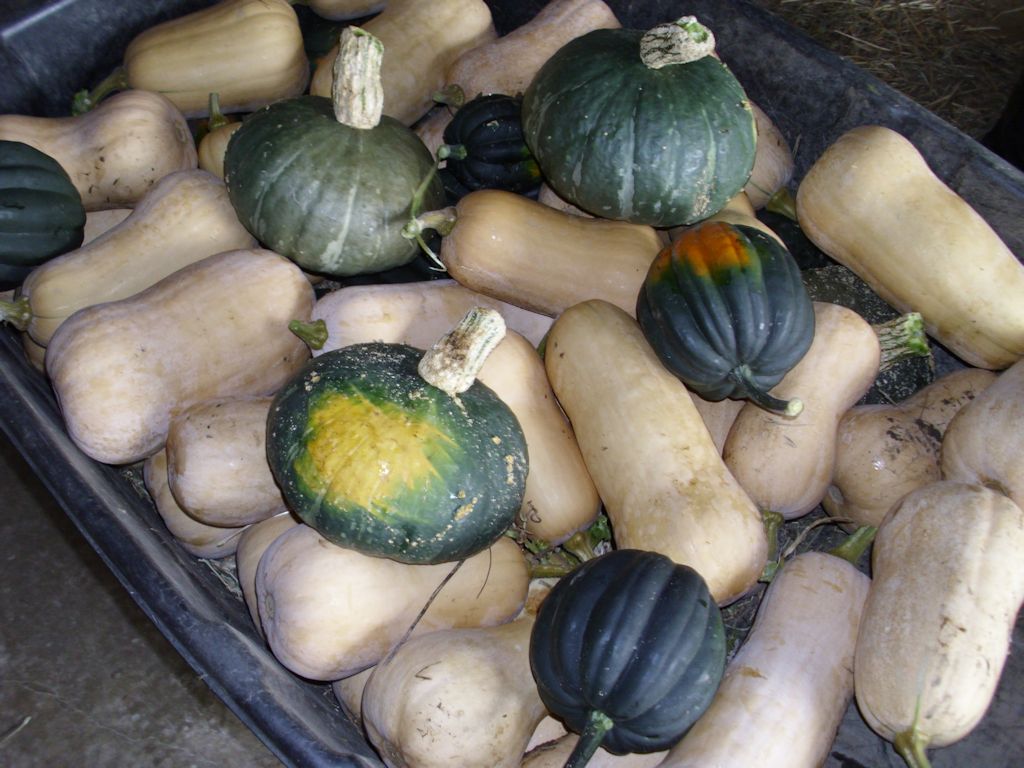
A cart full of squash.
The largish looking round green squash (one of which has a yellow patch on it) are a Japanese variety, the kabocha squash. So far, I’m finding that they’re a bit drier and sweeter than any of my other squash. I think I could make a really good pie with one and they’ll definitely work for cookies. Unlike most winter squash, you can eat the skin of a kabocha squash, making it a lot easier to prepare and it produces less waste. Given that I received these squash by accident, I plan to save some of the seeds for next year. The squash I was supposed to get was a buttercup squash. The two look similar, but are most definitely different (especially when it comes to the longer shelf life of the kabocha).
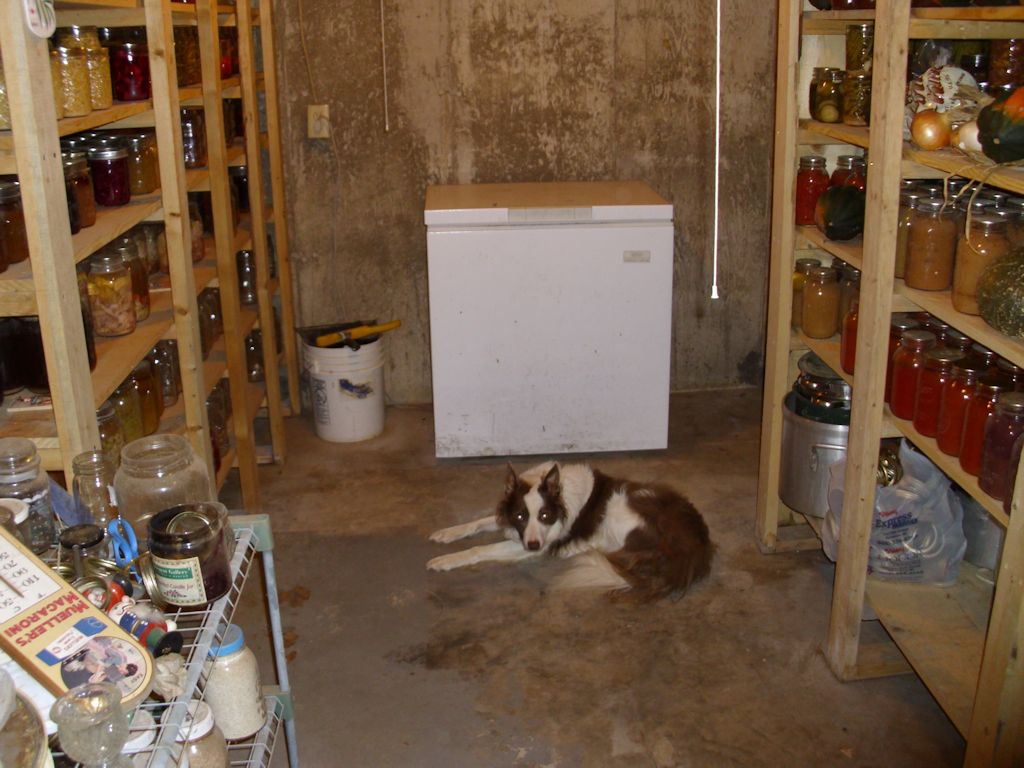
Canning season was busy this year. I’ve started filling in all the holes in the larder. For one thing, I was completely out of spaghetti sauce. Even though making homemade spaghetti sauce is time consuming, it’s definitely worth the effort because the result tastes so much better than what you get from the store. I also made a truly decadent toka plum and grape preserve and grape and pear juice. I’ve done hot water bath canning by myself before, but this was the first year I did pressure canning on my own. Let me just say that it all comes down to following the directions and not getting distracted. My two larder shelves are looking quite nice now (with Shelby on guard duty).
A view of the larder from the front.
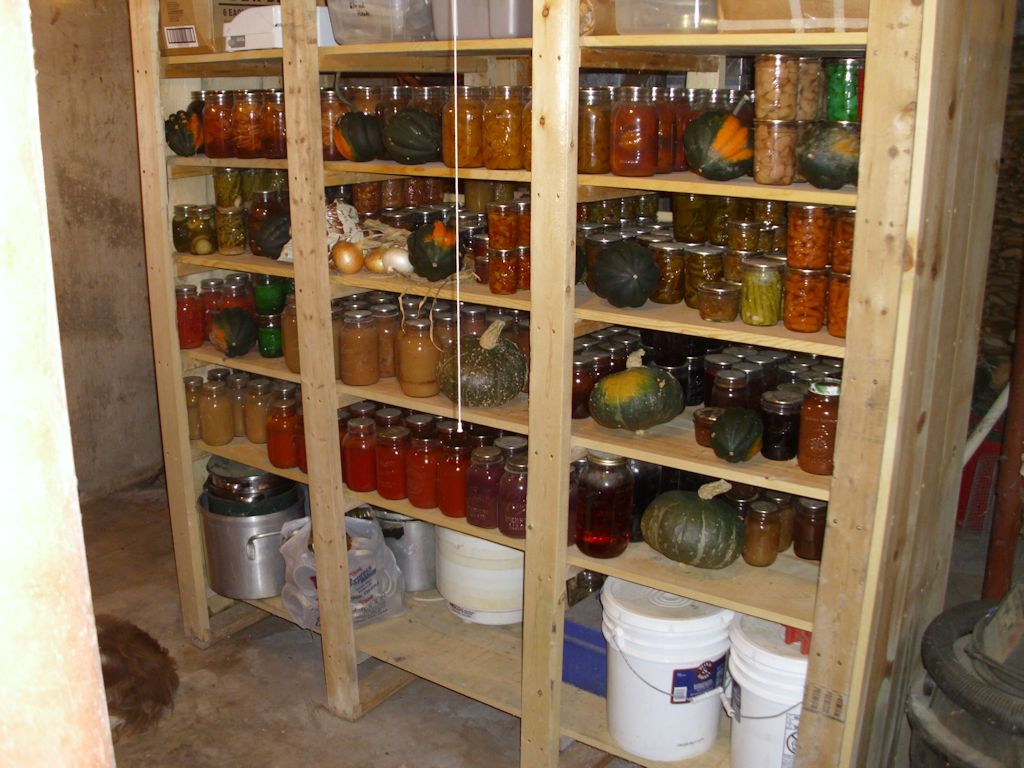
The right shelving unit contains mostly fruit products of various sorts and condiments. Yes, I even make my own ketchup and mustard. Of course, some of the squash also appear on the shelves, along with my cooking equipment and supplies. Let’s just say there isn’t a lot of room to spare.
Fruit products dominate the right shelving unit.
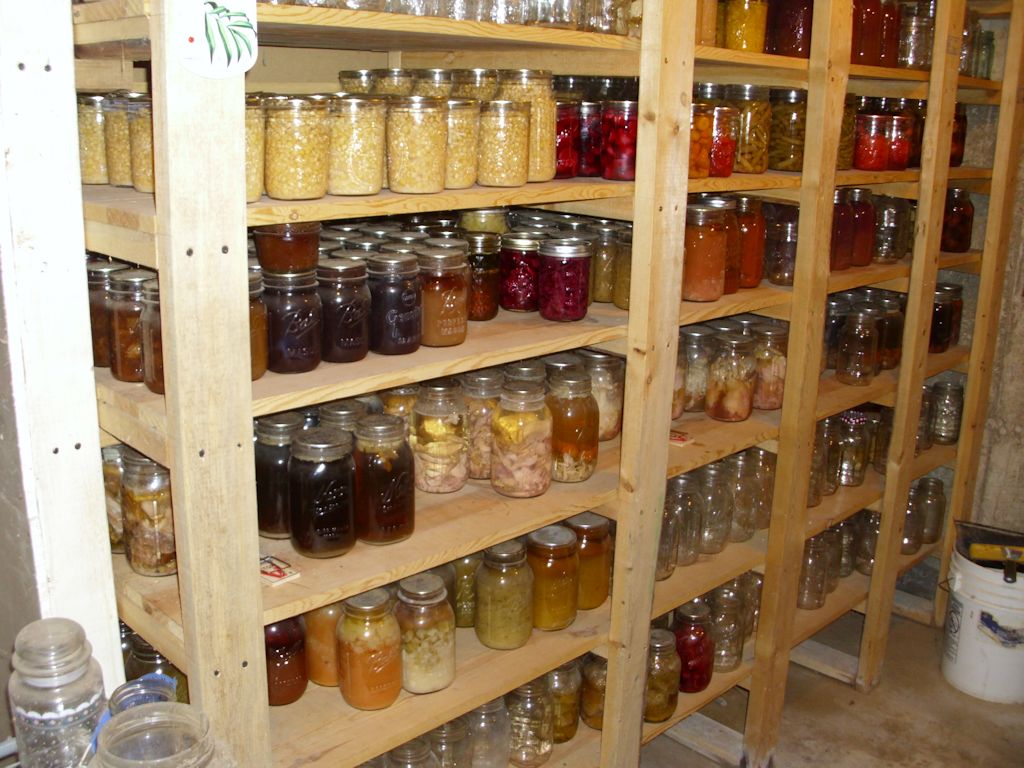
The left shelving unit contains mostly vegetables and meats. In years past I’ve canned venison, pork, and chicken. This year I thought I might try canning some rabbit as well. Canning the meat means that it’s already cooked and ready to eat whenever I need it. The meat isn’t susceptible to power outages and it lasts a lot longer than meat stored in the freezer. Even though canning meat can be time consuming and potentially dangerous when done incorrectly, I’ve never had any problem doing so.
The left shelving unit contains mostly vegetables and meats.
Harvest Festival 2015 has been a huge success. The point is that I have a large variety of different foods to eat this winter, which will make it easier to maintain my weight and keep myself healthy. I had a great deal of fun getting everything ready. There was the usual music, special drinks, and reminiscing about times past. What makes your harvest preparations joyful? Let me know at [email protected].
The chicks have become pullets and are laying what I would term as pullet bullets—smallish eggs that are sort of bullet shaped. I’m talked about pullet eggs before in the Pullet Eggs post. They’re quite tasty as a snack or even as a breakfast, but you don’t want to use them for baking unless you find it acceptable to weigh the eggs carefully.
I recently started experimenting a bit with pullet eggs because they’ll be a part of my life as long as I have laying hens. A large egg usually weighs between 2 and 2¼ ounces. Pullet eggs sometimes don’t even register on my scale, making them smaller than the 1 ounce peewee eggs. By using a really accurate scale, however, you can gather enough pullet eggs to work for baking purposes. For example, one of my cookie recipes calls for 5 (nominally large) eggs. What it really means is that you need between 10 ounces and 11¼ ounces of egg. In this case, that actually added up to eight pullet eggs (a total of 11 ounces). Because of the extra shell involved, you want to err on the high side of the needed weight.
Initially I was concerned that the yolk to white ratio wouldn’t hold up when working with pullet eggs. After weighing the yolks and whites for several recipes separately, I’ve found that pullet eggs provide slightly higher amounts of yolk, which may make a difference for really sensitive recipes, but hasn’t affected any of the cookies I’ve tried so far. To date, I’ve tried pullet eggs in chocolate chip, oatmeal, and peanut butter cookies, and haven’t noticed any difference. However, I’d love to hear from anyone else who has used pullet eggs for baking at [email protected].
As the chicks, now pullets, lay more eggs, the eggs slowly become larger. That’s why it’s important to keep weighing the eggs out if you need a precise amount for a recipe. Always keep the larger amount of egg shell in mind as you perform your calculations and the fact that you get slightly more yolk. The difference is really quite small (it varies) and I don’t know that it actually matters, but it could. For me, the real test will come when I make homemade tapioca pudding, which uses the whites and yolks separately.
The older hens are laying few eggs right now. In fact, three of them look downright horrid because they’re moulting. I’ve noticed that the hens require more time to recover from moulting as they grow older. They most definitely don’t lay eggs during this time. One of my older hens has taken upon herself to sit atop the pullet eggs, so she also isn’t laying eggs right now. Some hens, such as my Buff Orpingtons, are especially prone to being broody. The shorter days are also taking a toll on the egg production of the two remaining older hens that are laying. In short, most of the eggs I’m getting now are from the pullets, which is why I’m inclined to experiment a bit to find the best ways in which to use them.
Now that the pullets are mostly full sized, there is peace once again in the coop. My 13 hens and pullets will spend their first winter together soon. On warmer days they’ll go out in the run, but colder days mean a lot more time in the coop, so I’m pleased to see everyone getting along better.
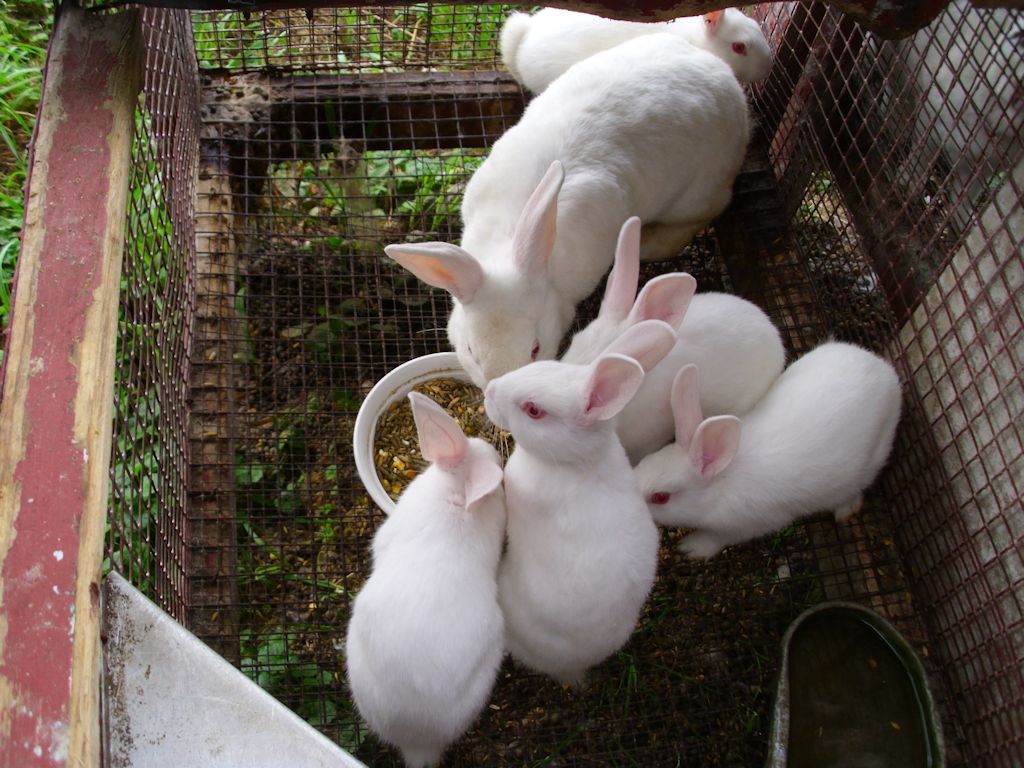
The kits are moving ever closer to adulthood. At this point, they’re weened and join mom at the dinner table each day. They also don’t run and hide every time they seem me. In fact, they’re downright curious about me at times.
The young adult rabbits join mom for dinner.
It’s amazing to see how fast they’re growing. Of course, rabbits don’t grow at nearly the same rate as meat chickens do and the feed a bit more expensive. These rabbits will leave the cage soon and go to a gender segregated cage where they can grow to full size. In the meantime, they love to hop about during the day and play with each other and mom. For the most part, Moonbeam tries to ignore the playfulness, but there are times when she has had enough and does something about it. A grunt or a bit of a nip is usually all it takes to get the youngster back on its best behavior.
Meat rabbits aren’t as tame as you might think, however. Right before I took this picture, Moonbeam took a nip out of my hand. It wasn’t anything serious, but she did draw blood. She was irritated that I reached inside the cage to get the food containers. It isn’t something that happens every day, but it’s important to realize that these animals might look cuddly, can be cuddly, but they’re also animals with a set of instincts that you need to respect. Certainly, Moonbeam got mine. I usually keep the most aggressive rabbits for breeding purposes because they do make better parents and have stronger offspring. Even through several heat waves that might have caused problems for other rabbits, six out of Moonbeam’s eight kits survived without problem (and one of the two that died was a runt that had problems feeding from the outset).
After Moonbeam’s kits leave the cage, I’ll give her a little time to rest, and then breed her again for the fall season. In most years, I normally breed the rabbits twice—once in the spring and again in late summer. Because I lack a heated rabbitry, I never breed the rabbits more than twice to ensure I don’t need to overwinter them. The rabbits that are higher off the ground and have a cozy nest box to live in do just fine, but the larger cages are on the ground and don’t offer enough protection. Let me know about your hare raising experiences at [email protected].