
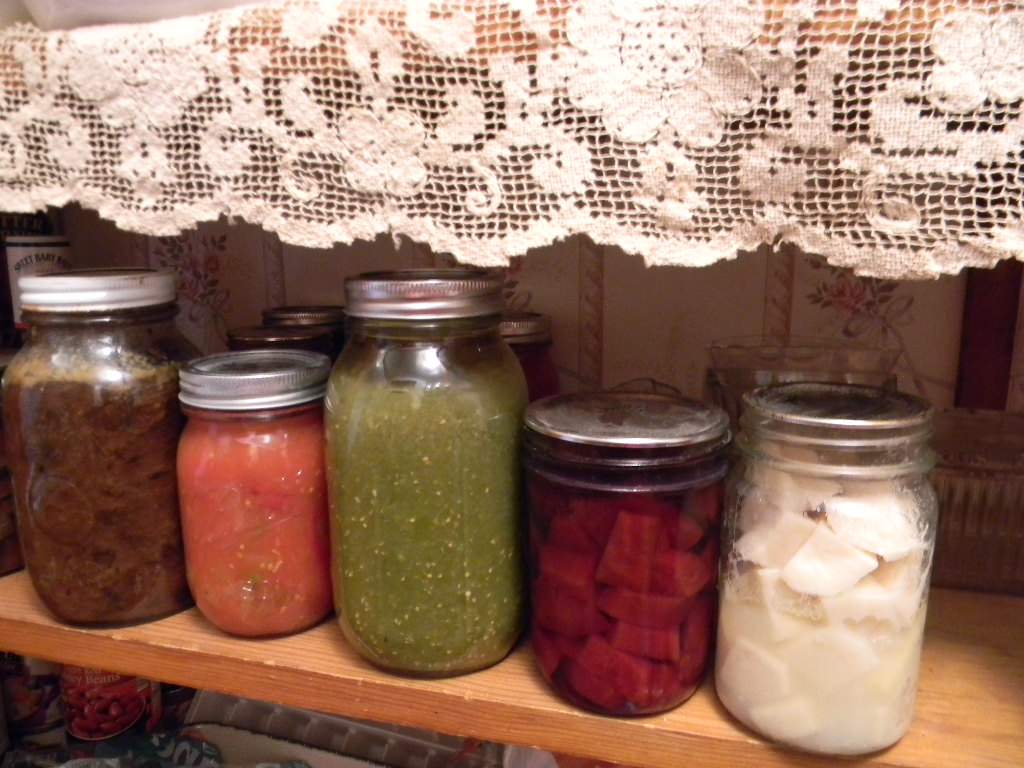
All canned using a pressure Canner
As I was growing up, I helped in the kitchen quite a bit, especially during canning season. We had several big blue (water bath) canners that were used for pints and quarts of all kinds of tomato products as well as jams and jellies. I never saw my mom use a pressure canner. One day I asked her—why? It turned out that before I was born, she and her mother were working with a pressure canner. They went into the other room for something and forgot to check on it until they heard the pressure value and gasket blow off. A jar had broken inside and the vegetables had clogged the pressure valve. The content of canner spewed into the air, all over the kitchen! Seeing this chaos—and cleaning up the mess afterward—convinced my mom never to can anything under pressure while there were kids around, just in case.
So it wasn’t until I was a young wife that I convinced my Aunt Betty to teach me about pressure canning. After doing some research, we went together and bought a pretty expensive “All-American” brand canner.
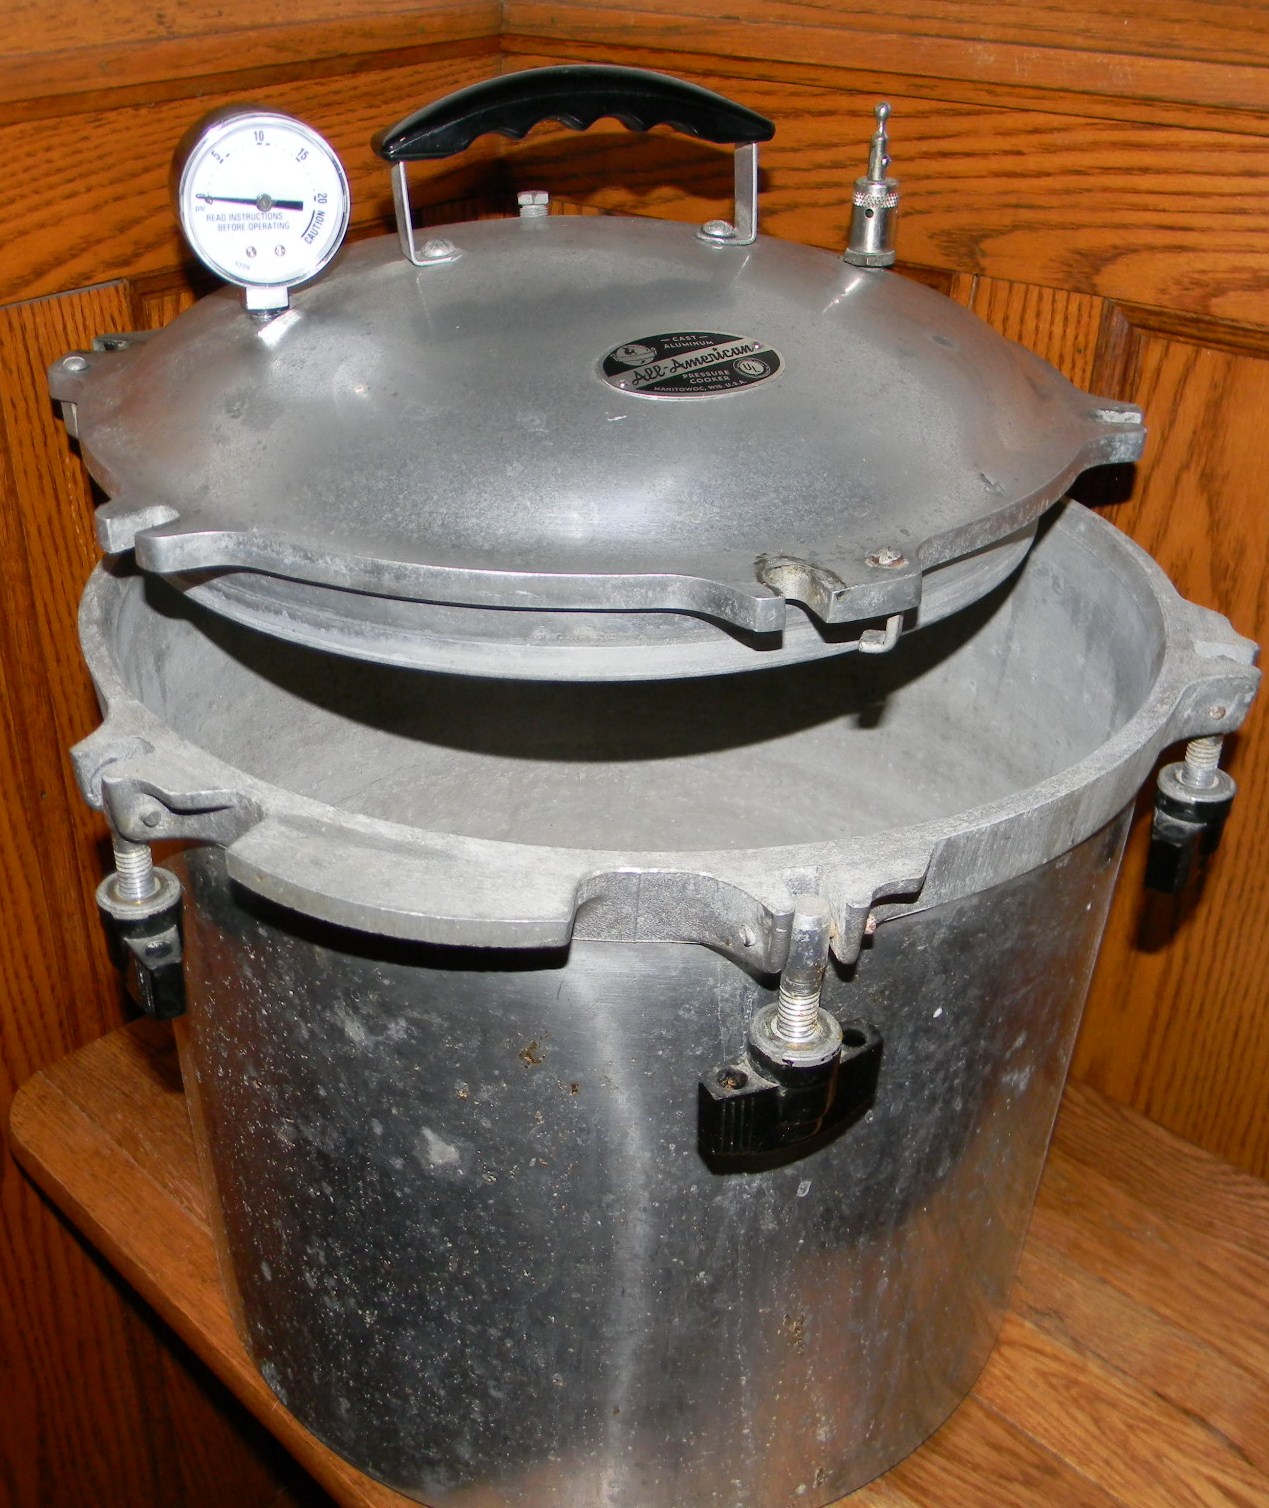
It has a metal to metal construction with 6 turn-screws to hold the lid in place. It is extremely safe. For the amount of food that I process, it was a wonderful investment. I think of my Aunt Betty every time I use it.
Here are some safety tips to use if you decide to dive into the world of pressure canning.
- READ THE INSTRUCTIONS CAREFULLY.
- Familiarize yourself with the equipment to make sure that you know exactly how it works before using it to process food. Be sure you know how much water is needed (a metal yardstick works well to measure the depth of the water) and how many jars should go in a batch.
- Follow the recipe exactly, at least the first time you are making something new. The herbs and spices used during the canning process develop as the product cools and is stored. After opening it, you can decide whether you want to change the recipe for next year’s harvest.
- Invest in good equipment and treat it with respect. You don’t necessarily need new equipment. Garage sales and thrift stores often have sturdy equipment for sale. Watch for breaks, holes, scorch marks or cracks in the metal. These are sure signs that the canner has been used for something other than its original purpose.
- Replace the rubber seals regularly, if your canner uses them.
- Replace the pressure valve if it is showing any sign of wear. It is important that this part of the canner be accurate.
- Stay in the kitchen while the pot is cooking. In this case, a watched pot is a good thing. The canner will build up to pressure. The stove must be adjusted to keep it at the right pressure throughout the whole canning time. If the pressure is under the required amount—the food won’t cook correctly. If the pressure goes over—there is risk of breaking jars and messes in the kitchen.
- FOLLOW THE INSTRUCTIONS for cooling down the canner. Remember there are glass jars inside and they are very fragile in this state.
- Do NOT open the canner until the pressure has naturally gone down to zero, according to the pressure gauge. This part of the process cannot be hurried.
- Remove the jars carefully and finish them according to the recipe. Putting a towel on your table or counter will keep the area drier and reduce the risk of the jars bumping together.
- After the jars are cool, inspect them to make sure they have sealed properly. If any fail to do so, put it in your refrigerator to use right away.
- LABEL jars with contents and the year, before putting it into your pantry,
All in all, pressure canning is a great way to store your harvest, You have control of exactly what is in your food. Many recipes can be adapted for special diets. And, the jars look so pretty in your pantry! If you have stories about your pressure canning experiences or any questions, please share them by adding your comment to this post or contacting John at [email protected].