Self-Sufficiency and the Store

I’ve written quite a few times about the health and monetary benefits of self-sufficiency at any level (see my Health Benefits of Self-Sufficiency and Health Benefits of Self-Sufficiency (Part 2) posts for details). It’s even possible to put a dollar amount on your self-sufficiency endeavors (see Calculating an Hourly Wage for details). Of course, not everyone can produce as much of their own food as we do, but I encourage you to produce as much as you can. I’ve been reading more and more articles online, like the one entitled “8 Food frauds on your shopping list” that tell me that your local store may be undermining your efforts to eat well. In this article, you discover that the milk you just bought could actually be causing problems like kidney stones because it contains melamine. In addition, there are all sorts of problems with food contamination. Reports such as “How safe is your grocery store?” give me pause when considering any sort of food purchase. Certainly, reading articles like this have significantly changed our buying habits for the small number of luxury items we purchase each year. They should affect your buying habits too.

At one time, most stores received the majority of their products from local sources. If you bought a steak, it probably came from a beef cow that was butchered and processed locally—perhaps from a neighbor who raised beef cattle. The same held true for all sorts of items—vegetables and fruits alike. The items you purchased from the store had a lower carbon footprint because they didn’t involve transportation over long distances. In addition, these items were fresher; many of them were never even frozen. During this time, it was actually possible to trace a source of problem food directly to the grower because the grocery knew the grower and what kinds of products the grower produced. Our food was considerably safer as a result.

Three things have happened to make the day of locally grown food pass into history. First, people have developed a taste for a wider variety of foods. This isn’t necessarily a bad idea because variety does tend to help create a better diet, but the cost has been felt on a global scale in the increase of everything from pesticide use to increased greenhouse gasses. I’ll leave it to you to decide whether breathing contaminated air and drinking poisoned water is really worth the health benefits of a diverse diet. Add to your calculations the chances that the food you’re eating is something other than advertised because your store may misrepresent the product to you in order to make a sale.

Second, people have placed price as their first (and sometimes only) criterion for making a food purchase. Locally grown food is sometimes more expensive than the food you can obtain from another location. Gone is the day where the grocery store owner knew precisely who grew what in the store. Today you can ask your butcher where a piece of meat comes from and you’ll receive a shrug (at best) for your efforts. The apple you’re eating could come from Washington, but it could just as easily come from some other country. There really isn’t a good way to know.

Third, governments have placed an emphasis on the global economy for various reasons. You get goods from overseas in many cases because the government has decided that you’ll get those goods for political reasons. A trade pact may require America to buy so many items from China in exchange for some other concession. I’ve written before about the global economy (see Considering the Inefficiency of a Global Economy for details). From my perspective, unless another country truly does own the market for a particular product, using locally grown or produced items makes far more sense and using these local items (even if they cost more) would significantly reduce our global pollution problems, not to mention making the local economy work better.

Whether you agree with me on these issues or not, it’s still a matter of choosing whether you’ll continue to buy products of dubious quality and origin. Besides becoming more self-sufficient, you can take control of your food sources by going to a local farmer’s market or choosing to spend more at smaller stores where the grocer actually does know the source of the food that the store sells. Yes, you’re going to pay more for the food you buy this way and it may not always be convenient to obtain the variety of food that you want, but the food you eat will be higher quality and less susceptible to contamination. When you do encounter a problem with your food, you can actually do something about it.

When is the last time you chose quality over price? Are you spending time thinking about what you eat and whether the food is actually good for you? Let me know at [email protected].


Self-Sufficiency and Technology

One of the things I’ve been curious about lately is how much of a role technology plays in current self-sufficiency efforts. For example, there has been a strong emphasis on heirloom (heritage) plants and animals, rather than using plants and animals that science has helped to produce, because these older varieties offer things that modern science can’t. For many people, the main reason to rely on heirloom varieties is that they always produce the same thing. If you plant an heirloom seed, you get the expected plant, rather than something mysterious that results from hybridization. Of course, there are people of the opposite persuasion who feel that that older varieties lack the benefits that science can provide, such as increased yield or better taste.

Technology also affects technique. Some people eschew modern machines and do all of the work required to meet their self-sufficiency requirements by hand. The benefits are that the carbon footprint of such efforts is incredibly small, costs are low, and the results often better. Using technology makes things faster and easier. Just how much technology you use depends on the size of your work area and the results you expect. Many people use a combination of hand and machine techniques.

Most people recognize that the use or lack of technology has a significant impact on the outcome of self-sufficiency efforts. In addition, the choices we make affect our neighbors and the planet to some degree. Choosing the best options for one scenario often lead to problems in another. That’s why there is growing debate over just how much technology is good for those who engage in self-sufficiency as I do. I’m constantly looking for a better answer—one that produces good results with a minimum of effort, but is also good for the planet.

The question that I have pondered most as of late is how technology affects the presentation of information.  The problem for anyone writing about self-sufficiency is that no one really knows for sure just how people get self-sufficiency information. For example, do you rely heavily on questions you ask online to obtain information? Would you purchase e-books instead of the paper variety in order to reduce the cost of the information, while also reducing the effects of producing paper on the planet? In order to do a good job of providing information to you, I need to know how you communicate. Let me know your ideas on the topic at [email protected].


Finishing the Chicken Coop Structure

Last week you saw the roof raised on the chicken coop (see Raising the Chicken Coop Roof). There are still a number of steps to accomplish before the chicken coop is ready for occupancy. This week, you’ll see some of the finishing steps performed to make the chicken coop more habitable before adding the exterior treatment.

Of course, one of the more important tasks is to create a set of stairs to get into the coop. As things stand now, you need mighty long legs to get into the coop. Kevin puzzled over the dimensions of the stairs for a while and then came up with steps with a 7-inch rise.

ChickenCoop0601

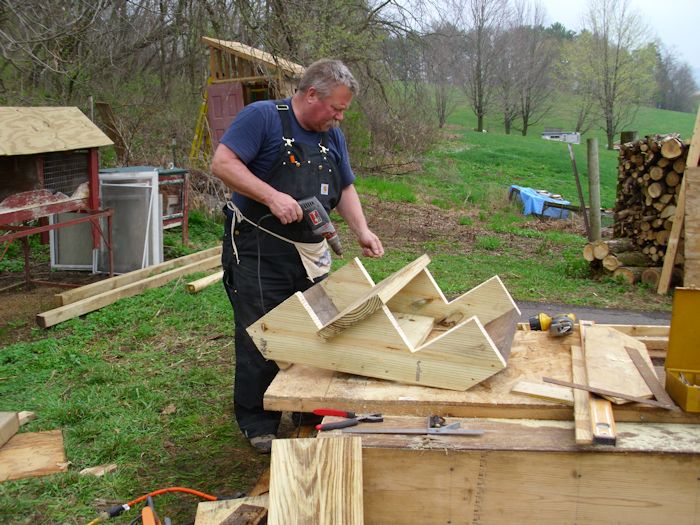
This is one of the only places where we used new wood, partly because we didn’t have any wood the right size. The stringer (the part that goes from the top of the coop to the ground and holds the treads) has to be strong enough to hold up under the conditions in which it will be used. We relied on pressure treated lumber in this case because it’s the best option available in this case. The stairs rely on 8″ treads. As you can see from the picture, there is a back support for strength.There aren’t any risers in this case because they would probably get in the way during the winter when trying to clear the treads of snow. After the steps were finished, we put them in place.

ChickenCoop0602

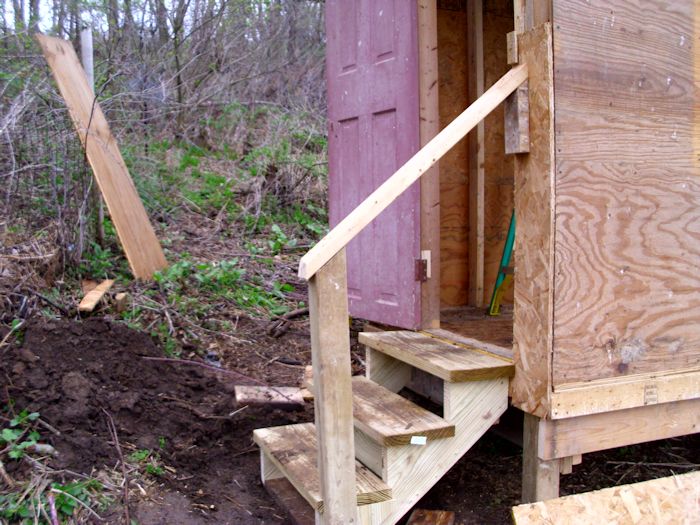
To make things safer, Kevin also added a handrail and post. In order to get the steps to fit properly, I needed to level the ground out, which required a bit of digging. The black earth shown in the picture will be added to the garden. At some point, I’ll even things out more and add some gravel to create a non-slip pathway for the winter and wet days. The stairs will receive a coat of primer, and then a coat of non-skid paint. To then make the whole thing look a little nicer for the future we’ll probably end up looking at metal trim colors to trim the different wood components with. Once the project has been completed, it shouldn’t really be looking the same as what we started with at all!

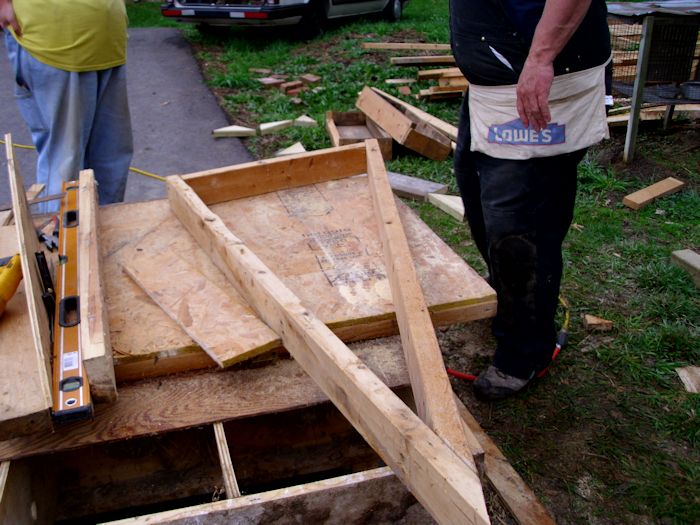
Remember that the roof is at an angle and the ceiling joists are flat. So, there is currently no way to nail any sort of cladding to the exterior of the coop. In order to provide a nailing surface, Kevin and I both built triangles to fit into the space between the ceiling joist and the roof like this one here (Kevin’s is much better than the one I created, but he also has a lot more experience than I do).

ChickenCoop0603

We each added a couple of studs to the triangle to make it easier to nail things in place. The coop also requires a window. The coop we took down had three windows, so we chose the best looking of the three and used it for the new coop. The window required a little work, but it now slides as it should and will provide both light and ventilation for the chickens.

ChickenCoop0604

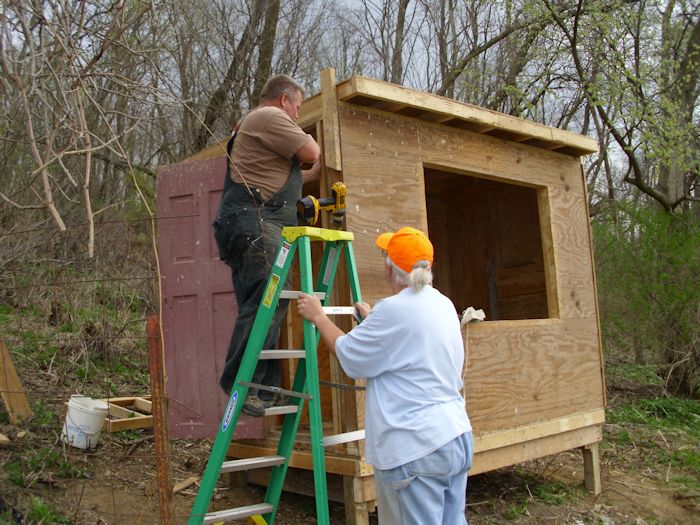
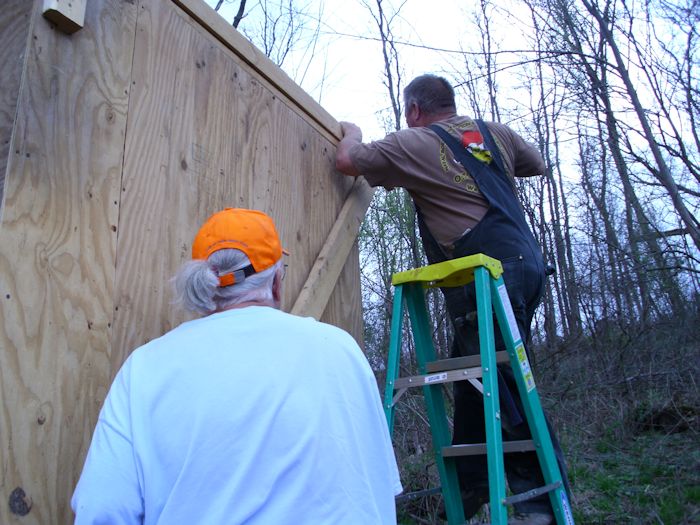
Kevin had also gotten up early this particular morning and put the tar paper on the roof. Actually, the coop isn’t quite ready for tar paper yet. We’re still putting the cladding in place. Most of the cladding is plywood that we obtained from the old coop. In a few places, we also used oriented-strand board (OSB) because the old coop had plenty of it as well.

One of the items that I managed not to get a picture of is the window in the back of the coop. We put on up near the top of the coop in the extension used to hold the roof in place. You’ll see a couple different pictures of this addition later in the process. For now, just keep in mind that we built a window back there to allow cross flow during the summer months. The window seals tightly during the winter months to help keep things warmer in the coop.

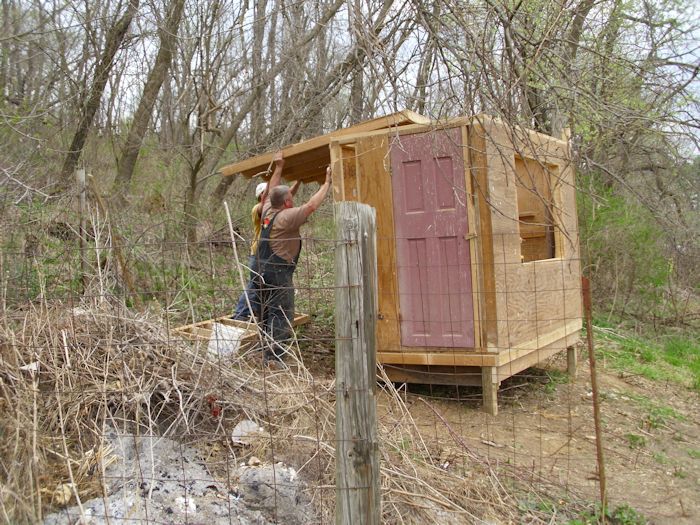
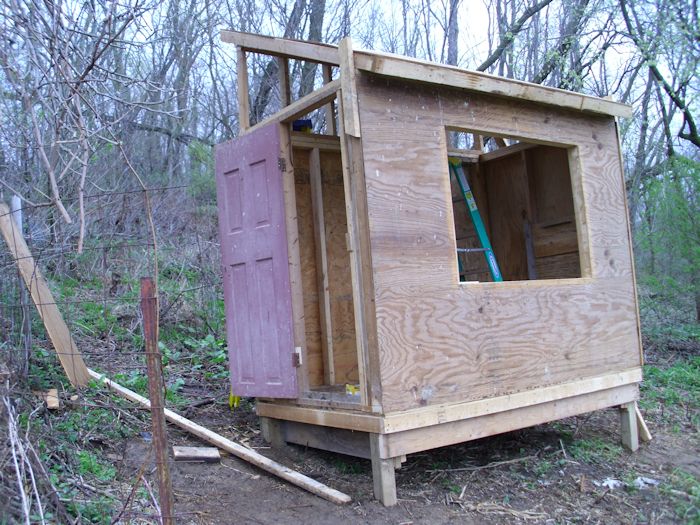
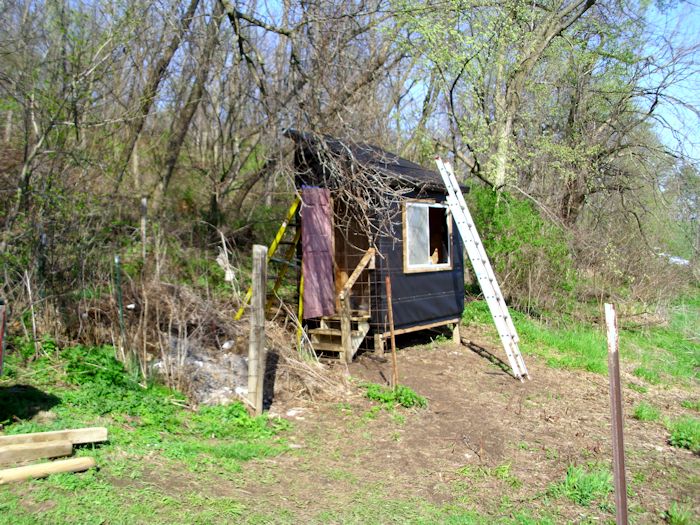
Once we got all of the cladding in place, it was time to complete the tar paper. We used staples to hold the tar paper in place. When putting the tar paper on, you start at the bottom and move up. That way, the overlaps work with gravity to keep water from getting under the tar paper. The completed coop looks like this:

ChickenCoop0605

Next week we’ll take a bit of a sidetrack. The coop is eventually going to be completely covered with corrugated metal, similar to the best metal buildings maryland has to offer. Who knows, as my collection of chickens grows, I might just have to buy a much bigger space for them! The long lasting covering will never require replacement and will help keep the coop daft free. Unfortunately, we needed to bend the corrugated metal, which is easier said than done. You’ll learn the technique we used to accomplish the task. In the meantime, let me know if you have any questions about this stage of the coop building process at [email protected].

A History of Microprocessors

Every once in a while, someone will send me a truly interesting link. Having seen a few innovations myself and possessing a strong interest in history, I read the CPU DB: Recording Microprocessor History on the Association for Computing Machinery (ACM) site with great interest. The post is a bit long, but essentially, the work by Andrew Danowitz, Kyle Kelley, James Mao, John P. Stevenson, and Mark Horowitz does something that no other site does, it provides you with a comprehensive view of 790 different microprocessors created since the introduction of Intel’s 4004 in November 1971. The CPU DB is available for anyone to use and should prove useful for scientist, developer, and hobbyist alike.

Unlike a lot of the work done on microprocessors, this one hasn’t been commissioned by a particular company. In fact, you’ll find processors from 17 different vendors. The work also spans a considerable number of disciplines. For example, you can discover how the physical scaling of devices has changed over the years and the effects of software on processor design and development.

A lot of the information available in this report is also available from the vendor or a third party in some form. The problem with vendor specification sheets and third party reports is that they vary in composition, depth, and content-making any sort of comparison extremely difficult and time consuming. This database makes it possible to compare the 790 processors directly and using the same criteria. A researcher can now easily see the differences between two microprocessors, making it considerably easier to draw conclusions about microprocessor design and implementation.

Not surprisingly, it has taken a while to collect this sort of information at the depth provided. According to the site, this database has been a work in progress for 30 years now. That’s a long time to research anything, especially something as esoteric as the voltage and frequency ranges of microprocessors. The authors stated their efforts were hampered in some cases by the age of the devices and the unavailability of samples for testing. I would imagine that trying to find a usable copy of a 4004 for testing would be nearly impossible.

You’ll have to read the report to get the full scoop of everything that CPU DB provides. The information is so detailed that the authors resorted to using tables and diagrams to explain it. Let’s just say that if you can’t find the statistic you need in CPU DB, it probably doesn’t exist. In order to provide a level playing field for all of the statistics, the researchers have used standardized testing. For example, they rely on the Standard Performance Evaluation Corporation (SPEC) benchmarks to compare the processors. Tables 1 and 2 in the report provide an overview of the sorts information you’ll find in CPU DB.

This isn’t a resource I’ll use every day. However, it is a resource I plan to use when trying to make sense of performance particulars. Using the information from CPU DB should remove some of the ambiguity in trying to compare system designs and determine how they affect the software running on them. If you feel like your CPU may be overloaded, companies like Apica Systems can help with sorting that out so your website is not underperforming. Let me know what you think of CPU DB at [email protected].


Considering the Fracus Over E-book Pricing

There is currently a debate raging over e-book pricing. The charge is one of price fixing and the debate affects all book publishers. Even though the press has focused on Apple as the target of the DOJ investigation, the lawsuit also affects five other publishers:
Hachette, HarperCollins, Macmillan, Penguin and Simon & Schuster. Of these six defendants, three have settled with the DOJ: Harper Collins, Simon & Schuster and Hachette. Any time vendors collude to set prices at a specific level in order to improve profits its price fixing. The law is blind as to the reasons behind the price fixing, engaging in this practice is simply against the law for any reason.

The supposed point of the lawsuit is to restore competition to the market, but more than a few people see the opposite happening if the DOJ is successful. There is a fly in the ointment—Amazon. It seems that Amazon has actually been pricing e-book content at a loss in order to promote the Kindle, which has placed the publishers in an unenviable position of losing money in order to remain competitive. Healthy debate on the topic is probably the best course of action until all of the facts come to light, but debate of this sort seldom occurs. Some industry pundits are wondering whether Amazon should be part of the lawsuit as well. A few have come outright as said that Amazon is more of a problem than the publishers for these reasons:


  • The lawsuit will hurt professional authors financially.
  • A decrease in compensation will end up closing smaller bookstores.
  • After Amazon buries the competition, buyers will be hurt by the resulting monopoly.
  • Lower book prices will adversely affect the quality of content available to readers.
  • Amazon already uses the same model as the publisher do, but hasn’t been named in the lawsuit.

At issue here is one of fairness and eventual results. It’s not fair for the DOJ to pursue price fixing for some actors in this situation and not others. If the DOJ is serious about fixing the current problems with competition in the e-book market, then it really does need to do something about Amazon. Otherwise, the result will be a monopoly that will hurt everyone and prove incredibly expensive to fix. More importantly, professional authors already make little money for their efforts—squeezing them further will definitely result in a loss of the incredible wealth of professional authors available today. Fixing the problems in the market will prove considerably more easy than trying to reestablish the author base used to write books when they become completely unprofitable.

Perhaps this will eventually work out in an unexpected way. This may be yet one more nail in the coffin that is currently killing books as a means for exchanging information. The interactive tools that are being developed for use with books may eventually take over and everyone will use them for all sorts of training. However, these tools are currently in their infancy and authors like me are only now beginning the build the expertise required to use them. In the meantime, it’s important that the DOJ take appropriate actions to ensure true competition in the marketplace.

What is your take on this issue? Do you even read books anymore to obtain information or do you rely on some other source? Let me know at [email protected].
 

Raising the Chicken Coop Roof

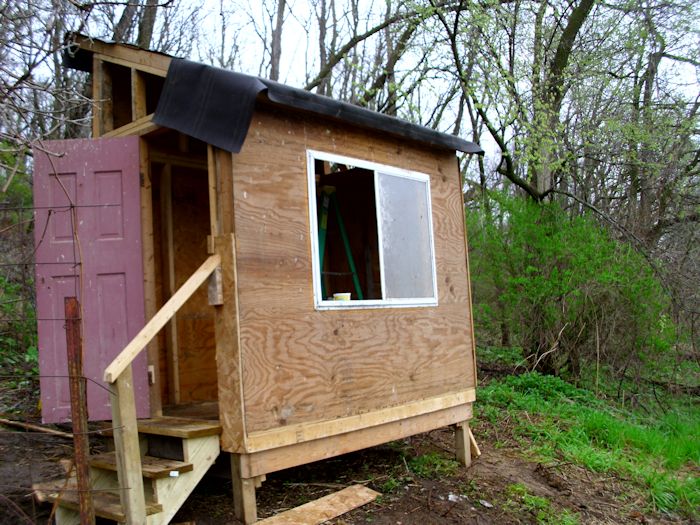
If you’ve been following along with this series of posts, you saw the walls go up in last week’s post, “Adding Walls to the Chicken Coop.” This week, you’ll see how we put a roof on the chicken coop.

Getting a roof put on was a bit of a challenge because we had no heavy equipment with which to work. We couldn’t exactly bring in the likes of Pennsylvania roofers because, well, they work on homes, not coops. In addition, the chicken coop isn’t on flat ground-in fact, the slope in the front of the coop is significant. So, with a lack of flat ground and no heavy equipment, trying to get the roof in place was an experiment in leverage and ingenuity.

To begin with, we built the roof section on the ground. One end, the end that will rest directly on the ceiling joists, is closed off. The other end, the one that will eventually rest on an extension, has been cut at an angle and is open.

The roof section is two feet wider than the floor to account for the roof slope. In addition, the roof is sloped toward the south so that the sun will hit it full force during the winter months and keep the snow off. In addition, sloping the roof toward the south, the same direction as the slope of the hill on which the chicken coop is built, keeps the water from any rains from flowing under the chicken coop and possibly washing out the supports.

To begin the process of raising the roof, we tilted it against the back of the building. Three of us raised the back end at that point.

ChickenCoop0501

After the roof was in place, the three of us worked at squaring the front of the roof with the front of the chicken coop. Notice the 2 X 4 sticking out of the top of the right side of the front of the roof.

ChickenCoop0502

When the roof was squared, we added another 2 X 4 to the other end of the front of the coop and then moved the roof out the amount of space required for the overhang. The two 2 X 4 pieces are then attached to the roof using a single screw so that the entire assembly acts as a hinge we can use to keep the roof in place while creating the slope at the back of the roof.

ChickenCoop0503

At this point, we attached two long 2 X 4s to each end of the back of the roof. The 2 X 4s are precisely the same length. We used them to raise the back of the roof up and then hold it in place.

ChickenCoop0504

With the roof raised, Kevin added an extension to the back wall of the chicken coop. We secured the extension to the ceiling joist of the back wall and then lowered the roof onto it. The back of the roof was then secured to the extension and then we secured the front of the roof to the ceiling joist of the front of the chicken coop. The result looks like this:

ChickenCoop0505

At this point, the roof is in place. Next week I’ll talk about a number of items required to finish the basic coop structure. In the meantime, please let me know if you have any questions at [email protected].


Social Networking Traps

I recently read an article on ComputerWorld entitled, “‘Girls Around Me’ shows a dark side of social networks.” It isn’t the first time that FourSquare and Facebook have gotten press for their lack of respect for user privacy and it won’t be the last. Even the social network I use, LinkedIn, has received more than a few black eyes in the privacy arena. Any time you engage in any sort of social network, everything that you upload is going to be treated as someone’s personal data source. You have no choice about it. Absolutely everything you upload, from your name and picture, to the last time you updated the list of things you’re interested in, will be used by someone for some purpose other than the one you envisioned—count on it!

Yes, these social networks help you maintain your relationships with friends and they do provide a means of creating professional networks with others. However, if you think that these companies are running these social networking sites out of the goodness of their hearts, think again. These companies run these sites to obtain any personal information about you that they can. The information is used to generate demographics, to spam your inbox with e-mail you never wanted, and to keep outsiders informed about your activities. If you engage in any sort of social networking, someone is spying on you and they’re doing it with the blessing of the company that hosts your page. In short, if you don’t want someone misusing a piece of your information, keep it to yourself because these organizations have no self-control in misusing your information.

What does surprise me is that anyone things that this old news is even worth printing. Do people not understand that the naked pictures they posted of themselves at an illegal party will have long lasting effects? If you think that there is any help coming from the government, think again. In the US, at least, there isn’t any chance whatsoever that the government will take a stand on employers and others probing every dark secret you’ve ever posted. Lest you think that you can take a stand and simply not allow information to your information, think again. People have gotten fired for refusing to share their secrets. Anything you post also lasts forever, like some sort of terrifying tattoo that you can’t scrub clean. I’ve used special search engines like the Wayback Machine to dig up material that the author was certain was scrubbed from the Internet forever. Get used to the idea that once you upload a picture, make a statement, or do something else weird on the Internet, the material is going to last forever whether you want it to or not and someone is going to dig it up to embarrass (or harass) you at the most inconvenient moment.

I’ve used social networking professionally. It helps me make contacts with other professionals so that I can get consulting or editing jobs. With this in mind, I keep my posts professional. I try not to post anything I think could be embarrassing later. Obviously, I’ve made mistakes, just like everyone does, but nothing of a gross nature. Still, these little errors have crept up in the past when talking with others. It begins innocently enough…but you said, “So and So” on your LinkedIn page. Didn’t you really mean that? As much as a misstatement makes me shuffle in my seat, I can only imagine the terror of someone finding a picture that was supposed to be viewed by friends alone.

The short version of all this is that you need to use social networking carefully. Share only what you want people to see forever. Write your posts and save them as drafts—let them sit a day or two before you actually publish them. Don’t think that your Web site or blog are safe either; both are often used as weapons against their authors by unscrupulous people. It’s a new world out there. Social networking as made it possible for more people to find out more information about you faster than ever before. The life you ruin could be your own! Let me know your viewpoint on social networking and privacy at [email protected].


Adding Walls to the Chicken Coop

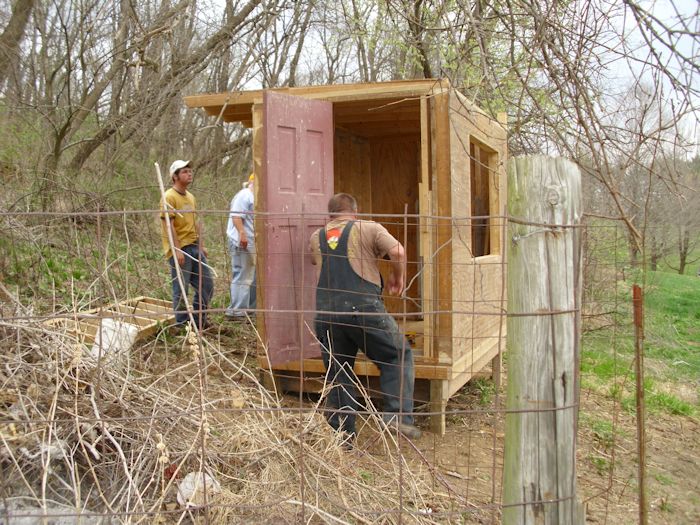
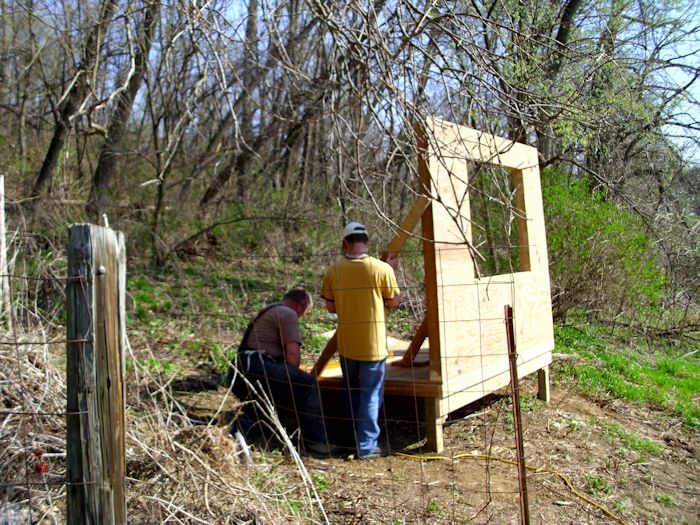
Last week saw the completion of the chicken coop foundation (see Building the Chicken Coop Foundation). Of course, the logical next stop is to add some walls to the foundation. As with the foundation, we built the walls in place for the most part and then carried them to the chicken coop. Kevin decided to build the only wall with a window first, the front wall. Adding a window to the front wall, the one that faces south, will help heat the chicken coop in the winter because the sun will be able to shine on the inside almost all day long. During the summer months, the window will allow the breeze that comes up from our valley to move air around on the inside of the chicken coop.

ChickenCoop0401

In this picture, Kevin and Cody are just finishing up on the braces to support the wall during the building process. I’m off the shot doing some work on the next wall to go up.

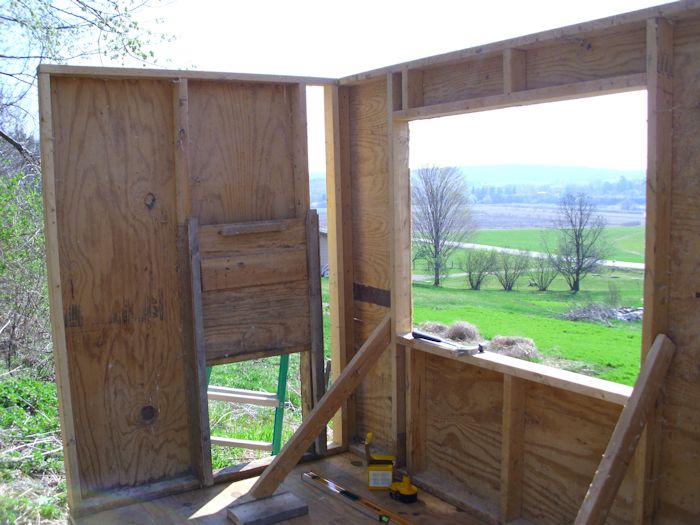
The second wall faces toward the east and it contains the door the chickens will use to access their run outside of the coop. We did this wall next to provide a square corner on which to build the rest of the coop structure.

ChickenCoop0402

We’ll use a piece of plywood to close in the right side of the second wall later. The most important part now is to get the structure in place. The door you see simply slides up to let the chickens out. At night we’ll close the door to keep predators out. You can’t see it easily in the picture, but there is a little latch that holds the door up. We can swing the latch to keep the door closed as well.

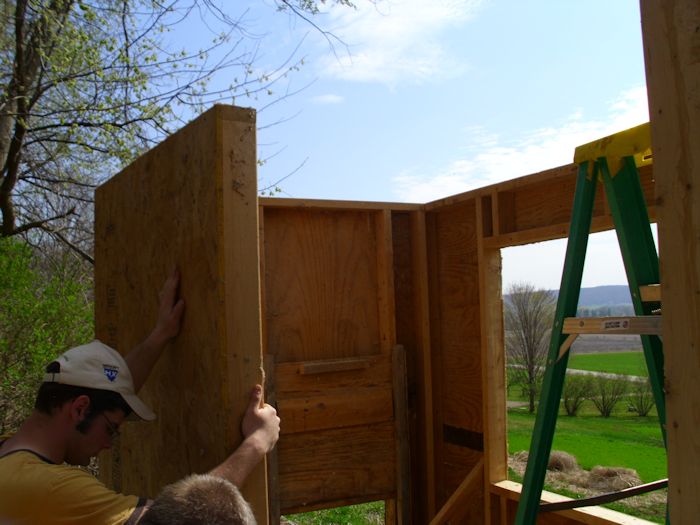
The third wall to go up is on the north side. It will eventually have a window in it near the top to provide ventilation in summer. This wind will blow straight through the coop to keep things cool. The trees from the woods will provide shade during the summer months as well.

ChickenCoop0403

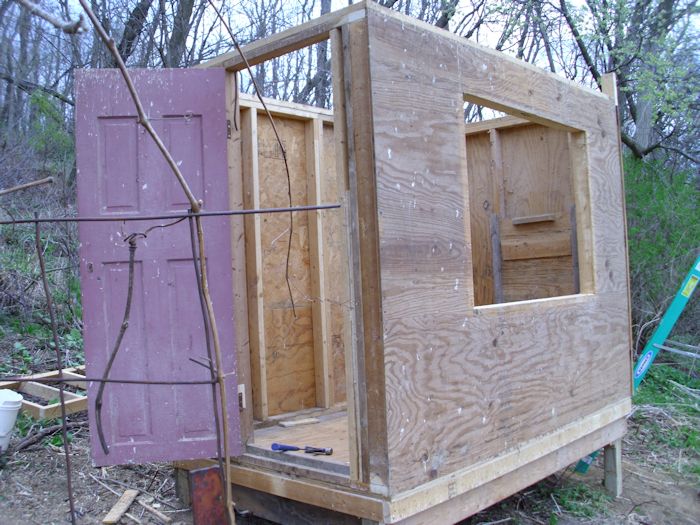
The fourth wall, the one facing west, contains the coop door. After this wall is added, we’ll take out the bracing from inside of the coop since all of the walls are now supporting each other.

ChickenCoop0404

The door is simply an old door from a house. Eventually, the door will be double hung. The screen door will go on the inside of the coop to keep the chickens from simply running out through it during the summer months when the main door will be kept open during the day to provide ventilation.

The walls are bolted into the floor and into each other at this point, so we have a solid framework for the roof. That’s what I’ll talk about next week. In the meantime, let me know if you have any questions at [email protected].


Fun is Where You Find It (Part 5)

Last year about this time, I posted the original Fun is Where You Find It! where I discussed the egg decorating kit we purchased for Easter. Of course, it’s a fun activity, so we did it again this year with Paas Basket Buddies egg decorating kit. Imagine seeing the cutest kittens and puppies on your Easter eggs and you’ll have an inkling of the results of using this kit. The online price of $4.99 is a little more than the $3.99 price we paid at our local store. The kit is on par with last year’s price. Eggs are a lot more expensive though at $1.59 for large eggs.

FunisWhereYouFindIt0505

The dyes used in this kit are a bit better than last year’s kit—I’m not sure why. It could be that the tie dye kit instructions were designed to produce better mixed results. We did use the vinegar method described on the box and soaked the eggs for around thee minutes each to obtain the results shown here.

FunisWhereYouFindIt0501

For once, our results actually matched those on the package for the most part. The six colors are: red, blue, green, yellow, orange, and pink. No matter what we tried, we couldn’t get the pink to turn out right. You can see the single pink egg in this dozen is speckled. It’s a pretty egg, but not the results we anticipated.

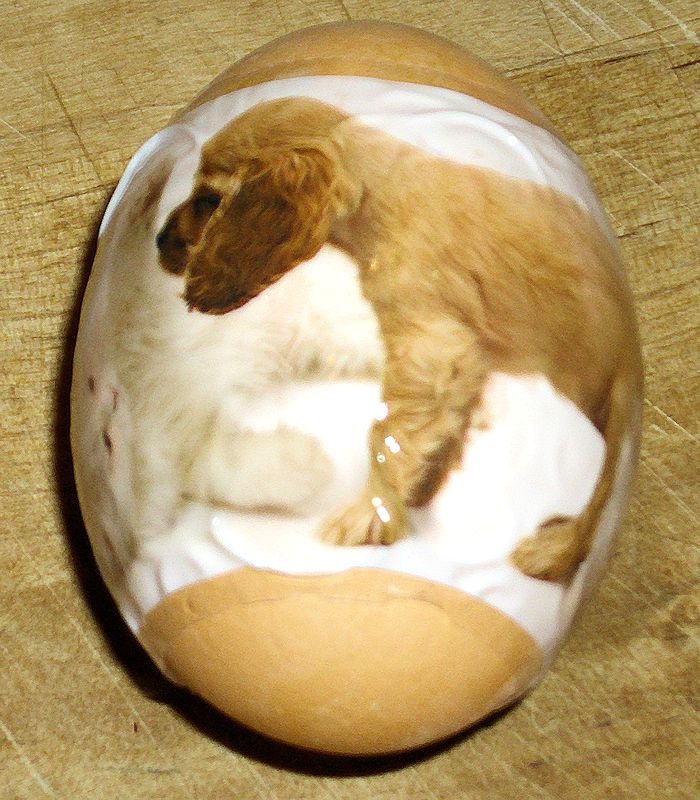
This is the kit to use if you have young children and don’t want any kind of a mess. Except for dipping the eggs, there really isn’t much risk of creating any sort of damage to clothing or furniture and an adult could perform the dipping part. The kit does come with 9 Eggarounds, which are wraps you put around your eggs, and then shrink into place. The Eggarounds look like this initially.

FunisWhereYouFindIt0502

Notice the somewhat tight fit. You have to use large eggs with the Eggarounds because they won’t shrink enough for medium eggs. On the other hand, some large eggs proved a little too large. Still, in the two dozen eggs we made up, there were plenty of eggs the right size. The box talks about two methods of working with the Eggarounds—the water shrinking method is messy and proved unsatisfactory. Using a blow dryer works as advertised. Here are the results we obtained from our eggs:

FunisWhereYouFindIt0503

You can see that our first egg has a few ripples in the surface. Playing some with the technique produced smoother results as we went along. I don’t think it’s possible to get a completely smooth surface without a lot of practice. However, the results are eye pleasing and fun to work with.

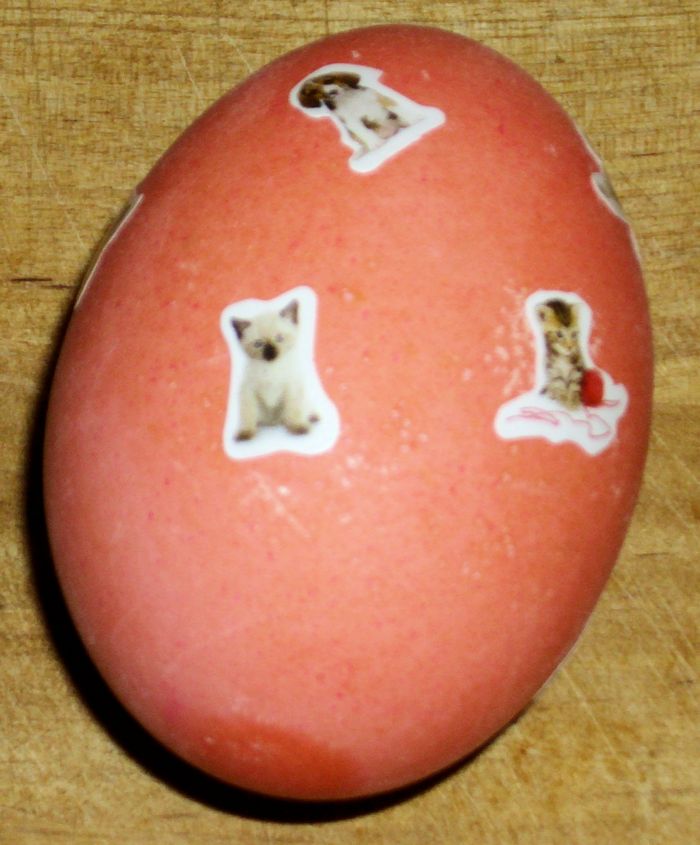
The kit also comes with 90 stickers. The Eggarounds took care of the decorating needs for 9 of the 24 eggs we cooked up. That left 15 eggs or six stickers per egg, which really isn’t enough to do the job. We decided to leave the pink eggs as they were, speckled, because they really are eye pleasing that way. Using eight to ten stickers per egg produces a nice result. Here is a typical result using eight stickers:

FunisWhereYouFindIt0504

Overall, we found this kit extremely easy to use. It required about 2 hours worth of effort for us to complete the 24 hard boiled eggs—making for some extremely cheap fun that we can benefit from later. The kit won’t support more than 24 eggs unless you don’t mind having some undecorated eggs at the end (colored, but without stickers). What sort of results do you get out of the egg decorating kits that you’ve tried? Let me know at [email protected].
 

Building the Chicken Coop Foundation

At the end of my post about the chicken coop last week (see Moving the Chicken Coop Parts), we had moved all of the required components to our house from wherever they were stored at the time. After we found a few discount chicken coops, it was time to start putting the chicken coop together, which meant clearing a spot for it and building a foundation.

The place where Rebecca and I live is absolutely gorgeous, but also completely devoid of anything approach flat. So, finding a place to put the chicken coop was less a matter of space and more a matter of finding something flat enough to use. In addition, the place had to be close enough to the house to feed the chickens in winter (putting it out in the middle of the orchard would have been a bad idea) and also close enough to the compost heap to make clearing the chicken coop of waste matter easy. With all of these factors in mind, I cleared as much brush as possible from the location next to the compost heap. The chicken coop is now on the right of the compost heap, while the rabbit cages are to the left.

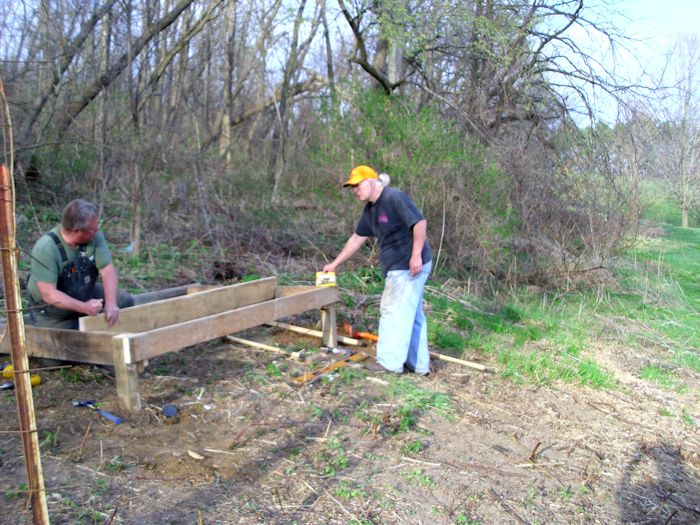
To keep the chicken coop from sliding off into oblivion, we started by digging two post holes and adding a board between them.

ChickenCoop0301

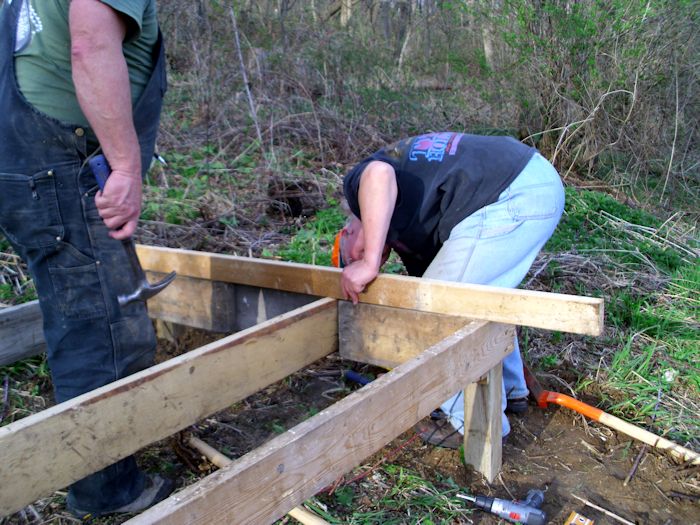
After making sure this starting point was completely level (despite the fact that things looked quite uneven due to the unevenness of the terrain), we added two more posts, one at a time. All four posts were tied together with boards and made level. After that, we started adding two additional boards in the center to reinforce everything as shown here.

ChickenCoop0302

Make sure everything is even and well-secured is important. We took the time to check and double check everything at this point.

ChickenCoop0303

The posts we’re using are pressure treated 4 X 4 stock. The joists and other framing members are 2 X 6 stock. All of this lumber was recovered from the old chicken coop. In a few cases, we not only had to remove old screws or other hardware, but also clean the stock before we could use it.

We had actually built the floor from a piece of existing wall used in the old chicken coop. Keven made a few changes to the wall design and strengthened it, but the floor was moved intact from the existing site to its new home. Floor space is important for good chicken health. The chicken coop will eventually hold ten chickens and we allowed 4 square feet per chicken inside the coop. (The chicken run allocates an additional 20 square feet per chicken.) Because the floor will take a lot of abuse, we used a double layer of 1/2 inch exterior grade plywood for the floor. The second layer was screwed on at 90 degrees to the first layer right before we moved it to the foundation.

ChickenCoop0304

The floor framing is 2 X 4 stock, but it’s heavily reinforced. Once the floor was ready, we moved it to the platform we had built earlier.

ChickenCoop0305

With the floor in place, we secured it to the platform. Of course, the final check was to make sure everything was still level.

ChickenCoop0306

The next step is to start putting up walls. We’re going to build them in place and move them in whole sections as well. You’ll learn the details in next week’s post. In the meantime, let me know if you have any questions about this phase of building the chicken coop at [email protected].