Wine Making – Unsticking a Batch

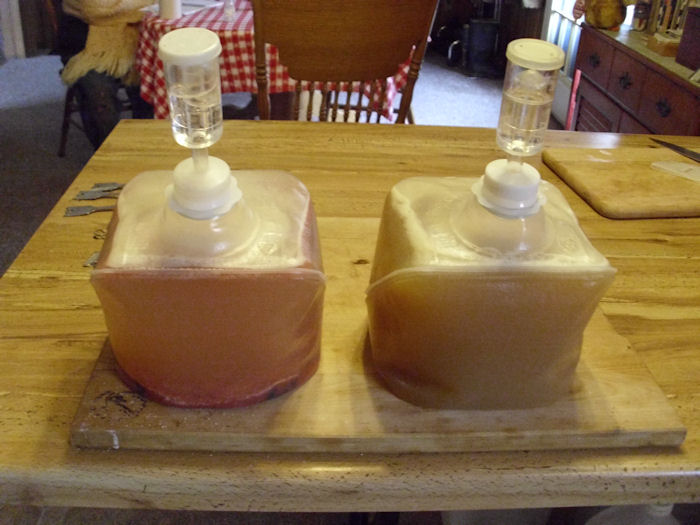
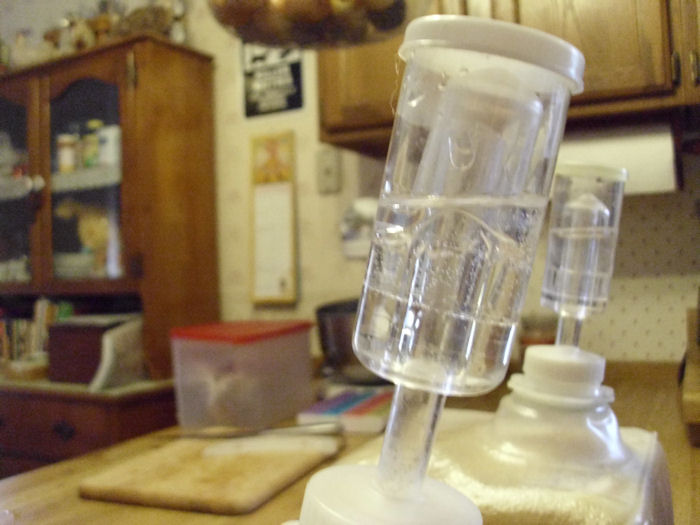
In my post, Wine Making – Day 1, I discuss how to start a batch of wine. If you followed that post, your wine has been perking away for several days now. In fact, tomorrow you’ll start to think about doing the Day 10 processing. Of course, this all assumes that everything has gone as planned. In most cases, it does, but there are situations where the wine can simply stop fermenting. The little plug inside the air lock may even float to the bottom. Even if it hasn’t, when the bubbles stop appearing every minute or two (the fermentation process slows as the yeast turns the sugar into alcohol) you know something is wrongyou have a stuck batch.

Don’t fret! Your efforts haven’t been wasted. I’ve never run into a situation where I wasn’t able to get the wine restarted with a little patience.

Start by placing your ear next to the container. If you can still hear some bubbles, you’re actually in great shape. In fact, spend a little more time looking for bubbles because the fermentation does slow considerably by day 10. If you don’t hear anything, you might have to work just a bit harder to get the batch restarted. In most cases, you’re just fine as long as you can still smell the yeast when you open air lock.

The first step is to ensure your wine containers are in a room where it’s warm enough to ferment. The lowest room temperature that has ever succeeded for me is 50 degrees Fahrenheit. You normally want the room temperature in the 70 degree range. Having the temperature too high is also unproductive. If you live in a warm climate and the air temperature is 95 degrees or higher, you’ll likely find that the yeast has a hard time continuing to work. Theoretically, the yeast will live just fine all the way up to 110 degrees in most cases, but most of us (yeast included) have a comfort zone.

The next step is to add a cup of sugar to the batch using the funnel. Add the sugar slowly. If you add it all at once and the yeast is still active, there is a tendency for the wine to bubble violently and create a mess by spilling out of the top of the container. After you add the sugar, use the handle of a slotted spoon to stir the sugar in (being careful to disturb the sediment at the bottom of the container as little as possible). Here’s what my slotted spoon looks like:

SlottedSpoon

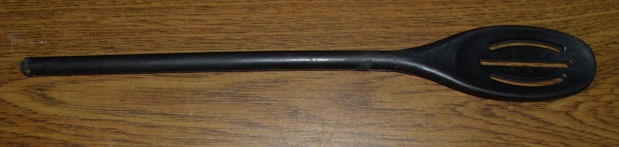
The spoon is almost flat and it has a skinny handle. This spoon is perfect for working with the fermentation container opening. (I was lucky to find this sort of spoon in plastic, normally you see them as wooden spoons.)

Look at the batch and listen to it again.  If you see tiny bubbles and hear them when you listen to the container, you know that the batch has restarted. Close the airlock and let the wine continue to ferment.

However, you might find that the wine still hasn’t restarted. In this case, add 1 teaspoon of yeast nutrient to the batch and stir it in using the handle of the spoon. Listen again to see if you’ve been successful. In many cases, you’ll have to wait about five minutes to see any effectbe patient!

If the wine doesn’t restart after you add the nutrient, try adding some more wine yeast (I generally use Montrachet). The old yeast might still be alive, but there may not be enough left to restart the batch. Sprinkle the full amount required for the size batch you’re trying to create. Remember that one packet of yeast is normally good for around 5 gallons of wine. This time, put the airlock back in place and wait for fifteen minutes.

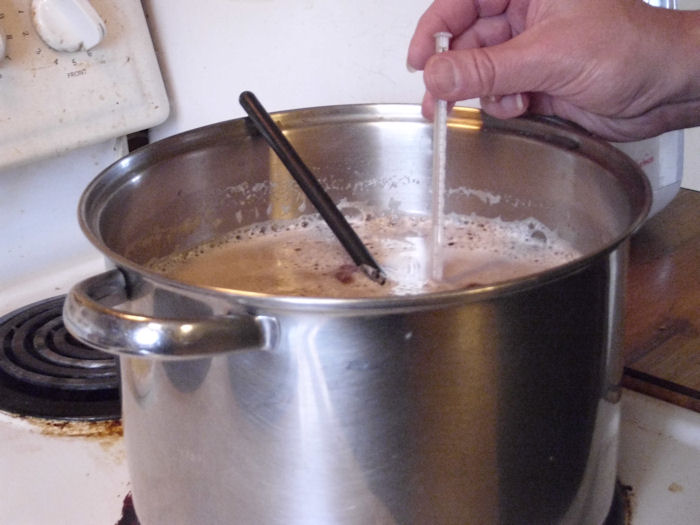
I’ve never had wine fail to restart by this point. If you supply sugar, nutrient, and yeast at the right temperature, then the wine should ferment just fine. However, the temperature can be a tricky part of the process. Take the wine’s temperature using your dairy thermometer. If the temperature is too low, place the container in a warmer location. Generally, it’s a bad idea to pour the contents out of the container and try to reheat it in another container on the stove. If you do have problems getting your wine restarted, we may be able to work out a solution. Let me know at [email protected].


Dealing with Digital Addiction

It may sound odd coming from a guy who has written 87 computer books and over 300 articles, but I think the world has a severe technology addiction that’s going to cause us significant woe at some point (assuming it hasn’t already). Obesity, people who think cable television is a basic necessity, the need to have a cell phone constantly attached to one’s ear, and all of the other negatives commonly associated with a digital addiction today are only the beginningthings will get worse. Don’t get me wrong, technology definitely has positive aspects and it has a role to fulfill in the modern world, but I think we’ve gone way too far (and I’m sure we’ll go further).

One of the best ways in which technology can help is to level the playing field for those with special needs. In fact, anyone who knows me knows that I have a very special place in my heart for those who have special needs and can be helped by technology used in a positive way. However, it’s often the technology developed for people with special needs that seems to hurt us the worst (think of the television remoteit mainly started as an accessibility aid).

I read a PC Magazine commentary by Lance Ulanoff this morning about digital addiction and a book that will help you with it. Most people don’t need a bookthey need a reason and a plan. You can’t combat anything that you’re not convinced you need to combat. Some people are incredibly happy being addicted to technologyI feel sad for them because they’re missing out. If you make your entire world revolve around technology, you’re likely missing out on real friends and relationships with family. You’re also missing out on a vast range of experiences that have nothing to do with technology. However, unless you see that you’re missing out on these things, nothing that I or anyone else says will convince you of anything. So, you need a reason to deal with a digital addition.

If you finally do come up with a good reason, you need a plan. When I gave up smoking years ago, I had to find a way to fill the vacuum. I immeditately went to a vape shop an bought a 18650 battery for my e-cigarette. I knew that smoking was very bad for my health and using an e-cig seemed like a much better option for me. It made quitting smoking much easier, I have to say. The same is true for people who drink in excess. Some choose to go to luxury alcohol rehab to help resolve it. This is a great way to overcome any addiction, but especially things like smoking, drugs and alcohol. Of course, if things are severe and you have a particularly strong addiction to alcohol or drugs, you may need to contact the team at Enterhealth for professional help. But on a smaller scale, replacing what you crave with something much healthier is a great way of going about it. My way of dealing with the addiction is probably uniqueI bought some running clothes and a new pair of shoes. Every time I wanted a cigarette, I went for a run instead. For about a month, I actually ended up sleeping on the couch in my running clothes because it was easier than having to get dressed to address an urge in the middle of the night. After about six months I found I had lost 20 pounds and that I felt extremely good. So, something positive came out of getting rid of those cigarettes.

My own technology addiction came sometime after I left the Navy. It seemed as if my wife couldn’t pry me out of my office under any circumstance and that I couldn’t enjoy any activity that didn’t somehow involve my computer. I was constantly worried about missing somethingthat some event would happen and I wouldn’t be available to deal with it. (If this sounds at all familiar, you likely have a digital addiction too.) I’m not quite sure when it snuck up on me, but it did. As with my cigarette addiction, once I realized I had a problem (my weight skyrocketed and I felt terrible), I came up with a plan to deal with it. I started including daily walks in my regimen, spent time with my wife playing board games, going to shows instead of watching television, went on picnics, started working with wood, and took time to enjoy events at the park. My mother-in-law helped by getting us an annual pass to the zoo. All of these things are part of the plan that fills the void so technology doesn’t rule my life.

The battle to contribute in a positive way to the world and yet not let technology rule my life is ongoing. You’ve seen my posts on self-sufficiencythat’s part of the plan. I don’t carry a cell phone, don’t worry about the messages in my inbox or on my answering machine, and think about things other than writing. Twice a year I shut everything offthe computer doesn’t exist for that time intervalmy wife and I get reacquainted. As a result, I’m happier and healthier than I have been in many years. If you find that you can’t leave the technology at home, unplug, and not feel any remorse about doing it, then you have a digital addiction and I encourage you to find both a reason and a plan for dealing with it. Let me know your thoughts about digital addiction at [email protected].

Wine Making – Day 1

This post is the start of a series showing my particular technique for making wine. There are probably more ways of making wine than you can imaginecertainly more than I’ve seen. The technique I use produces highly repeatable results in small quantities (suitable for the home enthusiast) in 31 days. I don’t use a two-stage fermentation technique, nor do I rely on whole fruits/vegetables as a source of juice. This technique relies on pure juice and is extremely simple, but it does produce some nice tasting wine. If you are not partial to the whole wine making process, you might want to check out some GraysOnline wine online so you can cut out the middleman, but wouldn’t it be fun to make it, order some anyway and compare them? Another plus… you get more wine!

Many foods are preserved using fermentation. For example, we also make sauerkraut, a kind of fermented food. Wine is probably one of the earliest forms for food preservation through fermentation. In this case, yeast (species Saccharomyces cerevisiae) consumes sugar found in juice to produce carbon dioxide and alcohol. It’s the alcohol that preserves the juice.

This form of preservation was probably found by accident in early history. It turns out that the yeast required to produce wine occurs naturally on some fruit such as grapes. When you see that light dusty coating on grapes growing on the vine, part of that dust is the yeast. If you wanted, you could simply crush the grapes and let nature take its course, which is how some people still make wine. Certainly, there is nothing wrong with this approach. However, naturally occurring yeasts don’t always produce the best results and sometimes you can end up with vinegar when the alcohol is oxidized by acetic acid bacteria, AAB, instead of being stabilized to produce wine.

In order to produce wine, and not vinegar, the modern technique is to kill the microbes by adding a campden tablet to the juice. Later this year, I’ll show some techniques for producing and preserving juice for wine making. For now, just assume that you have the amount of prepared juice required for the wine you want to make.

The first day of wine making is the most time consuming, so you can’t become a reverse wine snob super quickly. It can be worth picking up something else to drink in the interim period. I normally set aside three hours to perform the steps required to start two, one gallon, batches of wine that will eventually produce eight bottles. In most cases, I’ll create wine from two different juicesno need to be boring when you’re doing something creative .

To start the process, you gather all of your equipment and sterilize it using a one-step sterilizer designed for wine making. You need these basic pieces of equipment to make wine:

  • Mixing container capable of holding the amount of wine you want to make (one gallon in my case)
  • Four-cup measuring cup
  • Measuring spoons
  • Funnel (for pouring the wine mixture into the fermentation container)
  • Fermentation container
  • Air lock and adapter (you’ll see a picture of it later)
  • Dairy thermometer


You want to gather all of the ingredients as well. The ingredients you use depend on the kind of wine you’re making, but generally you’ll need sugar (food for the yeast), yeast nutrient (helps the yeast to start growing), pectic enzyme (helps produce clear wine that lacks a pectic haze), and acid blend (improves the pH balance of the juice and the eventual taste of the wine). Some wines also require yeast energizer (works like yeast nutrient for some types of fruit) and tannin (helps the wine keep longer, promotes clearing, and improves taste).

Of course, the most important wine making ingredient is the yeast. I generally use a Montrachet wine yeast. It performs well in a wide temperature range, produces a somewhat drier wine (one that has less remaining sugar with a higher alcohol content), and tends not to stop working until the fermentation process is complete (a condition known as getting stuck). The yeast you choose makes a great deal of difference in the quality and taste of your wine. Never use bread yeast for wineit tends to produce a low alcohol result and the wine won’t clear properly. After all, the purpose of bread yeast is to produce lots of carbon dioxide for fluffy bread.

There are a lot of sources for recipes and I’ll eventually share some of mine, but each recipe produces different results, so you’ll have to play around to see what produces the result you like best. That’s part of the fun of making wine. If winemaking turns out not to be your thing, you may instead want to buy a bottle from the best wine store denver so you can get an excellent quality wine without the difficulty of doing it yourself. Here’s a picture of my winemaking ingredients:

WineDay1_1

After you have everything gathered, mix the ingredients in the mixing container to produce the must (the name of the wine mixture), but don’t add the yeast. The next step for me is to gently warm the must to the optimal temperature for the yeast (105 degrees for Montrachet). Keep mixing the ingredients to make absolutely certain they’re mixed completely. Measure the temperature carefullytoo cold and the yeast won’t start as quickly as it couldtoo hot and you’ll kill the yeast:

WineDay1_2

After the mixture is at the right temperature, pour it into the fermentation container. Sprinkle the yeast on top. Add water to the air lock and attach the air lock to the fermentation container as shown here:

WineDay1_3

In this case, you’re seeing tomato wine on the left (delicious with a stronger tasting cheese) and apple wine on the right (a wonderful desert wine). The tomato wine has raisins added to it for taste. I’m using one gallon cubi-containers originally obtained as part wine making kits purchased a long time ago. Buying a kit is one of the better ways to get all of the equipment you need to make wine, but you can easily purchase the components separately. Notice I also put my containers on a cutting board. That makes it easy for me to move my fermentation containers around to more evenly heated rooms or simply to get them out of the way.

Keep an eye on your containers for a while. You want to be sure that the air locks are working properly to keep out foreign yeast and bacteria. Here’s a closeup of my air locks:

WineDay1_4

The one in the front is already in the right position. Carbon dioxide produced by the yeast has pushed the little cap up in the middle. In order to get out, the carbon dioxide will now need to go down through the water in the air trap and then out through holes in the top. In this way, the container maintains positive pressurekeeping out external sources of contamination. The air lock shown in the back isn’t in the right position yet because the yeast has just started working. Eventually, that cap will rise to the top as well. So, are there any questions about day one? Let me know at [email protected].